MoveToLocation 분석해보기
MoveToLocation, MoveToActor 함수를 더 정확하게 사용해보고 싶어 내부구현부를 보며 공부해보았다.
// 내부 코드
EPathFollowingRequestResult::Type AAIController::MoveToLocation(const FVector& Dest, float AcceptanceRadius, bool bStopOnOverlap, bool bUsePathfinding, bool bProjectDestinationToNavigation, bool bCanStrafe, TSubclassOf<UNavigationQueryFilter> FilterClass, bool bAllowPartialPaths)
{
	// abort active movement to keep only one request running
	if (PathFollowingComponent && PathFollowingComponent->GetStatus() != EPathFollowingStatus::Idle)
	{
		PathFollowingComponent->AbortMove(*this, FPathFollowingResultFlags::ForcedScript | FPathFollowingResultFlags::NewRequest
			, FAIRequestID::CurrentRequest, EPathFollowingVelocityMode::Keep);
	}

	FAIMoveRequest MoveReq(Dest);
	MoveReq.SetUsePathfinding(bUsePathfinding);
	MoveReq.SetAllowPartialPath(bAllowPartialPaths);
	MoveReq.SetProjectGoalLocation(bProjectDestinationToNavigation);
	MoveReq.SetNavigationFilter(*FilterClass ? FilterClass : DefaultNavigationFilterClass);
	MoveReq.SetAcceptanceRadius(AcceptanceRadius);
	MoveReq.SetReachTestIncludesAgentRadius(bStopOnOverlap);
	MoveReq.SetCanStrafe(bCanStrafe);

	return MoveTo(MoveReq);
}
이동 요청을 보내기 전에는 항상 AbortMove를 먼저 하는 것을 알 수 있다.
이유는 AIController 내부에 여러 Move 요청이 동시에 존재하면 서로 경로 갱신, 상태 변경 등 영향을 줄 수 있기 때문이다.
이후, 새 FAIMoveRequest 생성하고 필요한 옵션을 설정한 후 MoveTo를 호출하는 것을 볼 수 있다.
MoveTo 분석
MoveTo(const FAIMoveRequest& MoveRequest, FNavPathSharedPtr* OutPath)
{
	// ... //
	if (RequestID.IsValid())
	{
		bAllowStrafe = MoveRequest.CanStrafe();
		ResultData.MoveId = RequestID;
		ResultData.Code = EPathFollowingRequestResult::RequestSuccessful;

		if (OutPath)
		{
			*OutPath = Path;
		}
	}
}
MoveTo() 매개변수를 보면, OutPath를 사용하는데 이 변수에 경로에 대한 정보를 저장하고 있었다.
자세히 알아보기 위해 FNavPathSharedPtr 내부를 더 추적해봤다.
typedef TSharedPtr<struct FNavigationPath, ESPMode::ThreadSafe> FNavPathSharedPtr;FNavPathSharedPtr을 확인해보니:
- 계획된 경로 포인트
- Partial Path 여부
- 목적지
- 유효성 정보
등 Nav 경로 관련 데이터가 모두 담겨 있었다.
따라서 추후에 이 정보까지 확인한다면, 적의 경로 계산에 대한 정보를 확인할 수 있어보였다.
// CustomController에서 MoveToLocation 구현
UPathFollowingComponente BEPathFollowingComponent = GetPathFollowingComponent();
if (BEPathFollowing Component && BEPathFollowingComponent->GetStatus() != EPathFollowingStatus::Idle)
{
	BEPathFollowingComponent->AbortMove(this, FPathFollowingResultFlags::ForcedScript | FPathFollowingResultFlags::NewRequest , FAIRequestID::CurrentRequest, EPathFollowingVelocity Mode:: Keep);
}

FAIMoveRequest MoveReq(*TargetLocation);
MoveReq.SetUsePathfinding (true);
MoveReq.SetAllowPartialPath(true);
MoveReq.SetProjectGoalLocation(false); MoveReq.SetNavigationFilter({});
MoveReq.SetAcceptanceRadius (AcceptanceRadius);
MoveReq.SetReachTestIncludes AgentRadius(true);
MoveReq.SetCanStrafe (true);
FlavPathSharedPtr OutPath;
FPathFollowingRequestResult MyRequestResult MoveTo(MoveReq, &OutPath);

if (OutPath.IsValid())
{
	// ... //
}
적 크기별 Nav 경로 탐색
RecastNavMesh를 이용하면 NavMesh는 하나여도, Agent마다 자신 크기에 맞는 경로 탐색이 가능하다
"Project Settings -> Engine -> Navigation System -> Supported Agents"
에서 원하는 도로(소형몹 전용, 중형몹 전용 등)를 만들어주면 된다
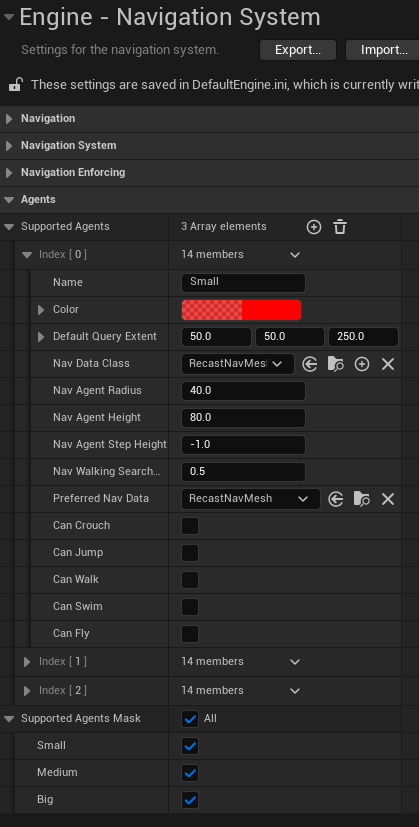
그리고 Supported Agents Mask를 활성화해야 적용된다.
각 Agent는 Radius, Height 기준으로 자신이 사용할 Nav경로를 결정한다.
예를 들어 경로가 받을 수 있는 Agent의 Radius가 :
- Small : 30
- Medium : 50
일 때, Agent의 Capsule Radius가 40이면:
- Small은 통과 불가
- Medium 사용
으로 판정된다.
즉 정확히 일치하지 않아도 자신의 크기를 수용 가능한 가장 작은 도로를 선택하게 된다.
추가로 Capsule Height는 Half Height 기준으로 저장되므로,
Supported Agent 입력 시에는 2 * Capsule Height 값을 넣어야 한다.
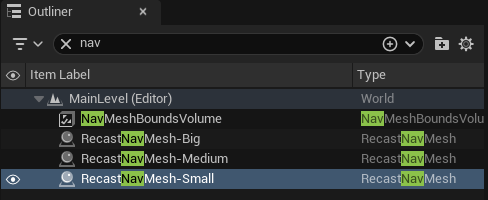
Path Build를 해주면 Outliner에Agent별 RecastNavMesh가 각각 생성된다.
그리고 각 RecastNavMesh의 Detail에서 Enable Drawing을 켜면 눈으로 확인 가능하다
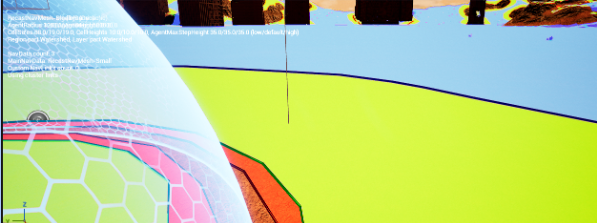
확인해보니:
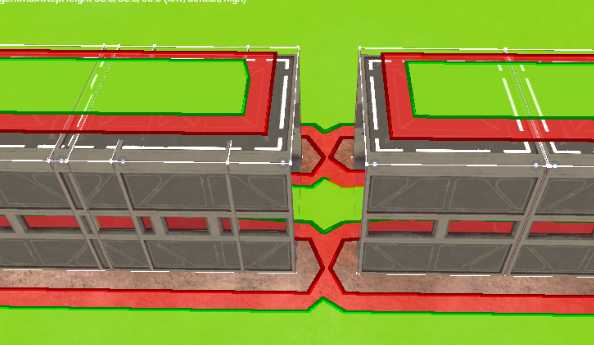
- 작은 적은 좁은 길까지 Nav 연결
- 큰 적은 좁은 Nav 끊김
되는 것을 볼 수 있었다.