Node.js 다운로드
Node.js 홈페이지 이동
https://nodejs.org/ko/download
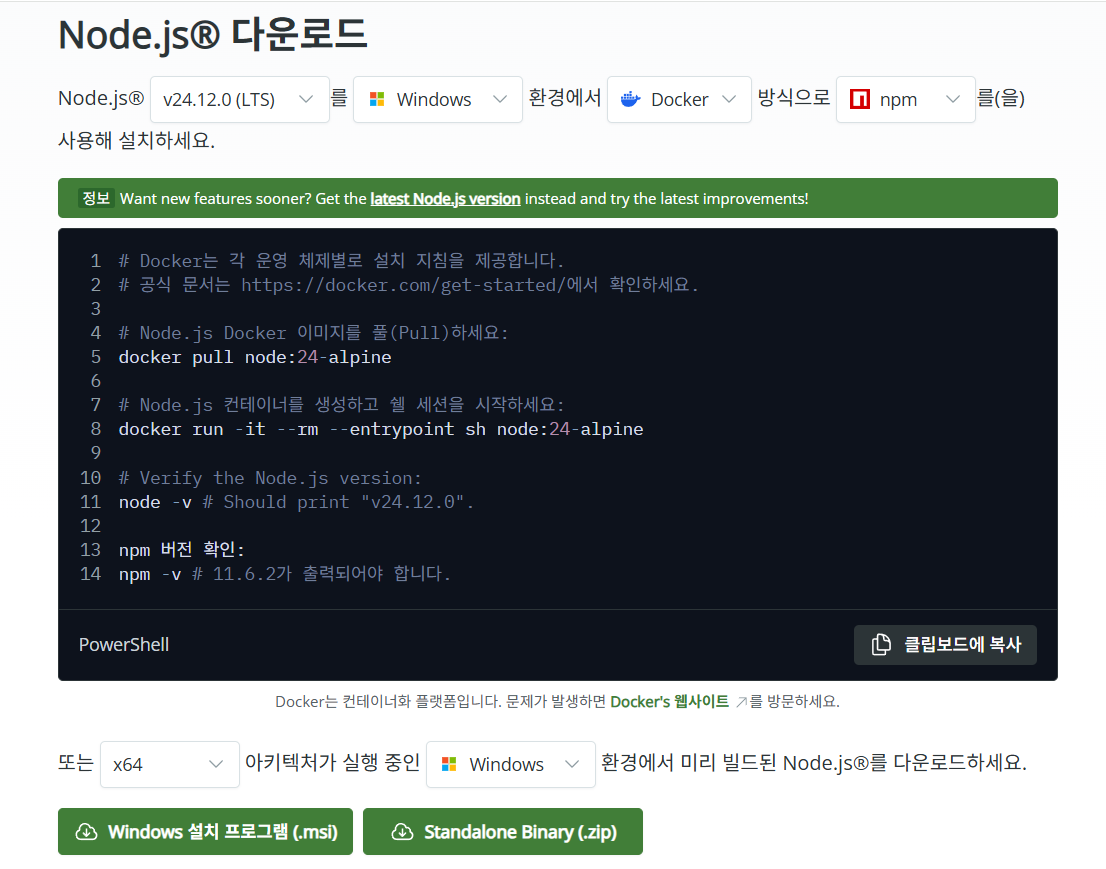
Windows 설치 프로그램(.msi) 다운로드
체크는 안하면 안 넘어가는 것만 하고 다운로드 받아주면 됨
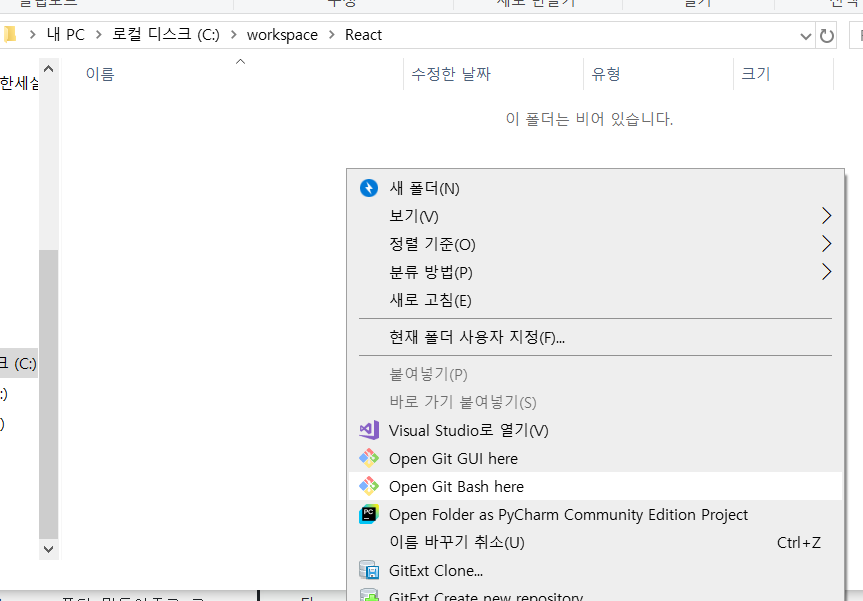
다음 C 드라이브에 workspace 폴더 만들어주고 그 안에 React 폴더 만들어줌
yarn 설치
git bash 열어줌
yarn 설치 명령어
npm install -g yarnyarn 버전 확인 명령어
yarn --versionuser@DESKTOP-PTJ30JK MINGW64 /c/workspace/React
$ node -v
v24.12.0
user@DESKTOP-PTJ30JK MINGW64 /c/workspace/React
$ yarn --version
bash: yarn: command not found
user@DESKTOP-PTJ30JK MINGW64 /c/workspace/React
$ npm install -g yarn
added 1 package in 1s
npm notice
npm notice New minor version of npm available! 11.6.2 -> 11.7.0
npm notice Changelog: https://github.com/npm/cli/releases/tag/v11.7.0
npm notice To update run: npm install -g npm@11.7.0
npm notice
user@DESKTOP-PTJ30JK MINGW64 /c/workspace/React
$ yarn --version
1.22.22react 앱 생성
react 앱 생성하기
yarn create react-app test-app
test-app 이 프로젝트 이름이 됨
user@DESKTOP-PTJ30JK MINGW64 /c/workspace/React
$ yarn create react-app test-app
yarn create v1.22.22
[1/4] Resolving packages...
warning create-react-app > tar-pack > fstream-ignore@1.0.5: This package is no longer supported.
warning create-react-app > tar-pack > fstream@1.0.12: This package is no longer supported.
warning create-react-app > tar-pack > fstream-ignore > fstream@1.0.12: This package is no longer supported.
warning create-react-app > tar-pack > rimraf@2.7.1: Rimraf versions prior to v4 are no longer supported
warning create-react-app > tar-pack > fstream > rimraf@2.7.1: Rimraf versions prior to v4 are no longer supported
warning create-react-app > tar-pack > tar@2.2.2: This version of tar is no longer supported, and will not receive security updates. Please upgrade asap.
warning create-react-app > tar-pack > tar > fstream@1.0.12: This package is no longer supported.
warning create-react-app > tar-pack > uid-number@0.0.6: This package is no longer supported.
warning create-react-app > tar-pack > rimraf > glob@7.2.3: Glob versions prior to v9 are no longer supported
warning create-react-app > tar-pack > rimraf > glob > inflight@1.0.6: This module is not supported, and leaks memory. Do not use it. Check out lru-cache if you want a good and tested way to coalesce async requests by a key value, which is much more comprehensive and powerful.
[2/4] Fetching packages...
[3/4] Linking dependencies...
[4/4] Building fresh packages...
success Installed "create-react-app@5.1.0" with binaries:
      - create-react-app
(node:9864) [DEP0190] DeprecationWarning: Passing args to a child process with shell option true can lead to security vulnerabilities, as the arguments are not escaped, only concatenated.
(Use `node --trace-deprecation ...` to show where the warning was created)
'C:\Users\user' is not recognized as an internal or external command,
operable program or batch file.
error Command failed.
Exit code: 1
Command: C:\Users\user\AppData\Local\Yarn\bin\create-react-app
Arguments: test-app
Directory: C:\workspace\React
Output:

info Visit https://yarnpkg.com/en/docs/cli/create for documentation about this command.
사용자 이름에 공백이 있어서 test-app 설치 실패
찾아보니 CRA 공식도 yarn create react-app은 더 이상 권장하지 않는다고 함...
react app 생성 안될 때 해결 방법
npx create-react-app test-app프로젝트 생성 성공하면 이렇게 뜸
user 03-18@DESKTOP-PTJ30JK MINGW64 /c/workspace/React
$ npx create-react-app test-app
npm warn exec The following package was not found and will be installed: create-react-app@5.1.0
npm warn deprecated inflight@1.0.6: This module is not supported, and leaks memory. Do not use it. Check out lru-cache if you want a good and tested way to coalesce async requests by a key value, which is much more comprehensive and powerful.
npm warn deprecated fstream-ignore@1.0.5: This package is no longer supported.
npm warn deprecated rimraf@2.7.1: Rimraf versions prior to v4 are no longer supported
npm warn deprecated uid-number@0.0.6: This package is no longer supported.
npm warn deprecated glob@7.2.3: Glob versions prior to v9 are no longer supported
npm warn deprecated fstream@1.0.12: This package is no longer supported.
npm warn deprecated tar@2.2.2: This version of tar is no longer supported, and will not receive security updates. Please upgrade asap.
create-react-app is deprecated.

You can find a list of up-to-date React frameworks on react.dev
For more info see:https://react.dev/link/cra

This error message will only be shown once per install.

Creating a new React app in C:\workspace\React\test-app.

Installing packages. This might take a couple of minutes.
Installing react, react-dom, and react-scripts with cra-template...


added 1303 packages in 58s

266 packages are looking for funding
  run `npm fund` for details

Initialized a git repository.

Installing template dependencies using npm...

added 17 packages, removed 1 package, and changed 1 package in 7s

265 packages are looking for funding
  run `npm fund` for details
Removing template package using npm...


removed 1 package, and audited 1319 packages in 4s

265 packages are looking for funding
  run `npm fund` for details

9 vulnerabilities (3 moderate, 6 high)

To address all issues (including breaking changes), run:
  npm audit fix --force

Run `npm audit` for details.

Created git commit.

Success! Created test-app at C:\workspace\React\test-app
Inside that directory, you can run several commands:

  npm start
    Starts the development server.

  npm run build
    Bundles the app into static files for production.

  npm test
    Starts the test runner.

  npm run eject
    Removes this tool and copies build dependencies, configuration files
    and scripts into the app directory. If you do this, you can’t go back!

We suggest that you begin by typing:

  cd test-app
  npm start

Happy hacking!
ls 명령어로 하위 폴더 확인
User 03-18@DESKTOP-PTJ30JK MINGW64 /c/workspace/React
$ ls
test-app/
cd 명령어로 폴더 이동
User 03-18@DESKTOP-PTJ30JK MINGW64 /c/workspace/React
$ cd test-app/
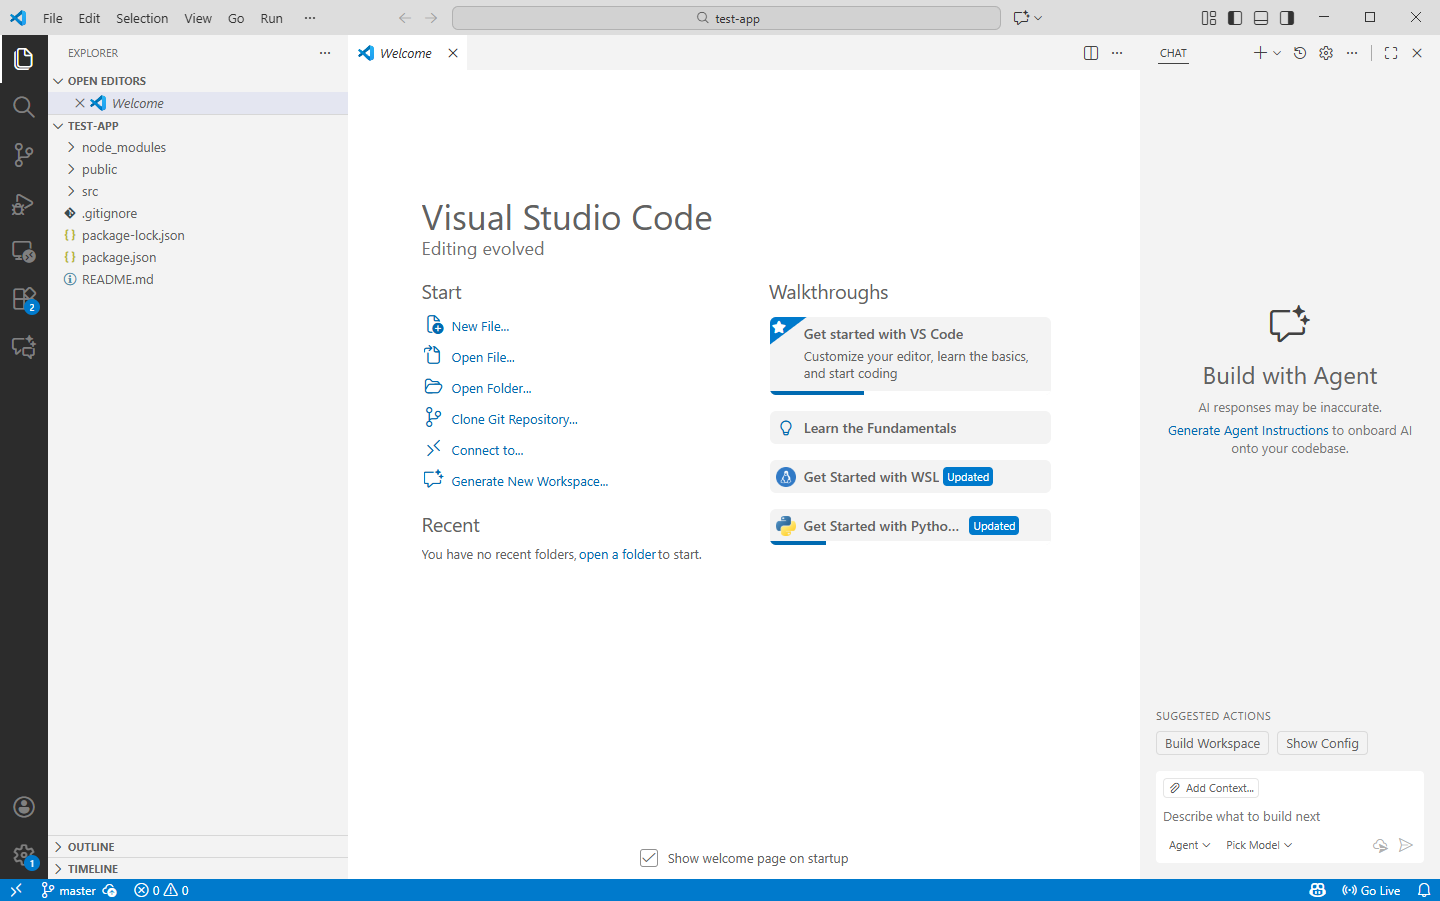
code . 명령어로 프로젝트 폴더 VSCode 로 열기
User 03-18@DESKTOP-PTJ30JK MINGW64 /c/workspace/React/test-app (master)
$ code .
react app 실행시키기
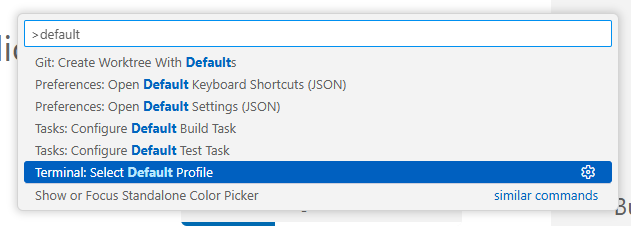
VS Code 기본 터미널을 Git bash로 변경
ctrl + shift + p 누른 후 상단 창에 default 작성
Terminal Select Default profile 클릭
Git Bash 선택
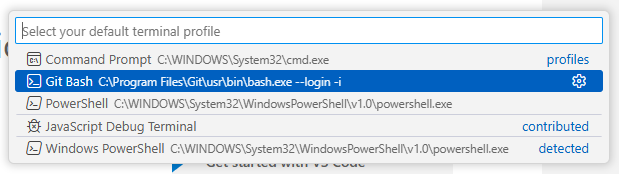
터미널 변경 후 ctrl + shift + `(백틱) 눌러서 터미널 열기
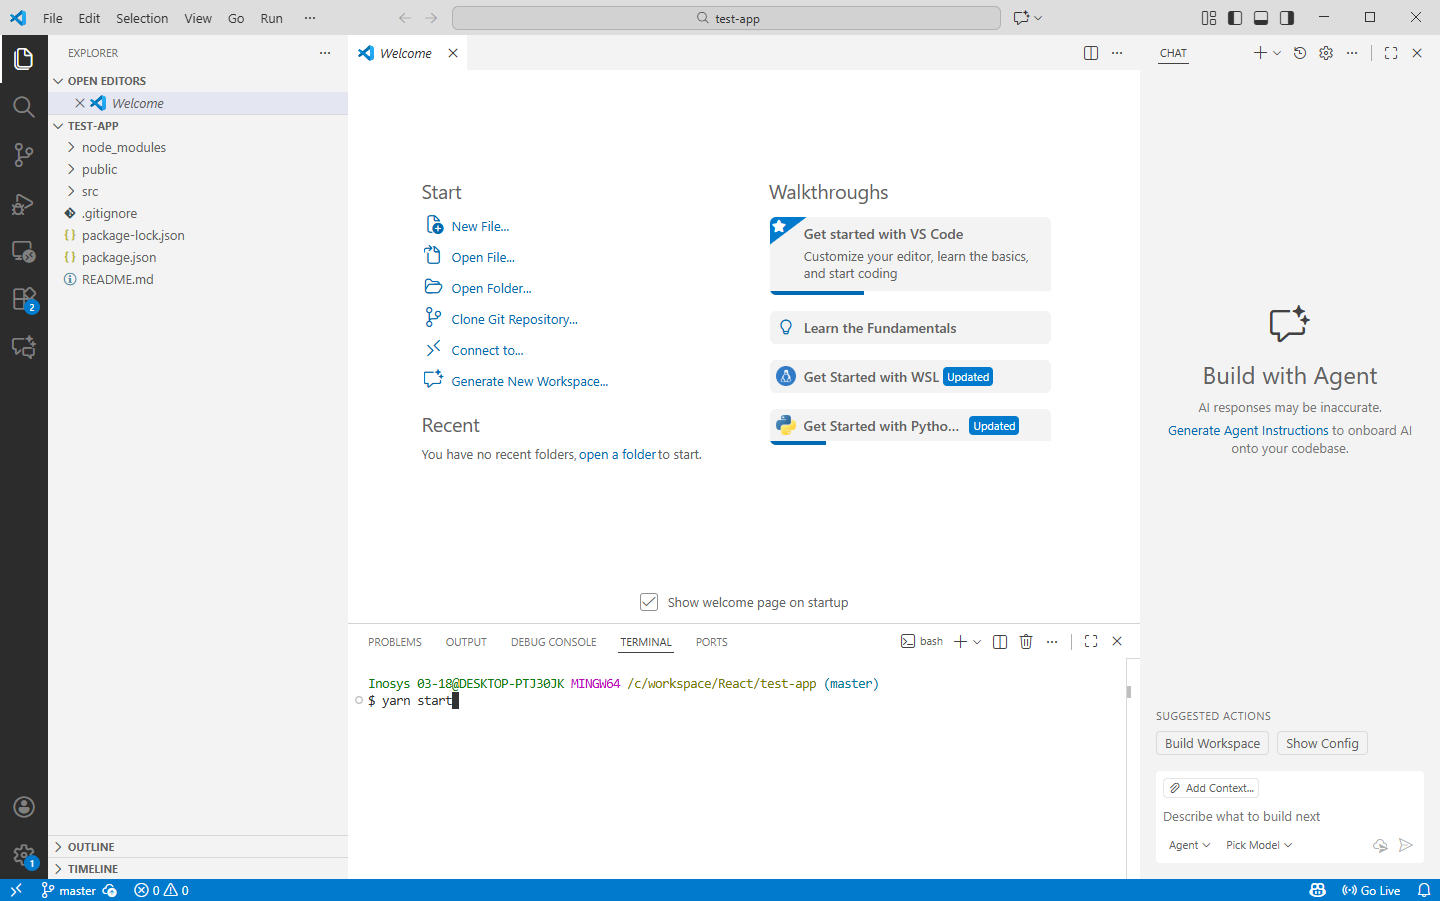
터미널에 yarn start 명령어 입력으로 프로젝트 실행시키기
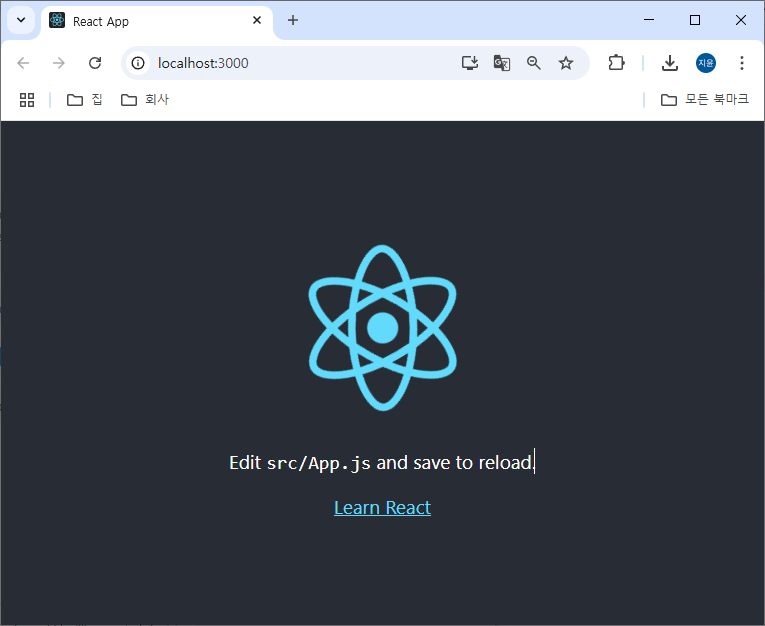
기본 포트는 3000
프로젝트 src/App.js
import logo from './logo.svg';
import './App.css';

function App() {
  return (
    <div className="App">
      <header className="App-header">
        <img src={logo} className="App-logo" alt="logo" />
        <p>
          Edit <code>src/App.js</code> and save to reload.
        </p>
        <a
          className="App-link"
          href="https://reactjs.org"
          target="_blank"
          rel="noopener noreferrer"
        >
          Learn React
        </a>
      </header>
    </div>
  );
}

export default App;
코드 분석해보기
App.js
import logo from './logo.svg';
import './App.css';

function App() {
  return (
    <div className="App">
      <header className="App-header">
        <img src={logo} className="App-logo" alt="logo" />
        <p>
          Edit <code>src/App.js</code> and save to reload.
        </p>
        <a
          className="App-link"
          href="https://reactjs.org"
          target="_blank"
          rel="noopener noreferrer"
        >
          Learn React
        </a>
      </header>
    </div>
  );
}

export default App; // 내보내기
export default App 으로 내보내고 있음
index.js
import React from 'react';
import ReactDOM from 'react-dom/client';
import './index.css';
import App from './App'; // 요기서 App import
import reportWebVitals from './reportWebVitals';

const root = ReactDOM.createRoot(document.getElementById('root'));
// root라는 id를 가진 element를 가져오겠다. (public 폴더 안 index.html에 있음)
root.render(
  <React.StrictMode>
    <App />
    {/* App.js를 나타냄 */}
  </React.StrictMode>
);

// If you want to start measuring performance in your app, pass a function
// to log results (for example: reportWebVitals(console.log))
// or send to an analytics endpoint. Learn more: https://bit.ly/CRA-vitals
reportWebVitals();
App.js에서 내보낸 App 을 index.js에서 import 하고 있음
root.render 안에 은 App.js 를 나타냄
root 에 App.js 렌더링 하겠다는 뜻
root 는 root 라는 id를 가진 element를 가져오겠다는 건데 root 라는 id는 index.html에서 쓰이고 있음
index.html
<!DOCTYPE html>
<html lang="en">
  <head>
    <meta charset="utf-8" />
    <link rel="icon" href="%PUBLIC_URL%/favicon.ico" />
    <meta name="viewport" content="width=device-width, initial-scale=1" />
    <meta name="theme-color" content="#000000" />
    <meta
      name="description"
      content="Web site created using create-react-app"
    />
    <link rel="apple-touch-icon" href="%PUBLIC_URL%/logo192.png" />
    <!--
      manifest.json provides metadata used when your web app is installed on a
      user's mobile device or desktop. See https://developers.google.com/web/fundamentals/web-app-manifest/
    -->
    <link rel="manifest" href="%PUBLIC_URL%/manifest.json" />
    <!--
      Notice the use of %PUBLIC_URL% in the tags above.
      It will be replaced with the URL of the `public` folder during the build.
      Only files inside the `public` folder can be referenced from the HTML.

      Unlike "/favicon.ico" or "favicon.ico", "%PUBLIC_URL%/favicon.ico" will
      work correctly both with client-side routing and a non-root public URL.
      Learn how to configure a non-root public URL by running `npm run build`.
    -->
    <title>React App</title>
  </head>
  <body>
    <noscript>You need to enable JavaScript to run this app.</noscript>
    <div id="root"></div>
    <!--
      This HTML file is a template.
      If you open it directly in the browser, you will see an empty page.

      You can add webfonts, meta tags, or analytics to this file.
      The build step will place the bundled scripts into the <body> tag.

      To begin the development, run `npm start` or `yarn start`.
      To create a production bundle, use `npm run build` or `yarn build`.
    -->
  </body>
</html>
클래스형 컴포넌트
src/test/Test1.js
src 폴더 아래에 test 폴더 생성하고 Test1.js 파일 생성함
Test1.js 코드 작성
import { Component } from "react"; // 컴포넌트 import

class Test1 extends Component { // 컴포넌트의 선언부
    // 생성자
    constructor(prop) {
        // prop : 부모에게 받은 속성, 부모가 Test1에 보내준 값을 prop으로 받음.
        super(prop); // super 생성자 이용해서 prop 전달하겠다는 내용
        this.state = {plusCount : 0,
            minusCount : 0
        }; // state 컴포넌트의 내부 상태를 관리하는데 사용되는 데이터
        // state 내부에 count 라는 이름을 가진 상태 초기값이 0이다.
    }

    // 함수
    handleClick = () => {
        this.setState({ plusCount : this.state.plusCount + 1,
            minusCount : this.state.minusCount - 1
        });
    }

    render() {
        return (
            <div>
                <h1>PlusCount : {this.state.plusCount}</h1>
                <h1>MinusCount : {this.state.minusCount}</h1>
                <button onClick={this.handleClick}>버튼</button>
            </div>
        );
    }
}

export default Test1; // 컴포넌트 정의하고 만든 걸 내보내기
컴포넌트 생성해서 기능까지 정의하는 함수를 내보내기
App.js에서 import 해서 렌더링 해줄 거임
import './App.css';
import Test1 from './test/Test1'; // Test1 컴포넌트 가져오기 위해

function App() {
  return (
    <div>
      <Test1 />
      {/* Test1.js 가져온 거 */}
    </div>
  );
}

export default App; // 내보내기
정의
- 클래스형 컴포넌트는 ES6의 class 문법으로 정의됨
- React의 Component를 상속받아 구현하며, render() 메서드가 필수임.
특징
- 상태 관리 : this.state로 상태를 관리하고, this.setState로 상태를 업데이트.
- 생명주기 메서드 : componentDidMount, componentDidUpdate, componentWillUnmount 등 생명주기 메서드 제공.
- 구조 복잡 : 클래스 문법과 this 바인딩이 필요해 상대적으로 코드가 복잡함.
- 레거시 코드에서 사용 : 기존 프로젝트나 이전 버전의 React에서 많이 사용됨.
함수형 컴포넌트와 Hooks가 도입되기 전까지는 상태 관리와 생명주기 메서드를 다루는 유일한 방법.
React State
상태 값을 의미하는 값이 변경되면 화면이 다시 렌더링 됨
React에서의 state란 컴포넌트 내부에서 관리되는 상태 값을 의미함.
컴포넌트가 생성되고, 갱신될 때마다 변경될 수 있는 값이며, 이 값이 변경될 때마다 화면이 다시 렌더링됨.
state는 useState를 사용하여 컴포턴트 내부에서 관리할 수 있으며, setState 함수를 통해 값을 업데이트할 수 있음.
React에서의 state는 컴포넌트의 상태를 저장하고 필요에 따라 다시 렌더링하는 데 사용됨.
함수형 컴포넌트
src/test/Test2.js
import { useState } from "react";

// 함수형 컴포넌트
function Test2() {
    const [name, setName] = useState("지윤");

    const handleClick = () => {
        setName("송지윤");
    }

    return (
        <div>
            <h1>Hello, {name}</h1>
            <button onClick={handleClick}>스위치</button>
            {/* this 사용 X */}
        </div>
    );
}

// 만든 컴포넌트 내보내기
export default Test2;
App.js에서 import
import logo from './logo.svg';
import './App.css';
import Test1 from './test/Test1'; // Test1 컴포넌트 가져오기 위해 import
import Test2 from './test/Test2'; // Test2 컴포넌트 가져오기 위해 import

function App() {
  return (
    <div>
      <Test1 />
      {/* Test1.js 가져온 거 */}
      <Test2 />
    </div>
  );
}

export default App; // 내보내기
정의
- 함수형 컴포넌트는 단순히 JavaScript 함수로 정의된 컴포넌트
- props를 받아 JSX를 반환
- React 16.8부터 Hooks가 도입되면서, 상태와 생명주기 관리가 가능
특징
- 가벼움 : 간단한 문법으로 작성 가능.
클래스 선언 및 this 키워드 사용이 필요 없음. - Hooks 지원 : useState, useEffect 등 다양한 Hook을 통해 상태 관리와 생명주기 메서드를 대체 가능
- 추천 방식 : React 커뮤니티와 공시 문서에서 함수형 컴포넌트를 권장.
최신 React 프로젝트에서 주로 사용됨. - 성능 개선 : React는 함수형 컴포넌트를 더 효율적으로 처리할 수 있도록 최적화.
React Props
Props는 React 컴포넌트에게 데이터를 전달하는 방법 중 하나
Props는 부모 컴포넌트로부터 자식 컴포넌트로 전달되며, 컴포넌트 내부에서 변경할 수 없는 읽기 전용 데이터
Props를 사용하면 컴포넌트 간의 데이터 전달이 간단하고 유지보수하기 쉬워짐. 또한 컴포넌트의 재사용성을 높일 수 있음
1. State lifting up : 상태 끌어올리기
Test3.js
import { useState } from "react"; // 함수형 컴포넌트

// props 이용해서 부모가 전달한 함수 받아오기
const Id = (props) => {
    // props : {onChangeId}
    const {kId} = props; // kId라는 이름으로 부모가 전달한 함수 받아오기

    return (
        <>
            <div>
                <label>ID : </label>
                <input onChange={kId}></input>
                {/* onChange 이벤트 핸들러에 kId 넣어서 onChangeId 함수 연결 */}
            </div>
        </>
    );
}

const Pw = ({onChangePw}) => {
    // 부모 컴포넌트에서 받아온 함수
    return (
        <>
            <div>
                <label>PW : </label>
                <input onChange={onChangePw}></input>
            </div>
        </>
    );
}

// 1. Test3 컴포넌트 (부모)
const Test3 = () => {
    // id 와 pw 정의
    const [id, setId] = useState("");
    const [pw, setPw] = useState("");
    // 빈 값 초기화

    const onChangeId = (e) => {
        setId(e.target.value);
    }

    const onChangePw = (e) => {
        setPw(e.target.value);
    }

    return (
        <>
            <Id kId={onChangeId}></Id>
            {/* props 의 key */}
            <Pw onChangePw={onChangePw}></Pw>
            <div>
                <button disabled={id.length === 0 || pw.length === 0}>
                    Login
                </button>
            </div>
        </>
    );
}

export default Test3;
props의 key 값도 다 똑같이 써주지만 구분하기 위해서 다르게 써서 가져와봤음
App.js에서 꺼내서 쓰면 됨
import logo from './logo.svg';
import './App.css';
import Test1 from './test/Test1'; // Test1 컴포넌트 가져오기 위해 import
import Test2 from './test/Test2'; // Test2 컴포넌트 가져오기 위해 import
import Test3 from './test/Test3';

function App() {
  return (
    <div>
      <Test1 />
      {/* Test1.js 가져온 거 */}
      <Test2 />
      <Test3 />
    </div>
  );
}

export default App; // 내보내기
2. Props Drilling : 상태 내리꽂기
Props Drilling은 React에서 사용되는 용어로, Props를 통해 데이터를 전달할 때, 하위 컴포넌트에서 필요하지 않은 Props를 계속해서 전달하는 것을 의미
이러한 방법은 코드의 가독성을 떨어뜨리고, 유지보수를 어렵게 만들 수 있습니다.
따라서 Props Drilling을 최소화하기 위해서는, 필요한 Props만을 전달하고, 필요하지 않은 Props는 하위 컴포넌트에서 직접 접근하는 것이 좋습니다.
이를 위해서는 React Context난 Redux와 같은 상태 관리 라이브러리를 사용하는 것도 좋은 방법입니다.
Test4.js
import { useState } from "react";

// 부모 컴포넌트
function Test4() {
    const [name, setName] = useState("홍길동");

    const handleClick = () => {
        setName("홍길동 아님");
    }

    return (
        <>
            <Child1 name={name}></Child1>
            <button onClick={handleClick}>이름 변경</button>
        </>
    );
}

function Child1(props) {
    return <Child2 name={props.name}></Child2>
}

function Child2(props) {
    return <Child3 name={props.name}></Child3>
}

function Child3(props) {
    return <h1>{props.name}</h1>
}

export default Test4;
제일 마지막에 있는 Child3가 가져와진거임
헤드 태그
-> 가독성이 떨어지고 유지보수 어려움
Props 응용 전개 연산자
Test5.js
import { useState } from "react";

function Test5() {
    const [userData, setUserData] = useState({name : '홍길동', age : 30});
    return <MyComponent {...userData} />
}

function MyComponent(props) {
    const {name, age} = props;
    const content = `이름 : ${name}, 나이 : ${age}`;
    return <h3>{content}</h3>
}

export default Test5;
조건문 사용하기
Test6.js
function Test6(props) {
    const isLogin = props.login;

    return (
        isLogin ? <h1>Welcome</h1> : <h1>Please sign up</h1>
    );
}

export default Test6;
App.js
import logo from './logo.svg';
import './App.css';
import Test1 from './test/Test1'; // Test1 컴포넌트 가져오기 위해 import
import Test2 from './test/Test2'; // Test2 컴포넌트 가져오기 위해 import
import Test3 from './test/Test3';
import Test4 from './test/Test4';
import Test5 from './test/Test5';
import Test6 from './test/Test6';

function App() {
  return (
    <div>
      <Test1 />
      {/* Test1.js 가져온 거 */}
      <Test2 />
      <Test3 />
      <Test4 />
      <Test5 />
      <Test6 login={false} />
    </div>
  );
}

export default App; // 내보내기
반복문 사용하기
// 아래에서 exprot default Test7 안 써줘도 됨
export function Test7() {
    const nums =[1, 2, 3, 4, 5];
    const listItem = nums.map((num) => <li>{num}</li>);
    // num + 1 로 연산도 가능
    return <ul>{listItem}</ul>
}
App.js
import './App.css';
import Test6 from './test/Test6';
import { Test7 } from './test/Test7';

function App() {
  return (
    <div>
      <Test6 login={false} />
      <Test7 />
    </div>
  );
}

export default App; // 내보내기