
오전문제
-
사용자로부터 총 5개의 정수를 입력받아 하나의 쓰레드에게 전달하고, 총합을 계산해서 그 결과를 출력하는프로그램을 작성하자
package com.test.memo;

import java.util.Scanner;

class IntegerCom {
    int num = 0;
    boolean isNewNum = false;

    void setNum(int n) {
        synchronized (this) {
            if (isNewNum) { // true라면
                try {
                    wait(); // 특정조건을 충족시키기를 기다림
                } catch (InterruptedException e) {
                    e.printStackTrace();
                }
            }
            num = n;
            isNewNum = true;
            notify();
        }
    }

    int getNum() { // 저장된 정수 반환
        int reNum;
        synchronized (this) {
            if (!isNewNum) { // false라면
                try {
                    wait();
                } catch (InterruptedException e) {
                    e.printStackTrace();
                }
            }
            reNum = num;
            isNewNum = false;
            return reNum;
        }
    }
}

class IntegerSum extends Thread {
    IntegerCom com;
    int sum;

    IntegerSum(IntegerCom com) {
        this.com = com;
    }

    @Override
    public void run() {
        for (int i = 0; i < 5; i++) {
            sum += com.getNum();
        }
        System.out.println("입력된 정수의 합 : " + sum);
    }
}

public class Practice {
    public static void main(String[] args) {
        IntegerCom com = nm();
        IntegerSum sum = new IntegerSum(com);
        sum.start();

        Scanner sc = new Scanner(System.in);

        System.out.println("5개의 정수 입력 ...");
        for (int i = 0; i < 5; i++) {
            com.setNum(sc.nextInt());
        }
        try {
            sum.join();
        } catch (InterruptedException e) {
            e.printStackTrace();
        }
    }
}
- Scanner로부터 입력을 받고 sum.start()를 호출하는 것이 좋지만 현대 코드에서 IntegerCom객체의 setNum()에서 wait()이 호출되고 있기 때문에, 입력받고 sum.start()를 한다면 wait()메서드가 호출되서 스레드가 깨어날 때 까지 sum.start()가 실행지 않는다.
- 문제15 폴더에 있는 소스를 ReentrantLock을 이용하여 수정하시오.
package com.test.memo;

import java.util.concurrent.locks.ReentrantLock;

class IHaveTwoNum {
    int num1 = 0;
    int num2 = 0;
//    Object key1 = new Object();
//    Object key2 = new Object();
    private final ReentrantLock key1 = new ReentrantLock();
    private final ReentrantLock key2 = new ReentrantLock();

    public void addOneNum1() {
        key1.lock();
        try {
            num1 += 1;
        } finally {
            key1.unlock();
        }
    }

    public void addTwoNum1() {
        key1.lock();
        try {
            num1 += 2;
        } finally {
            key1.unlock();
        }
    }

    public void addOneNum2() {
        key2.lock();
        try {
            num2 += 1;
        } finally {
            key2.unlock();
        }
    }

    public void addTwoNum2() {
        key2.lock();
        try {
            num2 += 2;
        } finally {
            key2.unlock();
        }
    }

    public void showAllNums() {
        System.out.println("num1: " + num1);
        System.out.println("num2: " + num2);
    }

}

class AccessThread extends Thread {
    IHaveTwoNum twoNumInst;

    public AccessThread(IHaveTwoNum inst) {
        twoNumInst = inst;
    }

    public void run() {
        twoNumInst.addOneNum1();
        twoNumInst.addTwoNum1();

        twoNumInst.addOneNum2();
        twoNumInst.addTwoNum2();
    }
}

public class Practice1 {
    public static void main(String[] args) throws Exception {
        IHaveTwoNum numInst = new IHaveTwoNum();

        AccessThread at1 = new AccessThread(numInst);
        AccessThread at2 = new AccessThread(numInst);

        at1.start();
        at2.start();

        try {
            at1.join();
            at2.join();
        } catch (InterruptedException e) {
            e.printStackTrace();
        }
        numInst.showAllNums();
    }
}
//num1: 6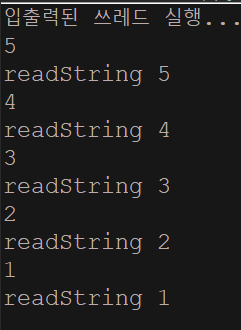
//num2: 6- 예제를 통해서 Condition 인스턴스 기반의 실행순서 동기화의 사례를 보여라. 이 예제에서는 두 개의 쓰레드가 생성되는데, 하나는 프로그램 사용자로부터 문자열을 입력 받는 쓰레드이고, 다른 하나는 입력 받은 문자열을 출력하는 쓰레드이다.
package com.test.memo;

import java.util.Scanner;
import java.util.concurrent.locks.Condition;
import java.util.concurrent.locks.ReentrantLock;

class InputCom {
    String newInput;
    boolean isNewString = false;

    private final ReentrantLock lock = new ReentrantLock();
    private final Condition read = lock.newCondition();
    private final Condition write = lock.newCondition();

    void setNewString(String str) {
        lock.lock();
        try {
            if (isNewString) {
                write.await();
            }
            newInput = str;
            isNewString = true;
            read.signal();
        } catch (InterruptedException e) {
            e.printStackTrace();
        } finally {
            lock.unlock();
        }
    }

    String getString() {
        String str = null;

        lock.lock();
        try {
            if (!isNewString) {
                read.await();
            }
            str = newInput;
            isNewString = false;
            write.signal();
        } catch (InterruptedException e) {
            e.printStackTrace();
        } finally {
            lock.unlock();
        }
        return str;
    }
}

class StringWriter extends Thread {
    InputCom com;

    StringWriter(InputCom com) {
        this.com = com;
    }

    @Override
    public void run() {
        for (int i = 0; i < 5; i++) {
            System.out.println("readString " + com.getString());
        }
    }
}

class StringReader extends Thread {
    InputCom com;

    StringReader(InputCom com) {
        this.com = com;
    }

    @Override
    public void run() {
        Scanner sc = new Scanner(System.in);
        String in;

        for (int i = 0; i < 5; i++) {
            in = sc.next();
            com.setNewString(in);
        }
    }
}

public class Practice1 {
    public static void main(String[] args) throws Exception {
        InputCom com = new InputCom();
        StringReader sr = new StringReader(com); // 스레드 2
        StringWriter sw = new StringWriter(com); // 스레드 3

        System.out.println("입출력된 쓰레드 실행...");
        sr.start();
        sw.start();
    }
}
1.Thread문제
- main 쓰레드의 이름을 출력해 보자.
package com.test.memo;

public class Practice1 {

    public static void main(String[] args) {
        System.out.println(Thread.currentThread().getName());
    }
}// main- 실행 결과가 다음과 같이 나오도록 람다를 완성하자.
//실행 결과
0 2 4 6 8 10 12 14 16 18
package com.test.memo;

public class Practice1 {

    public static void main(String[] args) {
        Runnable task1 = () -> {
            for (int i = 0; i < 20; i++) {
                if (i % 2 == 0) {
                    System.out.print(i + " ");
                }
            }
        };
        Thread t1 = new Thread(task1);
        t1.start();
    }
}// 0 2 4 6 8 10 12 14 16 18 - 다음 task를 쓰레드풀을 생성한 후에 그 쓰레드풀을 이용해서 실행하자.
그리고 쓰레드 풀을 소멸하도록 하자.
package com.test.memo;

import java.util.concurrent.ExecutorService;
import java.util.concurrent.Executors;

public class Practice1 {

    public static void main(String[] args) {
        Runnable task = () -> {
            int n1 = 10;
            int n2 = 20;
            String name = Thread.currentThread().getName();
            System.out.println(name + ": " + (n1 + n2));
        };
        ExecutorService exr = Executors.newSingleThreadExecutor();
        exr.submit(task);

        System.out.println("End" + Thread.currentThread().getName());

        exr.shutdown();
    }
}//Endmain
//pool-1-thread-1: 30- 쓰레드풀을 만들고, Callable 인터페이스를 기반으로 1부터 10까지 더한 값을 반환 받도록 코드를 작성하자.
package com.test.memo;

import java.util.concurrent.Callable;
import java.util.concurrent.ExecutorService;
import java.util.concurrent.Executors;
import java.util.concurrent.Future;

public class Practice1 {

    public static void main(String[] args) {
        // 쓰레드 풀 생성
        ExecutorService exr = Executors.newSingleThreadExecutor();

        // Callable 객체 생성 및 submit
        Callable<Integer> c = () -> {
            int sum = 0;
            for (int i = 1; i <= 10; i++) {
                sum += i;
            }
            return sum;
        };
        // Future 객체를 통해 Callable의 결과값을 받음
        Future<Integer> f = exr.submit(c);

        try {
            int result = f.get();// 블록킹되어 결과값을 기다림
            System.out.println("1~10까지의 합 : " + result);
        } catch (Exception e) {
            e.printStackTrace();
        }
        // 쓰레드 풀 종료
        exr.shutdown();
    }
}// 1~10까지의 합 : 55- ArrayList의 동기화 처리 예시를 작성하자.
package com.test.memo;

import java.util.ArrayList;
import java.util.Collections;
import java.util.List;
import java.util.ListIterator;
import java.util.concurrent.ExecutorService;
import java.util.concurrent.Executors;
import java.util.concurrent.TimeUnit;

public class Practice1 {
    public static List<Integer> lst = Collections.synchronizedList(new ArrayList<Integer>());

    public static void main(String[] args) {
        for (int i = 0; i < 16; i++)
            lst.add(i);
        System.out.println(lst);
        Runnable task = () -> { // 이 코드로 해야 Iterator()까지 동기화 처리된것
            synchronized (lst) { // 동기화 블록의 내부를 실행할 때 lst에 다른 쓰레드의 접근을 허용하지 않는다.
                ListIterator<Integer> itr = lst.listIterator();

                while (itr.hasNext())
                    itr.set(itr.next() + 1);
            }
        };
        ExecutorService exr = Executors.newFixedThreadPool(3); // 3개짜리 풀 생성
        exr.submit(task);
        exr.submit(task);
        exr.submit(task); // 쓰레드 3개 실행

        exr.shutdown();
        try {
            exr.awaitTermination(100, TimeUnit.SECONDS);
        } catch (InterruptedException e) {

            e.printStackTrace();
        }
        System.out.println(lst);
    }
}// [0, 1, 2, 3, 4, 5, 6, 7, 8, 9, 10, 11, 12, 13, 14, 15]
//[3, 4, 5, 6, 7, 8, 9, 10, 11, 12, 13, 14, 15, 16, 17, 18]
람다식 예제
예제 1
interface Printable {
    void print(String s);    // 매개변수 하나, 반환형 void
}

class OneParamNoReturn {
    public static void main(String[] args) {
        Printable p;

        p = (String s) -> {System.out.println(s);};    // 줄임 없는 표현
        p.print("Lambda exp one.");

        p = (String s) -> System.out.println(s);    // 중괄호 생략
        p.print("Lambda exp two.");

        p = (s) -> System.out.println(s);    // 매개변수 형 생략
        p.print("Lambda exp three.");

        p = s -> System.out.println(s);    // 매개변수 소괄호 생략
        p.print("Lambda exp four.");
    }
}

/*
Lambda exp one.
Lambda exp two.
Lambda exp three.
Lambda exp four.
*/
예제 2
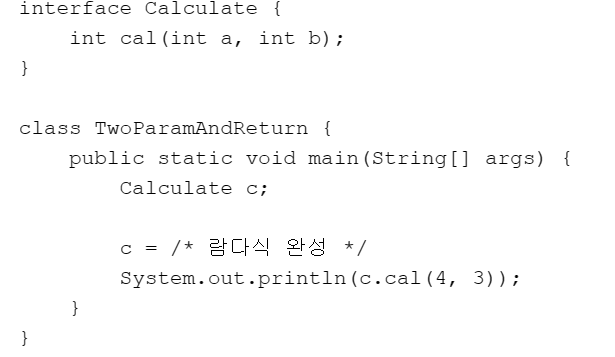
interface Calculate {
    void cal(int a, int b);    // 매개변수 둘, 반환형 void
}

class TwoParamNoReturn {
    public static void main(String[] args) {
        Calculate c;
        c = (a, b) -> System.out.println(a + b);
        c.cal(4, 3);

        c = (a, b) -> System.out.println(a - b);
        c.cal(4, 3);

        c = (a, b) -> System.out.println(a * b);
        c.cal(4, 3);
    }
}

/*
7
1
12
*/
interface HowLong {
int len(String s); // 값을 반환하는 메소드
}
class OneParamAndReturn {
public static void main(String[] args) {
HowLong hl = s -> s.length();
System.out.println(hl.len("I am so happy"));
}
}
/*
13
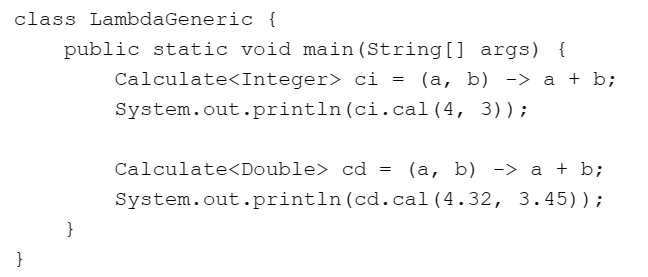
*/예제 3
@FunctionalInterface
interface Calculate <T> {
    T cal(T a, T b);
}

class LambdaGeneric {
    public static void main(String[] args) {
        Calculate<Integer> ci = (a, b) -> a + b;
        System.out.println(ci.cal(4, 3));

        Calculate<Double> cd = (a, b) -> a + b;
        System.out.println(cd.cal(4.32, 3.45));
    }
}
/*
7
7.7700000000000005
*/
표준 함수형 인터페이스 와 람다 예제
Predicate
import java.util.List;
import java.util.Arrays;
import java.util.function.Predicate;
//@FunctionalInterface
//public interface Predicate<T> { > 미리 정의되어 있는 함수형 인터페이스
// boolean test(T t); > test메소드 하나 정의되어 있음, 메인메소드에서 이 test를 만들어서 같이 보내야한다.
//}
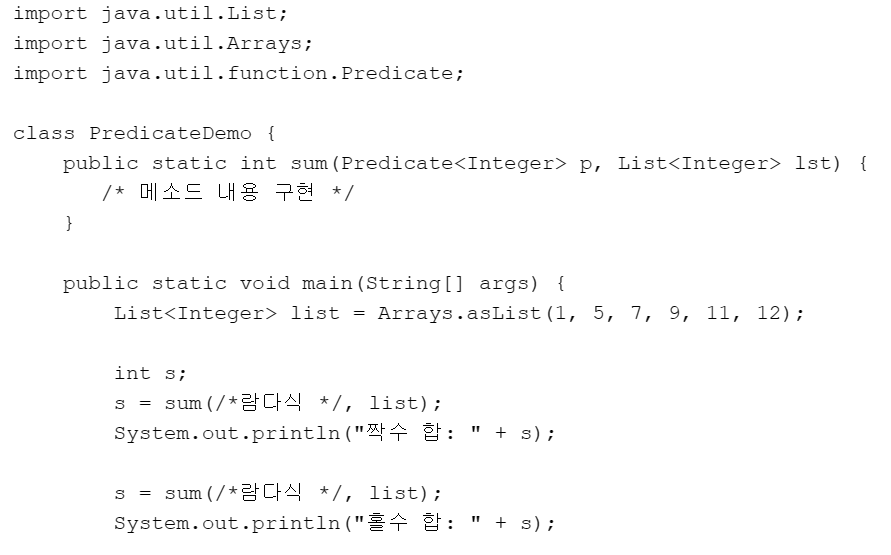
class PredicateDemo {
public static int sum(Predicate<Integer> p, List<Integer> lst) {
int s = 0;
for(int n : lst) {
if(p.test(n))
s += n;
}
return s;
}
public static void main(String[] args) {
List<Integer> list = Arrays.asList(1, 5, 7, 9, 11, 12);
int s; //test()
s = sum(n -> n%2 == 0, list);
System.out.println("짝수 합: " + s);
s = sum(n -> n%2 != 0, list);
System.out.println("홀수 합: " + s);
}
}
/*
짝수 합: 12
홀수 합: 33
*/-
표준으로 정의된 대표적인 함수형 인터페이스 네 개와 그 안에 위치한 추상 메소드는 아래와 같다.(암기)
이들은 java.util.function 패키지로 묶여있다.
-
Predicate boolean test(T t) : 매개변수 하나, 반환 타입 boolean
-
Supplier T get() : 매개변수 x, 반환값 O
-
Consumer void accept(T t) : 매개변수O, 반환값 X
-
Function<T, R> R apply(T t) : 하나의 매개변수를 받아서 결과를 반환
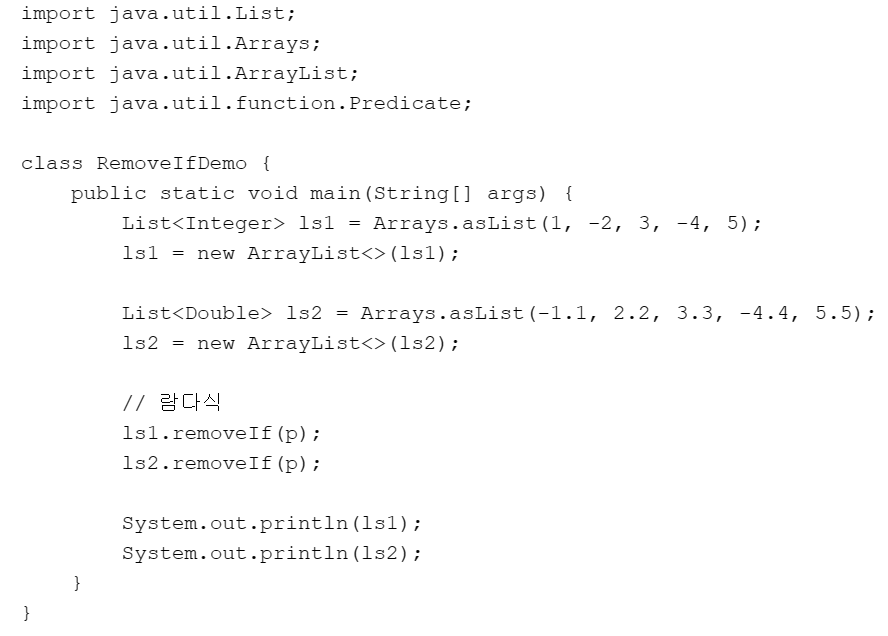
Predicate removeIf()
-
default boolean removeIf(Predicate<? super E> filter)>Collection\<E> 인터페이스에 디폴트 메소드로 정의되어 있다.- 컬렉션 인스턴스에 저장된 인스턴스를 다음 test 메소드의 인자로 전달했을 때, true가 반환되는 인스턴스는 모두 삭제하는 메소드다.
import java.util.List;
import java.util.Arrays;
import java.util.ArrayList;
import java.util.function.Predicate;

class RemoveIfDemo {
    public static void main(String[] args) {
        List<Integer> ls1 = Arrays.asList(1, -2, 3, -4, 5);
        ls1 = new ArrayList<>(ls1);

        List<Double> ls2 = Arrays.asList(-1.1, 2.2, 3.3, -4.4, 5.5);
        ls2 = new ArrayList<>(ls2);

        Predicate<Number> p = n -> n.doubleValue() < 0.0; //조건을 만족하는 애는 삭제 > 0보다 작으면 삭제
        ls1.removeIf(p);
        ls2.removeIf(p);

        System.out.println(ls1); //1 3 5
        System.out.println(ls2); //2.2  3.3  5.5
    }
}-
ArrayList의 제네릭을 Integer로 인스턴스를 생성하면, 그 안에 존재하는 removeIf메소드의 E는 아래와 같이 Integer로 결정된다.
public boolean removeIf(Predicate<? super Integer> filter) {...}
-
제네릭을 Number로 놓은 이유는 실수 정수 모두 다룰 수 있게 하기 위함
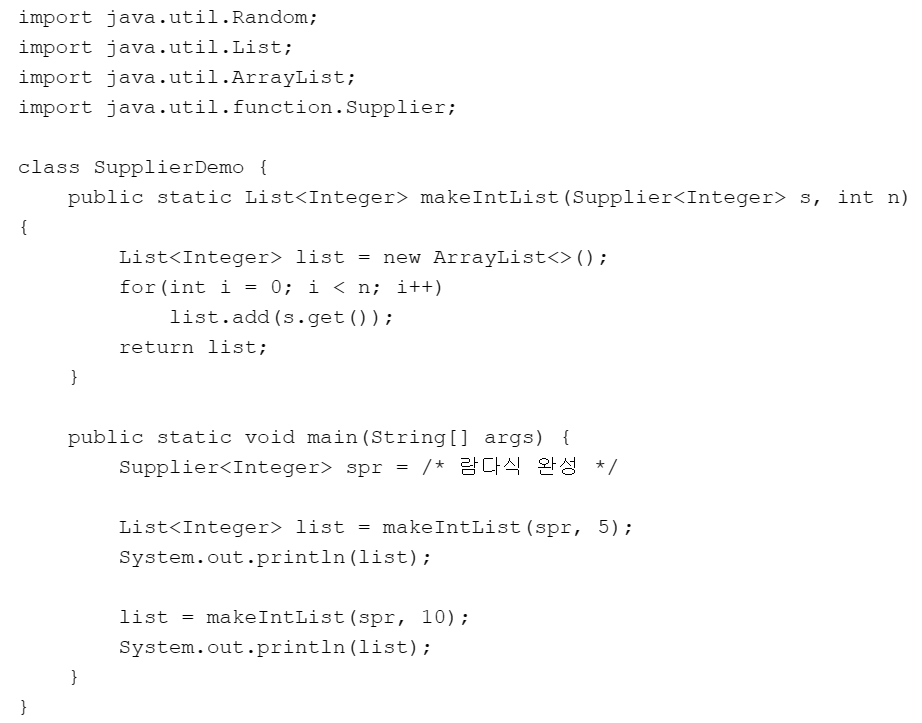
Supplier
단순히 무언가를 반환해야 할 때 유용하게 사용할 수 있다.
package com.test.memo;

import java.util.ArrayList;
import java.util.List;
import java.util.Random;
import java.util.function.Supplier;

public class Practice1 {
    public static List<Integer> makeIntList(Supplier<Integer> s, int n) {
        List<Integer> list = new ArrayList<>();
        for (int i = 0; i < n; i++)
            list.add(s.get());
        return list;
    }

    public static void main(String[] args) {

//        Supplier<Integer> spr = new Supplier<Integer>() {
//
//            @Override
//            public Integer get() {
//                Random rand = new Random();
//                return rand.nextInt(50);
//            }
//        };
        // 아래의 코드가 위 주석처리 된 부분을 람다로 표현
        Supplier<Integer> spr = () -> {
            Random rand = new Random();
            return rand.nextInt(50);
        };

        List<Integer> list = makeIntList(spr, 5);
        System.out.println(list);

        list = makeIntList(spr, 10);
        System.out.println(list);
    }
}
//[30, 5, 26, 47, 37]
//[19, 31, 4, 47, 43, 13, 22, 37, 24, 4]- Supplier T get(); : 단순히 무엇인가 반환할 때
Consumer
import java.util.function.Consumer;

class ConsumerDemo {
    public static void main(String[] args) {
        Consumer<String> c = s -> System.out.println(s);

        c.accept("Pineapple");    // 출력이라는 결과를 보임
        c.accept("Strawberry");
    }
}

/*
Pineapple
Strawberry
*/- Consumer void accept(T t); : 전달된 인자 기반으로 '반환' 이외의 다른 결과를 보일 때 > 인자는 전달받지만, 반환은 하지 않는다.
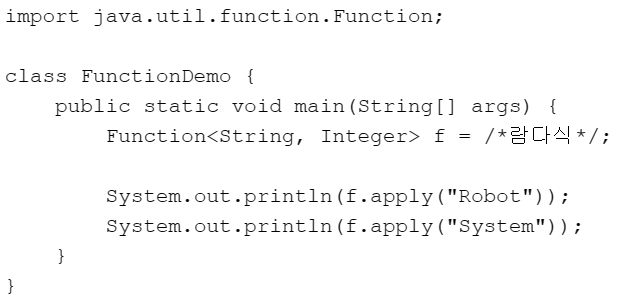
Function
package com.test.memo;
import java.util.function.Function;
public class Practice1 {
public static void main(String[] args) {
Function<String, Integer> f = s -> s.length();
// 위의 람다식이 아래의 익명 클래스를 내포한것
// Function<String, Integer> f = new Function<String, Integer>() {
//
// @Override
// public Integer apply(String t) {
// return t.length()
// }
// };
System.out.println(f.apply("Robot"));
System.out.println(f.apply("System"));
}
}
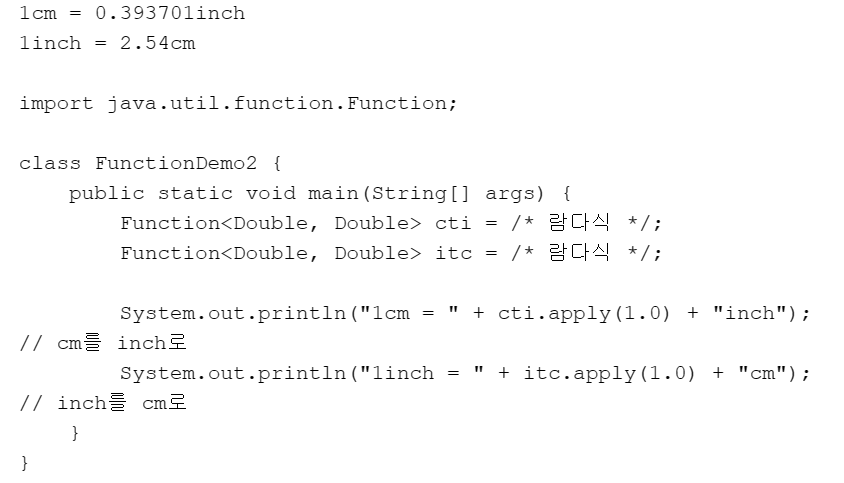
//5 6import java.util.function.Function;
class FunctionDemo2 {
public static void main(String[] args) {
Function<Double, Double> cti = d -> d * 0.393701;
Function<Double, Double> itc = d -> d * 2.54;
System.out.println("1cm = " + cti.apply(1.0) + "inch"); // cm를 inch로
System.out.println("1inch = " + itc.apply(1.0) + "cm"); // inch를 cm로
}
}
/*
1cm = 0.393701inch
1inch = 2.54cm
*/- 자료형으로 사용하고 싶다면 그냥 제네릭에 자료형을 넣어주면 된다.
기본자료형이 정해진 표준 함수 인터페이스
Predicate
import java.util.List;
import java.util.Arrays;
import java.util.function.IntPredicate;

class IntPredicateDemo {
    public static int sum(IntPredicate ip, List<Integer> lst) {
        int s = 0;

        for(int n : lst) {
            if(ip.test(n))
                s += n;
        }

        return s;
    }

    public static void main(String[] args) {
        List<Integer> list = Arrays.asList(1, 5, 7, 9, 11, 12);

        int s;
        s = sum(n -> n%2 == 0, list);
        System.out.println("짝수 합: " + s);

        s = sum(n -> n%2 != 0, list);
        System.out.println("홀수 합: " + s);

    }
}

/*
짝수 합: 12
홀수 합: 33
*/- IntPredicate boolean test(int value)
- LongPredicate boolean test(long value)
- DoublePredicate boolean test(double value)
- BiPredicate<T, U> boolean(T t, U u) : 두 개의 인자를 받아 true, false를 결정할 수 있는 인터페이스
Supplier
import java.util.Random;
import java.util.List;
import java.util.ArrayList;
import java.util.function.IntSupplier;

class IntSupplierDemo {
    public static List<Integer> makeIntList(IntSupplier is, int n) {
        List<Integer> list = new ArrayList<>();

        for(int i = 0; i < n; i++)
            list.add(is.getAsInt());

        return list;
    }

    public static void main(String[] args) {
        IntSupplier  ispr = () -> {
            Random rand = new Random();
            return rand.nextInt(50);
        };

        List<Integer> list = makeIntList(ispr, 5);
        System.out.println(list);

        list = makeIntList(ispr, 10);
        System.out.println(list);
    }
}

/*
[37, 47, 3, 20, 15]
[33, 8, 33, 43, 44, 49, 2, 47, 6, 38]
*/-
IntSupplier int getAsInt()
-
LongSupplier long getAsLong()
-
DoubleSupplier double getAsDouble()
-
Boolean Supplier boolean getAsBoolean()
제네릭이 아닌 위와 같이 구체화한 인터페이스들이 더 성능이 좋다. > 사용법은 같다.
Consumer
import java.util.function.ObjIntConsumer;

class ObjIntConsumerDemo {
    public static void main(String[] args) {
        ObjIntConsumer<String> c = (s, i) -> System.out.println(i + ". " + s);

        int n = 1;
        c.accept("Toy", n++);
        c.accept("Book", n++);
        c.accept("Candy", n);
    }
}

/*
1. Toy
2. Book
3. Candy
*/-
IntConsumer void accept(int value)
- ObjIntConsumer void accept(T t, int value)
-
LongConsumer void accept(long value)
- ObjLongConsumer void accept(T t, long value)
-
DoubleConsumer void accept(double value)
- ObjDoubleConsumer void accept(T t, double value)
-
BiConsumer<T, U> void accept(T t, U u)
Function
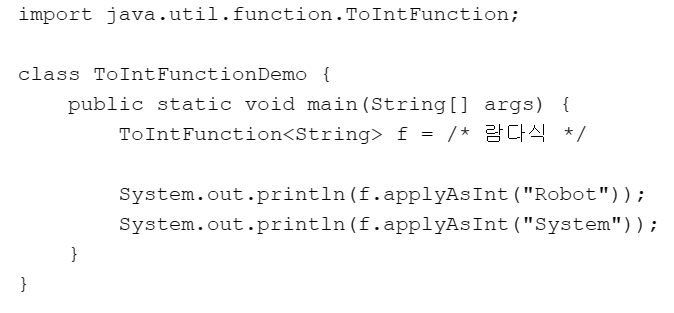
import java.util.function.ToIntFunction;

class ToIntFunctionDemo {
    public static void main(String[] args) {
        ToIntFunction<String> f = s -> s.length();

        System.out.println(f.applyAsInt("Robot"));
        System.out.println(f.applyAsInt("System"));
    }
}

/*
5
6
*/-
IntToDoubleFunction double applyAsDouble(int value)
-
DoubleUnaryOperator double applyAsDouble(double operand)
Function<T, R>에서 T와 R을 모두 기본 자료형으로 결정하여 정의한
인터페이스들
-
BiFunction\<T, U, R> R apply(T t, U u)
-
IntFunction\ R apply(int value)
-
DoubleFunction\ R apply(double value)
-
ToIntFunction\ int applyAsInt(T value)
-
ToDoubleFunction\ double applyAsDouble(T value)
-
ToIntBiFunction\<T, U> int applyAsInt(T t, U u)
-
ToDoubleBiFunction\<T, U> double applyAsDouble(T t, U u)
Function<T, R>에 위치한 추상 메소드의 매개변수 선언과 반환형을 다양화 한 것들
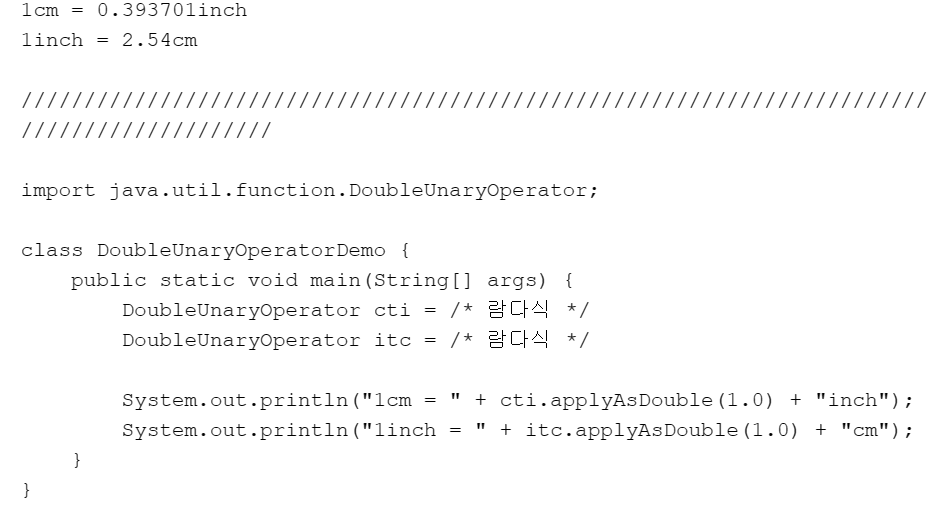
import java.util.function.DoubleUnaryOperator;

class DoubleUnaryOperatorDemo {
    public static void main(String[] args) {
        DoubleUnaryOperator cti = d -> d * 0.393701;
        DoubleUnaryOperator itc = d -> d * 2.54;

        System.out.println("1cm = " + cti.applyAsDouble(1.0) + "inch");
        System.out.println("1inch = " + itc.applyAsDouble(1.0) + "cm");
    }
}

/*
1cm = 0.393701inch
1inch = 2.54cm
*/- 참고로 UnaryOperator는 Function<T, R>을, 그리고BinaryOperator은 BiFunction<T, U, R>을 상속하여 정의한 인터페이스이다.
람다식 문제
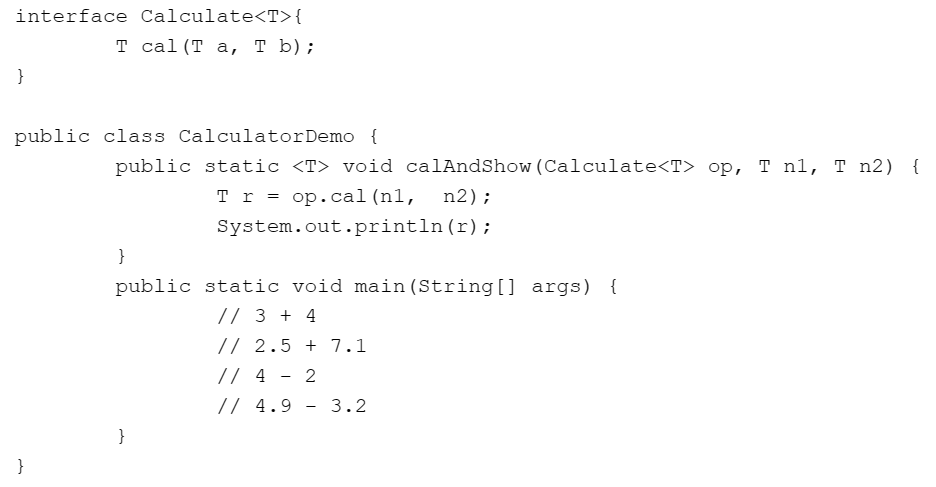
- 래 코드에서 주석에 명시된 연산의 결과를 출력하기 위한 calAndShow 메소드의 호출문을 람다식을 기반으로 작성해보자.
interface Calculate{
T cal(T a, T b);
}
public class CalculatorDemo {
public static void calAndShow(Calculate op, T n1, T n2) {
T r = op.cal(n1, n2);
System.out.println(r);
}
public static void main(String[] args) {
// 3 + 4
// 2.5 + 7.1
// 4 - 2
// 4.9 - 3.2
}
}
package com.test.memo;

interface Calculate<T> {
    T cal(T a, T b);
}

public class Practice1 {
    public static <T> void calAndShow(Calculate<T> op, T n1, T n2) {
        T r = op.cal(n1, n2);
        System.out.println(r);
    }

    public static void main(String[] args) {
//           Calculate<Integer> c1 = (a, b) -> a + b;
//           calAndShow(c1, a, null);
        calAndShow((a, b) -> a + b, 3, 4);
        calAndShow((a, b) -> a + b, 2.5, 7.1);
        calAndShow((a, b) -> a - b, 4, 2);
        calAndShow((a, b) -> a - b, 4.9, 3.2);
    }
}- 객체를 만들어 넘겨줘도 되지만, 위처럼 람다로 보내는게 유용하다. > 람다는 정말 많이 사용하니까 잘 알자
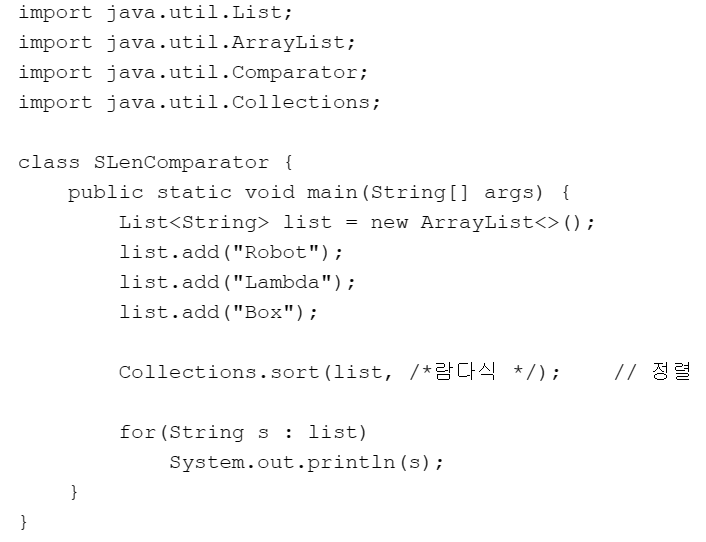
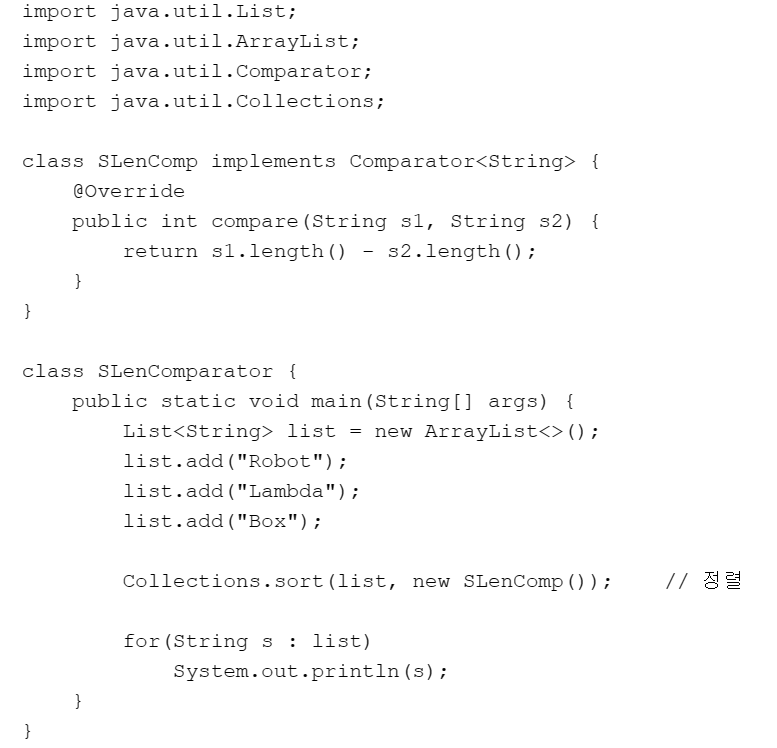
- SLenComparator.java를 람다식 기반으로 수정해보자. 수정 결과에서는 클래스 SLenComp의 정의가 지워져야 한다.
package com.test.memo;

import java.util.ArrayList;
import java.util.Collections;
import java.util.List;

//class SLenComp implements Comparator<String> {
//    @Override
//    public int compare(String s1, String s2) {
//        return s1.length() - s2.length();
//    }
//}

public class Practice1 {

    public static void main(String[] args) {
        List<String> list = new ArrayList<>();
        list.add("Robot");
        list.add("Lambda");
        list.add("Box");

//        Collections.sort(list, new SLenComp()); // 정렬

        Collections.sort(list, (s1, s2) -> s1.length() - s2.length());
        for (String s : list)
            System.out.println(s);
    }
}
표준형 함수 인터페이스 문제
- 아래의 코드에서 주석으로 표시된 내용의 출력을 보이도록 show 메소드의 몸체를 채워 보자. - [Predicate - test]
import java.util.Arrays;
import java.util.List;
import java.util.function.Predicate;
public class PredicateShow {
public static void show(Predicate p, List lst) {
// 채워 넣을 부분
}
public static void main(String[] args) {
List lst1 = Arrays.asList(1, 3, 8, 10, 11);
show(n->n%2!= 0, lst1); // 홀수만 출력
List lst2 = Arrays.asList(-1.2, 3.5, -2.4, 9.5);
show(n->n>0.0, lst2); // 0.0 보다 큰 수 출력
}
}
package com.test.memo;

import java.util.Arrays;
import java.util.List;
import java.util.function.Predicate;

public class Practice1 {

    public static <T> void show(Predicate<T> p, List<T> lst) {
//        for(T n : lst) {
//            if((int)n % 2 != 0) {
//                System.out.println(n);
//            }
//        } 내가 풀다 만것

        for (T n : lst) {
            if (p.test(n)) //각 객체의 test()메소드를 호출해 안에있는 값 반환받아서
                System.out.println(n);
        }
    }

    public static void main(String[] args) {
        List<Integer> lst1 = Arrays.asList(1, 3, 8, 10, 11);
        show(n -> n % 2 != 0, lst1); // 홀수만 출력

  //위 Predicate<T> p 에 아래 메서드가 들어가는것이다. > 람다로 그렇제 정의해놨으니까

  //Predicate<Integer> p = new Predicate<Integer>() {
          //@Override
            // public boolean test(Integer t) { //홀수인지 아닌지
                //  return t % 2 != 0;
            //}
        //};


        List<Double> lst2 = Arrays.asList(-1.2, 3.5, -2.4, 9.5);
        show(n -> n > 0.0, lst2); // 0.0 보다 큰 수 출력

          //마찬가지로 위 show 인자의 p를 람다로 정의했기에 아래 코드의 형태로 작성되어 p에 들어간것이다.
          //Predicate<Double> p2 = new Predicate<Double>() {

            //@Override
            //public boolean test(Double t) {
                //return t > 0;
            //}
        //};
    }
}

//1
//3
//11
//3.5
//9.5-
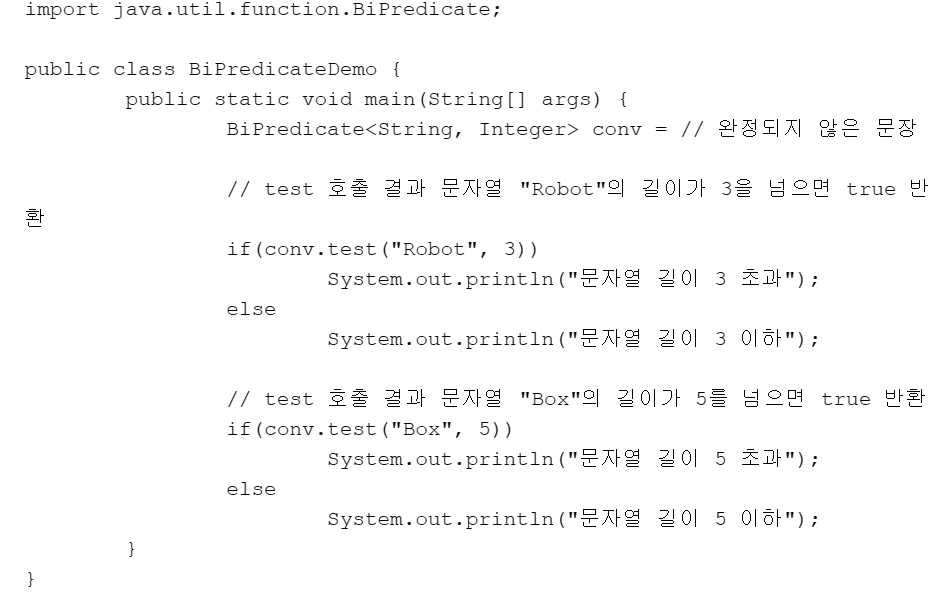
아래 코드가 정상적으로 동작하도록 '완성되지 않은 문장'을 완성해보자. 어떠한 내용을 담아야 할지는 주석의 내용을 참조하여 판단하자
[BiPredicate\<T, U>]
람다로
package com.test.memo;

import java.util.function.BiPredicate;

public class Practice1 {
    public static void main(String[] args) {
        BiPredicate<String, Integer> conv = (s, i) -> {
            if (s.length() > i) {
                return true;
            }
            return false;
        };

        // test 호출 결과 문자열 "Robot"의 길이가 3을 넘으면 true 반환
        if (conv.test("Robot", 3))
            System.out.println("문자열 길이 3 초과");
        else
            System.out.println("문자열 길이 3 이하");

        // test 호출 결과 문자열 "Box"의 길이가 5를 넘으면 true 반환
        if (conv.test("Box", 5))
            System.out.println("문자열 길이 5 초과");
        else
            System.out.println("문자열 길이 5 이하");
    }
}
 //문자열 길이 3 초과
 //문자열 길이 5 이하
익명 클래스로
package com.test.memo;

import java.util.function.BiPredicate;

public class Practice1 {
    public static void main(String[] args) {
        BiPredicate<String, Integer> conv = new BiPredicate<String, Integer>() {

            @Override
            public boolean test(String t, Integer u) {
                if (t.length() > u)
                    return true;

                return false;
            }
        };

        // test 호출 결과 문자열 "Robot"의 길이가 3을 넘으면 true 반환
        if (conv.test("Robot", 3))
            System.out.println("문자열 길이 3 초과");
        else
            System.out.println("문자열 길이 3 이하");

        // test 호출 결과 문자열 "Box"의 길이가 5를 넘으면 true 반환
        if (conv.test("Box", 5))
            System.out.println("문자열 길이 5 초과");
        else
            System.out.println("문자열 길이 5 이하");
    }
}- 인터페이스 BiConsumer<T, U>를 기반으로 위 클래스의 인스턴스에 int형, double형 데이터를 저장하는 기능의 람다식을 각각 작성하고, 이를 확인하기 위한 예제를 작성해보자.[Biconsumer<T, U> void accept(T t, U u)]
package com.test.memo;

import java.util.function.BiConsumer;
import java.util.function.ObjIntConsumer;

class Box<T> {
    private T ob;

    public void set(T o) {
        ob = o;
    }

    public T get() {
        return ob;
    }
}

public class Practice1 {

    public static void main(String[] args) {
//        Box<Integer> box = new Box<>();
//        ObjIntConsumer<Integer> o = (s, i) -> box.set(i);
        BiConsumer<Box<Integer>, Integer> c1 = (b, i) -> b.set(i);
        BiConsumer<Box<Double>, Double> c2 = (b, i) -> b.set(i);

        Box<Integer> bi = new Box<>();
        Box<Double> bd = new Box<>();

        c1.accept(bi, 10);
        c2.accept(bd, 10.45);

        System.out.println(bi.get());
        System.out.println(bd.get());
    }
}
정리 문제
- 다음 소스코드를 이용하여, 결과가 다음과 같이 나오도록 람다식을 작성하시오.
package com.test.memo;

import java.util.ArrayList;
import java.util.Collections;
import java.util.List;

public class Practice1 {

    public static void main(String[] args) {
        List<String> list = new ArrayList<>();
        list.add("Robot");
        list.add("Lambda");
        list.add("Box");

        Collections.sort(list, (str1, str2) -> Integer.compare(str1.length(), str2.length())); // 정렬
//
        for (String s : list)
            System.out.println(s);
    }
}
//Box
//Robot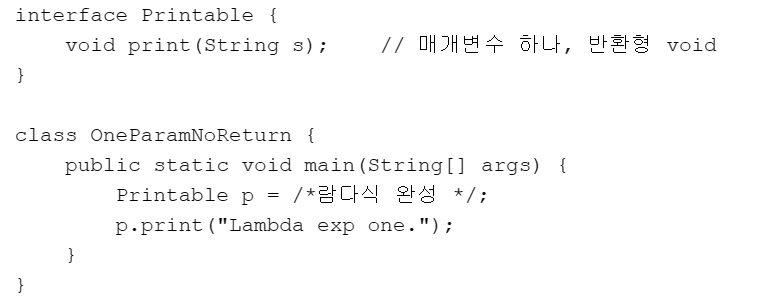
//Lambda- 다음 소스 코드에 람다식을 작성하여, 다음과 같이 출력하도록 하시오.
package com.test.memo;

interface Printable {
    void print(String s); // 매개변수 하나, 반환형 void
}

public class Practice1 {

    public static void main(String[] args) {
        Printable p = s -> System.out.println(s);

        p.print("Lambda exp one.");
    }
}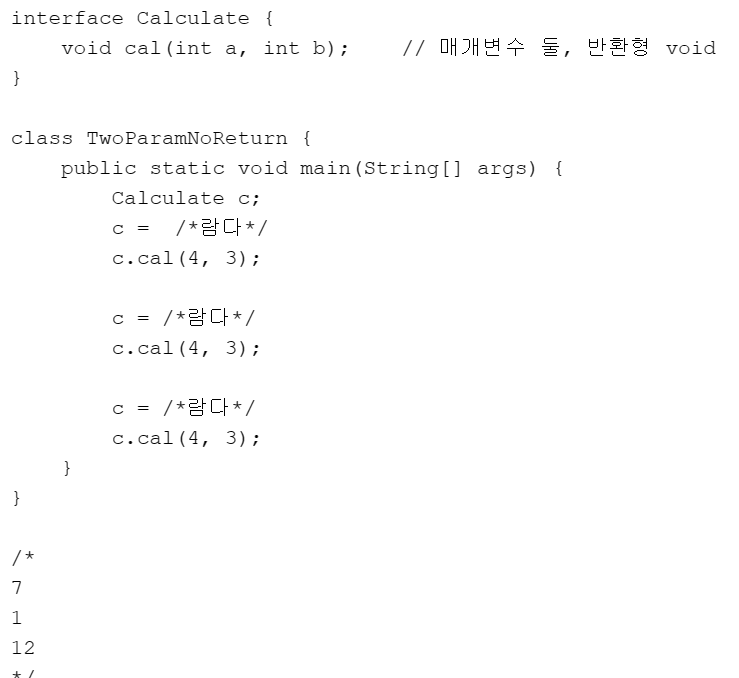
//Lambda exp one.- 다음 소스 코드에 람다식을 작성하여, 다음과 같이 출력하도록 하시오.
package com.test.memo;

interface Calculate {
    void cal(int a, int b); // 매개변수 둘, 반환형 void
}

public class Practice1 {

    public static void main(String[] args) {
        Calculate c;
        c = (a, b) -> System.out.println(a + b);
        c.cal(4, 3);

        c = (a, b) -> System.out.println(a - b);
        c.cal(4, 3);

        c = (a, b) -> System.out.println(a * b);
        c.cal(4, 3);
    }
}
//7 1 12- 다음과 같은 출력결과가 나오도록 람다식을 완성하시오. 7
package com.test.memo;

interface Calculate {
    int cal(int a, int b); // 매개변수 둘, 반환형 void
}

public class Practice1 {

    public static void main(String[] args) {
        Calculate c;

        c = (a, b) -> {
            return a + b;
        };

        System.out.println(c.cal(4, 3));
    }
}
//7- 다음과 같은 출력결과가 나오도록 람다식을 완성하시오. 13

package com.test.memo;

interface HowLong {
    int len(String s); // 값을 반환하는 메소드
}

public class Practice1 {

    public static void main(String[] args) {
        HowLong hl = s -> {
            return s.length();
        };
        System.out.println(hl.len("I am so happy"));
    }
}
//13-
함수형 인터페이스에 대해 설명하고 그 예시를 드시오.
-
함수형 인터페이스란 단, 하나의 추상 메서드만을 가지는 인터페이스다.
-
@Functionallnterface 애노테이션을 명시할 수 있고, 람다식으로 구현할 수 있다.
-
6-1 . 0 부터 49사이의 난수를 발생시키는 람다식을 작성하시오.
package com.test.memo;

interface Random {
    int ran(); // 매개변수 없는 메서드
}

public class Practice1 {

    public static void main(String[] args) {
        Random ran = () -> {
            return (int) (Math.random() * 50);
        };
        System.out.println(ran.ran());
    }
}
//0~49사이 난수 하나 출력 -
다음 소스코드와 출력결과를 참고하여 함수형 인터페이스를 작성하시오.
7
7.7700000000000005
package com.test.memo;

interface Calculate<T> {// int와 double이 모두 올 수 있도록 제네릭 타입 형태로
    T cal(T a, T b);
}

public class Practi//ce1 {

    public static void main(String[] args) {
        Calculate<Integer> ci = (a, b) -> a + b;
        System.out.println(ci.cal(4, 3));

        Calculate<Double> cd = (a, b) -> a + b;
        System.out.println(cd.cal(4.32, 3.45));
    }
}
//7
//7.7700000000000005
7-1 .
문제 1. 아래 코드에서 주석에 명시된 연산의 결과를 출력하기 위한 calAndShow 메소드의 호출문을 람다식을 기반으로 작성해보자.
package com.test.memo;

interface Calculate<T> {// int와 double이 모두 올 수 있도록 제네릭 타입 형태로
    T cal(T a, T b);
}

public class Practice1 {
    public static <T> void calAndShow(Calculate<T> op, T n1, T n2) {
        T r = op.cal(n1, n2);
        System.out.println(r);
    }

    public static void main(String[] args) {
        calAndShow((a, b) -> a + b, 3, 4);
        calAndShow((a, b) -> a + b, 2.5, 7.1);
        calAndShow((a, b) -> a - b, 4, 2);
        calAndShow((a, b) -> a - b, 4.9, 3.2);

    }
}
//7
//9.6
//2
//1.7000000000000002
문제 2. SLenComparator.java를 람다식 기반으로 수정해보자. 수정 결과에서는 클래스 SLenComp의 정의가 지워져야 한다.
package com.test.memo;

import java.util.ArrayList;
import java.util.Collections;
import java.util.List;

//class SLenComp implements Comparator<String> {
//    @Override
//    public int compare(String s1, String s2) {
//        return s1.length() - s2.length();
//    }
//}
public class Practice1 {

    public static void main(String[] args) {
        List<String> list = new ArrayList<>();
        list.add("Robot");
        list.add("Lambda");
        list.add("Box");

        Collections.sort(list, (s1, s2) -> s1.length() - s2.length()); // 정렬

        for (String s : list)
            System.out.println(s);

    }
}
//Box
//Robot
//Lambda- 암기할 내용
- 표준으로 정의된 대표적인 함수형 인터페이스 네 개와 그 안에 위치한 추상 메소드는 아래와 같다.
java.util.function 패키지로 묶여있다.
| 함수형 인터페이스 | 추상 메소드 |
|---|---|
| Predicate\ | boolean test(T t) |
| Supplier\ | T get() |
| Consumer\ | void accept(T t) |
| Function\<T, R> | R apply(T t) |
매개 변수가 두 개인 함수형 인터페이스
- 매개변수가 2개인 함수형 인터페이스에는 이름 앞에 "Bi" 가 붙는다.
- Supplier는 존재 x 사용하고싶다면, 새로운 클래스를 정의해 , 해당 클래스를 반환하는 Supplier를 사용해야 한다.
매개변수의 타입으로 보통 'T'를 사용하므로, 알파벳에서 'T'의 다음 문자인 'U', 'V', 'W'를 매개변수의 타입으로 사용하는 것일 뿐 별다른 의미X
| 함수형 인터페이스 | 추상 메소드 |
|---|---|
| BiPredicate\<T, U> | boolean test(T t, U u) |
| BiConsumer\<T, U> | void accept(T t, U u) |
| BiFunction\<T, U, R> | R apply(T t, U u) |
Supplier는 매개변수는 없고 반환값만 존재하는데, 메서드는 두 개의 값을 반환할 수 없으므로 BiSupplier가 없는 것이다.
두 개 이상의 매개변수를 갖는 함수형 인터페이스
2개 이상이 필요하다면, 직접 만들어서 써야한다.
ex) 만일 3개의 매개변수를 갖는 함수형 인터페이스를 선언한다면 아래와 같다.
@FunctionalINterface
interface TriFunction<T, U, V, R> {
    R apply(T t, U u, V v);
}
UnaryOperator / BinaryOperator Function
- 다른 변형으로 UnaryOperator와 BinaryOperator가 있는데, 매개변수의
타입과 반환타입의 타입이 모두 일치한다는 점만 제외하고는 Function과 같다.
UnaryOperator와 BinaryOperator의 조상은 각각 Function과BiFunction이다.
메소드 - apply()
8-1 . 다음 출력결과를 참고하여 람다식과 sum 메소드를 완성하시오.
짝수 합: 12
홀수 합: 33
package com.test.memo;

import java.util.Arrays;
import java.util.List;
import java.util.function.Predicate;

public class Practice1 {
    public static int sum(Predicate<Integer> p, List<Integer> lst) {
        int s = 0;
        for (int n : lst) {
            if (p.test(n)) {
                s += n;
            }
        }
        return s;
    }

    public static void main(String[] args) {
        List<Integer> list = Arrays.asList(1, 5, 7, 9, 11, 12);

        int s;
        s = sum(n -> n % 2 == 0, list);
        System.out.println("짝수 합: " + s);

        s = sum(i -> i % 2 != 0, list);
        System.out.println("홀수 합: " + s);
    }
}
//짝수 합: 12
//홀수 합: 33
8-2. 아래의 코드에서 주석으로 표시된 내용의 출력을 보이도록 show 메소드의 몸체를 채워 보자.

package com.test.memo;

import java.util.Arrays;
import java.util.List;
import java.util.function.Predicate;

public class Practice1 {
    public static <T> void show(Predicate<T> p, List<T> lst) {
        for (T t : lst) {
            if (p.test(t)) { // 해당 람다 결과값 boolean으로 반환
                System.out.print(t + " ");
            }
        }
        System.out.println();
    }

    public static void main(String[] args) {
        List<Integer> lst1 = Arrays.asList(1, 3, 8, 10, 11);
        show(n -> n % 2 != 0, lst1); // 홀수만 출력

        List<Double> lst2 = Arrays.asList(-1.2, 3.5, -2.4, 9.5);
        show(n -> n > 0.0, lst2); // 0.0 보다 큰 수 출력
    }
}-
8-1을 IntPredicate로 구현해보자. 보충설명하자면 sum 메소드의 원형을 다음 형태로 해라.
- public static int sum(IntPredicate ip, List\ lst) { }
package com.test.memo;

import java.util.Arrays;
import java.util.List;
import java.util.function.IntPredicate;

public class Practice1 {
    public static int sum(IntPredicate ip, List<Integer> lst) {
        int s = 0;
        for (int n : lst) {
            if (ip.test(n)) {
                s += n;
            }
        }
        return s;
    }

    public static void main(String[] args) {
        List<Integer> list = Arrays.asList(1, 5, 7, 9, 11, 12);

        int s;
        s = sum(n -> n % 2 == 0, list);
        System.out.println("짝수 합: " + s);

        s = sum(i -> i % 2 != 0, list);
        System.out.println("홀수 합: " + s);
    }
}- 메소드는 같은 test()이기에 인터페이스 이름만 바꿔주면 된다.
9-1. [BiPredicate\<T, U>]
아래 코드가 정상적으로 동작하도록 '완성되지 않은 문장'을 완성해보자. 어떠한 내용을 담아야 할지는 주석의 내용을 참조하여 판단하자.
package com.test.memo;

import java.util.function.BiPredicate;

public class Practice1 {

    public static void main(String[] args) {
        BiPredicate<String, Integer> conv = (s, i) -> s.length() > i;

        // test 호출 결과 문자열 "Robot"의 길이가 3을 넘으면 true 반환
        if (conv.test("Robot", 3))
            System.out.println("문자열 길이 3 초과");
        else
            System.out.println("문자열 길이 3 이하");

        // test 호출 결과 문자열 "Box"의 길이가 5를 넘으면 true 반환
        if (conv.test("Box", 5))
            System.out.println("문자열 길이 5 초과");
        else
            System.out.println("문자열 길이 5 이하");
    }
}
//문자열 길이 3 초과
//문자열 길이 5 이하- 다음 출력결과를 참고하여 다음 소스코드의 람다식을 완성하시오.
람다식의 내용은 0부터 49사이의 난수를 발생시켜서 리턴시킨다.
[25, 42, 43, 23, 18][49, 44, 32, 5, 2, 0, 44, 36, 20, 41]
package com.test.memo;

import java.util.ArrayList;
import java.util.List;
import java.util.function.Supplier;

public class Practice1 {
    public static List<Integer> makeIntList(Supplier<Integer> s, int n) {
        List<Integer> list = new ArrayList<>();
        for (int i = 0; i < n; i++)
            list.add(s.get());
        return list;
    }

    public static void main(String[] args) {
        Supplier<Integer> spr = () -> {
            return (int) (Math.random() * 50);
        };

        List<Integer> list = makeIntList(spr, 5);
        System.out.println(list);

        list = makeIntList(spr, 10);
        System.out.println(list);
    }
}
//[5, 37, 40, 47, 15]
//[45, 31, 10, 22, 46, 12, 48, 22, 13, 39]-
10번의 makeIntList의 메소드 원형을 다음과 같이 바꿔서 구현하자.
public static List\ makeIntList(IntSupplier is, int n) {}
메서드 :
int getAsInt()
package com.test.memo;

import java.util.ArrayList;
import java.util.List;
import java.util.function.IntSupplier;

public class Practice1 {
    public static List<Integer> makeIntList(IntSupplier is, int n) {
        List<Integer> list = new ArrayList<>();
        for (int i = 0; i < n; i++)
            list.add(is.getAsInt());
        return list;
    }

    public static void main(String[] args) {
        IntSupplier spr = () -> {
            return (int) (Math.random() * 50);
        };

        List<Integer> list = makeIntList(spr, 5);
        System.out.println(list);

        list = makeIntList(spr, 10);
        System.out.println(list);
    }
}
//[5, 37, 40, 47, 15] 계속 다르게 난수 발생
//[45, 31, 10, 22, 46, 12, 48, 22, 13, 39]-
다음 출력결과를 보고 다음 람다식을 완성하시오.
Pineapple
Strawberry
package com.test.memo;

import java.util.function.Consumer;

public class Practice1 {

    public static void main(String[] args) {
        Consumer<String> c = s -> System.out.println(s);

        c.accept("Pineapple");
        c.accept("Strawberry");
    }
}
//Pineapple
//Strawberry-
출력결과가 다음과 같이 나오도록 람다식을 작성하시오.
-
Toy
-
Book
-
Candy
-
package com.test.memo;

import java.util.function.ObjIntConsumer;

public class Practice1 {

    public static void main(String[] args) {
        ObjIntConsumer<String> c = (s, i) -> System.out.println(i + ". " + s);

        int n = 1;
        c.accept("Toy", n++);
        c.accept("Book", n++);
        c.accept("Candy", n++);
    }
}
//1. Toy
//2. Book
//3. Candy
13-1. [BiConsumer\<T, U>]
인터페이스 BiConsumer\<T, U>를 기반으로 아래 클래스의 인스턴스에 int형, double형 데이터를 저장하는 기능의 람다식을 각각 작성하고, 이를 확인하기 위한 예제를 작성해보자.
class Box{
private T ob;
public void set(T o) { ob = o; }
public T get() { return ob;}
}
package com.test.memo;

import java.util.function.BiConsumer;

class Box<T> {
    private T ob;

    public void set(T o) {
        ob = o;
    }

    public T get() {
        return ob;
    }
}

public class Practice1 {

    public static void main(String[] args) {
        BiConsumer<Box<Integer>, Integer> bc1 = (b, i) -> b.set(i);
        BiConsumer<Box<Double>, Double> bc2 = (b, i) -> b.set(i);

        Box<Integer> bi = new Box<>();
        Box<Double> bd = new Box<>();

        bc1.accept(bi, 10);
        bc2.accept(bd, 10.55);

        System.out.println(bi.get());
        System.out.println(bd.get());
    }
}
//10
//10.55- 다음 출력결과를 보고 람다식을 완성하시오. 5 6
package com.test.memo;

import java.util.function.Function;

public class Practice1 {

    public static void main(String[] args) {
        Function<String, Integer> f = s -> s.length();
        System.out.println(f.apply("Robot"));
        System.out.println(f.apply("System"));
    }
}
//5
//6- 다음 출력결과를 보고 소스코드를 완성하시오.
package com.test.memo;

import java.util.function.Function;

public class Practice1 {

    public static void main(String[] args) {
        Function<Double, Double> cti = d -> d * 0.393701;
        Function<Double, Double> itc = d -> d * 2.54;

        System.out.println("1cm = " + cti.apply(1.0) + "inch"); // cm를 inch로
        System.out.println("1inch = " + itc.apply(1.0) + "cm"); // inch를 cm로
    }
}
//1cm = 0.393701inch
//1inch = 2.54cm- 다음 출력결과를 보고 람다를 작성하시오. 5 6
package com.test.memo;

import java.util.function.ToIntFunction;

public class Practice1 {

    public static void main(String[] args) {
        ToIntFunction<String> f = s -> s.length();

        System.out.println(f.applyAsInt("Robot"));
        System.out.println(f.applyAsInt("System"));
    }
}
//5
//6- 다음 출력결과를 보고 람다식을 완성하시오.
package com.test.memo;

import java.util.function.DoubleUnaryOperator;

public class Practice1 {

    public static void main(String[] args) {
        DoubleUnaryOperator cti = i -> i * 0.393701;
        DoubleUnaryOperator itc = i -> i * 2.54;

        System.out.println("1cm = " + cti.applyAsDouble(1.0) + "inch");
        System.out.println("1inch = " + itc.applyAsDouble(1.0) + "cm");
    }
}
//1cm = 0.393701inch
//1inch = 2.54cm- 다음 소스 코드에서 ls1과 ls2의 0 미만의 값을 삭제하도록 람다식을 완성하자.
package com.test.memo;

import java.util.ArrayList;
import java.util.Arrays;
import java.util.List;
import java.util.function.Predicate;

public class Practice1 {

    public static void main(String[] args) {
        List<Integer> ls1 = Arrays.asList(1, -2, 3, -4, 5);
        ls1 = new ArrayList<>(ls1);

        List<Double> ls2 = Arrays.asList(-1.1, 2.2, 3.3, -4.4, 5.5);
        ls2 = new ArrayList<>(ls2);

        Predicate<Number> p = n -> n.doubleValue() < 0.0; // 0보다 작으면 삭제
        // 람다식
        ls1.removeIf(p);
        ls2.removeIf(p);

        System.out.println(ls1);
        System.out.println(ls2);

    }
}
//[1, 3, 5]
//[2.2, 3.3, 5.5]
메소드 참조(Methos References)
람다식으로 줄어든 코드의 양을 조금 더 줄일 수 있게 한다
-
메소드 참조의 4가지 유형과 메소드 참조의 장점
- static 메소드의 참조
- 참조변수를 통한 인스턴스 메소드 참조
- 클래스 이름을 통한 인스턴스 메소드 참조
- 생성자 참조
import java.util.List;
import java.util.Arrays;
import java.util.ArrayList;
import java.util.Collections;
import java.util.function.Consumer;

class ArrangeList {
    public static void main(String[] args) {
        List<Integer> ls = Arrays.asList(1, 3, 5, 7, 9);
        ls = new ArrayList<>(ls);

        Consumer<List<Integer>> c = l -> Collections.reverse(l);    // 람다식
        Consumer<List<Integer>> c = new Consumer<List<Integer>>(){  //위 람다식을 익명클래스로 해놓은거
            @Override
            public void accept(List<Integer> l){
                Collections.reverse(1); //순서를 뒤집기
            }
        };
        c.accept(ls);    // 순서 뒤집기 기능을 accept안에 넣어 실행
        System.out.println(ls);        // 출력
    }
}

// Consumer<T> void accept(T t)
// static 메소드의 참조
//[9, 7, 5, 3, 1]-
Consumer<List<Integer>> c = Collections::reverse;- 메소드 정보만 전달할 수 있도록
-
ClassName::staticMethodName> static 메서드의 참조 방법으로 :: 은 메소드 참조를 의미하는 연산자다. -
메소드 참조를 기반으로 람다식으로 가능하다.
-
Consumer<List<integer>> c = l -> Collections.reverse(l); -
Consumer<List<Integer>> c = Collections::reverse;
-
accept 메소드 호출 시 전달되는 인자를 reverse 메소드를 호출하면서 그대로 전달한다.
예제 2
import java.util.List;
import java.util.Arrays;
import java.util.ArrayList;
import java.util.Collections;
import java.util.function.Consumer;

class JustSort {
    public void sort(List<?> lst) {    // 인스턴스 메소드
        Collections.reverse(lst);
    }
}

class ArrangeList3 {
    public static void main(String[] args) {
        List<Integer> ls = Arrays.asList(1, 3, 5, 7, 9);
        ls = new ArrayList<>(ls);
        JustSort js = new JustSort();

           //람다식에서 같은 지역내에서 선언된 참조변수 js 에 접근하고 있다.
        Consumer<List<Integer>> c = e -> js.sort(e);
        // Consumer<List<Integer>> c = js::sort;  이렇게 메소드 참조고 대신할 수 있다.

        c.accept(ls);
        System.out.println(ls);
    }
}

//[9, 7, 5, 3, 1]

/*-
람다식에서 같은 지역 내에 선언된 참조변수 js에 접근하고 있다. > 람다식은 본래 인스턴스의 생성으로 이어진다는 사실을 고려하면 다소 특이
-
람다식에서 같은 지역에 선언된 참조변수에 접근하는 것은 가능하다.
- final로 선언되었거나 effectively final이어야 한다는 조건을 만족한다면 참조변수에 접근 가능
effectively final : 사실상 final 선언이 된 것과 같음 > 값 변경 불가능
public static void main(String[] args) {
    ...
    JustSort js = new JustSort();
    js = new JustSort();        // 다른 인스턴스를 참조하게 했다.
    Consumer<List<Integer>> c = l -> js.sort(l);
    ...
    js = null;
-
위 코드처럼 작성한다면 컴파일 오류가 일어난다. > js가 effectively final이 아니기 때문이다. > 주소값이 변경되면 안된다.
- js 에 null을 대입해도 컴파일 오류가 일어난다. 이유는 위와 같다.
-
ReferenceName::instanceMethodName : 인스턴스 메소드는 :: 을 이용해 참조 가능하다.
예제 2-1
import java.util.List;
import java.util.Arrays;
import java.util.ArrayList;
import java.util.Collections;
import java.util.function.Consumer;

class JustSort {
    public void sort(List<?> lst) {    // 인스턴스 메소드
        Collections.reverse(lst);
    }
}

class ArrangeList4 {
    public static void main(String[] args) {
        List<Integer> ls = Arrays.asList(1, 3, 5, 7, 9);
        ls = new ArrayList<>(ls);
        JustSort js = new JustSort();

        Consumer<List<Integer>> c = js::sort;    // 메소드 참조 기반
        c.accept(ls);
        System.out.println(ls);
    }
}
예제 3
import java.util.List;
import java.util.Arrays;

class ForEachDemo {

    public static void main(String[] args) {
        List<String> ls = Arrays.asList("Box", "Robot");

        // 람다식 기반
        ls.forEach(s -> System.out.println(s));

        // 메소드 참조 기반
        ls.forEach(System.out::println);
    }
}-
Collection인터페이스는 Iterable를 상속해, 컬렉션 클래스들은 대부분 Iterable을 구현하게 되는데, 이 인터페이스에는 디폴트 메소드가 정의되어 있다.
default void forEach(Consumer<? super T> action) {
    for(T t: this)        // this는 이 메소드가 속한 컬렉션 인스턴스를 의미함
        action.accept(t);    // 모든 저장된 데이터들에 대해 이 문장 반복
}
즉, 위의 메소드가 호출되면 컬렉션 인스턴스에 저장되어 있는 모든 인스턴스들을 대상으로
action.accept(t);가 실행되게 된다. > t는 저장되어있는 인스턴스 각각을 의미
-
forEach 문의 호출은, 람다식 또는 메소드 참조를 토앻 진행할 수 있다.
- ls.forEach(System.out::println);
예제 4
ToIntBiFunction <> applyAsInt(); 메서드 존재
import java.util.function.ToIntBiFunction;

class IBox {
    private int n;

    public IBox(int i) { n = i; }

    public int larger(IBox b) {
        if(n > b.n)
            return n;
        else
            return b.n;
    }
}

class NoObjectMethodRef {
    public static void main(String[] args) {
        IBox ib1 = new IBox(5);
        IBox ib2 = new IBox(7);

        //첫 번째 인자로 전달된 인스턴스의 메소드
        // 두 상자에 저장된 값 비교하여 더 큰 값 반환
        ToIntBiFunction<IBox, IBox> bf = (b1, b2) -> b1.larger(b2);                     //applyAsInt()메서드의 정의를 람다로
    // > ToIntBiFunction<IBox, IBox> bf = IBox::larger; 메소드 참조 방식으로 한다면 이렇게

        int bigNum = bf.applyAsInt(ib1, ib2);
        System.out.println(bigNum);}
}

// 7ClassName::instanceMethodName> 메소드 참조 방식
예제 4-1
import java.util.function.ToIntBiFunction;

class IBox {
    private int n;

    public IBox(int i) { n = i; }

    public int larger(IBox b) {
        if(n > b.n)
            return n;
        else
            return b.n;
    }
}

class NoObjectMethodRef2 {
    public static void main(String[] args) {
        IBox ib1 = new IBox(5);
        IBox ib2 = new IBox(7);

        // 두 상자에 저장된 값 비교하여 더 큰 값 반환
        ToIntBiFunction<IBox, IBox> bf = IBox::larger;
        int bigNum = bf.applyAsInt(ib1, ib2);
        System.out.println(bigNum);}
}

// 7

// ToIntBiFunction<T, U>    int applyAsInt(T t, U u)
예제 5
interface SMaker {
    String make(char[] ar);
}

class StringMaker {
    public static String chsToString(char[] a, SMaker m) {
        return m.make(a);
    }

    public static void main(String[] args) {

        //Function<char[], String> f = ar -> new String(ar); String생성자를 이용해 반환
        //Function<char[], String> f = String::new;    // 생성자 참조 방식
        SMaker sm = (ar) -> {
            return new String(ar);
        };


        char[] src = {'R', 'o', 'b', 'o', 't'};
        String str = chsToString(src, sm);
        System.out.println(str);
    }
}

//Robot

// Function<T, R> R apply(T t)-
public static void main(String[] args){ Function<char[], String> f = String::new; ... String str = f.apply(src); ... }-
f의 참조 대상이 String::new이므로, f는 String의 생성자를 참조하게 되는데, 참조변수 f의 자료형이 Function<char[], String>이므로 매개변수 형이 char[]인 아래의 생성자를 참조하게 된다.
-
public String(char[] value)- 따라서 이후 다음 문장을 실행하면 ,
String str = f.apply(src);
apply(src) { new String(src); }//메소드 정의가 아닌 apply()가 호출될 때 실행되는 내용 - 따라서 이후 다음 문장을 실행하면 ,
-
예제 5-1
import java.util.function.Function;

class StringMaker2 {
    public static void main(String[] args) {
        Function<char[], String> f = String::new;

        char[] src = {'R', 'o', 'b', 'o', 't'};
        String str = f.apply(src);
        System.out.println(str);
    }
}
// Function<T, R>    R apply(T t)
메소드 참조 문제
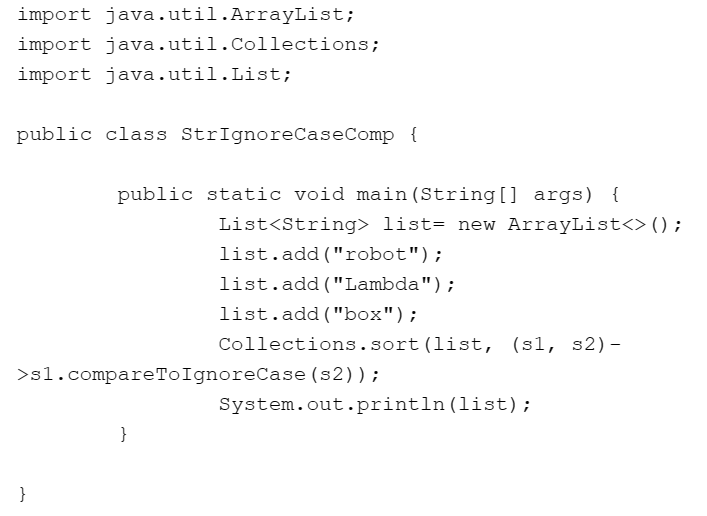
- 다음을 메소드 참조 방식으로 수정해보자.
package com.test.memo;

import java.util.ArrayList;
import java.util.Collections;
import java.util.List;

public class Practice1 {

    public static void main(String[] args) {
        List<String> list = new ArrayList<>();
        list.add("robot");
        list.add("Lambda");
        list.add("box");
        // Comparator<String> c = (s1, s2) -> s1.compareToIgnoreCase(s2);
        Collections.sort(list, String::compareToIgnoreCase);
        System.out.println(list);
    }
}
//[box, Lambda, robot]
람다와 생성자 참조 문제
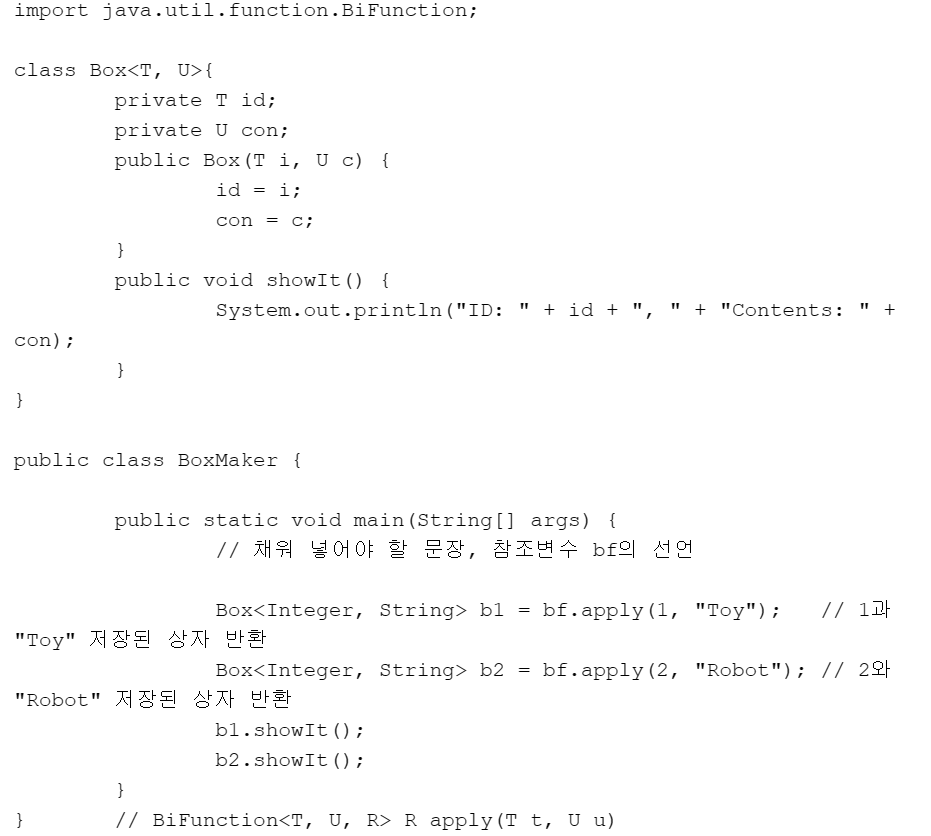
- 아래 예제가 잘 동작하도록 빈 문장 하나를 채워 넣자. 단 채워 넣을 문장은 BiFunction<T, U, R> 인터페이스를 기반으로 작성된 '람다식'을 포함해야 한다.
package com.test.memo;

import java.util.function.BiFunction;

class Box<T, U> {
    private T id;
    private U con;

    public Box(T i, U c) {
        id = i;
        con = c;
    }

    public void showIt() {
        System.out.println("ID: " + id + ", " + "Contents: " + con);
    }
}

public class Practice1 {

    public static void main(String[] args) {
        // 채워 넣어야 할 문장, 참조변수 bf의 선언
        // 익명클래스
//        BiFunction<Integer, String, Box<Integer, String>> bf = new BiFunction<Integer, String, Box<Integer,String>>() {
//                                    //들어가는 부분
//            @Override
//            public Box<Integer, String> apply(Integer t, String u) {
//                return new Box<Integer, String>(t, u);
//            }
//        };
        // 람다식으로
//        BiFunction<Integer, String, Box<Integer, String>> bf = (t, u) -> new Box<Integer, String >(t, u);
        // 생성자 참조로
        BiFunction<Integer, String, Box<Integer, String>> bf = Box::new;
        Box<Integer, String> b1 = bf.apply(1, "Toy"); // 1과 "Toy" 저장된 상자 반환
        Box<Integer, String> b2 = bf.apply(2, "Robot"); // 2와 "Robot" 저장된 상자 반환
        b1.showIt();
        b2.showIt();
    }
}
//ID: 1, Contents: Toy
//ID: 2, Contents: Robot
암기
| 함수형 인터페이스 | 추상 메소드 |
|---|---|
| Predicate\ | boolean test(T t) |
| Supplier\ | T get() |
| Consumer\ | void accept(T t) |
| Function\<T, R> | R apply(T t) |
[매개변수가 두개]
| 함수형 인터페이스 | 추상 메소드 |
|---|---|
| BiPredicate\<T, U> | boolean test(T t, U u) |
| BiConsumer\<T, U> | void accept(T t, U u) |
| BiFunction\<T, U, R> | R apply(T t, U u) |