오전 문제 레이아웃
<!DOCTYPE html>
<html lang="kr">
<head>
    <meta charset="UTF-8">
    <link rel="preconnect" href="https://fonts.googleapis.com">
    <link rel="preconnect" href="https://fonts.gstatic.com" crossorigin>
    <link href="https://fonts.googleapis.com/css2?family=Silkscreen:wght@400;700&display=swap" rel="stylesheet">
    <link rel="preconnect" href="https://fonts.googleapis.com">
    <link rel="preconnect" href="https://fonts.gstatic.com" crossorigin>
    <link href="https://fonts.googleapis.com/css2?family=Micro+5&family=Silkscreen:wght@400;700&display=swap" rel="stylesheet">
    <style>
        .silkscreen-regular {
            font-family: "Silkscreen", sans-serif;
            font-weight: 400;
            font-style: normal;
        }
        .micro-5-regular {
  font-family: "Micro 5", sans-serif;
  font-weight: 400;
  font-style: normal;
        }
        /*아래처럼 초기화해주지 않으면 buttons랑 tab_item칸이 일치되지 않는다.*/
        *{
            margin: 0;
            padding: 0;
        }
        li{
            list-style: none;
        }
        a{
            text-decoration: none;
        }
        img{
            border: 0;
        }
        #main_header{ /*머릿글 사이즈 설정*/
            width: 960px; margin: 0 auto;
            bottom: 20px;

            height: 160px;
            position: relative;
        }
        #main_header > #title{
            position: absolute;
            left: 10px; top: 60px;
        }
        #main_header  #title  h1, #main_header  #title  h2{
        margin: 0;
        padding: 0;
        font-size: 2.5em;
       }
        #main_header > #main_gnb{
            position: absolute;
            right: 0; top: 45px;
        }
       #main_gnb > ul{
        overflow: hidden;
       }
       #main_gnb > ul > li{
        float: left;
       }
       #main_gnb > ul > li > a{
        display: block;
        padding: 3px 8px;
        border: 1px solid black
       }
       #main_gnb > ul > li > a:hover{
        background: black;
        color: white;
       }
       #main_gnb > ul > li:first-child > a{
        border-radius: 13px 0 0 13px;
       }
       #main_gnb > ul > li:last-child > a{
        border-radius: 0 13px 13px 0;
       }
       #main_header > #main_lnb{
        position: absolute;
        right: 0; bottom: 5px;
       }
       #main_lnb > ul {
        overflow: hidden;
       }
       #main_lnb > ul > li{
        float: left;
       }
       #main_lnb > ul > li > a{
        display: block;
        padding: 8px 15px;
        border: 1px solid black;
       }
       #main_lnb > ul > li > a:hover{
        background: black;
        color: white;
       }
       #main_lnb > ul > li:first-child > a{
        border-radius: 13px 0 0 13px;
       }
       #main_lnb > ul > li:last-child > a{
        border-radius: 0 13px 13px 0;
       }
       #content{
        width: 960px;
        margin: 0 auto;
        overflow: hidden;
       }
       #content > #main_section{
        width: 750px; /* 750px */
        float: left;
       }
       #content > #main_aside{
        width: 200px;
        float: right;
       }
       #main_section > article.main_article {
        margin-bottom: 10px;
        padding: 10px;
        border: 1px solid black;
       }
       section.buttons{
        overflow: hidden;
       }
       section.buttons > label{
        display: block;
        float: left;

        /*lint-height 는 텍스트 블록 내에서 한 줄의 높이를 지정 >> 텍스트의 수직 정렬과 텍스트 줄 사이의 간격 */
        line-height: 30px;
        width: 100px;
        height: 30px;
        text-align: center;

        box-sizing: border-box;
        border: 1px solid black;
       }
       input:nth-of-type(1):checked ~ section.buttons > label:nth-of-type(1){
        background: black;
        color: white;
       }
       input:nth-of-type(2):checked ~ section.buttons > label:nth-of-type(2){
        background: black;
        color: white;
       }
       /*라디오 버튼 없애주기 - 아래 하나 */
       input:nth-of-type(1){
        display: none;
       }
       input:nth-of-type(1) ~ div:nth-of-type(1){
        display: none;
       }
        input:nth-last-of-type(1):checked ~ div:nth-of-type(1){
        display: block;
       }
       input:nth-of-type(2){
        display: none;
       }
       input:nth-of-type(2) ~ div:nth-of-type(2){
        display: none;
       }
       input:nth-last-of-type(2):checked ~ div:nth-of-type(2){
        display: block;
       }
       .item{
        overflow: hidden;
        padding: 10px;
        border: 1px solid black;
        border-top: none;
       }
       img{
        width: 60px;
        height: 45px;
       }
       .thumbnail{
        float: left;
       }
       .description{
        float: left;
        margin-left: 30px;
        height: 50px;
       }
       .description > strong {
        display: block;
        width: 120px;
        white-space: nowrap;
        overflow: hidden;
        text-overflow: ellipsis;
       }
       .thumbnail{
        float: left;
        margin-right: 15px;
       }
       #main_footer {
        /* 중앙 정렬 */
        width: 960px; margin: 0 auto;
        margin-bottom: 10px;

        /* 테두리 */
        box-sizing: border-box;
        padding: 0px;
        border: 1px solid black;

        /* 글자 정렬 */
        text-align: center;
        font-size: 30px;
        }


    </style>
</head>
<body>
   <header id="main_header">
    <div id="title">
        <h1 class="silkscreen-regular">Rint Development</h1>
        <h2 class="micro-5-regular">HTML5 + CSS3 Basic</h2>
    </div>
    <nav id="main_gnb">
        <ul>
            <li><a href="https://www.naver.com/">Naver</a></li>
            <li><a href="https://www.google.com/">Google</a></li>
            <li><a href="https://www.daum.net/">Daum</a></li>
            <li><a href="https://www.bing.com/">Bing</a></li>
        </ul>
    </nav>
    <nav id="main_lnb">
        <ul>
            <li><a href="#">JAVA</a></li>
            <li><a href="#">Eclipse</a></li>
            <li><a href="#">CSS</a></li>
            <li><a href="#">HTML</a></li>
            <li><a href="#">Visual Studio</a></li>
        </ul>
    </nav>
   </header>
   <div id="content">
        <section id="main_section">
            <article class="main_article">
                <h1>Main Article 1</h1>
                <p>Lorem ipsum dolor sit amet, consectetur adipiscing elit. Curabitur in magna libero. Sed nec pharetra nunc. Proin eget magna id ipsum eleifend cursus sit amet nec lectus. Nunc quis lacus magna. Aliquam blandit, sapien ut viverra fermentum, elit tortor ornare nisi, in luctus sem massa pulvinar turpis. Cras tincidunt dictum urna ut ultricies. Nullam diam nibh, pellentesque non laoreet ut, bibendum nec mauris. Maecenas pulvinar porttitor laoreet. Vivamus bibendum purus nisl, eget aliquam lectus. Maecenas justo libero, euismod sit amet suscipit eu, vulputate eget neque. Aliquam quam est, blandit nec iaculis non, suscipit vel nunc. Proin et odio aliquam erat pharetra accumsan et quis neque. Vivamus interdum accumsan leo eu adipiscing. Integer accumsan elit non turpis faucibus porttitor. Aliquam scelerisque nisi et turpis pretium at ultricies turpis pharetra.</p>
            </article>
            <article class="main_article">
                <h1>Main Article 2</h1>
                <p>Lorem ipsum dolor sit amet, consectetur adipiscing elit. Curabitur in magna libero. Sed nec pharetra nunc. Proin eget magna id ipsum eleifend cursus sit amet nec lectus. Nunc quis lacus magna. Aliquam blandit, sapien ut viverra fermentum, elit tortor ornare nisi, in luctus sem massa pulvinar turpis. Cras tincidunt dictum urna ut ultricies. Nullam diam nibh, pellentesque non laoreet ut, bibendum nec mauris. Maecenas pulvinar porttitor laoreet. Vivamus bibendum purus nisl, eget aliquam lectus. Maecenas justo libero, euismod sit amet suscipit eu, vulputate eget neque. Aliquam quam est, blandit nec iaculis non, suscipit vel nunc. Proin et odio aliquam erat pharetra accumsan et quis neque. Vivamus interdum accumsan leo eu adipiscing. Integer accumsan elit non turpis faucibus porttitor. Aliquam scelerisque nisi et turpis pretium at ultricies turpis pharetra.</p>
            </article>
            <article class="main_article">
                <h1>Main Article 3</h1>
                <p>Lorem ipsum dolor sit amet, consectetur adipiscing elit. Curabitur in magna libero. Sed nec pharetra nunc. Proin eget magna id ipsum eleifend cursus sit amet nec lectus. Nunc quis lacus magna. Aliquam blandit, sapien ut viverra fermentum, elit tortor ornare nisi, in luctus sem massa pulvinar turpis. Cras tincidunt dictum urna ut ultricies. Nullam diam nibh, pellentesque non laoreet ut, bibendum nec mauris. Maecenas pulvinar porttitor laoreet. Vivamus bibendum purus nisl, eget aliquam lectus. Maecenas justo libero, euismod sit amet suscipit eu, vulputate eget neque. Aliquam quam est, blandit nec iaculis non, suscipit vel nunc. Proin et odio aliquam erat pharetra accumsan et quis neque. Vivamus interdum accumsan leo eu adipiscing. Integer accumsan elit non turpis faucibus porttitor. Aliquam scelerisque nisi et turpis pretium at ultricies turpis pharetra.</p>
            </article>
        </section>
            <aside id="main_aside">
                <input id="first" type="radio" name="tab" checked>
                <input id="second" type="radio" name="tab">

                <section class="buttons">
                    <label for="first">First</label>
                    <label for="second">Second</label>
                </section>
                <div class="tab_item">
                    <ul>
                        <li class="item"><a href="#">
                            <div class="thumbnail">
                                <img src="aaa.png">
                            </div>
                            <div class="description">
                                <strong>VetNam 1</strong>
                                <p>2023-06-06</p>
                            </div>
                        </a></li>
                        <li class="item"><a href="#">
                            <div class="thumbnail">
                                <img src="aaa.png">
                            </div>
                            <div class="description">
                                <strong>VetNam 2</strong>
                                <p>2023-06-07</p>
                            </div>
                        </a></li>
                        <li class="item"><a href="#">
                            <div class="thumbnail">
                                <img src="aaa.png">
                            </div>
                            <div class="description">
                                <strong>VetNam 3</strong>
                                <p>2023-06-08</p>
                            </div>
                        </a></li>
                        <li class="item"><a href="#">
                            <div class="thumbnail">
                                <img src="aaa.png">
                            </div>
                            <div class="description">
                                <strong>VetNam 4</strong>
                                <p>2023-06-09</p>
                            </div>
                        </a></li>
                    </ul>
                </div>
                <div class="tab_item">
                    <ul>
                        <li class="item"><a href="#">
                            <div class="thumbnail">
                                <img src="aaa.png">
                            </div>
                            <div class="description">
                                <strong>VetNam trip1</strong>
                                <p>2023-06-06</p>
                            </div>
                        </a></li>
                        <li class="item"><a href="#">
                            <div class="thumbnail">
                                <img src="aaa.png">
                            </div>
                            <div class="description">
                                <strong>VetNam trip2</strong>
                                <p>2023-06-07</p>
                            </div>
                        </a></li>
                        <li class="item"><a href="#">
                            <div class="thumbnail">
                                <img src="aaa.png">
                            </div>
                            <div class="description">
                                <strong>VetNam trip3</strong>
                                <p>2023-06-08</p>
                            </div>
                        </a></li>
                        <li class="item"><a href="#">
                            <div class="thumbnail">
                                <img src="aaa.png">
                            </div>
                            <div class="description">
                                <strong>VetNam trip4</strong>
                                <p>2023-06-09</p>
                            </div>
                        </a></li>
                    </ul>
                </div>
            </aside>
   </div>
   <footer id="main_footer">
    <h3 class="micro-5-regular">HTML5 + CSS3 Basic</h3>
    <address class="micro-5-regular">Website Layout Basic</address>
</footer>
</body>
</html>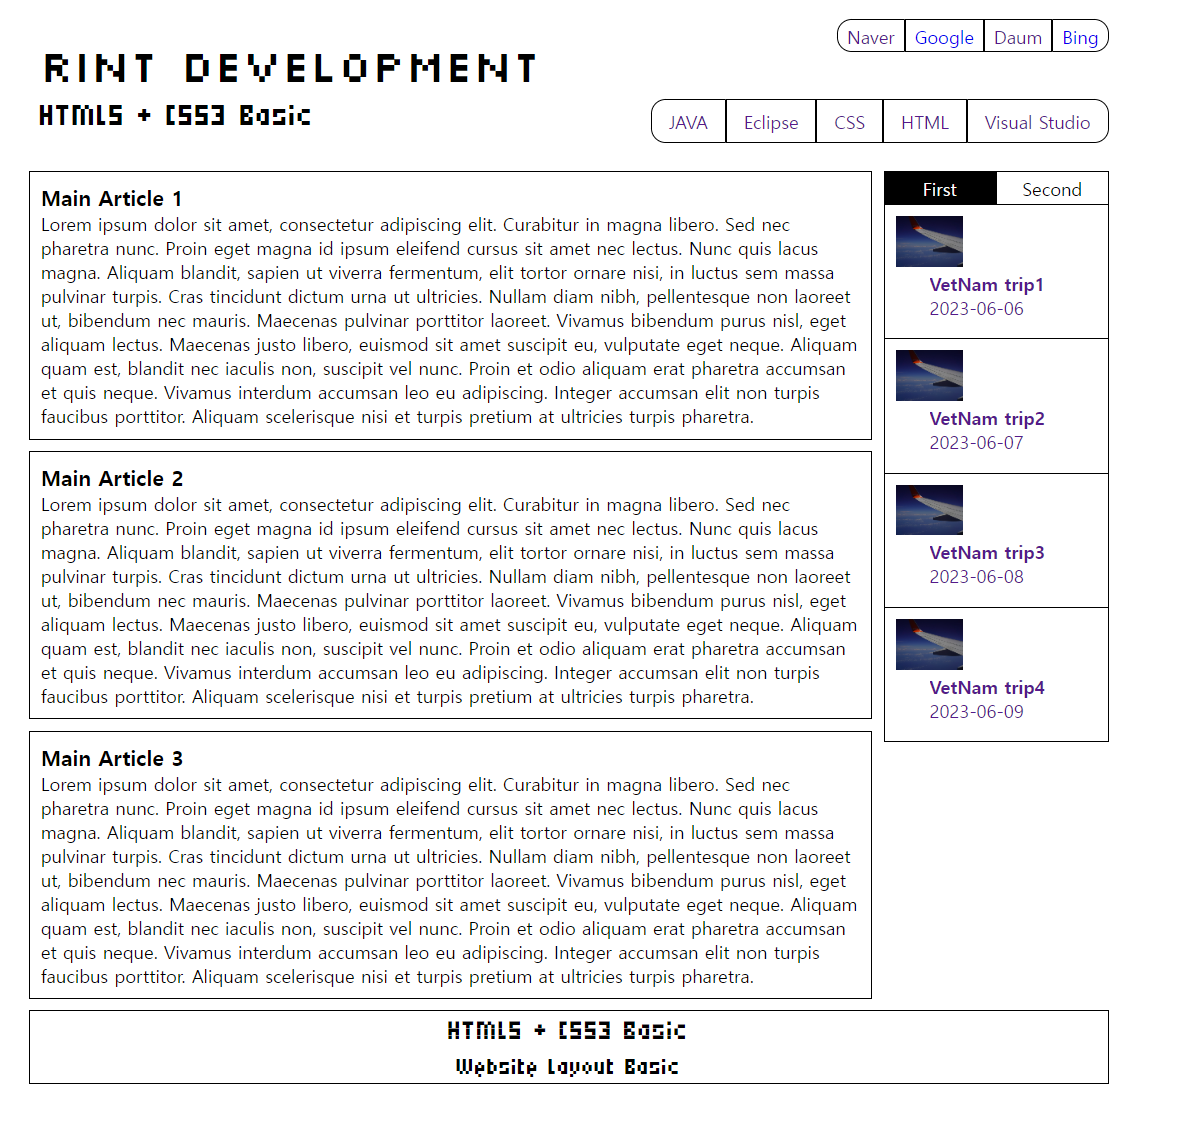
Emmet - 자동완성
vs code에는 emmet이 자동 설치 되어있다.
띄어쓰기는 하지 않는다. 제대로 인식을 못할 수 있다.
태그를 따로 명시하지 않는다면 div태그로 자동완성 된다.
-
코드 기본 틀 자동 완성
! + tab >> html
-
body안에 div#id_name + tab하면 자동완성
- #name + tab 해도 div태그로 자동완성 따로 태그를 명시하지 않으면 자동으로 div태그로 완성시킨다.
-
class이름을 id로 준다는 가정하에 div(태그이름).id + tab 하면 자동완성
-
.id>ul + tab하면 클래스이름은 id인 div태그 안에 ul이 들어가 자동완성 -
#name+.id>ul +tab: 하면 아이디가 name이고 클래스 이름이 id인 그 안에 ul이 있는 형태로 자동완성 -
div>ul>li + tab: dib안에 ul 안에 li 가 있는 형태로 자동완성 -
div+h1+p +tab: +는 동위선택자로 바로 뒤에 오게끔 자동완성된다. -
ul>li*5 +tab: ul안에 li가 5개가 있는 형태로 자동완성
-
(ul>li3)2 +tab : ul의 자손 li가 3개있고 그 형태가 두개있게끔 자동완성
- (form > input 3)2+ul>li*4+span*2 +tab : 들여쓰기까지는 안된다.
-
h1{List} + tab: h1중괄호 안에 텍스트를 넣어주면 문장 삽입도 가능
h1{List}+ul>li{list}*3 +tab
-
$가있는 부분은 auto_increment처럼 값이 순차적으로 증가해서 알아서 들어간다.
-
ul>li{list$}*5 +tab: -
ul>li.item$@-*5 +tab: 클래스 이름이 item뒤에 번호가 역순으로 되어있어서 $@- 를 사용 -
ul>li{list$@3}*5 +tab: list뒤에 숫자가 3부터 시작 -
ul>li.item$@-3*5 +tab: 3부터 역순으로 5개
-
-
h1#title +tab -
div#title//#title + tab -
h1.title +tab -
.main.main-title +tab : 연속으로 두개넣으면 클래스가 여러개일 때 자동완성 가능
-
input[type="password" name="PW" placeholder="Enter Password Please"] + tab: 속성을 자동완성 >> 대괄호 사용 -
div+div>p>span+em^blockquote +tab: 캐럿^을 사용하면 한단계 위로, +는 동위 >꺽새는 자손div+div>p>span+em^^blockquote + tab: blockquote태그는 인용했다는 의미의 태그 + q태그도 존재 >>q태그는 짧은 이용으로 자동으로 쌍따옴표가 들어간다.
-
앵커태그는 a+tab만해도 href가 들어간다.
-
a{Click me} +tab -
a[href="http://www.naver.com"]{naver} +tab:앵커태그가 naver사이트를 가진 형태로 자동완성 -
a{click}+b{here}
-
-
p{Click}^a{here}+{to continue} + tabp{Click}+a{here}+{to continue}
-
select#menu>option*5 +tab -
div>lorem +tab : 문장까지 자동완성 된다.
-
ul>li*3>lorem +tab : 하면 li가 3줄로 lorem문장이 나눠서 써진다.
emmet문제
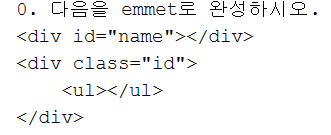
#name+.id>ul
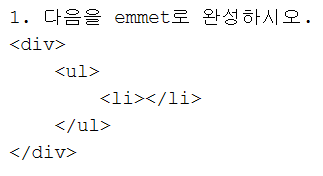
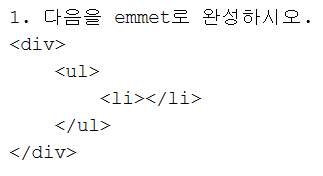
div>ul>li
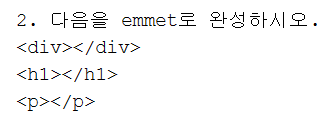
div+h1+p
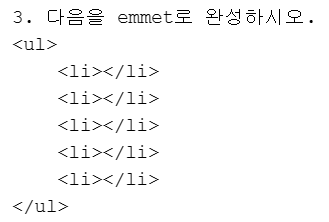
ul>li*5
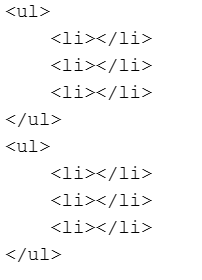
(ul>li*3)*2
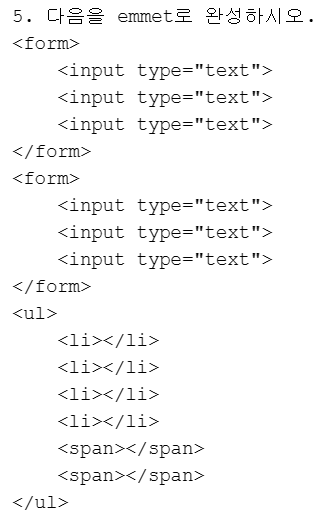
(form>input*3)*2+ul>li*4+span*2
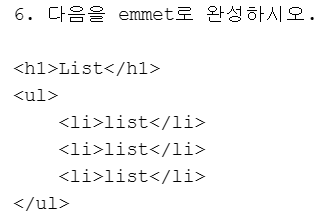
h1{List}+ul>li{list}*3
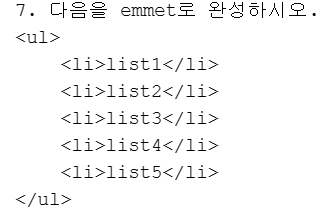
ul>li{list$}*5
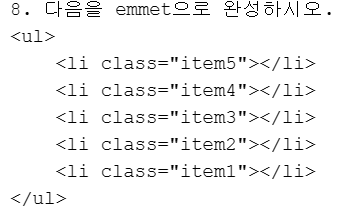
ul>li.item$@-*5
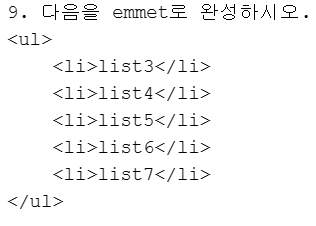
ul>li{list$@3}*5
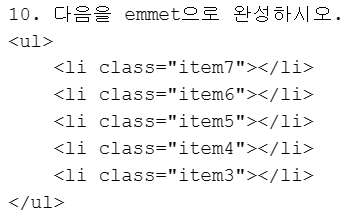
ul>li.item$@-3*5
h1#title
div#title
h1.title

div.main.main-title
input[type="password" name="PW" placeholder="Enter Password Please"]
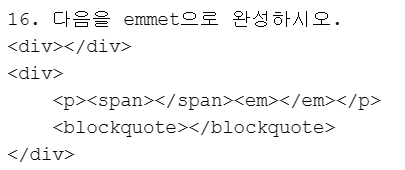
div+div>p>span+em^blockquote
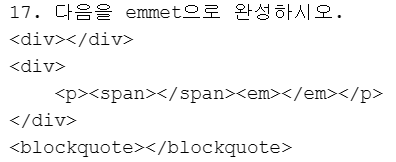
div+div>p>span+em^^blockquote
a{Click me}
a[href="http://www.naver.com"]+b{here}

-
p{Click}>a{here}+{to continue}select#menu>option*5
div>lorem
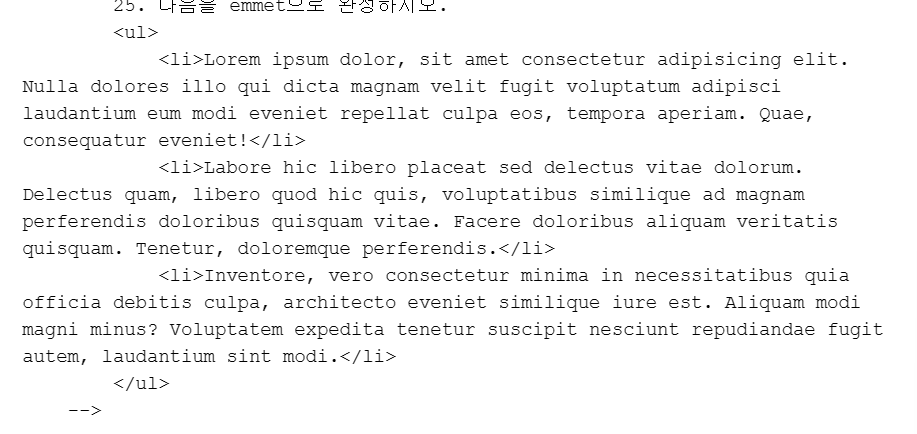
ul>li*3>lorem
emmet-CSS문제
<!DOCTYPE html>
<html lang="ko">
<head>
    <meta charset="UTF-8">
    <meta http-equiv="X-UA-Compatible" content="IE=edge">
    <meta name="viewport" content="width=device-width, initial-scale=1.0">
    <title>Document</title>
    <style>
        /*
            1. 다음을 emmet으로 완성하시오.
            div{position: relative;}
            답 : div{pos}
        */
        /*
            2. 다음을 emmet으로 완성하시오.
            div{top: ;}
            답 : div{t}
        */
        /*
            3. 다음을 emmet으로 완성하시오.
            div{float: left;}
            답 : div{fl}
        */
        /*
            4. 다음을 emmet으로 완성하시오.
            div{display: block;}
            답 : div{d}
        */
        /*
            5. 다음을 emmet으로 완성하시오.
            div{visibility: hidden;}
            답 : div{v}
        */
        /*
            6. 다음을 emmet으로 완성하시오.
            div{overflow: hidden;}
            답 : div{ov}
        */
        /*
            7. 다음을 emmet으로 완성하시오.
            div{margin: ;}
            답 : div{m}
        */
        /*
            8. 다음을 emmet으로 완성하시오.
            div{margin: auto;}
            답 : div{m:a}
        */
        /*
            9. 다음을 emmet으로 완성하시오.
            div{width: ;}
            답 : div{w}
        */
        /*
            10. 다음을 emmet으로 완성하시오.
            div{height: ;}
            답 : div{h}
        */
    </style>
</head>
<body>

</body>
</html>
placeholder - 칸에 흐릿하게 설명
<!DOCTYPE html>
<html>
<style>
input[type=text], select {/*텍스트 입력 필드, 셀렉트 박스의 스타일*/
  width: 100%;/*부모 요소의 100%너비를 차지하도록 하기위해서*/
  padding: 12px 20px;/*안쪽 여백 위쪽12px, 아래쪽 20px*/
  margin: 8px 0;/*외부 여백 위아래 8px*/
  display: inline-block;
  border: 1px solid #ccc;
  border-radius: 4px;
  box-sizing: border-box;
}

input[type=submit] {/*제출 버튼의 스타일*/
  width: 100%;
  background-color: #4CAF50;
  color: white;
  padding: 14px 20px;/*안쪽 여백*/
  margin: 8px 0;/*외부 여백*/
  border: none;/*테두리 없음*/
  border-radius: 4px;
  cursor: pointer;
}

input[type=submit]:hover {
  background-color: #45a049;
}

div {
  border-radius: 5px;
  background-color: #f2f2f2;
  padding: 20px;
}
</style>
<body>

<h3>Using CSS to style an HTML Form</h3>

<div>
  <form action="/action_page.php">/*데이터가 전송 될 url지정*/
    <label for="fname">First Name</label>
    <input type="text" id="fname" name="firstname" placeholder="Your name..">

    <label for="lname">Last Name</label>
    <input type="text" id="lname" name="lastname" placeholder="Your last name..">

    <label for="country">Country</label>
    <select id="country" name="country">/*드롭다운 목록*/
      <option value="australia">Australia</option>
      <option value="canada">Canada</option>
      <option value="usa">USA</option>
    </select>

    <input type="submit" value="Submit">
  </form>
</div>

</body>
</html>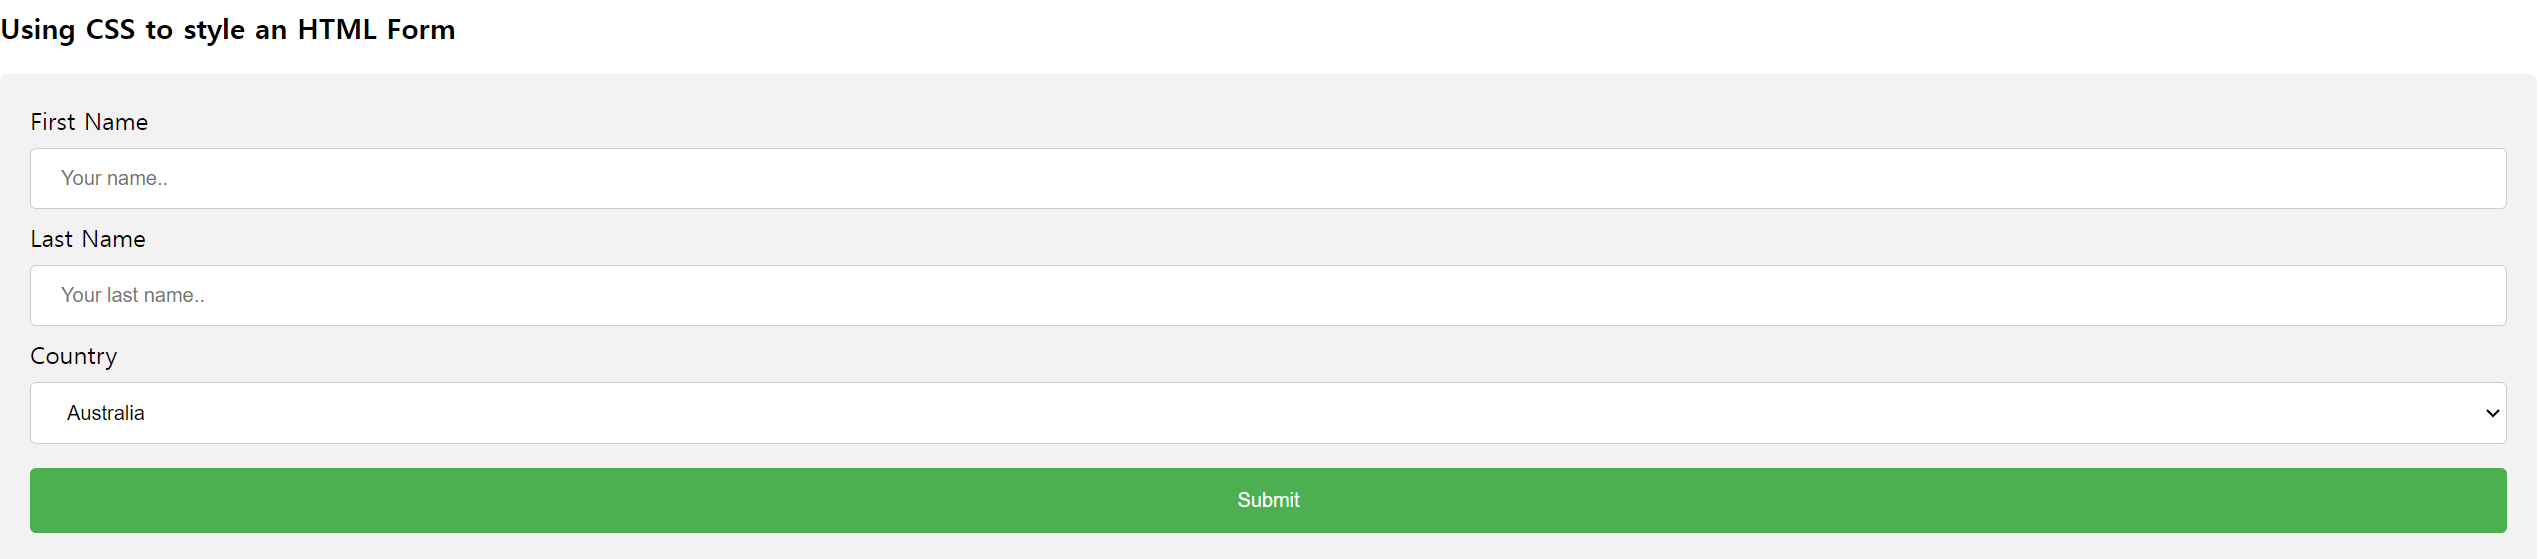
Image Transparency - 흐린이미지에 호버 하면 진해짐
- opacity : 요소의 투명도를 지정한다. 범위는 0(완전 투명) 1(완전 불투명)
<!DOCTYPE html>
<html>
<head>
<style>
img {
  opacity: 0.5;
}

img:hover {
  opacity: 1.0;
}
</style>
</head>
<body>

<h1>Image Transparency</h1>
<p>The opacity property is often used together with the :hover selector to change the opacity on mouse-over:</p>
<img src="img_forest.jpg" alt="Forest" width="170" height="100">
<img src="img_mountains.jpg" alt="Mountains" width="170" height="100">
<img src="img_5terre.jpg" alt="Italy" width="170" height="100">

</body>
</html>
Java Script
body안에 script사이에 내용을 넣어준다.
기본 함수 및 변수 선언
데이터 화면 출력
- document.write() : ()안의 것을 화면에 출력하라는 메서드
- window.alert() : ()안의 것을 경고창을 띄워 출력하라는 메서드
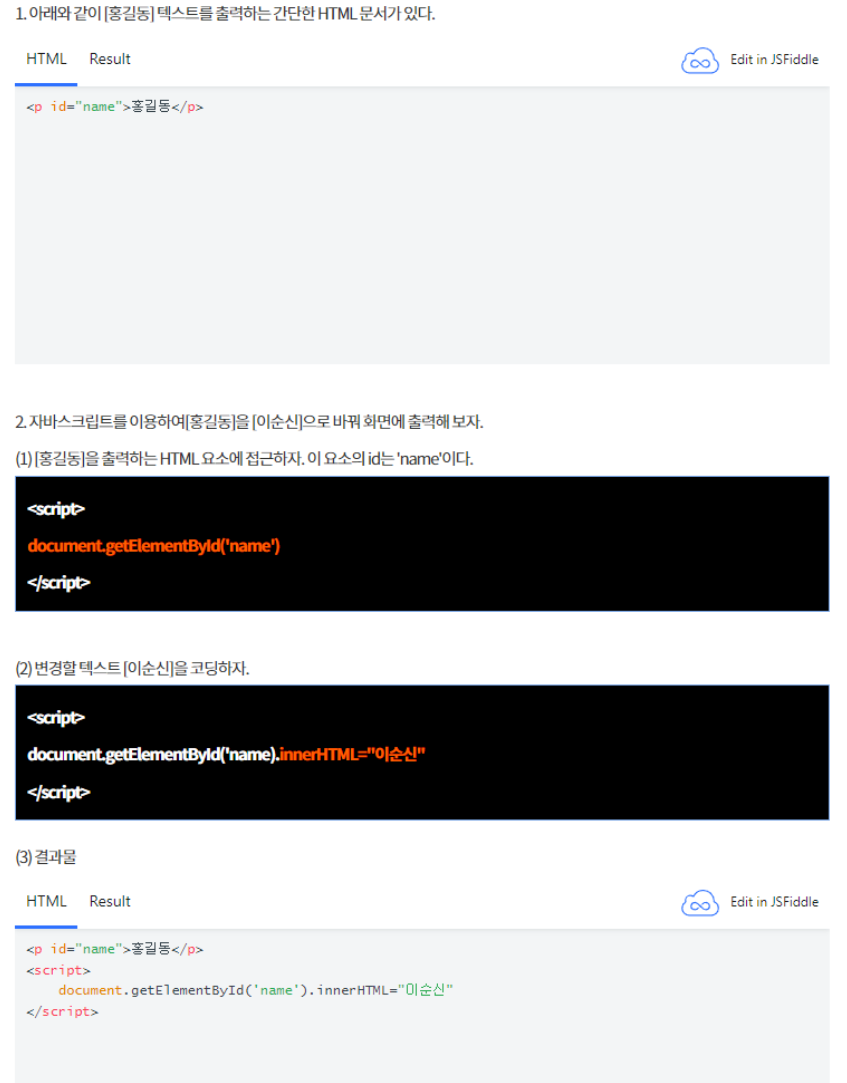
- innerHTML="" : HTML로 [홍길동]이라는 콘텐츠를 화면에 출력 > [이순신]으로 바꿔 출력하게 하려면, 속성을 사용 + HTML요소에 접근하려면 document.getElementById메서드 사용
변수 선언
대부분의 프로그램은 블록 레벨 스코프를 가지지만 javascript 에서의 var은 함수 스코프다.
블록 레벨 스코프는 자바에서의 변수와 같다고 생각하면 된다.
- 변수를 선언할때는 var, let, const 라는 3개의 키워드를 사용해 선언한다. >> let, const를 사용하는 것을 권장
- var는 함수 스코프(펑션 레벨 스코프)로, 함수(function) 내에서만 접근 할 수 있다. >> function내에서 지역변수
- 중복 선언이 가능하다.
- 앞에 키워드를 쓰지 않으면 자동으로 var로 인식
let num1 = 10;let은 블록 스코프(블록 레벨 스코프)로, 블록 내 선언되면 블록 내에서만 접근할 수 있는 스코프이다. >> 블럭 밖에서 선언 = 전역변수: 어디서든 접근 가능- 중복 선언이 불가능하다.
const num1 = 10;>> const는 상수로 변경이 불가능한 값을 입력할때 사용한다. (블록 레벨 스코프) >> 변수에 저장된 주소값이 변경 불가능하게 되는 것- 중복 선언이 불가능하다.
- java script는 동적으로 자료형이 바뀐다. 위 num1에 String, boolean등을 넣으면 자동으로 변경된다.
- var는 함수 스코프(펑션 레벨 스코프)로, 함수(function) 내에서만 접근 할 수 있다. >> function내에서 지역변수
hoisting
변수 및 함수 선언이 해당 스코프의 맨 위로 옮겨지는 것을 의미한다.
변수와 함수 선언은 컴파일 단계에서 메모리에 저장되지만, 실제 할당은 해당 라인에서 실행된다. 이것은 JavaScript 엔진이 코드를 해석하는 방식 중 하나다.
-
선언을 출력 아래에서 했지만 인식을 해서 undefined가 출력이 된다.
<script> document.write(num); /*undefined로 출력*/ var num = 10; document.write(num);/*10 출력*/ -
아래와 같이 함수도 선언보다 먼저 호출했지만 정상적으로 출력이 된다.
<script> hi(); function hi(){ document.write("hi"); } -
초기화는 호이스팅 되지 않는다.
<script>
document.write(num); /*에러*/
let num = 10;
document.write(num); /*10 출력*/
document.write();
- 화면에 출력
    <!DOCTYPE html>
    <html lang="ko">
<head>
    <meta charset="UTF-8">
    <meta name="viewport" content="width=device-width, initial-scale=1.0">
    <title>Document</title>
</head>

<body>
    <script>
            document.write("<h1>Hello</h1>");
    </script>
</body>

</html>
함수를 만드는 법
- function 키워드를 주고 키워드 명을 주고 소괄호()를 준 후 중괄호 안에 실행시킬 명령어를 넣는다.
- 세미콜론은 안넣어도 자동으로 붙여주지만, 넣는것을 권장한다. >> 안넣으면 의도치않은 오류 발생 가능
- function 키워드 안에서 변수를 선언할때는 변수 선언 키워드를 사용하지 않는다.
<!DOCTYPE html>
<html lang="ko">

<head>
    <meta charset="UTF-8">
    <meta name="viewport" content="width=device-width, initial-scale=1.0">
    <title>Document</title>
</head>

<body>
    <script>
        function hi(){
    document.write("hi<br>");
        }
        function add(num1, num2){/*변수 선언 키워드 사용x*/
    return num1 + num2;
      /*return undefined; 리턴값이 없음*/
        }
        hi();/*hi를 호출했음으로 hi출력*/
        let result = add(10, 5);/*15가 반환*/
        document.write(result + "<br>");
        result = hi();
        document.write(result  + "<br>");
    </script>
</body>

</html>- about:blank 안에서 f12 해서 let num;으로 변수를 주고 console.log(num);을 이용해 출력을하면 undefined를 출력한다.
java script를 이용한 구구단 출력하기
<!DOCTYPE html>
<html lang="ko">
<head>
    <meta charset="UTF-8">
    <meta name="viewport" content="width=device-width, initial-scale=1.0">
    <title>Document</title>

</head>
<body>
    <script>
        for (let i = 1; i <= 9; i++) {
            document.write(i + "단" + "<br>");
            for (let j = 2; j <= 9; j++) {
                let result = i + " * " + j + " = " + (i * j) + "<br>";
                document.write(result);
            }
            document.write("<br>");
        }
    </script>


</body>
</html>
$를 이용해 구구단 출력
- 중괄호 안에있는 변수 안에 값을 가져온다.
<!DOCTYPE html>
<html lang="ko">
<head>
    <meta charset="UTF-8">
    <meta name="viewport" content="width=device-width, initial-scale=1.0">
    <title>Document</title>

</head>
<body>
    <script>
        for (let i = 1; i <= 9; i++) {
            // document.write(i + "단" + "<br>");
            document.write(`${i}단` + "<br>");
            for (let j = 2; j <= 9; j++) {
                // let result = i + " * " + j + " = " + (i * j) + "<br>";
                // document.write(result);
                document.write(`${i}*${j}=${i*j}` + "<br>");
            }
            document.write("<br>");
        }
    </script>


</body>
</html>
Java Script 예제
예제 1 getElementById : 특정 id를 가진 요소를 찾아 반환
<!DOCTYPE html>
<html>
<body>

<h2>Use JavaScript to Change Text</h2>
<p>This example writes "Hello JavaScript!" into an HTML element with id="demo":</p>

<p id="demo"></p>

<script>
document.getElementById("demo").innerHTML = "Hello JavaScript!";
</script>

</body>
</html>
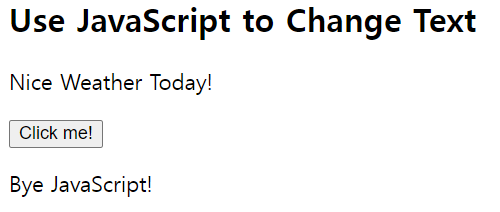
예제 2 - onclick : 메소드를 호출해 문장이 바뀜
-
function안에 메소드 호출을 함으로써 버튼을 클릭했을 때(onclick) 해당 메소드를 호출해 변경시키는 원리
<!DOCTYPE html>
<html lang="ko">
<head>
    <meta charset="UTF-8">
    <meta name="viewport" content="width=device-width, initial-scale=1.0">
    <title>Document</title>

</head>
<body>
    <h2>Use JavaScript to Change Text</h2>
    <p> Nice Weather Today!</p>

    <button type="button" onclick="myFunction()">Click me!</button>
    <p id="demo">Hello JavaScript!</p>

    <script>
        function myFunction(){
            document.getElementById("demo").innerHTML = "Bye JavaScript!";
        }
    </script>


</body>
</html>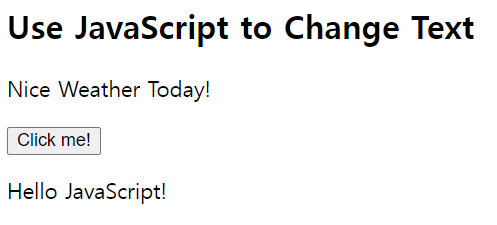
예제 3 onclick : 함수를 호출해 색이 변화
<!DOCTYPE html>
<html>
<body>

<h1>My First JavaScript</h1>

<p id="demo">JavaScript can change the style of an HTML element.</p>

<script>
function myFunction() {
  document.getElementById("demo").style.fontSize = "25px";
  document.getElementById("demo").style.color = "red";
  document.getElementById("demo").style.backgroundColor = "yellow";
}
</script>

<button type="button" onclick="myFunction()">Click Me!</button>

</body>
</html>
응용
- 첫번째 버튼을 누르면 문장이 바뀌고,
- 아래 버튼을 누르면 글씨 크기와, 배경, 글자 색이 바뀐다.
<!DOCTYPE html>
<html lang="ko">
<head>
    <meta charset="UTF-8">
    <meta name="viewport" content="width=device-width, initial-scale=1.0">
    <title>Document</title>

</head>
<body>
    <h2>Use JavaScript to Change Color</h2>

    <p id="demo">Hello JavaScript!</p>

    <script>
        function myFunction(){
            document.getElementById("demo").innerHTML = "Bye JavaScript!";
        }
        function myFunction2(){
            document.getElementById("demo").style.fontSize="25px";
            document.getElementById("demo").style.color="white";
            document.getElementById("demo").style.backgroundColor="black";
        }
        </script>
        <button type="button" onclick="myFunction()">Click me!: change text</button><br>
        <button type="button" onclick="myFunction2()">Click me!: change color</button>

</body>
</html>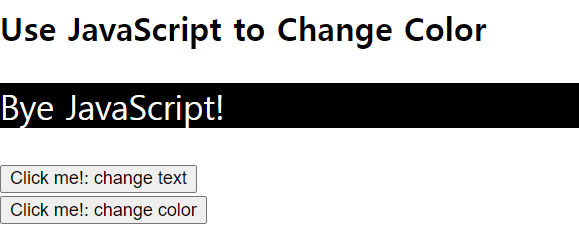
예제 4 : 사진
<!DOCTYPE html>
<html>
<body>
<script>
function light(sw) {/*sw에 p안에서 넘겨준 숫자가 넘어옴*/
  let pic;
  if (sw == 0) {
    pic = "pic_bulboff.gif" /*불 꺼진 이미지*/
  } else {
    pic = "pic_bulbon.gif"
  }
  document.getElementById('myImage').src = pic;
  /*id가 myImage인 이미지 요소의 src속성을 pic변수에 할당된 값으로 변경한다.*/
}
</script>

<img id="myImage" src="pic_bulboff.gif" width="100" height="180">

<p>
<button type="button" onclick="light(1)">Light On</button>
<button type="button" onclick="light(0)">Light Off</button>
</p>

</body>
</html>
스크립트를 이용해 1~25까지의 표 만들기
다음을 중첩 for문을 이용해 출력해 보세요.
5행5열 표를 만들고, 데이터가 1부터 25까지 출력되도록 작성하세요.
내가 푼 풀이
<!DOCTYPE html>
<html lang="ko">
<head>
    <meta charset="UTF-8">
    <meta name="viewport" content="width=device-width, initial-scale=1.0">
    <title>Document</title>
    <style>
        table {/*얘 때문에 테이블의 경계가 인접하는 셀의 경계와 병합된것/
            border-collapse: collapse;
        }
        td {
            border: 1px solid black;
            width: 50px;
            height: 50px;
            text-align: center;
            vertical-align: middle;
        }
    </style>
</head>
<body>
    <table id="bingoBoard">
        <!-- JavaScript에서 생성될 내용 -->
    </table>

    <script>
        // 표 생성
        var table = document.getElementById('bingoBoard');
        var number = 1;

        for (var i = 0; i < 5; i++) {
            var row = table.insertRow();
            for (var j = 0; j < 5; j++) {
                var cell = row.insertCell();
                cell.textContent = number++;
            }
        }
    </script>

</body>
</html>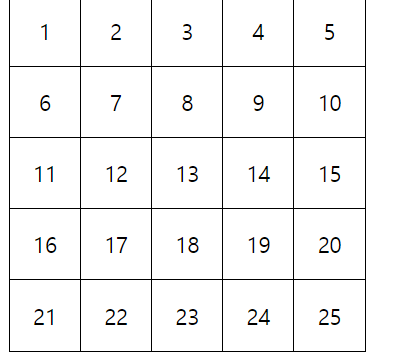
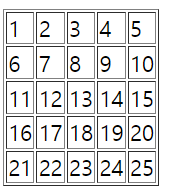
선생님 풀이
<!DOCTYPE html>
<html>
<body>

<div id="demo"></div>

<script>
    let table = `<table border='1'>`;
    let num = 1;
    for(let i=0;i<5;i++){
        table += `<tr>`;
        for(let j=0;j<5;j++){
            table += `<td>${num++}</td>`;
        }
        table += `</tr>`;
    }
    table += `</table>`;
    document.getElementById("demo").innerHTML = table;
</script>
</body>
</html>
\
\
\ \ \ \ \
\<\tr>
\
<td>6\</td> /<td>7\</td> <td>8\</td> /<td>9\</td> <td>10\</td> 이런 형태로 존재하게 되는 것
Date관련 함수
예제 1
-
대괄호로 배열 선언
-
변수에 값을 주지 않으면 undefined로 초기화 되어있음
-
new Date()
- Date 객체의 생성자 함수
- 현재 시간과 날짜 정보를 담은 Date 객체를 반환
-
getMonth()
- Date 객체의 메소드로, 현재 월 정보를 가져온다.
- 반환 값은 0부터 시작하는 숫자이며, 1월은 0, 2월은 1, ..., 12월은 11로 표현
-
getFullYear()
- Date 객체의 메소드로, 현재 연도 정보를 가져온다.
-
getDate()
- Date 객체의 메소드로, 현재 날짜 정보를 가져온다.
- 반환 값은 1부터 시작하는 숫자이며, 현재 달의 몇 번째 날인지를 나타낸다.
-
document.write()
-
문서에 텍스트를 출력하는 함수
HTML 문서의 현재 위치에 텍스트나 HTML 코드를 쓸 수 있다. 이전 내용은 모두 지워진다.일반적으로 디버깅이나 간단한 테스트 목적으로만 사용해야 합니다. 실제로는 잘 사용되지 않는다.
-
-
dayOfTheWeek[0]
- 배열 dayOfTheWeek의 첫 번째 요소를 가져와서 출력한다.
- 여기서 dayOfTheWeek 배열은 요일의 이름을 담고 있다. 인덱스 0은 일요일을 나타낸다.
  <!DOCTYPE html>
  <html lang="ko" dir="ltr">

<head>
  <meta charset="utf-8">
  <title>Html Basic</title>
  <style media="screen">
  </style>
</head>

<body>
  <script>
    let now = new Date();/*Date객체의 생성자 함수 > 현재 시간과 날짜 정보를 담은 Date객체 반환*/
    let curMonth = now.getMonth();
    let curYear = now.getFullYear();
    let num;
    let dayOfTheWeek = ["일", "월", "화", "수", "목", "금", "토"];/*대괄호로 배열 선언*/
    document.write(num+"<br>");/*num에 값을 할당하지 않아 undifined가 출력*/
    document.write(curMonth + "<br>");
    document.write(curYear + "<br>");
    document.write(dayOfTheWeek[0]);
  </script>
</body>

</html>
Date api 참고
https://www.w3schools.com/jsref/jsref_obj_date.asp
tutorial
https://www.w3schools.com/js/js_dates.asp
css에서의 media속성
-
특정 장치나 매체에 대해 조건부로 적용
-
일반적으로
media속성은@media규칙 내에서 사용
-
all: 모든 미디어 유형에 대해 스타일을 적용합니다. -
print: 인쇄 매체에 대해 스타일을 적용합니다. -
screen: 컴퓨터 스크린에 대해 스타일을 적용합니다. -
speech: 음성 합성 장치에 대해 스타일을 적용합니다.
@media screen and (max-width: 600px) and (min-height: 400px) {
  body {
    background-color: lightblue;
  }
}
| 1\ | 2\ | 3\ | 4\ | 5\ |