오전문제
- 화살표 함수는 this(window객체)가 이벤트 발생 객체가 아니므로, event.target사용
- event.currentTarget도 가능
   <!DOCTYPE html>
   <html>
   <head>
    <title></title>
    <script>
      const listener = (event) => {
        const length = event.target.value.length; // textarea의 글자의 길이 값을 가져오자.
        const h1 = document.querySelector('h1')
        h1.textContent = `글자 수 : ${length}`
      }

      document.addEventListener('DOMContentLoaded', () => {
        const textarea = document.querySelector('textarea')
        textarea.addEventListener('keyup', listener)
      })
      // 이벤트 리스너가 외부로 분리되었습니다.

    </script>
   </head>
   <body>
    <h1></h1>
    <textarea></textarea>
   </body>
</html>- fucntion함수는 this사용 가능
  <!DOCTYPE html>
  <html>
  <head>
    <title></title>
    <script>
      const listener = function(event) {
        const length = this.value.length; // textarea의 글자의 길이 값을 가져오자.
        const h1 = document.querySelector('h1')
        h1.textContent = `글자 수 : ${length}`
      }

      document.addEventListener('DOMContentLoaded', () => {
        const textarea = document.querySelector('textarea')
        textarea.addEventListener('keyup', listener)
      })
      // 이벤트 리스너가 외부로 분리되었습니다.

    </script>
  </head>
  <body>
    <h1></h1>
    <textarea></textarea>
  </body>
</html>- 이메일 형식 검증
  <!DOCTYPE html>
  <html lang="ko">

<head>
    <meta charset="UTF-8">
    <meta name="viewport" content="width=device-width, initial-scale=1.0">
    <title>Document</title>
    <script>
        document.addEventListener('DOMContentLoaded', () => {
            const email = document.querySelector('input[type="email"]');
            const message = document.querySelector('h2');

            email.addEventListener('keyup', function(){
                const email = this.value;
                const isVaild = checkEmail(email);

                if(isVaild){
                    message.textContent = '올바른 이메일 형식입니다.';
                    message.style.color = 'green';
                }else{
                    message.textContent = '올바른 이메일 형식이 아닙니다.';
                    message.style.color = 'red';
                }
            });
        });
        function checkEmail(email){
            const pattern = /^[a-zA-Z0-9._]+@[a-zA-Z0-9.-]+\.[a-zA-Z]{2,}$/;
            return pattern.test(email);
        }
    </script>

</head>

<body>
    <input type="email" placeholder="이메일을 입력하세요">
    <h2></h2>

</body>

</html>- message에서 h2를 가져와서 사용하려 하니 에러가 떴다. 그 이유는 getElementByTagName 메서드는 단일 요소를 선택하는 메서드가 아니고, 태그 이름에 해당하는 모든 요소를 선택해 nodeList로 반홚나다.
- 그래서 해당 메서드를 통해 h2객체를 가져오려고 했다면
const message = document.getElementsByTagName('h2')[0];이렇게 사용해줬어야 한다.
- 그래서 해당 메서드를 통해 h2객체를 가져오려고 했다면
정규 표현식 마지막 부분은 최상위 도메인을 나타내는 부분으로, 영문 알파벳 대소문자가 포함될 수 있고, 최소 두 글자 이상이어야 한다.{2,} + $는 문자열의 끝을 나타낸다. + ^는 문자열의 시작
- 배열에 1부터 10까지 넣자. 배열에 a부터 z까지 넣자. 그리고 각각의 값을 출력하자.
  <!DOCTYPE html>
  <html lang="ko">


<head>
    <meta charset="UTF-8">
    <meta name="viewport" content="width=device-width, initial-scale=1.0">
    <title>Document</title>
    <script>
        document.addEventListener('DOMContentLoaded', () => {

            // 1부터 10까지의 숫자를 담은 배열 생성
            const numbers = [];
            for (let i = 1; i <= 10; i++) {
                numbers.push(i);
            }

            // 알파벳 a부터 z까지의 문자를 담은 배열 생성
            const alphabets = [];
            for (let i = 97; i <= 122; i++) {
                alphabets.push(String.fromCharCode(i));
            }
            document.getElementsByTagName('p')[0].innerHTML = numbers.join(", ");
            document.getElementsByTagName('p')[1].innerHTML = alphabets.join(", ");
        });
    </script>

</head>

<body>
    <p></p>
    <p></p>
</body>

</html>
script를 head에서 쓸거면 body요소가 아직 브라우저에서 로드되지 않은 상태일 수 있으므로 DOMContetntLoaded 이벤트를 사용하여 문서가 완전히 로드된 후 스크립트를 실행해야 한다.
- 타이머 활성화
- 배열 해체 할당을 통해 초기화와 변수 선언을 동시에 편리하게 사용
<!DOCTYPE html>
<html lang="ko">
<head>
    <meta charset="UTF-8">
    <meta name="viewport" content="width=device-width, initial-scale=1.0">
    <title>Document</title>
    <script>
        document.addEventListener('DOMContentLoaded', () => {
            let [timer, timerID] = [0,0];
            const h1 = document.querySelector('h1');
            const checkbox = document.querySelector('input');

            checkbox.addEventListener('change', (event) => {
                if(event.target.checked){
                    timerId = setInterval(() => {
                        timer += 1;
                        h1.textContent = `${timer}초`
                    }, 1000);
                }else{
                    clearInterval(timerId);
                }
            });
        });
    </script>
</head>
<body>
    <input type="checkbox">
    <span>타이머 활성화</span>
    <h1></h1>
</body>
</html>-
화살표 함수로 event처리 할때
event.target은 실제로 이벤트를 발생시킨 요소를 가리킨다. >> 보통 하나의 요소만 가리 -
event.currentTarget은 현재 이벤트 핸들러가 연결된 요소를 가리킨다. >> 여러 요소 중 하나일 수 있다.이벤트가 해당 요소의 자식 요소에서 발생했을 떄는 위와 값이 다를 수 있음

- 링크 활성화
<!DOCTYPE html>
<html lang="ko">
<head>
    <meta charset="UTF-8">
    <meta name="viewport" content="width=device-width, initial-scale=1.0">
    <title>Document</title>
    <script>
        document.addEventListener('DOMContentLoaded', () => {
            let status = false;

            const checkbox = document.querySelector('input');

            checkbox.addEventListener('change', (event) => {
                status = event.target.checked;
            });
            const link = document.querySelector('a');
            link.addEventListener('click', (event) => {
                if(!status){
                    event.preventDefault();
                }
            });
        });
    </script>
</head>
<body>
    <input type="checkbox">
    <span>링크 활성화</span>
    <br>
    <a href="https://www.naver.com">네이버</a>
</body>
</html>preventDefault()함수는 이벤트의 기본 동작을 취소한다. a태그의 클릭 이벤트를 처리할 때, 브라우저는 해당 링크의 주소로 이동하는 기본 동작을 수행하는데, 이러한 기본 동작을 원치 않을 때 호출해 중지시킬 수 있다.

할일 목록
- 또 체크버튼 span색 변경 못했다.. 이게 왜 안되지
<!DOCTYPE html>
<html lang="ko">
<head>
    <meta charset="UTF-8">
    <meta name="viewport" content="width=device-width, initial-scale=1.0">
    <title>할 일 목록</title>
    <script>
        document.addEventListener('DOMContentLoaded', () => {
            const text = document.querySelector('input[type="text"]');
            const submit = document.querySelector('input[type="submit"]');
            const todo = document.querySelector('#todoList');

            submit.addEventListener('click', addTodoList);

            text.addEventListener('keypress', (event) => {
                if(event.key === 'Enter'){
                    event.preventDefault();
                    addTodoList();
                }
            });

            function addTodoList(){
                if(text.value.trim() === ""){
                    alert("할 일을 입력해주세요.");
                    return;
                }
                makeList(text.value);
            }

            function makeList(text){
                const listItem = document.createElement("li");
                const span = document.createElement("span");
                const removeButton = document.createElement("button");

                removeButton.textContent = '✖';
                removeButton.style.marginLeft = '10px';
                removeButton.style.cursor = 'pointer';
                removeButton.style.border = 'none';
                span.textContent = "✔";
                span.style.cursor = 'pointer';

                span.addEventListener('mouseenter', function() {
                    this.style.color = '#ccc';

                });
                span.addEventListener('mouseleave', function() {
                    this.style.color = '#222';
                });
                removeButton.addEventListener('mouseenter', function() {
                    this.style.color = '#ccc';

                });
                removeButton.addEventListener('mouseleave', function() {
                    this.style.color = '#222';
                });
                removeButton.addEventListener('click', () => {
                    todo.removeChild(listItem);
                });

                span.addEventListener('click', (event) => {
                    if(event.target === span){
                        if(listItem.classList.contains('checked')){
                            listItem.classList.remove('checked');
                            listItem.style.color = ''; // 원래 색으로
                            listItem.style.textDecoration = '';
                            removeButton.style.color = '';
                            // event.target.style.color = '#222';
                        } else{
                            listItem.classList.add('checked');
                            listItem.style.color = '#ccc';
                            listItem.style.textDecoration = 'line-through';
                            removeButton.style.color = '#ccc';
                            // event.target.style.color = '#ccc';
                        }
                    }
                });
              listItem.appendChild(span);
              listItem.appendChild(document.createTextNode(" " + text));
              listItem.appendChild(removeButton);
              todo.appendChild(listItem);
              text.value = "";
            }
        });

    </script>
</head>
<body>
    <h1>할 일 목록</h1>
    <div id="container">
        <input type="text">
        <input type="submit" value="추가하기">
    </div>
    <ul id="todoList" style="list-style: none; font-size: 20px;"></ul>
</body>
</html>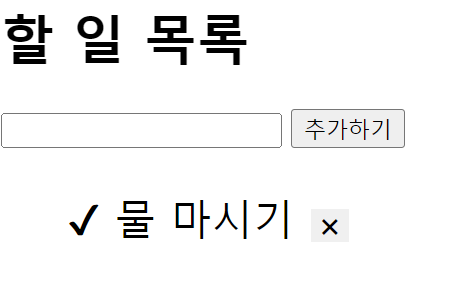
문제점
<!DOCTYPE html>
<html lang="ko">
<head>
    <meta charset="UTF-8">
    <meta name="viewport" content="width=device-width, initial-scale=1.0">
    <title>할 일 목록</title>
    <script>
        document.addEventListener('DOMContentLoaded', () => {
            const text = document.querySelector('input[type="text"]');
            const submit = document.querySelector('input[type="submit"]');
            const todo = document.querySelector('#todoList');

            submit.addEventListener('click', addTodoList);

            text.addEventListener('keypress', (event) => {
                if(event.key === 'Enter'){
                    event.preventDefault();
                    addTodoList();
                }
            });

            function addTodoList(){
                if(text.value.trim() === ""){
                    alert("할 일을 입력해주세요.");
                    return;
                }
                makeList(text.value);
            }

            function makeList(text){
                const listItem = document.createElement("li");
                const span = document.createElement("span");
                const removeButton = document.createElement("button");

                removeButton.textContent = '✖';
                removeButton.style.marginLeft = '10px';
                removeButton.style.cursor = 'pointer';
                removeButton.style.border = 'none';
                span.textContent = "✔";
                span.style.cursor = 'pointer';

                // span.addEventListener('mouseenter', function() {
                //     this.style.color = '#ccc';

                // });
                // span.addEventListener('mouseleave', function() {
                //     this.style.color = '#222';
                // });
                removeButton.addEventListener('mouseenter', function() {
                    this.style.color = '#ccc';

                });
                removeButton.addEventListener('mouseleave', function() {
                    this.style.color = '#222';
                });
                removeButton.addEventListener('click', () => {
                    todo.removeChild(listItem);
                });

                span.addEventListener('click', (event) => {
                    console.log(event.target);
                    console.log(event.target === span);
                    if(event.target === span){
                        if(listItem.classList.contains('checked')){
                            listItem.classList.remove('checked');
                            listItem.style.color = ''; // 원래 색으로
                            listItem.style.textDecoration = '';
                            removeButton.style.color = '';
                            event.target.style.color = '#222';

                        } else{
                            listItem.classList.add('checked');
                            listItem.style.color = '#ccc';
                            listItem.style.textDecoration = 'line-through';
                            removeButton.style.color = '#ccc';
                            event.target.style.color = '#ccc';
                        }
                    }
                });
              listItem.appendChild(span);
              listItem.appendChild(document.createTextNode(" " + text));
              listItem.appendChild(removeButton);
              todo.appendChild(listItem);
              text.value = "";
            }
        });

    </script>
</head>
<body>
    <h1>할 일 목록</h1>
    <div id="container">
        <input type="text">
        <input type="submit" value="추가하기">
    </div>
    <ul id="todoList" style="list-style: none; font-size: 20px;"></ul>
</body>
</html>- span에 색이 적용되지 않는 이유는 이벤트 핸들러를 추가해서 hover역할을 시켰기 때문에 체크가 되어도, 호버 역할때문에 다시 색이 검정색으로 지정된 것이였다. 위처럼 하면 css로하든 뭘하든 호버 역할은 안되지만, 그래도 색이 변경된 이유를 발견한 것에 만족...
해결책
<!DOCTYPE html>
<html lang="ko">
<head>
    <meta charset="UTF-8">
    <meta name="viewport" content="width=device-width, initial-scale=1.0">
    <title>할 일 목록</title>
    <style>
        .checked {
            color: grey;
        }
        .unchecked {
            color: black;
        }
    </style>
    <script>
        document.addEventListener('DOMContentLoaded', () => {
            const text = document.querySelector('input[type="text"]');
            const submit = document.querySelector('input[type="submit"]');
            const todo = document.querySelector('#todoList');

            submit.addEventListener('click', addTodoList);

            text.addEventListener('keypress', (event) => {
                if(event.key === 'Enter'){
                    event.preventDefault();
                    addTodoList();
                }
            });

            function addTodoList(){
                if(text.value.trim() === ""){
                    alert("할 일을 입력해주세요.");
                    return;
                }
                makeList(text.value);
                text.value = "";
            }

            function makeList(todoText){
                const listItem = document.createElement("li");
                const span = document.createElement("span");
                const removeButton = document.createElement("button");

                removeButton.textContent = '✖';
                removeButton.style.marginLeft = '10px';
                removeButton.style.cursor = 'pointer';
                removeButton.style.border = 'none';
                span.textContent = "✔";
                span.classList.add('unchecked'); // 초기 상태는 unchecked
                span.style.cursor = 'pointer';

                span.addEventListener('mouseenter', function() {
                    this.style.color = '#ccc';

                });
                span.addEventListener('mouseleave', function() {
                    this.classList.contains('checked') ? this.style.color = 'grey' : this.style.color = 'black';
                });
                removeButton.addEventListener('mouseenter', function() {
                    this.style.color = '#ccc';

                });
                removeButton.addEventListener('mouseleave', function() {
                    this.style.color = '#222';
                });
                removeButton.addEventListener('click', () => {
                    todo.removeChild(listItem);
                });

                span.addEventListener('click', () => {
                    if(listItem.classList.contains('checked')){
                        listItem.classList.remove('checked');
                        listItem.style.textDecoration = 'none';
                        span.classList.remove('checked');
                        span.classList.add('unchecked');
                    } else {
                        listItem.classList.add('checked');
                        listItem.style.textDecoration = 'line-through';
                        span.classList.add('checked');
                        span.classList.remove('unchecked');
                    }
                });

                listItem.appendChild(span);
                listItem.appendChild(document.createTextNode(" " + todoText));
                listItem.appendChild(removeButton);
                todo.appendChild(listItem);
            }
        });
    </script>
</head>
<body>
    <h1>할 일 목록</h1>
    <div id="container">
        <input type="text">
        <input type="submit" value="추가하기">
    </div>
    <ul id="todoList" style="list-style: none; font-size: 20px;"></ul>
</body>
</html>-
위 코드로 하면 내가 원하고자 했던것으로 실행 가능
classListTest 따라 쳐보기
<!DOCTYPE html>
<html lang="ko">
<head>
    <meta charset="UTF-8">
    <meta name="viewport" content="width=device-width, initial-scale=1.0">
    <title>Document</title>
    <style>
        .blue{
            color:blue;
        }
    </style>
</head>
<body>
    <h1>
        <span>난 span 태그야</span>
    </h1>
    <script>
        let $title = document.getElementsByTagName('h1')[0];
        let p = document.createElement('p');

        p.className = 'blue';
        // p.classList.add('blue');

        p.innerHTML = "난 JS로 추가된 p태그야";
        $title.appendChild(p);
    </script>
</body>
</html>
classListTest.html을 열고 f12를 눌러서 console창을 연다.
콘솔창에 다음 내용을 순서대로 타이핑하면서 결과를 본다.
p
p.className
p.className = 'red'
p
p.className = 'blue'
p
p.className = 'red blue'
p
p.className = 'blue'
p
p.classList
p.classList.add('red') // 클래스 추가
p
p.classList.item(0) // 0번째 클래스
p.classList.item(1) // 1번째 클래스
p.classList.item(2) // 2번째 클래스
p.classList.remove('red') // red 클래스 제거
p
p.classList.contains('blue') // 클래스 blue가 있으면 true 없으면 false
p.classList.contains('red')
p.classList.toggle('blue') // 클래스 blue가 있으면 클래스 blue를 삭제하고 없으면 추가한다.
p
p.classList.toggle('blue')
p
p.classList.replace('blue', 'yellow') // 클래스 blue를 yellow로 교체
p
- 단축평가 문제
다음의 실행 결과는?
(크롬에서 주소표시줄에 about:blank을 타이핑하고 F12를 console창에서 확인하시오.
-
console.log('Cat' && 'Dog');
- Dog
-
console.log('Cat' || 'Dog');
- Cat
-
console.log(true || 'anything');
- true
-
console.log(false || 'anything');
- anything
-
console.log(true && 'anything');
- anything
-
console.log(false && 'anything');
- false
-
var done = true;
var message = '';
if (done) message = '완료';
message = done && '완료';
console.log(message);
- 완료
- var done = false;
var message = '';
if (done) message = '미완료'
message = done || '미완료';
console.log(message);
- 미완료
-
var done = true;
var message = '';
if (done) message = '완료'
else message = '미완료'
console.log(message);message = done ? '완료' : '미완료';
console.log(message);
- 둘다 완료
- var elem = null;
var value = elem.value; // TypeError: Cannot read property 'value' of null
- typeError
- var elem = null;
// elem이 null이나 undefined와 같은 Falsy 값이면 elem으로 평가
// elem이 Truthy 값이면 elem.value로 평가
var value = elem && elem.value;
- null
- // 단축 평가를 사용한 매개변수의 기본값 설정
function getStringLength(str) {
str = str || '';
return str.length;
}
- getStringLength(); // 0
- getStringLength('hi'); // 2
12-1
// ES6의 매개변수의 기본값 설정
function getStringLength(str = '') {
return str.length
}
- getStringLength(); >> 0
- getStrringLength('hi'); >> 2
- var elem = null; // elem이 null또는 undefined이면 undefined 반환, 그렇지 않으면 우항의 프로퍼티 참조를 이어감
var value = elem?.value;
console.log(value);
- undefined
- var elem = null;
// elem이 Falsy 값이면 elem으로 평가, elem이 Truthy 값이면 elem.value로 평가
var value = elem&&elem.value;
console.log(value);
- null
- var str = '';
var length = str && str.length;
// 문자열의 길이를 참조하지 못함
console.log(length);
- ''
- var str = '';
var length = str?.length;
console.log(length);
- 0
- var foo = null ?? 'default string';
console.log(foo);
- "default string"
- var foo = '' || 'default string';
console.log(foo);
- "default string"
- var foo = '' ?? 'default string';
console.log(foo);
''
DOM 문제
javascipt는 head태그 안에 선언하는 것 보다 body태그의 끝에 선언하는게 더 좋은 방법이다.
- 주문하기 버튼을 누르면 주문한 목록이 뜨도록 하자. 주문하기는 한번만 가능하게 하자.
<!DOCTYPE html>
<html lang="ko">
<head>
    <meta charset="UTF-8">
    <meta name="viewport" content="width=device-width, initial-scale=1.0">
    <title>주문하기</title>
    <script>
        document.addEventListener('DOMContentLoaded', () => {
            const order = document.querySelector('h2');
            const submit = document.querySelector('input');
            submit.style.cursor = 'pointer';

            submit.addEventListener('click', () => {
                const cart = document.getElementsByTagName('p')[2];
                cart.textContent = order.textContent;
                cart.style.color = 'blue';
                submit.disabled = true; //한번 클릭하면 submit버튼 비활성화
            });
        });
    </script>
</head>
<body>
    <h1>상품 설명</h1>
    <h2>HTML + CSS + 자바스크립트 웹 표준의 정석</h2>
    <p>한 권으로 끝내는 웹 기본 교과서</p>
    <p>코딩 왕초보도 OK! 기초부터 활용까지 완전 정복</p>
    <input type="submit" value="주문하기">
    <hr>
    <p></p>
</body>
</html>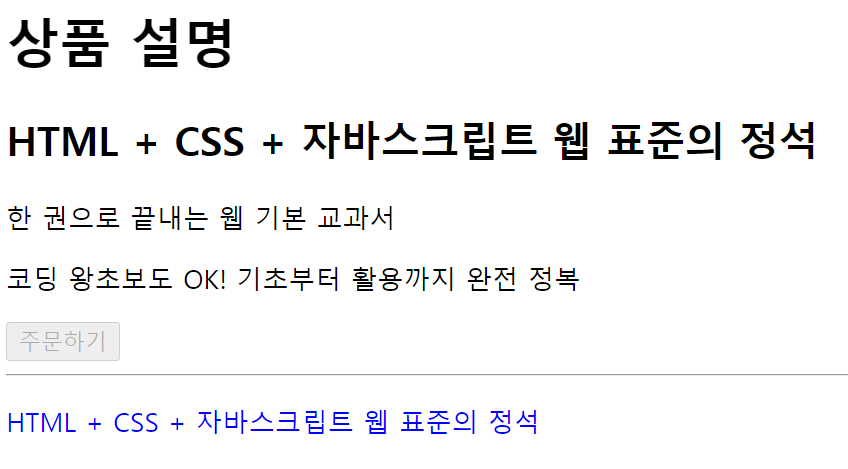
선생님 풀이
<!DOCTYPE html>
<html lang="ko">

<head>
    <meta charset="UTF-8">
    <meta http-equiv="X-UA-Compatible" content="IE=edge">
    <meta name="viewport" content="width=device-width, initial-scale=1.0">
    <title>노드 추가하기</title>
    <style>
        #container {
            border-bottom: 1px dashed #222;
            margin-bottom: 20px;
        }

        h1,
        h2,
        button,
        p {
            margin-bottom: 20px;
        }

        #cart {
            padding: 20px;
        }
    </style>
</head>

<body>
    <div id="container">
        <h1>상품 설명</h1>
        <h2>HTML+CSS+자바스크립트 웹 표준의 정석</h2>
        <p>한 권으로 끝내는 웹 기본 교과서 </p>
        <p>코딩 완초보도 OK! 기초부터 활용까지 완전정복</p>
        <button id="order">주문하기</button>
    </div>
    <div id="orderInfo"></div>

    <script>
        const orderInfo = document.querySelector("#orderInfo");   // 주문 정보 영역
        const orderButton = document.querySelector("#order");   // 주문하기 버튼
        const title = document.querySelector("#container > h2");   // 책 제목 요소

        orderButton.addEventListener("click", () => {
            let newP = document.createElement("p");    // 새로운 p 요소 생성
            let textNode = document.createTextNode(title.innerText);    // title의 텍스트 부분만 가져와 텍스트 노드로 생성

            newP.appendChild(textNode);      // 텍스트 노드를 새로운 p 요소에 추가
            newP.style.fontSize = "0.8em";
            newP.style.color = "blue";
            orderInfo.appendChild(newP);    // 새로운 p 요소를 orderInfo 영역에 추가
        }, { once: true });
        // click 이벤트가 여러 번 발생해도 한 번만 실행된다.
    </script>
</body>

</html>
{once: ture}: click이벤트를 한번말 수용하게끔 한다.
- 참가자 명단에 이름과 전공을 입력하고 등록하기를 누르면 이름과 전공이 등록되게 하자.
<!DOCTYPE html>
<html lang="ko">
<head>
    <meta charset="UTF-8">
    <meta name="viewport" content="width=device-width, initial-scale=1.0">
    <title>참가자 명단</title>
    <style>
         table {
            border-collapse: collapse; /* 테이블 셀의 테두리를 겹치도록 설정 */
        }

        th, td {
            border: 1px solid  rgba(0, 0, 0, 0.2); /* 테이블 셀의 테두리 스타일 설정 */
            padding: 10px 50px; /* 셀 내부 여백 설정 */
            text-align: center; /* 셀 안의 텍스트 정렬 설정 */
        }
    </style>
    <script>
        document.addEventListener('DOMContentLoaded', () => {
            const submit = document.querySelector('input[type="submit"]');
            const nameInput = document.getElementById('name');
            const majorInput = document.getElementById('major');
            const body = document.getElementById('participantList');


            submit.addEventListener('click', (event) => {
                event.preventDefault();

                const name = nameInput.value.trim();
                const major = majorInput.value.trim();

                if(name === '' || major === ''){
                    alert('이름과 전공을 올바르게 입력하세요.');
                    return;
                }
                const newRow = document.createElement('tr');
                const nameCell = document.createElement('td');
                const majorCell = document.createElement('td');

                majorCell.textContent = major;
                nameCell.textContent = name;

                newRow.appendChild(nameCell);
                newRow.appendChild(majorCell);

                body.appendChild(newRow);

                nameInput.value = '';
                majorInput.value = '';
                nameInput.focus(); //입력이 끝나면 포커스가 다시 이름 입력 칸에 가게끔
            });

        });
    </script>
</head>
<body>
    <h1>참가자 명단</h1>
    <div id="info">
        <p style="margin-left: 50px;">이 름
            <input type="text" id="name"  placeholder="이름을 입력하세요.">
        </p>
        <p style="margin-left: 50px;">전 공
            <input type="text" id="major" placeholder="본인의 전공을 입력하세요.">
        </p>
        <input type="submit" value="등록하기" style="padding: 10px 105px;">
        <table style="margin-top: 10px;">
            <thead>
                <tr>
                    <th>이름</th>
                    <th>전공</th>
                </tr>
            </thead>
            <tbody id = "participantList">

            </tbody>
        </table>
    </div>
</body>
</html>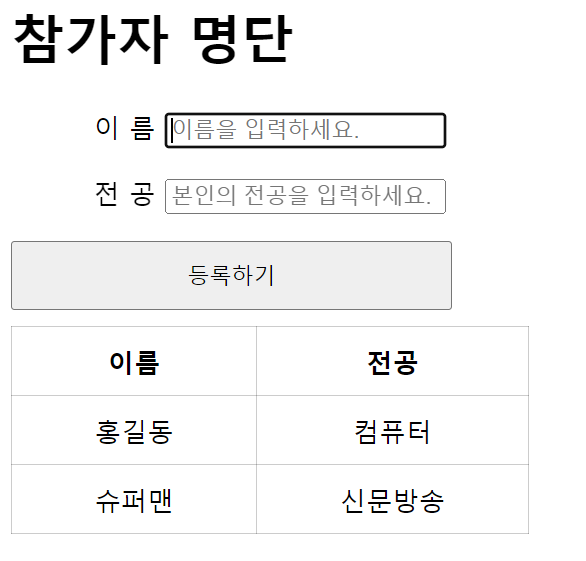
선생님 풀이
<!DOCTYPE html>
<html lang="ko">

<head>
    <meta charset="UTF-8">
    <meta http-equiv="X-UA-Compatible" content="IE=edge">
    <meta name="viewport" content="width=device-width, initial-scale=1.0">
    <title>연습문제 1</title>
    <style>
        #container {
            width: 400px;
            margin: 10px;
        }

        #userInput {
            list-style: none;
            width: 400px;
        }

        #userInput label {
            width: 50px;
            margin-right: 10px;
            line-height: 30px;
        }

        #userInput input {
            width: 200px;
            height: 30px;
            margin-bottom: 10px;
        }

        button {
            width: 300px;
            padding: 15px;
        }

        #attendant {
            margin-top: 20px;
        }

        table {
            border: 1px solid #ccc;
            border-collapse: collapse;
        }

        th,
        td {
            border: 1px solid #ccc;
            padding: 10px;
        }

        th:first-of-type {
            width: 150px;
        }

        th:last-of-type {
            width: 250px;
        }
    </style>
</head>

<body>
    <div id="container">
        <h1>참가자 명단</h1>
        <form>
            <ul id="userInput">
                <li>
                    <label for="username">이 름</label>
                    <input type="text" id="username">
                </li>
                <li>
                    <label for="major">전 공</label>
                    <input type="text" id="major">
                </li>
            </ul>
            <button>등록하기</button>
        </form>

        <table id="attendant">
            <thead>
                <tr>
                    <th>이 름</th>
                    <th>전 공</th>
                </tr>
            </thead>
            <tbody></tbody>
        </table>
    </div>

    <script>
        const username = document.querySelector("#username");
        const major = document.querySelector("#major");
        const bttn = document.querySelector("form > button");

        bttn.addEventListener("click", (e) => {
            e.preventDefault();
            let tbody = document.querySelector("#attendant > tbody");
            let newTr = document.createElement("tr");

            // 첫번째 셀에 입력한 이름 넣기
            let nameTd = document.createElement("td");
            nameTd.innerText = username.value;
            username.value = "";

            // 두번째 셀에 입력한 전공 넣기
            let majorTd = document.createElement("td");
            majorTd.innerText = major.value;
            major.value = "";

            // 두 셀을 새 줄에 추가하기
            newTr.appendChild(nameTd);
            newTr.appendChild(majorTd);

            // 새 줄을 tbody에 추가하기
            tbody.appendChild(newTr);
        });
    </script>
</body>
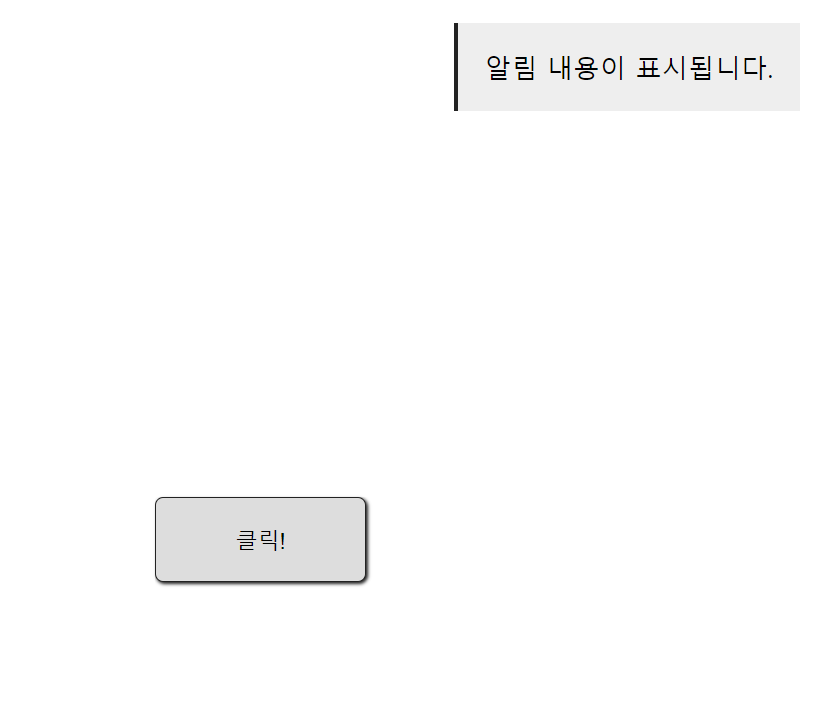
</html>- 클릭 버튼을 클릭하면 알림내용이 표시가 되고, 그 알림내용을 3초후에 사라지게 하자.
<!DOCTYPE html>
<html lang="ko">

<head>
    <meta charset="UTF-8">
    <meta name="viewport" content="width=device-width, initial-scale=1.0">
    <title>Document</title>
    <style>
        * {
            box-sizing: border-box;
        }

        body {
            display: flex;
            margin: 0;
            min-height: 100vh;
            justify-content: center;
            align-items: center;
            position: relative;
        }

        button {
            background-color: #ddd;
            padding: 1rem 3rem;
            border: 1px solid #222;
            border-radius: 5px;
            box-shadow: 1px 1px 2px #222;
        }

        /* noti-box로 우측 하단에 고정해 놓고, .noti를 그 안에 넣을 것! */
        #noti-box {
            position: fixed; /*고정 */
            top: 10px;
            right: 20px;
        }

        .noti {
            margin: 1rem;
            padding: 1rem;
            background-color: #eee;
            border-left: 3px solid #222;
        }
    </style>
</head>

<body>
    <div id="noti-box"></div>
    <button id="btn">클릭!</button>

    <script>
        const btn = document.querySelector('#btn');
        const notiBox = document.querySelector('#noti-box');

        btn.addEventListener('click', () => {
            const noti = document.createElement('div');
            noti.classList.add('noti');//class가 noti인 div가 생김
            noti.innerText = '알림 내용이 표시됩니다.';
            notiBox.appendChild(noti);

            setTimeout(() => { //timeInterval을 계속 반복 setTimeout은 지정된 시간동안 한번 실행
                noti.remove();//remove는 부모에서만 가능
            }, 3000);
        });
    </script>
</body>

</html>
    </script>
</body>
</html> -
setInterval : 지정된 시간 간격마다 함수를 반복적으로 실행 >> 명시된 시간마다 함수가 계속 호출
- clearInterval 을 명시적으로 호출하여 반복을 중지해야함
-
setTimeout : 지정된 시간이 경과한 후에 한 번만 함수를 실행
-
clearTimout : 명시적으로 호출해 실행을 중지해야함
-
비동기적인 작업을 수행할 때 예상치 못한 결과를 피하기위해 명시적으로 중지하는 것이 좋다.
-
설정하지 않으면 이전에 설정한 타이머가 여전히 대기상태에 있고, 실행이 끝난 후에 함수가 예기치 못하게 호출될 수 있다.
-
-
- 아침이면 images/morning.jpg 이미지가 보이게 하고, 오후면, images/afternoon.jpg 이미지가 보이게 하자.
<!DOCTYPE html>
<html lang="ko">
<head>
    <meta charset="UTF-8">
    <meta name="viewport" content="width=device-width, initial-scale=1.0">
    <title>Document</title>
    <style>
        *{
            box-sizing: border-box;
        }
        p{
            display: inline-block;
            background-color: black;
            border-radius: 8px;
            color: white;
            padding: 10px 20px;
            margin-left: 15px;
        }
        img{
            margin-left: 15px;
        }
    </style>
</head>
<body>
    <p>ENJOY YOUR LIFE</p> <br>
    <img src="" alt="현재 시간에 맞는 사진" id = "img">

    <script>
        const now = new Date();
        const hours = now.getHours();
        const p = document.querySelector('p');
        const img = document.querySelector('img');

        img.src = (hours < 12) ? "morning.jpg" : "afternoon.jpg";

    </script>
</body>
</html>
선생님 풀이
<!DOCTYPE html>
<html lang="ko">

<head>
    <meta charset="UTF-8">
    <meta http-equiv="X-UA-Compatible" content="IE=edge">
    <meta name="viewport" content="width=device-width, initial-scale=1.0">
    <title>노드 추가하기</title>
    <style>
        * {
            margin: 0;
            padding: 0;
        }

        body {
            height: 100vh;
            display: flex;
            flex-direction: column;
            justify-content: center;
            align-items: center;
        }
    </style>
    <style>
        h1 {
            padding: 10px 20px;
            margin-bottom: 20px;
            border-radius: 8px;
            background-color: #222;
            color: #fff;
            text-transform: uppercase;
        }
    </style>
</head>

<body>
    <div id="container">
        <h1>Enjoy your life</h1>
    </div>
    <script>
        const today = new Date();  // 현재 날짜와 시간 정보를 담은 today 객체
        const hrs = today.getHours();  // 현재 시간 중 시(hour) 정보 가져오기
        const container = document.querySelector("#container");

        let newImg = document.createElement("img");
        newImg.src = (hrs < 12) ? "images/morning.jpg" : "images/afternoon.jpg";
        container.appendChild(newImg);
    </script>
</body>

</html>- img를 동적으로 삽입해 container의 자식요소로 넣어주고 사진을 현재 시간에 따라 삼항 연산자를 통해 변경시켜준다.
자바스크립트 객체 1
예제 1 : 객체 선언
<!DOCTYPE html>
<html>
  <head>
    <title></title>
    <script>
      // 변수를 선언합니다.
      const pet = {
        name: '구름',
        eat: function (food) {
          alert(this.name + '은/는 ' + food + '을/를 먹습니다.')
        }
      }

      // 메소드를 호출합니다.
      pet.eat('밥')
    </script>
  </head>
  <body></body>
</html>-
객체: 이름(name)과 값(value)로 구성된 속성(property)을 가진 자바스크립트의 기본 데이터 타입
- 객체는 중괄호 {...}로 생성하며, 다음과 같은 형태의 자료를 쉼표(,)로 연결해서 입력한다. >> 키 : 값
-
배열은 객체를 기반으로 만들어 유사하지만, 배열은 요소에 접근할 때 인덱스를 사용하고, 객체는 키(key)를 사용한다.
-
위 코드에서는 pet객체가 name이라는 속성과 eat이라는 메소드를 가지고있고, food라는 매개변수를 받아들여 alert창을 띄우는 역할을 한다.
- 이렇게 코드를 실행하면 생성한 객체의 메소드가 호출되어 메시지를 표시한다.
<script>
    const product = {
        제품명 : '7D 건조 망고',     // 키와 값 뒤에 쉼표(,)를 넣어 구분합니다.
        유형: '당절임',
        성분: '망고, 설탕, 메타중아황산나트륨, 치자황색소',
        원산지 : '필리핀'
    }
</script> -
객체 뒤에 대괄호 [...]를 사용하고 키를 입력하면 객체의 요소에 접근할 수 있다. >> 대괄호로만 접근 가능
-
product['제품명']: 7D 건조 망고 반환 >>product.제품명이렇게도 접근 가능 -
product['유형'] : 당절임 반환 >>
product.유형객체는 위와 같이 대괄호[...]를 사용하는 방법 이외에 온점(.)을 사용할 수 있다.
-
예제 2 : 속성과 메소드 + 배열
-
배열 내부에 있는 값을 요소(element)다.
-
객체 내부에 있는 값은 속성(property)다.
const object = {
number : 273,
string : '구름',
boolean : true,
array : [52, 273, 103, 32],
method : function () {}
}- 배열의 요소와 마찬가지로 객체의 속성도 모든 형태의 자료형을 가질 수 있다.
속성과 메소드 구분하기
- 객체의 속성 중 함수 자료형인 속성을 특별히 메소드(method)라고 한다.
<script>
  const person = {
    name : '구름',
    eat : function(food) {}
  }
  // 메소드를 호출합니다.
  person.eat()
<script>- 객체 person은 name 속성과 eat 속성을 가지고 있는데, eat 속성처럼 입력값을 받아 무언가 한 다음 결과를 도출해내는 함수 자료형을 특별히 eat() 메소드라고 부른다.
기본적으로 화살표 함수는 메소드로 사용하지 않는다.
메소드 내부에서 this 키워드 사용하기
- 메소드 내에서 자기 자신이 가진 속성을 출력하고 싶을 때는 자신이 가진 속성임을 분명하게 표시해야 한다. >> 자기 자신이 가진 속성이라는 것을 표시할 때는 this 키워드를 사용
<script>
// 변수를 선언합니다.

const pet = {
    name : '구름',
    eat : function(food) {
        alert(this.name + '은/는 ' + food + '을/를 먹습니다.')
    }
}

pet.eat('밥');
</script>
예제 3 : 동적으로 객체 속성 추가/제거
- 객체를 처음 생성한 후에 속성을 추가하거나 제거하는 것을 '동적으로 속성을 추가한다' 또는 '동적으로 속성을 제거한다'고 표현한다.
추가하기
<!DOCTYPE html>
<html>
  <head>
    <title></title>
    <script>
      // 객체를 선언합니다.
      const student = {}
      student.이름 = '윤인성'
      student.취미 = '악기'
      student.장래희망 = '생명공학자'

      // 출력합니다.
      console.log(JSON.stringify(student, null, 2))
    </script>
  </head>
  <body></body>
</html>-
JSON.stringify() : JSON 문자열로 변환해 콘솔에 출력한다.
- JSON : 데이터를 효율적으로 저장하고 교환하기 위한 경량의 데이터 형식
제거하기
<!DOCTYPE html>
<html>
  <head>
    <title></title>
    <script>
      // 객체를 선언합니다.
      const student = {}
      student.이름 = '윤인성'
      student.취미 = '악기'
      student.장래희망 = '생명공학자'

      // 객체의 속성을 제거합니다.
      delete student.장래희망

      // 출력합니다.
      console.log(JSON.stringify(student, null, 2))
    </script>
  </head>
  <body></body>
</html>

<!--
  동적으로 객체 속성 제거하기

  delete 객체.속성
-->
예제 4 : 메소드 간단 선언 구문(익명함수)
- function() {} 형태로 선언하는 익명 함수와 ()=>{} 형태로 선언하는 화살표 함수는 객체의 메소드로 사용될 때 this 키워드를 다루는 방식이 다르다.
<!DOCTYPE html>
<html>
  <head>
    <title></title>
    <script>
      // 변수를 선언합니다.
      const test = {
        a: function () {      // 키를 주고 익명함수로 선언 >> test객체
          console.log(this)
        },
        b: () => {            // 화살표 함수로 선언 >> window객체
          console.log(this)
        }
      }

      // 메소드를 호출합니다.
      test.a()
      test.b()
    </script>
  </head>
  <body></body>
</html>
메소드 내부에서 this 키워들를 사용할 때 의미가 달라지므로 화살표 함수를 메소드로 사용하지 않는 편이다.
-
화살표 함수에서의 this는 window객체를 나타낸다.
- window 객체는 웹 브라우저 자체를 나타내는 '웹 브라우저에서 실행하는 자바스크립트의 핵심 객체'라고 생각하면 된다. (때에 따라 다르긴 함, 다른 객체가 나타날 수도 있음)
자바스크립트 객체 문법 문제 1
- pet 이라는 객체를 만들자.
pet 이라는 객체에는 name, eat 속성이 있다.
name 속성에는 '구름'이라고 주자.
eat 속성에는 메소드를 주자.
pet.eat('밥'); 이라고 호출하면
"구름은/는 밥을/를 먹습니다." 라고 alert 창을 띄우자.
<!DOCTYPE html>
<html lang="ko">

<head>
    <meta charset="UTF-8">
    <meta name="viewport" content="width=device-width, initial-scale=1.0">
    <script>
        const pet = {
            name: '구름',
            eat: function (food) {
                alert(this.name + '은/는 ' + food + '을/를 먹습니다.')
            }
        }
        pet.eat('밥');
    </script>
</head>
<body>
</body>
</html>
- student라는 빈 객체를 만들자.
동적으로 student 객체에 이름을 '윤인성', 취미를 '악기', 장래희망을 '생명공학자'를 추가하자.
콘솔창에 다음과 같이 JSON 형태로 출력하자.
"이름": "윤인성",
"취미": "악기",
"장래희망": "생명공학자"
<!DOCTYPE html>
<html lang="ko">

<head>
    <meta charset="UTF-8">
    <meta name="viewport" content="width=device-width, initial-scale=1.0">
    <script>
        const student = {
          이름 : '윤인성',
          취미 : '악기',
          장래희망 : '생명공학자'
        }
        console.log(JSON.stringify(student, null, 2))
    </script>
</head>
<body>
</body>
</html>
이렇게 객체명 명시해서도 가능
<!DOCTYPE html>
<html>
  <head>
    <title></title>
    <script>
      // 객체를 선언합니다.
      const student = {}
      student.이름 = '윤인성'
      student.취미 = '악기'
      student.장래희망 = '생명공학자'

      // 출력합니다.
      console.log(JSON.stringify(student, null, 2))
    </script>
  </head>
<body>- 2번에서 만든 student 객체에서 동적으로 student의 장래희망을 삭제하자.
그리고 콘솔창에 다음과 같이 JSON 형태로 출력하자.
{
"이름": "윤인성",
"취미": "악기"
}
<!DOCTYPE html>
<html lang="ko">

<head>
    <meta charset="UTF-8">
    <meta name="viewport" content="width=device-width, initial-scale=1.0">
    <script>
        const student = {
          이름 : '윤인성',
          취미 : '악기',
          장래희망 : '생명공학자'
        }
        delete student.장래희망;
        console.log(JSON.stringify(student, null, 2))
    </script>
</head>
<body>
</body>
</html>
- 1번에서 만든 pet 객체의 eat 메소드를 메소드 간단 선언 구문으로 바꿔보자.
pet.eat('밥'); 이라고 호출해보자.
<!DOCTYPE html>
<html>
  <head>
    <title></title>
    <script>
      // 객체를 선언합니다.
      const pet = {
        name: '구름',
        eat (food) {
          alert(this.name + '은/는 ' + food + '을/를 먹습니다.')
        }
      }

      // 메소드를 호출합니다.
      pet.eat('밥')
    </script>
  </head>
  <body></body>
</html>- function()을 따로 사용할 필요없이 바로 인자안에 받을 값 넣어 출력 가능
- test라는 객체를 만들고 a라는 속성에 익명함수를 주자. 그리고 콘솔창에서 this를 출력해보자. b라는 속성을 만들고 속성에 화살표함수를 주자. 그리고 콘솔창에서 this를 출력해보자.
<!DOCTYPE html>
<html lang="ko">

<head>
    <meta charset="UTF-8">
    <meta name="viewport" content="width=device-width, initial-scale=1.0">
    <script>
      const test = {
        a : function() {
            console.log(this);
        }
        ,b : () => {
            console.log(this);
        }
      }
      test.a();
      test.b();
    </script>
</head>
<body>
</body>
</html>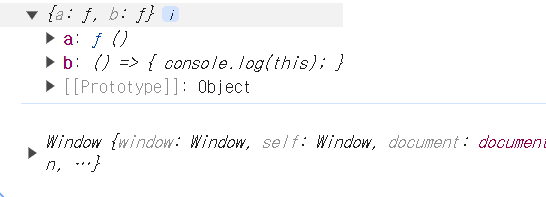
- a는 test 객체가 나오고, b 는 window함수가 나온 것을 볼 수 있다.
문자열 분리 문제
let input = 일자,달러,엔,유로 02,1141.8,1097.46,1262.37 03,1148.7,1111.36,1274.65 04,1140.6,1107.81,1266.58 07,1143.4,1099.58,1267.8 08,1141.6,1091.97,1261.07;
- 위 문자열에서 개행을 기준으로 새로운 문자열로 만들어 출력해보자
<!DOCTYPE html>
<html lang="ko">

<head>
    <meta charset="UTF-8">
    <meta name="viewport" content="width=device-width, initial-scale=1.0">
    <script>
        let input = `
            일자,달러,엔,유로
            02,1141.8,1097.46,1262.37
            03,1148.7,1111.36,1274.65
            04,1140.6,1107.81,1266.58
            07,1143.4,1099.58,1267.8
            08,1141.6,1091.97,1261.07
            `;
        let rows = input.trim().split('\n').map(a => a.trim().split(','));
        console.log(rows);
    </script>
</head>

<body>
</body>

</html>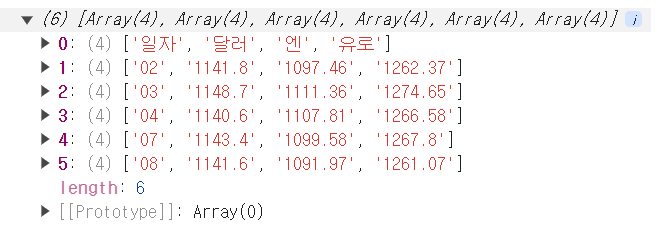
-
처음에 trim()을 이용해, 공백을 제거해주고, split('\n') 을 이용해 개행을 기준으로 배열로 반환 후
-
map함수 이용해 다시 trim()과 split(',')을 이용해 쉼표를 기준으로 배열을 생성해 반환한다.
-
최종적으로 2차원 배열이 되며, 각 행은 쉼표를 기준으로 분할된 값을 가지게 되는 것이다.
- 개행을 기준으로 배열로 나눈 후 map함수를 이용해 각 행을 처리한다. 이렇게 하면 각 행이 배열의 요소로 저장된다.
자바스크립트 객체 2
예제 1 : 기본자료형 / 객체 자료형
아래에서 한 prototype을 이용해 함수 추가한 예제
<!DOCTYPE html>
<html>
  <head>
    <title></title>
    <script>
      // power() 메소드를 추가합니다.
      Number.prototype.power = function (n = 2) {//매개변수를 안넘겨 주면 n은 2로
        return this.valueOf() ** n
      }

      // Number 객체의 power() 메소드를 사용합니다.
      const a = 12
      console.log('a.power():', a.power())
      console.log('a.power(3):', a.power(3))
      console.log('a.power(4):', a.power(4))
    </script>
  </head>
  <body></body>
</html>
객체 자료형
- 속성과 메소드를 가질 수 있는 모든 것은 객체로, 배열, 함수 모두 속성을 가질 수 있다.
//배열 속성 확인
const a = []
//undefined

a.sample = 10
//10

 a.sample
//10

//함수 속성 확인
function b() {}
//undefined

 b.sample = 10
//10

 b.sample
//10-
typeof연산자를 사용해 배열의 자료형을 확인해보면 "object"객체가 출력된다.
- 배열인지 확인하려면 Array.isArray() 메소드를 사용 >> 객체(메소드 가지고있으므로)
-
함수는 '실행이 가능한 객체'라는 특이한 자료로 typeof 연산자를 사용해서 자료형을 확인하면 "function"을 출력한다.
기본 자료형
-
숫자, 문자열, 불이 바로 기본 자료형이다.
- 이러한 자료형은 객체가 아니므로 속성을 가질 수 없다. >> 숫자에 속성을 추가해도 undefined로 출력된다.
기본자료형을 객체로 선언하기
new를 사용하지 않고 기본 자료형뒤에 온점을 찍고 속성을 넣으면 자바스크립트에서 일시적으로 객체로 승급시킨다. 그러나 실제로는 undefined로, 실질적으로 해당 속성을 유지할 수 없다. 그러므로 속성과 메소드를 추가로 가질 수 없다 >> new를 사용하지 않는다면의 예시
-
const 객체 = new 객체 자료형 이름()>> 이렇게 사용하면 기본 자료형으로 객체 생성 가능-
new Number(10) -
new String('안녕하세요') -
new Boolean(true)
-
-
위와같이 하면 기본 자료형이 아닌 객체이므로 이전과 다른 속성을 가진다.
 const f = new Number(273)
 //undefined

 typeof f
 // "object"

 f.sample = 10
 // 10

 f.sample
//  10
  // 속성을 가질 수 있습니다.

 f
 // Number{273, sample: 10}
  // 콘솔에서 단순하게 f를 출력하면 객체 형태로 출력합니다.

f + 0
 // 273

f.valueOf()
 // 273
  // 숫자와 똑같이 활용할 수 있고 valueof 메소드를 사용해서 값을 추출할 수도 있습니다.
new 키워드를 사용하지 않을 때 주의할 점
- new 키워드를 사용하지 않으면 함수가 자료형 변환 기능으로 작동한다.
const g = Number(273)
//undefined >> new를 안쓰면 그냥 형변환 시키는

typeof g      // 객체가 아닙니다.
//"number"
프로토타입으로 메소드 추가하기
-
prototype : 기본 자료형의 승급 때 일시적으로 입는 옷을 아예 새 옷으로 변경시키는 속성
-
prototype 객체에 속성과 메소드를 추가하면 모든 객체에서 해당 속성과 메소드를 사용할 수 있다. >> 기본 자료형 포함
-
객체 자료형 이름.prototype.메소드 이름 = function() {}
-
Number.prototype.sample = 10
//10

 const i = 273
//undefined

i.sample
//10
// sample 속성을 갖고 있습니다.- Number.porotype에 sample이라는 속성을 추가해 기본 자료형 뒤에 온점을 찍으면 해당 속성을 활용할 수 있다.
//제곱 연산자 **
 2 ** 2
//4

2 ** 3
//8

 2 ** 4
//16
prototype을 활용해 기본 자료형인 String 에 메소드(함수) 추가 예제
<!DOCTYPE html>
<html>
  <head>
    <title></title>
    <script>
      // prototype을 통해 contain() 메소드를 추가합니다.
      String.prototype.contain = function (data) {
        return this.indexOf(data) >= 0 //data 가 배열에 존재하는지 확인
      }

      Array.prototype.contain = function (data) {
        return this.indexOf(data) >= 0
      }

      // String 객체의 contain() 메소드를 사용합니다.
      const a = '안녕하세요'
      console.log('안녕 in 안녕하세요:', a.contain('안녕'))//true
      console.log('없는데 in 안녕하세요', a.contain('없는데'))//false

      // Array 객체의 contain() 메소드를 사용합니다.
      const b = [273, 32, 103, 57, 52]
      console.log('273 in [273, 32, 103, 57, 52]:', b.contain(273))//true
      console.log('0 in [273, 32, 103, 57, 52]:', b.contain(0))//false
    </script>
  </head>
  <body></body>
</html>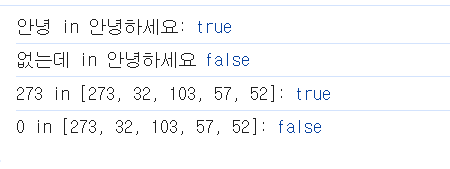
Number객체
- 숫자 N번째 자리수까지 출력하기 : toFixed()
- 소수점 이하 몇 자리까지만 출력하고 싶을 때 사용한다.
- 소수점 아래 2자리까지 출력하고 싶다면 toFixed(2), 3자리까지 출력하고 싶다면 toFixed(3) 형태로 사용한다.
 const l = 123.456789
//undefined

 l.toFixed(2)
//"123.46"

l.toFixed(3)
//"123.457"

 l.toFixed(4)
//"123.4568"- isNaN() : 숫자인지 확인하는 함수 >> 숫자면 false
- isFinite() : 무한인지 확인하는 함수 >>무한수 이면 false
- 숫자 자료 뒤에 온점을 찍어 사용하는 것이 아닌 Number뒤에 점을 찍고 사용한다.
// NaN(Not a Number)은 '숫자가 아니다'라는 의미로 자바스크립트에서 숫자로 나타낼 수 없는
  숫자를 의미한다.

const m = Number('숫로 변환할 수 없는 경우')
//undefined

 m
//NAN

 m === NaN
//false
  // NaN과 비교해서는 NaN인지 확인할 수 없다.

Number.isNaN(m)
//true

//infinity :  숫자를 0으로 나누는 것과 같이 무한대 숫자를 의미한다.

 const n = 10 / 0
//undefined

n
//Infinity    // 양의 무한대를 생성한다.

 const o = -10 / 0
//undefined

o
//-Infinity   // 음의 무한대를 생성한다.

 Number.isFinite(n)
//false

 Number.isFinite(o)
//false

Number.isFinite(1)
//true

 Number.isFinite(10)
//true- 무한대 숫자는 양의 무한대 숫자와 음의 무한대 숫자로 나뉜다.
- 무한대 연산자는 NaN과 다르게 비교연산자로 비교 가능하다.
n === Infinity || n === -Infinity>> true
문자열 양쪽 끝의 공백 없애기 : trim()
- trim() : 문자열 앞뒤 공백(띄어쓰기, 줄바꿈 등)을 제거할 수 있다.
- 모질라 String 객체의 속성과 메소드 : https://developer.mozilla.org/ko/docs/Web/JavaScript/Reference/Global_Objects/String
JSON 중요!
-
JSON(JavaScript Object Notation) : 서버와 클라이언트 간에 자료를 주고받기위해 양쪽 컴퓨터 모두 이해할 수 있는 표준형식 문자열
- 말 그대로 자바스크립트 객체 표기법을 사용하는 텍스트 형식의 자료를 가리킨다.
JSON 형식
-
JSON은 중괄호 { 와 } 사이에 '이름(name)'과 '값(value)'으로 구성되고 쉼표로 구분해서 여러개의 쌍을 나열할 수 있다.
기본형 { "이름" : 값, ... } -
JSON에서는 '이름' 부분에 반드시 큰따옴표를 붙여야 한다.
- '이름'에 작은따옴표를 사용하거나 큰따옴표가 없는 이름은 JSON에서 사용할 수 없다.
-
JSON 이름에는 공백(space)이나 하이픈(-), 언더바(_)를 함께 사용할 수 있다.
- 숫자는 그냥 표현 가능 그러나 그 외에는 쌍따옴표로 표시해야함
    //객체로 표현할 때
    {
    name : "도레미",
    major : "컴퓨터 공학",
    grade : 2
    }


//JSON으로 표현할 때
  {
    "name" : "도레미",
    "major" : "컴퓨터 공학",
    "grade" : 2
  }

//맞게 사용한 예
  { "name" : "도레미"}

//잘못 사용한 예
  {'name' : "도레미"}
  { name : "도레미"}

//이름에 공백, 하이픈, 언더바 사용 가능 >> 근데 언더바 사용이 좋음
{ "full name" : "도레미" }
{ "full-name" : "도레미" }
 { "full_name" : "도레미" } //이게 좋음
JSON의 값
JSON 자료의 값에서는 수(number)와 문자열(string), 논리값(boolean), null과 같은 기본 자료형과 배열, 객체와 같은 복합 자료형을 사용할 수 있다.
-
숫자형 : JSON에서는 정수와 실수 모두 사용할 수 있지만, 8진수나 16진수를 사용한 표기법은 지원하지 않는다. >>
48, -72, 25.8, -8.4, 2.3e4 -
문자열 : JSON 문자열은 항상 큰따옴표("")로 묶어야 한다. >> 작은 따옴표 사용 x
"자바스크립트", "HTML5"
-
논리값과 null : true 또는 false 값을 가지는 논리형을 사용할 수도 있고 null 유형도 사용할 수 있다.
-
JSON 문자열에는 또 다른 JSON 문자열이나 배열을 값으로 사용할 수 있다. 대괄호 사용
//배열 사용해 3개의 값 지정
{
 "name" : "도레미",
 "major" : "컴퓨터 공학",
 "grade" : 2,
 "course" : ["웹 기초", "자바스크립트", "인공지능"]
}

//JSON문자열 안에 또 다른 JSON 문자열 지정
{
 "name" : "도레미",
 "major" : "컴퓨터 공학",
 "grade" : 2,
 "course" : {
   "title" : "웹 기초",
   "timePerWeek" : 3
 }
}
객체를 JSON자료로 변환 : JSON.stringify() 함수
서버로 자료를 보내야 할 경우에는 객체 형식을 JSON 형식으로 변환해야한다. >> '직렬화(stringify)'
let student = {name:"도레미", major:"컴퓨터 공학", grade:2}//student객체 생성
  let json = JSON.stringify(student); //JSON형식으로 변경해 json 변수에 할당
//'{"name" : "백두산", "age" : 30, "hobby" : "swimming"}'` 이런 형식으로 json에 저장되어있다.- student === json을 실행하면 false가 반환된다. >> student는 객체 object이지만
json은 문자열 string이기 때문이다.
JSON문자열을 객체로 변환 : JSON.parse() 함수
- 파싱(parsing) : JSON 문자열을 자바스크립트 객체로 변환하는 것 >> JSON.parse() 함수 사용
let member = '{"name" : "백두산", "age" : 30, "hobby" : "swimming"}'- 객체로 변환할 때는 JSON을 문자열을 나타내는 작은 따옴표로 앞뒤로 붙여야 한다.
<!DOCTYPE html>
<html>
  <head>
    <title></title>
    <script>
      // 자료를 생성합니다.
      const data = [{
        name: '혼자 공부하는 파이썬',
        price: 18000,
        publisher: '한빛미디어'
      },{
        name: 'HTML5 웹 프로그래밍 입문',
        price: 26000,
        publisher: '한빛아카데미'
      }]

      // 자료를 JSON으로 변환합니다.
      const json = JSON.stringify(data)
      console.log(json)

      // JSON 문자열을 다시 자바스크립트 객체로 변환합니다.
      console.log(JSON.parse(json))
    </script>
  </head>
  <body></body>
</html>
Math 객체
<!DOCTYPE html>
<html>
  <head>
    <title></title>
    <script>
      const num = Math.random()

      console.log('# 랜덤한 숫자')
      console.log('0~1 사이의 랜덤한 숫자:', num)
      console.log('')

      console.log('# 랜덤한 숫자 범위 확대')
      console.log('0~10 사이의 랜덤한 숫자:', num * 10)
      console.log('0~50 사이의 랜덤한 숫자:', num * 50)
      console.log('')

      console.log('# 랜덤한 숫자 범위 이동')
      console.log('-5~5 사이의 랜덤한 숫자:', num * 10 - 5)
      console.log('-25~25 사이의 랜덤한 숫자:', num * 50 -25)
      console.log('')

      console.log('# 랜덤한 정수 숫자')
      console.log('-5~5 사이의 랜덤한 정수 숫자:', Math.floor(num * 10 - 5))
      console.log('-25~25 사이의 랜덤한 정수 숫자:', Math.floor(num * 50 - 25))
    </script>
  </head>
  <body></body>
</html>
유틸리티 라이브러리 : Loadash 라이브러리
- 홈페이지 : https://lodash.com
- Lodash CDN 링크 페이지 : https://www.jsdelivr.com/package/npm/lodash
- CDN이란 콘텐츠 전송 네트워크라는 의미이다. >> 위 싸이트타고 script src로 넣으면 라이브러리 사용 가능
- min 버전의 자바스크립트 파일은 자바스크립트 코드를 집핑(zipping)한 파일을 의미한다. >> 공백이 없음
<script src="https://cdn.jsdelivr.net/npm/lodash/lodash.min.js"></script>이거 head에 넣어야 Loadash사용 가능
- min 버전의 자바스크립트 파일은 자바스크립트 코드를 집핑(zipping)한 파일을 의미한다. >> 공백이 없음
- CDN이란 콘텐츠 전송 네트워크라는 의미이다. >> 위 싸이트타고 script src로 넣으면 라이브러리 사용 가능
- Lodash 라이브러리의 문서 : https://lodash.com/docs/4.17.15
- Lodash 라이브러리는 _ 라는 이름의 객체 안에 수 많은 메소드를 담고 있다. >> _ 언더바를 이용해 식별자를 만듬
- sortBy() : 배열을 어떤 것으로 정렬할지 지정하면, 지정한 것을 기반으로 배열을 정렬해서리턴해주는 메소드
구글에서 "popular javascript library 2023"으로 검색하면 다양한 라이브러리들이 나오므로 살펴보기 바란다.
underscore는 _ 기호를 의미한다. Loadash는 Low Dash를 줄인 것이며, 마찬가지로
_기호를 의미하는 말이다.
<!DOCTYPE html>
<html>
  <head>
    <title></title>
    <script src="https://cdn.jsdelivr.net/npm/lodash@4.17.15/lodash.min.js">
    </script>
    <script>
      // 데이터를 생성합니다.
      const books = [{
        name: '혼자 공부하는 파이썬',
        price: 18000,
        publisher: '한빛미디어'
      }, {
        name: 'HTML5 웹 프로그래밍 입문',
        price: 26000,
        publisher: '한빛아카데미'
      }, {
        name: '머신러닝 딥러닝 실전 개발 입문',
        prie: 30000,
        publisher: '위키북스'
      }, {
        name: '딥러닝을 위한 수학',
        price: 25000,
        publisher: '위키북스'
      }]

      // 가격으로 정렬한 뒤 출력합니다.underscore를 이용
      const output = _.sortBy(books, (book) => book.price)
      console.log(JSON.stringify(output, null,2))
    </script>
  </head>
  <body></body>
</html>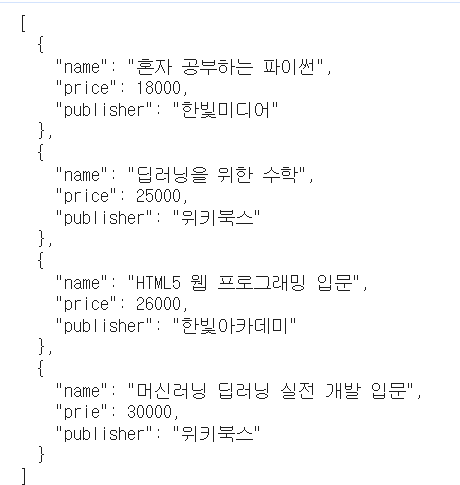
정리
- 실체가 있는 것 중에서 객체가 아닌 것을 기본 자료형이라고 하며, 숫자, 문자열, 불이 대표적인 예이다.
- 객체를 기반으로 하는 자료형을 객체 자료형이라고 하며, new 키워드를 활용해서 생성한다.
- 기본 자료형의 승급이란 기본 자료형이 일시적으로 객체 자료형으로 변화하는 것을 의미한다.
- prototype 객체란 객체의 틀을 의미하며, 이곳에 속성과 메소드를 추가하면 해당 객체 전체에서 사용할 수 있다.
확인 문제
확인 문제
- 다음 코드의 실행 결과를 예측해보세요. 예측과 다른 결과가 나온다면 왜 그런지 생각해보세요.
<script>
    const num = 52000
    num.원 = function() {
        return this.valueOf() + '원'
    }

    console.log(num.원())
</script>- num은 Number자료형으로 기본 자료형이므로, 함수가 존재할 수 없다. 일시적으로 승급되서 속서이 존재할 수 있으나, 객체가 된것은 아니기 때문에 typeError가 발생한다.
- prototype속성에 메소드를 추가해야 메소드 사용 가능
- 다음 코드의 실행 결과를 예측해보세요.
<script>
    function printLang(code){
        return printLang._lang[code]
    }
    printLang._lang = {
        ko: '한국어',
        en: '영어',
        ja: '일본어',
        fr: '프랑스어',
        es: '스페인어'
    }

    console.log('printLang("ko"):', printLang('ko'))
    console.log('printLang("en"):', printLang('en'))
</script>- 현재 printLang은 함수로, _lang변수에 객체를 넣었다. 그러므로 콘솔에 한국어, 영어가 출력될 것이다.
- 다음 중 어떤 종류의 객체들이 모두 공유하는 속성과 메소드를 추가할 때 사용하는
객체의 이름을 골라주세요.
① classProp ② prototype ③sample ④frame
- 2번 prototype
- 본문에서는 Loadash 라이브러리의 _.sortBy() 메소드를 살펴보았다. _orderBy() 메소드도 한번 살펴보고 어떤 형태로 사용해야 하는지 직접 예제를 작성해보세요. 그리고 다음과 같은 배열을 이름(name)으로 오름차순 정렬해주세요. (https://lodash.com/docs/4.17.15 참고)
  <script>
      // 데이터를 생성합니다.
      const books = [{
        name: '혼자 공부하는 파이썬',
        price: 18000,
        publisher: '한빛미디어'
      }, {
        name: 'HTML5 웹 프로그래밍 입문',
        price: 26000,
        publisher: '한빛아카데미'
      }, {
        name: '머신러닝 딥러닝 실전 개발 입문',
        prie: 30000,
        publisher: '위키북스'
      }, {
        name: '딥러닝을 위한 수학',
        price: 25000,
        publisher: '위키북스'
      }]

    </script>
풀이
<!DOCTYPE html>
<html lang="ko">
<head>
    <meta charset="UTF-8">
    <meta name="viewport" content="width=device-width, initial-scale=1.0">
    <title>Document</title>
</head>
<body>
    <script>
        // 데이터를 생성합니다.
        const books = [{
          name: '혼자 공부하는 파이썬',
          price: 18000,
          publisher: '한빛미디어'
        }, {
          name: 'HTML5 웹 프로그래밍 입문',
          price: 26000,
          publisher: '한빛아카데미'
        }, {
          name: '머신러닝 딥러닝 실전 개발 입문',
          prie: 30000,
          publisher: '위키북스'
        }, {
          name: '딥러닝을 위한 수학',
          price: 25000,
          publisher: '위키북스'
        }]

       const output = _.orderBy(books, 'name', 'asc');//name을 기준으 오름차순으로
       console.log(JSON.stringify(output, null, 2));//보기좋게 출
      </script>
</body>
</html>- Loadash를 사용하기 위해서는 라이브러리를 프로젝트에 추가해야한다.
객체 문법 문제
-
크롬 콘솔 창에서 빈 배열 하나를 만들고 거기에 sample이라는 속성을 동적으로 하나 만들고 값에 10을 주자. 그런 후에 그 배열에 sample이라는 속성 값을 출력해 보자.
let arr = [];
arr.sample = 10;
arr.sample;//object
- 함수도 객체이다. 다음과 같이 함수 b를 선언하고 함수에 속성을 지정한 후 확인해보면 함수가 속성을 가질 수 있다는 것을 알 수 있다.
function b() {}
b.sample = 10
b.sample
//10- 크롬 콘솔창에서 배열 a를 다음과 같이 typeof 연산자를 썼을 때 출력결과는?
typeof a
- object
- a 라는 변수가 가지고 있는 값이 배열인지 아닌지 체크할려면?
Array.isArray()
- 기본 자료형
자바스크립트에서는 실체가 있는 것(undefined와 null 등이 아닌 것) 중에 객체가 아닌 것을 기본 자료형(primitive types 또는 primitives)이라고 부릅니다. 숫자, 문자열, 불이 바로 기본 자료형입니다.
이러한 자료형은 객체가 아니므로 속성을 가질 수 없습니다. 예를 들어 숫자에 속성을 추가해보겠습니다.
const c = 273

c.sample = 10

c.sample
undefined // 속성을 만들 수 있는 것처럼 보이지만 실제로 속성이 만들어지지 않습니다.- 기본 자료형을 객체로 선언하기
자바스크립트는 기본 자료형을 객체로 선언하는 방법을 제공합니다. 숫자, 문자, 열, 불등으로 자료형을 변환하는 함수(Number, String, Boolean)는 다음과 같이 사용합니다.
- const 객체 = new 객체 자료형 이름()
- new 사용
-
자바스크립트는 사용의 편리성을 위해서 기본 자료형의 속성과 메소드를 호출할 때(기본 자료형 뒤에 온점을 찍고 무언가 하려고 하면) 일시적으로 기본 자료형을 객체로 승급시킵니다. 그래서 속성과 메소드를 사용할 수 있는 것입니다.
-
숫자 전체 객체 전부에 sample이라는 속성을 추가하고 10 이라는 값을 넣자.
그리고 그것을 크롬 콘솔 창에서 확인하자.
//Number은 기본 자료형으로 prototype을 사용해 속성을 추가해야한다.
//안한 예
Number.sample = 20;
(5).sample; //undefined

//prototype 사용 예
Number.prototype.sample = 30;
(3).sample; //30- 숫자 전체 객체에 power메소드를 추가하는데 주어진 인수 만큼 거듭 제곱을 하도록 하자. 만약 인수 없이 호출하면 2제곱하도록 하자.
Number.prototype.power = function (n = 2) {
        return this.valueOf() ** n
      }

// Number 객체의 power() 메소드를 사용합니다.
const a = 12;
 a.power();
 a.power(3);
 a.power(4);

 //Math.pow(); 로도 사용 가능
Math.pow(2, 2); //4- 제곱 연산자는
**기호를 사용한다.
- String 객체 전체에 contain 이라는 메소드를 추가하자. 그리고 그 메소드에 문자열을 넘겨주면, 문자열이 있으면 true 없으면 false를 반환하도록 하자.
String.prototype.contain = function (data) {
        return this.indexOf(data) >= 0
      }
 const a = '안녕하세요'
 a.contain('하세요'); // true
a.contain('수고'); // false- 배열 객체 전체에 contain 이라는 메소드를 추가하자. 그리고 그 메소드에 임의의 값을 인수로 넘겨주고, 그 인수가 배열에 있으면 true 없으면 false를 반환하도록 하자.
  Array.prototype.contain = function (data) {
        return this.indexOf(data) >= 0
      }
const b = [273, 32, 103, 57, 52]
b.contain(32); // true
b.contain(123); // false- 다음 실수 123.456789 를 소수점 셋째자리에서 반올림 하여 출력하자.
toFixed(): 소수점 이하 몇 자리까지만 출력하고 싶을 때 사용
let number = 123.456789;
let roundedNumber = number.toFixed(2); // 소수점 둘째 자리까지 반올림
console.log(roundedNumber); // 출력: "123.46"- 어떤 숫자가 NaN(Not a Number)인지 또는 Infinity(무한)인지 확인할 때 쓰는 메소드는?
.isFinite(): 양의 무한대, 음의 무한대라면 false >> 비교 연산자로 비교 가능.isNaN(): 비교값 === NaN 하면 무조건 false가 나오므로 이 함수를 이용해 확인해야한다.
- 다음을 크롬에서 실행했을 때 출력 결과는?
const m = Number('숫자로 변환할 수 없는 경우')
 m
//NAN
m === NaN //?- false가 나온다.
- NaN은 자기 자신과 일치하지 않는 유일한 값으로 항상 false를 반환한다.(어떤 숫자이건)
- 값이 NaN인지 확인하고 싶다면
isNaN()함수를 사용해야 한다
- 값이 NaN인지 확인하고 싶다면
- 위 14번에 m을 다음과 같이 했을 때 출력결과는?
Number.isNaN(m)
- true
- 다음 객체 배열을 책의 값을 기준으로 오름차순 정렬하자.
(Lodash 라이브러리 사용(CDN에서 가져옴) > https://cdn.jsdelivr.net/npm/lodash@4.17.15/lodash.min.js)
// 데이터를 생성합니다.
      const books = [{

        name: '혼자 공부하는 파이썬',
        price: 18000,
        publisher: '한빛미디어'

      }, {

        name: 'HTML5 웹 프로그래밍 입문',
        price: 26000,
        publisher: '한빛아카데미'

      }, {

        name: '머신러닝 딥러닝 실전 개발 입문',
        prie: 30000,
        publisher: '위키북스'

      }, {

        name: '딥러닝을 위한 수학',
        price: 25000,
        publisher: '위키북스'

      }]
풀이
<!DOCTYPE html>
<html>
  <head>
    <title></title>
    <script src="https://cdn.jsdelivr.net/npm/lodash@4.17.15/lodash.min.js">
    </script>
    <script>
      // 데이터를 생성합니다.
      const books = [{
        name: '혼자 공부하는 파이썬',
        price: 18000,
        publisher: '한빛미디어'
      }, {
        name: 'HTML5 웹 프로그래밍 입문',
        price: 26000,
        publisher: '한빛아카데미'
      }, {
        name: '머신러닝 딥러닝 실전 개발 입문',
        prie: 30000,
        publisher: '위키북스'
      }, {
        name: '딥러닝을 위한 수학',
        price: 25000,
        publisher: '위키북스'
      }]

      // 가격으로 정렬한 뒤 출력합니다.
      const output = _.sortBy(books, (book) => book.price, 'asc');
      console.log(JSON.stringify(output, null,2))
    </script>
  </head>
  <body></body>
</html>- books의 price를 기준으로 오름차순 실행해서 출력
- 실행결과를 유추해서 적으시오.
 const book ={

        name: '혼자 공부하는 파이썬',
        price: 18000,
        publisher: '한빛미디어'

      };
    const temp = JSON.stringify(book);
    console.log(temp);
{"name":"혼자 공부하는 파이썬","price":18000,"publisher":"한빛미디어"}- 숫자 빼고 다 쌍따움표로 출력
자바스크립트 객체 3
속성 존재 여부 확인
<!DOCTYPE html>
<html>
  <head>
    <title></title>
    <script>
      // 객체를 생성합니다.
      const object = {
        name: '혼자 공부하는 파이썬',
        price: 18000,
        publisher: '한빛미디어'
      }

      // 객체 내부에 속성이 있는지 확인합니다.
      if (object.name !== undefined) {
        console.log('name 속성이 있습니다.')
      } else {
        console.log('name 속성이 없습니다.')
      }
      if (object.author !== undefined) {
        console.log('author 속성이 있습니다.')
      } else {
        console.log('author 속성이 없습니다.')
      }

  //object.name || console.log('name 속성이 없습니다.') 이렇게도 표현 가능
  //object.author || console.log('author 속성이 없습니다.')
    </script>
  </head>
  <body></body>
</html>- 조건문으로 undefined인지 아닌지 속성 존재 여부를 확인할 수 있다.
이렇게도 가능
<!DOCTYPE html>
<html>
  <head>
    <title></title>
    <script>
      // 객체를 생성합니다.
      const object = {
        name: '혼자 공부하는 파이썬',
        price: 18000,
        publisher: '한빛미디어'
      }

       // 객체의 기본 속성을 지정합니다.
       object.name = object.name !== undefined ? object.name : '제목 미정'
       object.author = object.author !== undefined ? object.author : '저자 미상'

       // 객체의 기본 속성을 지정합니다.
          //object.name = object.name || '제목 미정'
          //object.author = object.author || '저자 미상' 이렇게도 표현 가능

       // 객체를 출력합니다.
       console.log(JSON.stringify(object, null, 2))
    </script>
  </head>
  <body></body>
</html>
객체 기반의 다중 할당
-
{ 속성 이름, 속성 이름 } = 객체
-
{ 식별자 = 속성 이름, 식별자 = 속성 이름 } = 객체
-
객체 다중 할당에서는 변수 이름과 객체의 속성 이름이 일치해야 한다.
<!DOCTYPE html>
<html>
  <head>
    <title></title>
    <script>
      // 객체를 생성합니다.
      const object = {
        name: '혼자 공부하는 파이썬',
        price: 18000,
        publisher: '한빛미디어'
      }

       // 객체에서 변수를 추출합니다.
       const { name, price } = object     // name에 object.name을 price에 object.price를
       console.log('# 속성 이름 그대로 꺼내서 출력하기')
       console.log(name, price) //혼자 공부하는 파이썬 18000
       console.log('')

       const { a=name, b=price } = object   // a에 object.name을 b에 object.price을
       console.log('# 다른 이름으로 속성 꺼내서 출력하기')
       console.log(a, b)//혼자 공부하는 파이썬 18000
    </script>
  </head>
  <body></body>
</html>
배열 기반의 다중 할당
 let [a, b] = [1, 2]     // a = 1, b = 2가 할당됩니다.
//undefined

console.log(a, b)
//  1, 2

[a, b] = [b, a]     // a에 b가 할당되고, b에 a가 할당되므로 값이 서로 교환됩니다.
// [2, 1]

 console.log(a, b)
// 2, 1
배열 전개 연산자
- 전개 연산자를 사용한 배열 복사 : [...배열]
얕은 복사 예시
  <!DOCTYPE html>
  <html>
  <head>
    <title></title>
    <script>
      // 사야 하는 물건 목록
      const 물건_200301 = ['우유', '식빵']
      const 물건_200302 = 물건_200301
      물건_200302.push('고구마')
      물건_200302.push('토마토')

      // 출력
      console.log(물건_200301)
      console.log(물건_200302)
    </script>
  </head>
  <body></body>
  </html>
깊은 복사 예시
-
전개 연산자를 사용한 배열 요소 추가 : [...배열, 자료, 자료, 자료]
-
배열을 여러 번 전개도 가능하다. 다른 2개 이상의 배열을 붙일 때도 활용 가능하다.
  <!DOCTYPE html>
  <html>
  <head>
    <title></title>
    <script>
      // 사야 하는 물건 목록
      const 물건_200301 = ['우유', '식빵']
      const 물건_200302 = [...물건_200301]  // 전개 연산자를 사용해서 배열을 복사합니다.
      물건_200302.push('고구마')
      물건_200302.push('토마토')

      // 출력
      console.log(물건_200301)
      console.log(물건_200302)
    </script>
  </head>
  <body></body>
  </html>
2개 이상 배열
  const a = ['우유', '식빵']
  //undefined
  const b = ['고구마', '토마토']
  //undefined


[...a, ...b]
//  (4) ["우유", "식빵", "고구마", "토마토"]
 [...b, ...a]
 // (4) ["고구마", "토마토", "우유", "식빵"]
객체 전개 연산자
- 전개 연산자를 사용한 객체 복사 : {...객체}
얕은복사 예시
<!DOCTYPE html>
<html>
  <head>
    <title></title>
    <script>
      const 구름 = {
        이름: '구름',
        나이: 6,
        종족: '강아지'
      }
      const 별 = 구름 //얕은 복사
      별.이름 = '별'
      별.나이 = 1

      console.log(JSON.stringify(구름))
      console.log(JSON.stringify(별));
      // 얕은 복사
    </script>
  </head>
  <body></body>
</html>- 출력하는 구름과 별 모두
{"이름":"별","나이":1,"종족":"강아지"}를 출력한다.
깊은 복사 예시
- 전개 연산자를 사용한 객체 요소 추가 : {...객체, 자료, 자료, 자료}
<!DOCTYPE html>
<html>
  <head>
    <title></title>
    <script>
      const 구름 = {
        이름: '구름',
        나이: 6,
        종족: '강아지'
      }
      const 별 = {...구름}
      별.이름 = '별'
      별.나이 = 1

      console.log(JSON.stringify(구름))
      console.log(JSON.stringify(별))
      // 깊은 복사
    </script>
  </head>
  <body></body>
</html>- 구름 출력 :
{"이름":"구름","나이":6,"종족":"강아지"} - 별 출력 :
{"이름":"별","나이":1,"종족":"강아지"}
기존 속성 덮어쓰기 >> 객체 전개 순서
-
전개라는 이름처럼 전개한 부분에 객체가 펼쳐진다.
<!DOCTYPE html> <html> <head> <title></title> <script> const 구름 = { 이름: '구름', 나이: 6, 종족: '강아지' } const 별 = { ...구름, 이름: '별', // 기존의 속성 덮어 쓰기 나이: 1, // 기존의 속성 덮어 쓰기 예방접종: true } console.log(JSON.stringify(구름)) console.log(JSON.stringify(별)) </script> </head> <body></body> </html> -
구름 :
{"이름":"구름","나이":6,"종족":"강아지"} -
별 :
{"이름":"별","나이":1,"종족":"강아지","예방접종":true}
뒤에 있는 이름과 나이가 앞에 있는 이름과 나이를 덮어씀
const 별 = {
    ...구름,
    이름 : '별',
    나이: 1,
    예방접종: true
  }

  // 위는 다음과 같은 의미이다.

  const 별 = {
    이름 : '구름',
    나이 : 6,
    종족 : '강아지',

    이름 : '별',
    나이 : 1,
    예방접종 : true
  }
전개를 뒤에 한다면 뒤에서 전개된다. 뒤에 있는 이름과 나이가 앞에 있는 이름과 나이를 덮어쓴다. >> 전개 연산자를 마지막에 사용해 종족 속성이 별의 제일 마지막에 있는 것을 알 수 있다.
 const 별 = {
    이름 : '별',
    나이 : 1,
    예방접종  : true,
    ...구름
  }

  // 위는 다음과 같은 의미이다.
  const 별 = {
    이름 : '별',
    나이 : 1,
    예방접종 : true,

    이름 : '구름',
    나이 : 6,
    종족 : '강아지'
  }
전개를 어떤 위치에서 하는지에 따라 결과가 달라진다.
객체 문법 문제 3
- 다음 객체에 name 속성이 있는지 체크합니다. 다음 객체에 author 속성이 있는지 체크합니다.
 const object = {

        name: '혼자 공부하는 파이썬',
        price: 18000,
        publisher: '한빛미디어'

      }
풀이
<!DOCTYPE html>
<html>

<head>
  <title></title>
  <script src="https://cdn.jsdelivr.net/npm/lodash@4.17.15/lodash.min.js">
  </script>
  <script>
    const object = {
      name: '혼자 공부하는 파이썬',
      price: 18000,
      publisher: '한빛미디어'
    }

    // name속성 있는지 체크
   if(object.name){
    console.log('name 속성이 있습니다.')
  } else {
    console.log('name 속성이 없습니다.')
  }

   //author 속성 있는지 체크 >> false값이 들어오지 않는다는 전제 하에
    object.author || console.log('author 속성이 없습니다.')
   </script>
</head>

<body></body>

</html>- name 속성은 있고, author속성은 없다고 출력
- 다음 객체에 name 속성이 없다면, 동적으로 name 속성을 주고 그 값을 '제목 미정'이라고 줍니다.
다음 객체에 author 속성이 없다면, 동적으로 author 속성을 주고 그 값을 '저자 미상'라고 줍니다.그리고 obejct 객체를 출력해봅니다.
   const object = {

        name: '혼자 공부하는 파이썬',
        price: 18000,
        publisher: '한빛미디어'

      }
풀이
   <!DOCTYPE html>
   <html>

<head>
  <title></title>
  <script src="https://cdn.jsdelivr.net/npm/lodash@4.17.15/lodash.min.js">
  </script>
  <script>
    const object = {
      name: '혼자 공부하는 파이썬',
      price: 18000,
      publisher: '한빛미디어'
    }

    object.name = object.name === undefined ? '제목 미정' : object.name;
    object.author = object.author === undefined ? '저자 미상' : object.author;

    console.log(JSON.stringify(object, null, 2))

  </script>

</head>

<body></body>

</html>-
name에는 원래 존재하던 혼자 공부하는 파이썬이 들어가있고, author속성이 추가되어 저자 미상이라는 값이 들어가 있다.
- 변수 a, b의 값에 배열 기반의 다중 할당으로 1, 2 의 값으로 초기화 합니다.
4 변수 a, b의 값을 치환합니다.
   <!DOCTYPE html>
   <html>


<head>
  <title></title>
  <script>
    let [a, b] = [1, 2];
    console.log(a, b);// 1 2

    [a, b] = [b, a];
    console.log(a, b); // 2 1

  </script>

</head>

<body></body>

</html>- let arrayA = [1, 2, 3, 4, 5]
변수 a, b, c를 배열 기반의 다중할당으로 arrayA를 이용해서 arrayA[0], arrayA[1], arrayA[2]로 초기화합니다.
<!DOCTYPE html>
<html>

<head>
  <title></title>
  <script>
  let arrayA = [1, 2, 3, 4, 5];
  let [a, b, c] = [arrayA[0], arrayA[1], arrayA[2]];
  //let [a, b, c] = arrayA; 이렇게 해도 앞에있는 값 먼저 할당
  console.log(a, b, c); //1 2 3
  </script>
</head>

<body></body>

</html>- 다음 object 객체를 이용하여(객체 기반의 다중 할당) name에 object.name을 price에 object.price로 초기화하자.
   const object = {

        name: '혼자 공부하는 파이썬',
        price: 18000,
        publisher: '한빛미디어'

      }
풀이
   <!DOCTYPE html>
   <html>
   <head>
    <title></title>
    <script>
      // 객체를 생성합니다.
      const object = {
        name: '혼자 공부하는 파이썬',
        price: 18000,
        publisher: '한빛미디어'
      }

       // 객체에서 변수를 추출합니다.
       const { name, price } = object     // name에 object.name을 price에 object.price를
       console.log('# 속성 이름 그대로 꺼내서 출력하기')
       console.log(name, price) //혼자 공부하는 파이썬 18000
       console.log('')

       const { a=name, b=price } = object   // a에 object.name을 b에 object.price을
       console.log('# 다른 이름으로 속성 꺼내서 출력하기')
       console.log(a, b)//혼자 공부하는 파이썬 18000
    </script>
   </head>
   <body></body>
</html>- 중괄호를 이용해 변수를 만들고, 객체를 넣으면 순차적으로 해당 변수에 객체 속성값이 들어갈 것
- 객체 다중 할당에서는 변수 이름과 객체의 속성 이름이 일치해야한다. 아니면 값이 할당되지 않는다.
- 다음 object 객체를 이용하여(객체 기반의 다중 할당) a에 object.name을 b에 object.price로 초기화하자.
   const object = {

        name: '혼자 공부하는 파이썬',
        price: 18000,
        publisher: '한빛미디어'

}- 다음의 실행결과를 유추하여 적으시오.
   // 사야 하는 물건 목록
      const 물건_200301 = ['우유', '식빵']
      const 물건_200302 = 물건_200301
      물건_200302.push('고구마')
      물건_200302.push('토마토')
      // 출력
      console.log(물건_200301)
console.log(물건_200302)- 우유, 식빵, 고구마, 토마토로 모두 출력 된다. >> 얕은 복사(주소값 참조로 다 변경됌)
- 8번 문제에서 물건_200302가 깊은 복사가 되게끔 구현하자.
- 전개 연산자로 배열을 전개하고 뒤에 자료를 추가한다. >>
[...배열, 자료, 자료, 자료]이렇게 가능
  <!DOCTYPE html>
  <html>


<head>
  <title></title>
  <script>
    const 물건_200301 = ['우유', '식빵']
      const 물건_200302 = [...물건_200301]; //전개 연산자 사용해 배열 복사
      물건_200302.push('고구마')
      물건_200302.push('토마토')
      // 출력
      console.log(물건_200301) //우유 식빵
      console.log(물건_200302) //우유 식빵 고구마 토마토 출력
  </script>
</head>

<body></body>

</html>- 우유, 식빵 / 고구마, 우유, 식빵, 토마토와 같이 실행 결과가 나오도록 ( )에 적절한 코드를 넣자.
   // 사야 하는 물건 목록
     const 물건_200301 = ['우유', '식빵']
     const 물건_200302 = (            )
     // 출력
     console.log(물건_200301)
     console.log(물건_200302)
풀이
   <!DOCTYPE html>
   <html>

<head>
  <title></title>
  <script>
     const 물건_200301 = ['우유', '식빵']
     const 물건_200302 = ['고구마', ...물건_200301, '토마토'];
     // 출력
     console.log(물건_200301)
     console.log(물건_200302)
  </script>
</head>

<body></body>

</html>- 다음과 같은 실행 결과가 나오게 코드를 완성하자.
    const a = ['우유', '식빵']
    const b = ['고구마', '토마토']
    실행결과
    (4) ['우유', '식빵', '고구마', '토마토']
    (4) ['고구마', '토마토', '우유', '식빵']
풀이
    <!DOCTYPE html>
    <html>


<head>
  <title></title>
  <script>
    const a = ['우유', '식빵']
    const b = ['고구마', '토마토']

    const a2 = [...a, ...b];
    const b2 = [...b, ...a];
    console.log(a2);
    console.log(b2);

  </script>

</head>

<body></body>

</html>- 다음의 실행결과를 유추해서 적어보자.
    const 구름 = {

        이름: '구름',
        나이: 6,
        종족: '강아지'

      }
      const 별 = 구름
      별.이름 = '별'
      별.나이 = 1
      console.log(JSON.stringify(구름))
console.log(JSON.stringify(별))- 얕은 복사로,
{"이름":"별","나이":1,"종족":"강아지"}2개의 출력 모두 이렇게 출력
- 12번을 깊은 복사가 되게 하자.
- 객체 전개 연산자 :
{...객체}
<!DOCTYPE html>
<html>

<head>
  <title></title>
  <script>
    const 구름 = {

    이름: '구름',
    나이: 6,
    종족: '강아지'

  }
  const 별 = {...구름};
  별.이름 = '별';
  별.나이 = 1;
  console.log(JSON.stringify(구름)); //{"이름":"구름","나이":6,"종족":"강아지"}
  console.log(JSON.stringify(별)); //{"이름":"별","나이":1,"종족":"강아지"}
  </script>
</head>

<body></body>

</html>-
다음의 출력결과를 유추하여 적어보자.
const 구름 = {

    이름: '구름',
    나이: 6,
    종족: '강아지'

  }
  const 별 = {

    ...구름,
    이름: '별',     // 기존의 속성 덮어 쓰기
    나이: 1,        // 기존의 속성 덮어 쓰기
    예방접종: true

  }
  console.log(JSON.stringify(구름))
  console.log(JSON.stringify(별))
{"이름":"구름","나이":6,"종족":"강아지"}{"이름":"별","나이":1,"종족":"강아지","예방접종":true}>> 구름의 속성들을 가져와 종족 속성도 존재하는 것이다.
-
다음의 출력결과를 유추하여 적어보자
const 구름 = {

    이름: '구름',
    나이: 6,
    종족: '강아지'

  }
  const 별 = {

    이름: '별',
    나이: 1,
    예방접종: true,
    ...구름

  }
  console.log(JSON.stringify(구름))
  console.log(JSON.stringify(별))
{"이름":"구름","나이":6,"종족":"강아지"}{"이름":"구름","나이":6,"예방접종":true,"종족":"강아지"}>> 객체 전개는 순서가 중요하므로 전개를 뒤에서 하니 종족이 뒤에 오는 것을 알 수 있다.