오전문제
객체 문법 문제
- pet 이라는 객체를 만들자.
pet 이라는 객체에는 name, eat 속성이 있다.
name 속성에는 '구름'이라고 주자.
eat 속성에는 메소드를 주자.
pet.eat('밥'); 이라고 호출하면
"구름은/는 밥을/를 먹습니다." 라고 alert 창을 띄우자.
<!DOCTYPE html>
<html lang="ko">
<head>
  <meta charset="UTF-8">
  <meta name="viewport" content="width=device-width, initial-scale=1.0">
  <title>Document</title>
</head>
<body>
  <script>
    const pet = {
      name : '구름',
      eat : function(food){
        alert(this.name + '은/는 ' + food + '을/를 먹습니다.');
      }
    }
    pet.eat('밥');
  </script>
</body>
</html>- student라는 빈 객체를 만들자.
동적으로 student 객체에 이름을 '윤인성', 취미를 '악기', 장래희망을 '생명공학자'를 추가하자.
콘솔창에 다음과 같이 JSON 형태로 출력하자.
{
"이름": "윤인성",
"취미": "악기",
"장래희망": "생명공학자"
}
<!DOCTYPE html>
<html lang="ko">

<head>
  <meta charset="UTF-8">
  <meta name="viewport" content="width=device-width, initial-scale=1.0">
  <title>Document</title>
</head>

<body>
  <script>
    const student = {
      이름: '윤인성',
      취미: '악기',
      장래희망: '생명공학자'
    }
    console.log(JSON.stringify(student));
  </script>
</body>

</html>- 2번에서 만든 student 객체에서 동적으로 student의 장래희망을 삭제하자.
그리고 콘솔창에 다음과 같이 JSON 형태로 출력하자.
{
"이름": "윤인성",
"취미": "악기"
}
<!DOCTYPE html>
<html lang="ko">

<head>
  <meta charset="UTF-8">
  <meta name="viewport" content="width=device-width, initial-scale=1.0">
  <title>Document</title>
</head>

<body>
  <script>
    const student = {
      이름: '윤인성',
      취미: '악기',
      장래희망: '생명공학자'
    }
    delete student.장래희망;
    console.log(JSON.stringify(student));
  </script>
</body>

</html>- 1번에서 만든 pet 객체의 eat 메소드를 메소드 간단 선언 구문으로 바꿔보자.
pet.eat('밥'); 이라고 호출해보자.
<!DOCTYPE html>
<html lang="ko">
<head>
  <meta charset="UTF-8">
  <meta name="viewport" content="width=device-width, initial-scale=1.0">
  <title>Document</title>
</head>
<body>
  <script>
    const pet = {
      name : '구름',
      eat (food){
        alert(this.name + '은/는 ' + food + '을/를 먹습니다.');
      }
    }
    pet.eat('밥');
  </script>
  </body>

</html>- test라는 객체를 만들고 a라는 속성에 익명함수를 주자. 그리고 콘솔창에서 this를 출력해보자. b라는 속성을 만들고 속성에 화살표함수를 주자. 그리고 콘솔창에서 this를 출력해보자.
<!DOCTYPE html>
<html lang="ko">
<head>
  <meta charset="UTF-8">
  <meta name="viewport" content="width=device-width, initial-scale=1.0">
  <title>Document</title>
</head>
<body>
  <script>
    const test = {
      a : function() {
        console.log(this);
      },
      b : () => {
        console.log(this);
      }
    }
    test.a();
    test.b();
  </script>
</body>
</html>
문자열 분리 문제
-
문자열을 쉼표를 기준으로 4개씩 새로운 배열을 만들자
- 2차원 배열생성
<!DOCTYPE html>
<html lang="ko">
<head>
  <meta charset="UTF-8">
  <meta name="viewport" content="width=device-width, initial-scale=1.0">
  <title>Document</title>
</head>
<body>
  <script>
    let input = `
일자,달러,엔,유로
02,1141.8,1097.46,1262.37
03,1148.7,1111.36,1274.65
04,1140.6,1107.81,1266.58
07,1143.4,1099.58,1267.8
08,1141.6,1091.97,1261.07
`;
    let arr = input.trim().split('\n').map(a => a.split(','));
    console.log(arr);
  </script>
</body>
</html>
객체 문법 문제 2
-
크롬 콘솔 창에서 빈 배열 하나를 만들고 거기에 sample이라는 속성을 동적으로 하나 만들고 값에 10을 주자. 그런 후에 그 배열에 sample이라는 속성 값을 출력해 보자.
let arr = [];
arr.sample = 10;
arr.sample;
- 함수도 객체이다. 다음과 같이 함수 b를 선언하고 함수에 속성을 지정한 후 확인해보면 함수가 속성을 가질 수 있다는 것을 알 수 있다.
function b() {}
b.sample = 10
b.sample
//10- 크롬 콘솔창에서 배열 a를 다음과 같이 typeof 연산자를 썼을 때 출력결과는?
typeof a
- object
- a 라는 변수가 가지고 있는 값이 배열인지 아닌지 체크할려면?
Array.isArray()
- 기본 자료형
자바스크립트에서는 실체가 있는 것(undefined와 null 등이 아닌 것) 중에 객체가 아닌 것을 기본 자료형(primitive types 또는 primitives)이라고 부릅니다. 숫자, 문자열, 불이 바로 기본 자료형입니다.
이러한 자료형은 객체가 아니므로 속성을 가질 수 없습니다. 예를 들어 숫자에 속성을 추가해보겠습니다.
const c = 273

c.sample = 10

c.sample
undefined // 속성을 만들 수 있는 것처럼 보이지만 실제로 속성이 만들어지지 않습니다.- 기본 자료형을 객체로 선언하기
자바스크립트는 기본 자료형을 객체로 선언하는 방법을 제공합니다. 숫자, 문자, 열, 불등으로 자료형을 변환하는 함수(Number, String, Boolean)는 다음과 같이 사용합니다.
- const 객체 = new 객체 자료형 이름()
- new 사용
-
자바스크립트는 사용의 편리성을 위해서 기본 자료형의 속성과 메소드를 호출할 때(기본 자료형 뒤에 온점을 찍고 무언가 하려고 하면) 일시적으로 기본 자료형을 객체로 승급시킵니다. 그래서 속성과 메소드를 사용할 수 있는 것입니다.
-
숫자 전체 객체 전부에 sample이라는 속성을 추가하고 10 이라는 값을 넣자.
그리고 그것을 크롬 콘솔 창에서 확인하자.
//Number은 기본 자료형으로 prototype을 사용해 속성을 추가해야한다.
//안한 예
Number.sample = 20;
(5).sample; //undefined

//prototype 사용 예
Number.prototype.sample = 30;
(3).sample; //30- 숫자 전체 객체에 power메소드를 추가하는데 주어진 인수 만큼 거듭 제곱을 하도록 하자. 만약 인수 없이 호출하면 2제곱하도록 하자.
Number.prototype.power = function (n = 2) {
        return this.valueOf() ** n
      }

// Number 객체의 power() 메소드를 사용합니다.
const a = 12;
 a.power();
 a.power(3);
 a.power(4);

 //Math.pow(); 로도 사용 가능
Math.pow(2, 2); //4- 제곱 연산자는
**기호를 사용한다.
- String 객체 전체에 contain 이라는 메소드를 추가하자. 그리고 그 메소드에 문자열을 넘겨주면, 문자열이 있으면 true 없으면 false를 반환하도록 하자.
String.prototype.contain = function (data) {
        return this.indexOf(data) >= 0
      }
 const a = '안녕하세요'
 a.contain('하세요'); // true
a.contain('수고'); // false- 배열 객체 전체에 contain 이라는 메소드를 추가하자. 그리고 그 메소드에 임의의 값을 인수로 넘겨주고, 그 인수가 배열에 있으면 true 없으면 false를 반환하도록 하자.
  Array.prototype.contain = function (data) {
        return this.indexOf(data) >= 0
      }
const b = [273, 32, 103, 57, 52]
b.contain(32); // true
b.contain(123); // false- 다음 실수 123.456789 를 소수점 셋째자리에서 반올림 하여 출력하자.
toFixed(): 소수점 이하 몇 자리까지만 출력하고 싶을 때 사용
let number = 123.456789;
let roundedNumber = number.toFixed(2); // 소수점 둘째 자리까지 반올림
console.log(roundedNumber); // 출력: "123.46"- 어떤 숫자가 NaN(Not a Number)인지 또는 Infinity(무한)인지 확인할 때 쓰는 메소드는?
.isFinite(): 양의 무한대, 음의 무한대라면 false >> 비교 연산자로 비교 가능
- 다음을 크롬에서 실행했을 때 출력 결과는?
const m = Number('숫자로 변환할 수 없는 경우')
 m
//NAN
m === NaN //?- false가 나온다.
- NaN은 자기 자신과 일치하지 않는 유일한 값으로 항상 false를 반환한다.(어떤 숫자이건)
- 값이 NaN인지 확인하고 싶다면
isNaN()함수를 사용해야 한다
- 값이 NaN인지 확인하고 싶다면
- 위 14번에 m을 다음과 같이 했을 때 출력결과는?
Number.isNaN(m)
- true
- 다음 객체 배열을 책의 값을 기준으로 오름차순 정렬하자.
(Lodash 라이브러리 사용(CDN에서 가져옴) > https://www.jsdelivr.com/package/npm/lodash) >> 이 링크에서 라이브러리 받아와서 사용
// 데이터를 생성합니다.
      const books = [{

        name: '혼자 공부하는 파이썬',
        price: 18000,
        publisher: '한빛미디어'

      }, {

        name: 'HTML5 웹 프로그래밍 입문',
        price: 26000,
        publisher: '한빛아카데미'

      }, {

        name: '머신러닝 딥러닝 실전 개발 입문',
        prie: 30000,
        publisher: '위키북스'

      }, {

        name: '딥러닝을 위한 수학',
        price: 25000,
        publisher: '위키북스'

      }]
풀이
<!DOCTYPE html>
<html>
  <head>
    <title></title>
    <script src="https://cdn.jsdelivr.net/npm/lodash@4.17.15/lodash.min.js">
    </script>
    <script>
      // 데이터를 생성합니다.
      const books = [{
        name: '혼자 공부하는 파이썬',
        price: 18000,
        publisher: '한빛미디어'
      }, {
        name: 'HTML5 웹 프로그래밍 입문',
        price: 26000,
        publisher: '한빛아카데미'
      }, {
        name: '머신러닝 딥러닝 실전 개발 입문',
        prie: 30000,
        publisher: '위키북스'
      }, {
        name: '딥러닝을 위한 수학',
        price: 25000,
        publisher: '위키북스'
      }]

      // 가격으로 정렬한 뒤 출력합니다.
      const output = _.sortBy(books, (book) => book.price, 'asc');
      console.log(JSON.stringify(output, null,2))
    </script>
  </head>
  <body></body>
</html>- books의 price를 기준으로 오름차순 실행해서 출력
- 실행결과를 유추해서 적으시오.
 const book ={

        name: '혼자 공부하는 파이썬',
        price: 18000,
        publisher: '한빛미디어'

      };
    const temp = JSON.stringify(book);
    console.log(temp);
{"name":"혼자 공부하는 파이썬","price":18000,"publisher":"한빛미디어"}- 숫자 빼고 다 쌍따움표로 출력
객체 문법 문제 3
- 다음 객체에 name 속성이 있는지 체크합니다. 다음 객체에 author 속성이 있는지 체크합니다.
 const object = {

        name: '혼자 공부하는 파이썬',
        price: 18000,
        publisher: '한빛미디어'

      }
풀이
<!DOCTYPE html>
<html>

<head>
  <title></title>
  <script src="https://cdn.jsdelivr.net/npm/lodash@4.17.15/lodash.min.js">
  </script>
  <script>
    const object = {
      name: '혼자 공부하는 파이썬',
      price: 18000,
      publisher: '한빛미디어'
    }

    // name속성 있는지 체크
   if(object.name){
    console.log('name 속성이 있습니다.')
  } else {
    console.log('name 속성이 없습니다.')
  }

   //author 속성 있는지 체크 >> false값이 들어오지 않는다는 전제 하에
    object.author || console.log('author 속성이 없습니다.')
   </script>
</head>

<body></body>

</html>- name 속성은 있고, author속성은 없다고 출력
-
다음 객체에 name 속성이 없다면, 동적으로 name 속성을 주고 그 값을 '제목 미정'이라고 줍니다.
다음 객체에 author 속성이 없다면, 동적으로 author 속성을 주고 그 값을 '저자 미상'라고 줍니다.
그리고 obejct 객체를 출력해봅니다.const object = { name: '혼자 공부하는 파이썬', price: 18000, publisher: '한빛미디어' }풀이
<!DOCTYPE html> <html>
-
name에는 원래 존재하던 혼자 공부하는 파이썬이 들어가있고, author속성이 추가되어 저자 미상이라는 값이 들어가 있다.
-
변수 a, b의 값에 배열 기반의 다중 할당으로 1, 2 의 값으로 초기화 합니다.
4 변수 a, b의 값을 치환합니다.<!DOCTYPE html> <html>
- let arrayA = [1, 2, 3, 4, 5]
변수 a, b, c를 배열 기반의 다중할당으로 arrayA를 이용해서 arrayA[0], arrayA[1], arrayA[2]로 초기화합니다.
<!DOCTYPE html>
<html>
<head>
<title></title>
<script>
let arrayA = [1, 2, 3, 4, 5];
let [a, b, c] = [arrayA[0], arrayA[1], arrayA[2]];
//let [a, b, c] = arrayA; 이렇게 해도 앞에있는 값 먼저 할당
console.log(a, b, c); //1 2 3
</script>
</head>
<body></body>
</html>-
다음 object 객체를 이용하여(객체 기반의 다중 할당) name에 object.name을 price에 object.price로 초기화하자.
const object = {

     name: '혼자 공부하는 파이썬',
     price: 18000,
     publisher: '한빛미디어'

   }
풀이
<!DOCTYPE html> <html> <head> <title></title> <script> // 객체를 생성합니다. const object = { name: '혼자 공부하는 파이썬', price: 18000, publisher: '한빛미디어' } // 객체에서 변수를 추출합니다. const { name, price } = object // name에 object.name을 price에 object.price를 console.log('# 속성 이름 그대로 꺼내서 출력하기') console.log(name, price) //혼자 공부하는 파이썬 18000 console.log('') const { a=name, b=price } = object // a에 object.name을 b에 object.price을 console.log('# 다른 이름으로 속성 꺼내서 출력하기') console.log(a, b)//혼자 공부하는 파이썬 18000 </script> </head> <body></body> </html>
- 중괄호를 이용해 변수를 만들고, 객체를 넣으면 순차적으로 해당 변수에 객체 속성값이 들어갈 것
- 객체 다중 할당에서는 변수 이름과 객체의 속성 이름이 일치해야한다. 아니면 값이 할당되지 않는다.
-
다음 object 객체를 이용하여(객체 기반의 다중 할당) a에 object.name을 b에 object.price로 초기화하자.
const object = { name: '혼자 공부하는 파이썬', price: 18000, publisher: '한빛미디어' }
-
다음의 실행결과를 유추하여 적으시오.
// 사야 하는 물건 목록 const 물건_200301 = ['우유', '식빵'] const 물건_200302 = 물건_200301 물건_200302.push('고구마') 물건_200302.push('토마토') // 출력 console.log(물건_200301) console.log(물건_200302)
- 우유, 식빵, 고구마, 토마토로 모두 출력 된다. >> 얕은 복사(주소값 참조로 다 변경됌)
- 8번 문제에서 물건_200302가 깊은 복사가 되게끔 구현하자.
- 전개 연산자로 배열을 전개하고 뒤에 자료를 추가한다. >>
[...배열, 자료, 자료, 자료]이렇게 가능
<!DOCTYPE html>
<head>
<title></title>
<script>
const 물건_200301 = ['우유', '식빵']
const 물건_200302 = [...물건_200301]; //전개 연산자 사용해 배열 복사
물건_200302.push('고구마')
물건_200302.push('토마토')
// 출력
console.log(물건_200301) //우유 식빵
console.log(물건_200302) //우유 식빵 고구마 토마토 출력
</script>
</head>
<body></body>
</html>-
우유, 식빵 / 고구마, 우유, 식빵, 토마토와 같이 실행 결과가 나오도록 ( )에 적절한 코드를 넣자.
// 사야 하는 물건 목록 const 물건_200301 = ['우유', '식빵'] const 물건_200302 = ( ) // 출력 console.log(물건_200301) console.log(물건_200302)풀이
<head>
<title></title>
<script>
const 물건_200301 = ['우유', '식빵']
const 물건_200302 = ['고구마', ...물건_200301, '토마토'];
// 출력
console.log(물건_200301)
console.log(물건_200302)
</script>
</head>
<body></body>
</html>- 다음과 같은 실행 결과가 나오게 코드를 완성하자.
const a = ['우유', '식빵']
const b = ['고구마', '토마토']
실행결과
(4) ['우유', '식빵', '고구마', '토마토']
(4) ['고구마', '토마토', '우유', '식빵']풀이
<head>
<title></title>
<script>
const a = ['우유', '식빵']
const b = ['고구마', '토마토']
const a2 = [...a, ...b];
const b2 = [...b, ...a];
console.log(a2);
console.log(b2);
</script>
</head>
<body></body>
</html>- 다음의 실행결과를 유추해서 적어보자.
const 구름 = {
이름: '구름',
나이: 6,
종족: '강아지'
}
const 별 = 구름
별.이름 = '별'
별.나이 = 1
console.log(JSON.stringify(구름))
console.log(JSON.stringify(별))
- 얕은 복사로,
{"이름":"별","나이":1,"종족":"강아지"}2개의 출력 모두 이렇게 출력
- 깊은 복사가 되게 하자.
- 객체 전개 연산자 :
{...객체}
<!DOCTYPE html>
<html>
<head>
<title></title>
<script>
const 구름 = {
이름: '구름',
나이: 6,
종족: '강아지'
}
const 별 = {...구름};
별.이름 = '별';
별.나이 = 1;
console.log(JSON.stringify(구름)); //{"이름":"구름","나이":6,"종족":"강아지"}
console.log(JSON.stringify(별)); //{"이름":"별","나이":1,"종족":"강아지"}
</script>
</head>
<body></body>
</html>-
다음의 출력결과를 유추하여 적어보자.
const 구름 = {

    이름: '구름',
    나이: 6,
    종족: '강아지'

  }
  const 별 = {

    ...구름,
    이름: '별',     // 기존의 속성 덮어 쓰기
    나이: 1,        // 기존의 속성 덮어 쓰기
    예방접종: true

  }
  console.log(JSON.stringify(구름))
  console.log(JSON.stringify(별))
{"이름":"구름","나이":6,"종족":"강아지"}{"이름":"별","나이":1,"종족":"강아지","예방접종":true}>> 구름의 속성들을 가져와 종족 속성도 존재하는 것이다.
-
다음의 출력결과를 유추하여 적어보자
const 구름 = {

    이름: '구름',
    나이: 6,
    종족: '강아지'

  }
  const 별 = {

    이름: '별',
    나이: 1,
    예방접종: true,
    ...구름

  }
  console.log(JSON.stringify(구름))
  console.log(JSON.stringify(별))
{"이름":"구름","나이":6,"종족":"강아지"}{"이름":"구름","나이":6,"예방접종":true,"종족":"강아지"}>> 객체 전개는 순서가 중요하므로 전개를 뒤에서 하니 종족이 뒤에 오는 것을 알 수 있다.
DOM 문제
<!DOCTYPE html>
<html lang="ko">
<head>
  <meta charset="UTF-8">
  <meta name="viewport" content="width=device-width, initial-scale=1.0">
  <title>상품 설명</title>
</head>
<body>
  <h1>상품 설명</h1>
  <h2>HTML + CSS + 자바스크립트 웹 표준의 정석</h2>
  <p> 한 권으로 끝내는 웹 기본 교과서</p>
  <p>코딩 왕초보도 OK! 기초부터 활용까지 완전 정복</p>
  <input type="submit" value="주문하기">
  <hr>
  <p></p>

  <script>
    const p = document.querySelectorAll('p')[2];
    const submit = document.querySelector('input');
    const h2 = document.querySelector('h2');
    submit.style.cursor = 'pointer';

    submit.addEventListener('click', () => {
      p.textContent = h2.textContent;
      p.style.color = 'blue';
      submit.disabled = true;//한번 클릭하면 비활성화
    });
  </script>
</body>
</html>
자바스크립트 에서의 오류처리
-
구문 오류(syntax error) : 괄호 개수를 잘못 입력하는 등의 오류로 코드가 실행조차 되지 않는 오류
- 프로그램 실행 전에 발생하는 코드의 문법적인 문제로 발생하는 오류를 의미 >> try~catch로 잡을 수 없다.
-
예외(exception) : 문법적 오류를 제외하고 코드 실행 중간에 발생하는 오류 >> 이를 처리하는것이 예외 처리
- 프로그램 실행 중에 발생하는 모든 오류를 의미
- 예외 처리는 예외가 발생했을 때 프로그램이 중단되지 않게 하는 처리입니다. 구문 오류는 예외 처리로 처리할 수 없다.
- try catch finally 구문은 try 구문 안에서 예외가 발생하면 catch 구문에서 처리하고, finally 구문은 예외 발생 여부와 상관없이 실행해야 하는 작업이 있을 때 사용한다.
예제 1 : 기본 예외 처리
- 조건문을 사용해서 예외가 발생하지 않게 만드는 것
<!DOCTYPE html>
<html>
  <head>
    <title></title>
  </head>
  <body>

  </body>
  <script>
    document.addEventListener('DOMContentLoaded', () => {
      const h1 = document.querySelector('h1')
      if (h1) {
        h1.textContent = '안녕하세요'
      } else {
        console.log('h1 태그를 추출할 수 없습니다.')//body에 h1태그가 없기에 출
      }
    })
  </script>
</html>-
대부분의 프로그래밍 언어는 배열의 길이를 넘는 위치를 선택할 경우 오류를 발생하지만 자바스크립트는 undefined를 출력하기만 한다.
- 문제가 발생할 수 있는 부분은 조건문 등으로 처리해야 한다.
예제 2 : try~catch > 기본 예외 처리
<!DOCTYPE html>
<html>
  <head>
    <title></title>
    <script>
      try {
        willExcept.byeBye()
        console.log("try 구문의 마지막 줄")
      } catch (exception) { //변수 이름이 exception >> 내 맘대로 줘도 됌 보통은 e라고
        console.log("catch 구문의 마지막 줄")
      }
    </script>
  </head>
  <body>
  </body>
</html>- willExcept가 선언되지 않았으니 catch구문의 마지막 줄이라고 출력 >> 예외를 발생시켜서 던져 catch가 잡음
예제 3 : try~catch~finally > 고급 예외 처리
<!DOCTYPE html>
<html>
  <head>
    <title></title>
    <script>
      try {
        willExcept.byeBye()
        console.log("try 구문의 마지막 줄")
      } catch (exception) {
        console.log("catch 구문의 마지막 줄")//실행
      } finally {
        console.log("finally 구문의 마지막 줄")//싱행
      }
    </script>
  </head>
  <body>
  </body>
</html>-
try구문에 들어가면 예외가 발생하던 하지 않던 finally가 실행된다.
- catch구문의 마지막 줄 출력하고 finally구문의 마지막 줄 실행
어떤 예외가 발생할지
예측하기 힘든 경우가 있다면 고급 예외 처리로 처리해주는 것이 좋다.
예제 4 : 기본 예외처리, 고급 예외 처리
throw / return
<!DOCTYPE html>
<html>
  <head>
    <title></title>
    <script>
      function test() {
        try {
          alert('A 위치입니다.')
          throw "예외 강제 발생"
        } catch (exception) {
          alert('B 위치입니다.')
          return //test를 호출한 곳으로 돌아간
        }
        alert('C 위치입니다.')
      }

      // 함수를 호출합니다.
      test()
    </script>
  </head>
  <body>
  </body>
</html>- A 위치 입니다. B 위치 입니다. 출력
finally
<!DOCTYPE html>
<html>
  <head>
    <title></title>
    <script>
      function test() {
        try {
          alert('A 위치입니다.')
          throw "예외 강제 발생"
        } catch (exception) {
          alert('B 위치입니다.')
          return //return이 있어도 finally가 존재해 finally를 실행하고 돌아간다.
        } finally {
          alert('C 위치입니다.')
        }
      }

      // 함수를 호출합니다.
      test()
    </script>
  </head>
  <body>
  </body>
</html>- A 위치입니다. B위치 입니다. C 위치 입니다. 출력
예외처리 확인 문제1
-
다음 코드 중에서 구문 오류가 발생하는 코드를 고르세요. >> 1번 나머지는 예외처리 가능
①②
③
④
-
예외 처리 구문의 조합으로 옳지 않은 것을 고르세요. >> 3번 finally는 마지막
① try {} catch(exception) {}
② try {} finally {}
③ try {} finally {} catch(exception) {}
④ try {} catch(exception) {} -
다음 코드 중에서 try catch finally 구문으로 처리할 수 없는 코드를 고르세요. >> 3번 >>> 문법 에러 syntax error
①②
③
④
4, try catch 예시를 작성하시오
<!DOCTYPE html>
<html lang="ko">
<head>
  <meta charset="UTF-8">
  <meta name="viewport" content="width=device-width, initial-scale=1.0">
  <title>예외 처리</title>
</head>
<body>
  <script>
    try{
      const n = 10;
      console.log(n() + n());
    }catch(e){
      console.log('error 발생'); //발생
    }
  </script>
</body>
</html>- try catch finally 예시를 작성하시오.
<!DOCTYPE html>
<html lang="ko">
<head>
  <meta charset="UTF-8">
  <meta name="viewport" content="width=device-width, initial-scale=1.0">
  <title>예외 처리</title>
</head>
<body>
  <script>
    try{
      const n = 10;
      console.log(n() + n());
    }catch(e){
      console.log('error 발생'); //발생
    }finally{
      console.log('try를 들어온 순간 finally 구문은 출력될 수 밖에 없쮜~~');//발생
    }
  </script>
</body>
</html>- 다음 코드의 실행 결과를 유추하여 작성하시오.
function test() {
        try {
          alert('A 위치입니다.')
          throw "예외 강제 발생"
        } catch (exception) {
          alert('B 위치입니다.')
          return
        }
        alert('C 위치입니다.')
      }

      // 함수를 호출합니다.
test()- A 위치 입니다. B 위치입니다. 후에 return으로 호출한 곳으로 돌아감
- 다음 코드의 실행 결과를 유추하여 작성하시오.
function test() {
        try {
          alert('A 위치입니다.')
          throw "예외 강제 발생"
        } catch (exception) {
          alert('B 위치입니다.')
          return
        } finally {
          alert('C 위치입니다.')
        }
      }

      // 함수를 호출합니다.
test()- A 위치입니다. B 위치입니다. C 위치 입니다. 후에 return으로 호출한 곳으로 돌아감
예외가 발생된 정보 확인
exception object
-
예외를 강제로 발생시킬 때
throw키워드 사용 -
catch에서 예외를 잡는 식별자가 예외 객체다.
예제 1 : 예외 객체
예외 객체 : 예외와 관련된 정보를 담은 객체
-
try catch 구문을 사용할 때 catch의 괄호 안에 입력하는 식별자가 예외 객체(exception object)다. 일반적으로 e나 exception 식별자 사용
-
예외 객체가 가지고 있는 속성은 브라우저에 따라 조금씩 다르다.
-
name : 예외 이름
-
message : 예외 메시지
-
<!DOCTYPE html>
<html>
  <head>
    <title></title>
    <script>
      try {
        const array = new Array(999999999999999)
      } catch (exception) {
        console.log(exception)
        console.log()
        console.log(`예외 이름: ${exception.name}`)
        console.log(`예외 메시지: ${exception.message}`)
      }
      /*
          RangeError: Invalid array length    at 8-2-1.html:7:23
          8-2-1.html:11 예외 이름: RangeError
          8-2-1.html:12 예외 메시지: Invalid array length
      */
    </script>
  </head>
  <body>
  </body>
</html>
예제 2 : 예외 강제 발생 > throw 형태 2가지
-
유틸리티 함수, 클래스를 만들고, 그러한 라이브러리의 함수를 다른 사람들이 활용하는 경우가 있다.
- 개발자가 의도한 대로 처리할 수 있도록 예외를 강제로 발생 시켜 사용자에게 주의를 준다.
<!DOCTYPE html>
<html>
  <head>
    <title></title>
    <script>
      function divide(a, b) {
        if (b === 0) {
          throw '0으로는 나눌 수 없습니다.'
        }
        return a / b
      }

      console.log(divide(10, 2))
      console.log(divide(10, 0))
    </script>
  </head>
  <body>
  </body>
</html>
throw 구문 사용 가능 형태 2가지
-
throw 문자열: 단순하게 예외를 발생 -
throw new Error(문자열): 조금 더 자세하게 예외를 발생 >> 파일 이름 과 에러 난 줄 번호까지
throw 문자열
<!DOCTYPE html>
<html lang="ko">
<head>
    <meta charset="UTF-8">
    <meta name="viewport" content="width=device-width, initial-scale=1.0">
    <title>Document</title>
</head>
<body>
    <script>
    function divide(a, b) {
        if (b === 0) {
          throw '0으로는 나눌 수 없습니다.'
        }
        return a / b
      }

      console.log(divide(10, 2))
      console.log(divide(10, 0))
    </script>
</body>
</html>
throw new Error
<!DOCTYPE html>
<html lang="ko">
<head>
    <meta charset="UTF-8">
    <meta name="viewport" content="width=device-width, initial-scale=1.0">
    <title>Document</title>
</head>
<body>
    <script>
      function divide(a, b) {
        if (b === 0) {
          throw new Error('0으로는 나눌 수 없습니다.')
        }
        return a / b
      }

      console.log(divide(10, 2))
      console.log(divide(10, 0))
    </script>
</body>
</html>- 예외가 발생된 위치까지 알려주므로 new Error 로 객체를 통해 에러를 발생시키는 것이 더 구체적으로 알려주므로 좋다 >> 디버깅 및 오류 추적 용이
예제 3 : js에서 예외처리의 NaN
잘못된 값인데도 정상 실행 코드
<!DOCTYPE html>
<html>
  <head>
    <title></title>
    <script>
      function test(object) {
        console.log(object.a + object.b)
      }

      test({})
    </script>
  </head>
  <body>
  </body>
</html>-
object.a가 undefined로 나오며, object.b도 undefined로 나온다.
-
object.a가 undefined로 나오며, object.b도 undefined로 나온다. 즉, 정상 실행
사용자에게 함수 잘못 사용 강제 인지 코드
<!DOCTYPE html>
<html>
  <head>
    <title></title>
    <script>
      function test(object) {
        if (object.a !== undefined && object.b !== undefined) {
          console.log(object.a + object.b)
        } else {
          throw new Error("a 속성과 b 속성을 지정하지 않았습니다.")
        }
      }

      test({})
    </script>
  </head>
  <body>
  </body>
</html>-
사용자가 코드의 문제점을 인지하고 해결할 수 있다.
-
예외 객체 : 예외와 관련된 정보를 담은 객체를 의미
-
throw 구문 : 예외를 강제로 발생시킬 때 사용하는 구문
예제 4 : 에러 핸들링
- 에러를 발생시키지 않고 에러를 다루고(handling)싶다면, try~catch문 사용
function sum(x, y){
    if(typeof x !== 'number' || typeof y !== 'number'){
        throw "숫자를 입력하세요.";
    }
    return x + y;
}
 try{
   sum("abc", 1)
  } catch(e){
   console.log(e);
}- 에러가 발생하는 대신 콘솔창에 텍스트로 출력이 되었다.
예외처리 문법 문제 2
- 배열의 크기가 허용되는 크기 이상을 주고 예외 처리를 하자.
그리고 예외의 이름과 메세지를 출력하자.
<!DOCTYPE html>
<html lang="ko">
<head>
  <meta charset="UTF-8">
  <meta name="viewport" content="width=device-width, initial-scale=1.0">
  <title>Document</title>
</head>
<body>
  <script>
    try{
      let arr = new Array [99999999999999999];

    }catch(e){

      console.log(e);
      console.log(e.name);
      console.log(e.meessage);

    }
  </script>

</body>
</html>
-
예외를 강제로 발생시킬때 throw 라는 키워드를 쓴다. 2가지 형태가 존재하는데, 이 두 가지 경우의 차이에 대해서 설명해라
-
throw 문자열 : 문자열만 출력된다.
-
throw new Error(문자열) : 에러 표시가 뜨고, 문자열과 무슨 파일에서 몇번 째 줄에 에러가 표시되는지 자세한 에러메시지가 뜬다.
-
- 예외가 강제로 발생되는 예시를 들어보자.
<!DOCTYPE html>
<html lang="ko">
<head>
    <meta charset="UTF-8">
    <meta name="viewport" content="width=device-width, initial-scale=1.0">
    <title>Document</title>
</head>
<body>
    <script>
      function divide(a, b) {
        if (a === 0 || b === 0) {
          throw new Error('0으로는 나눌 수 없습니다.')
        }
        return a / b
      }

      console.log(divide(10, 2))
      console.log(divide(10, 0))
    </script>
</body>
</html>
객체 지향 프로그래밍 언어
객체 지향 패러다임이란 객체를 우선적으로 생각해서 프로그램을 만든다는 방법론이다.
-
클래스 라는 문법으로 객체를 효율적이고 안전하게 만들어 객체 지향 패러다임을 쉽게 프로그래밍에 적용할 수 있도록 도와준다.
-
추상화 : 복잡한 자료, 모듈, 시스템 등으로부터 핵심적인 개념과 기능을 간추려내는 것을 추상화라고 한다. >> 공통적인 사항들을 가지고 모듈화 또는 재사용
예제 1 : 템플릿 리터럴
- 템플릿 리터럴 : 백틱을 사용해 문자열을 정의하고
${}구문을 사용해 변수나 표현식을 문자열에 삽입할 수 있다. - for~of : value가 들어간다.
- for~in : index가 들어간다.
<!DOCTYPE html>
<html>
  <head>
    <title></title>
    <script>
      // 객체를 선언합니다.
      const students = []
      students.push({ 이름: '구름', 국어: 87, 영어: 98, 수학: 88, 과학: 90})
      students.push({ 이름: '별이', 국어: 92, 영어: 98, 수학: 96, 과학: 88})
      students.push({ 이름: '겨울', 국어: 76, 영어: 96, 수학: 94, 과학: 86})
      students.push({ 이름: '바다', 국어: 98, 영어: 52, 수학: 98, 과학: 92})

      // 출력합니다.
      let output = '이름\t총점\t평균\n' // 템플릿 리터럴을 사용
      for (const s of students) {
        const sum = s.국어 + s.영어 + s.수학 + s.과학
        const average = sum / 4
        output += `${s.이름}\t${sum}점\t${average}점\n`
      }
      console.log(output)
    </script>
  </head>
  <body>
  </body>
</html>- 미리 문자열을 초기화하는 이유는 어떻게 구성될지 미리 정의하고, 그 뒤에 각 학생의 데이터를 처리할 때마다 이 문자열에 추가하기 때문이다.
예제 2 : 기능을 메소드로 추가하기
-
개발자들은 함수를 메소드로써 객체 내부에 넣어서 활용하는 방법을 사용한다.
- 객체의 수가 늘어나면 함수 이름 충돌이 발생할 수 있고, 혼동이 있을 수 있고, 가독성이 떨어질 수 있기에 함수명을 간단하게 넣고, 메소드를 작성한다.
<!DOCTYPE html>
<html>
  <head>
    <title></title>
    <script>
      // 객체를 선언합니다.
      const students = []
      students.push({ 이름: '구름', 국어: 87, 영어: 98, 수학: 88, 과학: 90})
      students.push({ 이름: '별이', 국어: 92, 영어: 98, 수학: 96, 과학: 88})
      students.push({ 이름: '겨울', 국어: 76, 영어: 96, 수학: 94, 과학: 86})
      students.push({ 이름: '바다', 국어: 98, 영어: 52, 수학: 98, 과학: 92})

      // 객체를 처리하는 함수를 선언합니다. > getSumOf함수를 굳이 만들 필요 없이 아래처럼
      //function getSumOf (student) {
       // return student.국어 + student.영어 + student.수학 + student.과학
      //}
       // function getAverageOf (student) {
       // return getSumOf(student) / 4
     // }

        // students 배열 내부의 객체 모두에 메소드를 추가합니다. >> 내부에 익명함수 추가
      for (const student of students) {
        student.getSum = function () {
          return this.국어 + this.영어 + this.수학 + this.과학
        }
        student.getAverage = function () {
          return this.getSum() / 4
        }
      }

      // 출력합니다.
      let output = '이름\t총점\t평균\n'
      for (const s of students) {
        output += `${s.이름}\t${getSum(s)}점\t${getAverageOf(s)}점\n`
      }
      console.log(output)
    </script>
  </head>
  <body>
  </body>
</html>- getSum 과 getAverage함수는 student객체의 메소드로 추가되어있으므로, for~of문에 s도 students배열의 각 요소가 s에 할당되었으므로, 해당 메소드를 호출할 수 있다.

결과값은 1번 예제와 같다.
예제 3 : 객체 만드는 함수
함수 안에 함수에서는 컴마를 이용해 존재한다.(아래에 클래스에서는 사용하지 않음)
- 아래 코드는 눈에 보이지 않는 문제가 존재하는데, 객체 별로 getSum(), getAverage(), toString() 메소드를 생성하므로 함수라는 기본 자료형보다 무거운
자료형이 여러 번 생성된다는 단점이 존재한다. toString: 최상위 클래스인 object클래스의 메소드
<!DOCTYPE html>
<html>
  <head>
    <title></title>
    <script>
      function createStudent(이름, 국어, 영어, 수학, 과학) {
        return {
          // 속성을 선언합니다.
          이름: 이름,
          국어: 국어,
          영어: 영어,
          수학: 수학,
          과학: 과학,
          // 메소드를 선언합니다. 사용 중인 코드는 최신 표현
           //getSum = function() {} >> 옛날 표현
          getSum () {
            return this.국어 + this.영어 + this.수학 + this.과학
          },
          getAverage () {
            return this.getSum() / 4
          },
          toString () {//반드시 this로 접근해야한다.
            return `${this.이름}\t${this.getSum()}점\t${this.getAverage()}점\n`
          }
        }
      }

      // 객체를 선언합니다.
      const students = []
      students.push(createStudent('구름', 87, 98, 88, 90))
      students.push(createStudent('별이', 92, 98, 96, 88))
      students.push(createStudent('겨울', 76, 96, 94, 86))
      students.push(createStudent('바다', 98, 52, 98, 92))

      // 출력합니다.
      let output = '이름\t총점\t평균\n'
      for (const s of students) {
        output += s.toString()
      }
      console.log(output)
    </script>
  </head>
  <body>
  </body>
</html>-
createStudent() 함수를 만들고, 여기에 객체를 만들어 리턴하게 만들었다.
-
장점
-
오탈자의 위험이 줄어든다.
-
코드를 입력하는 양이 크게 줄어든다.
-
마지막으로 속성과 메소드를 한 함수 내부에서 관리할 수 있으므로 객체를 더 손쉽게 유지보수 할 수 있다.
-
예제 4 : 클래스 선언하기
-
class: 객체를 만들 때 수많은 지원을 하는 대신 많은 제한을 거는 문법
- 클래스 이름은 첫 글자를 대문자로 지정한다. >> 암묵적 약속
-
prototype: 제한을 많이 하지 않지만, 대신 지원도 별로하지 않는 문법 (잘 사용x )
<!DOCTYPE html>
<html>
  <head>
    <title></title>
    <script>
      // 클래스를 선언합니다.
      class Student {

      }

      // 학생을 선언합니다.
      const student = new Student()

      // 학생 리스트를 선언합니다.
      const students = [
        new Student(),
        new Student(),
        new Student(),
        new Student()
      ]
    </script>
  </head>
  <body>
  </body>
</html>
예제 5 : 생성자(construct) 만들기
-
new 클래스이름: 객체(인스턴스) 생성 -
생성자: 클래스를 기반으로 인스턴스를 생성할 때 처음 호출되는 메소드
constructor키워드를 통해 생성자를 만든다 >> 자바에서는 클래스 이름 >>> 클래스에서만 사용되는 방식 그냥 function만들어서 객체 생성해 넣을 때는 저 키워드 안써도 됌
-
생성자에서는 속성을 추가하는 등의 객체 초기화 처리를 한다.
<!DOCTYPE html>
<html>
  <head>
    <title></title>
    <script>
      class Student {
        constructor (이름, 국어, 영어, 수학, 과학) {//함수 >>생성자를 호출하면 이 함수가 실행
          this.이름 = 이름
          this.국어 = 국어
          this.영어 = 영어
          this.수학 = 수학
          this.과학 = 과학
        }
      }

      // 객체를 선언합니다.
      const students = []
      students.push(new Student('구름', 87, 98, 88, 90))//객체를 만들면서 생성자 호출
      students.push(new Student('별이', 92, 98, 96, 88))
      students.push(new Student('겨울', 76, 96, 94, 86))
      students.push(new Student('바다', 98, 52, 98, 92))
    </script>
  </head>
  <body>
  </body>
</html>
위에 총 응용 코드
<!DOCTYPE html>
<html>
  <head>
    <title></title>
    <script>
      class Student {//클래스
        constructor (이름, 국어, 영어, 수학, 과학) {//생성
          this.이름 = 이름
          this.국어 = 국어
          this.영어 = 영어
          this.수학 = 수학
          this.과학 = 과학
        }

        getSum () {
          return this.국어 + this.영어 + this.수학 + this.과학
        }
        getAverage () {
          return this.getSum() / 4
        }
        toString () {//최상위 클래스인 object클래스의 메소드
          return `${this.이름}\t${this.getSum()}점\t${this.getAverage()}점\n`
        }
        /*
        처음 코드를 입력할 때, 메소드 사이에 쉼표를 넣는 실수를 하는 경우가 있는데,
        쉼표가 있으면 안 됩니다.
        */
      }
      // 객체를 선언합니다.
      const students = []
      students.push(new Student('구름', 87, 98, 88, 90))
      students.push(new Student('별이', 92, 98, 96, 88))
      students.push(new Student('겨울', 76, 96, 94, 86))
      students.push(new Student('바다', 98, 52, 98, 92))

      //출력합니다.
      let output = '이름\t총점\t평균\n'
      for (const s of students) {
        output += s.toString()
      }
      console.log(output)
    </script>
  </head>
  <body>
  </body>
</html>
클래스 문법 문제 1
- 추상화란 무엇인가?
- 추상화(abstraction)란 객체들 사이에서 공통된 특징이나 동작을 식별해 일반화해서 코드를 재사용하고 유지보수하기 쉽게 만드는 프로그래밍 개념이다. 이를 추상화해 하나의 클래스로 정의하는 것이다.
- 다음 코드에서 객체에 getSum 메소드와 getAverage 메소드를 추가하여 실행결과가 다음과 같이 나오게 하자.
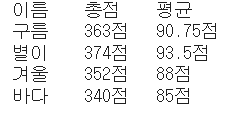
이름 총점 평균
구름 363점 90.75점
별이 374점 93.5점
겨울 352점 88점
바다 340점 85점
// 객체를 선언합니다.
      const students = []
      students.push({ 이름: '구름', 국어: 87, 영어: 98, 수학: 88, 과학: 90})
      students.push({ 이름: '별이', 국어: 92, 영어: 98, 수학: 96, 과학: 88})
      students.push({ 이름: '겨울', 국어: 76, 영어: 96, 수학: 94, 과학: 86})
      students.push({ 이름: '바다', 국어: 98, 영어: 52, 수학: 98, 과학: 92})

      // 코드 추가

      // 출력합니다.
      let output = '이름\t총점\t평균\n'
      for (const s of students) {
        output += `${s.이름}\t${s.getSum()}점\t${s.getAverage()}점\n`
      }
      console.log(output)
풀이
<!DOCTYPE html>
<html>
  <head>
    <title></title>
    <script>
      // 객체를 선언합니다.
      const students = []
      students.push({ 이름: '구름', 국어: 87, 영어: 98, 수학: 88, 과학: 90})
      students.push({ 이름: '별이', 국어: 92, 영어: 98, 수학: 96, 과학: 88})
      students.push({ 이름: '겨울', 국어: 76, 영어: 96, 수학: 94, 과학: 86})
      students.push({ 이름: '바다', 국어: 98, 영어: 52, 수학: 98, 과학: 92})

      // 코드 추가
      for(const student of students){

        student.getSum = function(){
          return this.국어 + this.영어 + this.수학 + this.과학;
        }
        student.getAverage = function() {
          return this.getSum() / 4;
        }
      }

      // 출력합니다.
      let output = '이름\t총점\t평균\n'
      for (const s of students) {
        output += `${s.이름}\t${s.getSum()}점\t${s.getAverage()}점\n`
      }
      console.log(output)
    </script>
  </head>
  <body>
  </body>
</html>-
객체 안에 메소드가 존재해야 하기 때문에 for~of문을 이용해 students배열 안에 존재하는 객체들을 꺼내서 메소드를 추가해준다.
- 그러므로 getSum을 호출할때 this.을 붙여줘야 한다. 그렇지않으면 에러가 난다.
- 다음 소스코드에 createStudent 함수를 완성해서, 실행결과와 같이 나오도록 하자.
이름 총점 평균
구름 363점 90.75점
별이 374점 93.5점
겨울 352점 88점
바다 340점 85점
// 객체를 선언합니다.
      const students = []
      students.push(createStudent('구름', 87, 98, 88, 90))
      students.push(createStudent('별이', 92, 98, 96, 88))
      students.push(createStudent('겨울', 76, 96, 94, 86))
      students.push(createStudent('바다', 98, 52, 98, 92))

      // 출력합니다.
      let output = '이름\t총점\t평균\n'
      for (const s of students) {
        output += s.toString()
      }
      console.log(output)
풀이
<!DOCTYPE html>
<html>
  <head>
    <title></title>
    <script>
      function createStudent(이름, 국어, 영어, 수학, 과학){
        return{
          이름 : 이름, 국어 : 국어, 영어: 영어, 수학: 수학, 과학: 과학, //속성 지정

          getSum(){
            return this.국어 + this.영어 + this.수학 + this.과학;
          },
          getAverage(){
            return this.getSum() / 4;
          },
          toString(){
            return `${this.이름}\t${this.getSum()}점\t${this.getAverage()}점\n`;
          }
        }
      }


      // 객체를 선언합니다.
      const students = []
      students.push(createStudent('구름', 87, 98, 88, 90))
      students.push(createStudent('별이', 92, 98, 96, 88))
      students.push(createStudent('겨울', 76, 96, 94, 86))
      students.push(createStudent('바다', 98, 52, 98, 92))

      // 출력합니다.
      let output = '이름\t총점\t평균\n'
      for (const s of students) {
        output += s.toString()
      }
      console.log(output)

    </script>
  </head>
  <body>
  </body>
</html>- createStudent함수에서 return값 안에 현 객체의 변수들을 초기화해주고 이를 기반으로 함수들을 생성해 리턴한다.
- 다음 코드가 실행될 수 있도록 Student 클래스를 만들고, 그 안에 생성자를 만들자.
 // 객체를 선언합니다.
      const students = []
      students.push(new Student('구름', 87, 98, 88, 90))
      students.push(new Student('별이', 92, 98, 96, 88))
      students.push(new Student('겨울', 76, 96, 94, 86))
      students.push(new Student('바다', 98, 52, 98, 92))
풀이
<!DOCTYPE html>
<html>
  <head>
    <title></title>
    <script>
      // 객체를 선언합니다.
      const students = []
      students.push(new Student('구름', 87, 98, 88, 90))
      students.push(new Student('별이', 92, 98, 96, 88))
      students.push(new Student('겨울', 76, 96, 94, 86))
      students.push(new Student('바다', 98, 52, 98, 92))

      class Student{
        constructor(이름, 국어, 영어, 수학, 과학){
          this.이름= 이름;
          this.국어 = 국어;
          this.영어 = 영어;
          this.수학 = 수학;
          this.과학 = 과학;
        }
      }
    </script>
  </head>
  <body>
  </body>
</html>- javascript에서 생성자를 만들 때 constructor키워드를 사용한다.
- 다음과 같은 실행결과 나오도록 Student 클래스에 생성자와 getSum, getAverage, toString 메소드를 추가하자.
이름 총점 평균
구름 363점 90.75점
별이 374점 93.5점
겨울 352점 88점
바다 340점 85점
// 객체를 선언합니다.
      const students = []
      students.push(new Student('구름', 87, 98, 88, 90))
      students.push(new Student('별이', 92, 98, 96, 88))
      students.push(new Student('겨울', 76, 96, 94, 86))
      students.push(new Student('바다', 98, 52, 98, 92))

      //출력합니다.
      let output = '이름\t총점\t평균\n'
      for (const s of students) {
        output += s.toString()
      }
      console.log(output)
풀이
<!DOCTYPE html>
<html>
  <head>
    <title></title>
    <script>
      class Student{
        constructor(이름, 국어, 영어, 수학, 과학){
          this.이름= 이름;
          this.국어 = 국어;
          this.영어 = 영어;
          this.수학 = 수학;
          this.과학 = 과학;
        }
        getSum(){
          return this.국어 + this.영어 + this.수학 + this.과학;
        }
        getAverage(){
          return this.getSum() / 4;
        }
        toString(){
          return `${this.이름}\t${this.getSum()}점\t${this.getAverage()}점\n`;
        }
      }

      // 객체를 선언합니다.
      const students = []
      students.push(new Student('구름', 87, 98, 88, 90))
      students.push(new Student('별이', 92, 98, 96, 88))
      students.push(new Student('겨울', 76, 96, 94, 86))
      students.push(new Student('바다', 98, 52, 98, 92))


      //출력합니다.
      let output = '이름\t총점\t평균\n'
      for (const s of students) {
        output += s.toString()
      }
      console.log(output);
    </script>
  </head>
  <body>
  </body>
</html>
this키워드를 사용하는 이유는 해당 메소드가 속한 객체의 속성을 참조하기 위함이다.
-
class Student로 묶여 있지만, 클래스로 정의된 메소드는 해당 클래스의 인스턴스에 속한 것이기 때문에 클래스 내에서 this키워드를 사용하여 현재 인스턴스의 속성에 접근해야한다.
-
각 인스턴스는 클래스의 구조를 공유하지만, 실제 데이터는 독립적으로 유지되기 때문에 해당 인스턴스의 값을 참조하기 위해 this를 사용해야한다.
- class내부에서 this 없이 속성에 접근하는 경우 그 속성이 클래스의 정적 속성인지, 클래스에 속한 다른메소드인지에 따라 다르게 해석될 수 있기 때문에 해당 속성이 인스턴스마다 고유한 값이라면 this를 사용해 현재 인스턴스에 접근하는 것이 옳다.
클래스 개념 2
예제 1 : 클래스와 메소드 활용
<!DOCTYPE html>
<html>
  <head>
    <title></title>
    <script>
      class Rectangle {
        constructor (width, height) {
          this.width = width
          this.height = height
        }

        // 사각형의 둘레를 구하는 메소드
        getPerimeter () {
          return 2 * (this.width + this.height)
        }

        // 사각형의 넓이를 구하는 메소드
        getArea () {
          return this.width * this.height
        }
      }

      const rectangle = new Rectangle(10, 20)
      console.log(`사각형의 둘레: ${rectangle.getPerimeter()}`)
      console.log(`사각형의 넓이: ${rectangle.getArea()}`)
    </script>
  </head>
  <body>
  </body>
</html>
예제 2 : 여러개의 클래스와 메소드 활용
<!DOCTYPE html>
<html>
  <head>
    <title></title>
    <script>
      class Rectangle {
        constructor (width, height) {
          this.width = width
          this.height = height
        }

        // 사각형의 둘레를 구하는 메소드
        getPerimeter () {
          return 2 * (this.width + this.height)
        }

        // 사각형의 넓이를 구하는 메소드
        getArea () {
          return this.width * this.height
        }
      }

      // 정사각형 클래스
      class Square {
        constructor (length) {
          this.length = length
        }

        // 정사각형의 둘레를 구하는 메소드
        getPerimeter () {
          return 4 * this.length
        }

        // 정사각형의 넓이를 구하는 메소드
        getArea () {
          return this.length * this.length
        }
      }

      // 클래스 사용하기
      const square = new Square(10)
      console.log(`정사각형의 둘레: ${square.getPerimeter()}`)
      console.log(`정사각형의 넓이: ${square.getArea()}`)
    </script>
  </head>
  <body>
  </body>
</html>
예제 3 : 클래스 상속(Inheritance)
-
자식 클래스 이름 extends 상속받을 부모클래스 이름: 이런 형태로 상속 선언- 자식 클래스는 부모 클래스의 메소드를 물려받아 사용할 수 있다. + 오버라이딩 가능 >> 부모 클래스는 자식 클래스의 메소드를 사용하려면, 자식 클래스의 인스턴스 생성해 this를 사용해 해당 인스턴스 속성에 접근해야 한다.
<!DOCTYPE html>
<html>
  <head>
    <title></title>
    <script>
      // 사각형 클래스
      class Rectangle {
        constructor (width, height) {
          this.width = width
          this.height = height
        }

        // 사각형의 둘레를 구하는 메소드
        getPerimeter () {
          return 2 * (this.width + this.height)
        }

        // 사각형의 넓이를 구하는 메소드
        getArea () {
          return this.width * this.height
        }
      }

      // 정사각형 클래스
      class Square extends Rectangle {
        constructor (length) {
          super(length, length)     // 부모의 생성자 함수를 호출하는 클래스
        }

      }

      // 클래스 사용하기
      const square = new Square(10)
      console.log(`정사각형의 둘레: ${square.getPerimeter()}`)
      console.log(`정사각형의 넓이: ${square.getArea()}`)
      /*
        getPerimeter() 메소드와 getArea() 메소드를 선언하지 않았지만,
        상속받았으므로 사용할 수 있습니다.
      */
    </script>
  </head>
  <body>
  </body>
</html>
예제 4 : private 속성과 private메소드
-
만약 사용자가 잘못된 값으로 객체를 생성한다면, 해당 객체의 잘못된 값으로 변경하는 것을 막을 수 없기 때문에 안전성을 확보하기 위해 private속성과 메소드 문법이 나왔다.
-
#: private을 사용하고 싶다면 속성과 메소드 이름 앞에 #을 붙이기만 하면된다.- #이 붙어있는 속성과 메소드는 모두 private속성과 메소드가 된다.
-
주의 : private 속성을 사용하기 전에 외부에 private속성으로 사용하겠다고 선언해야 한다.
<!DOCTYPE html>
<html>
  <head>
    <title></title>
    <script>
      // 사각형 클래스
      class Square {
        #length     // 이 위치에 해당 속성을 private 속성으로 사용하겠다고 미리 선언합니다.

        constructor (length) {
          if (length <= 0) {
            throw '길이는 0보다 커야 합니다.'
          }
          this.#length = length
        }
        getPerimeter () { return 4 * this.#length }
        getArea () { return this.#length * this.#length }
      }

      // 클래스 사용하기
      const square = new Square(10)
      console.log(`정사각형의 둘레: ${square.getPerimeter()}`)
      console.log(`정사각형의 넓이: ${square.getArea()}`)
    </script>
  </head>
  <body>
  </body>
</html>-
private 속성으로 변경하면 클래스 외부에서는 해당 속성에 접근할 수 없다.
- square 객체의 length 속성을 변경해도, 클래스 내부에서 사용하고 있는 속성은 #속성이지 length속성이 아니므로 결과에는 어떤 영향도 주지 않는다.
-
만약 -10을 넣었다면, throw를 통해 예외를 발생시켜 -10이라는 값은 생성자에서 거부되고 #length는 설정되지 않아 undefined일 것이다.
- throw로 생성자의 실행이 중단되어, 속성을 설정되지 않고, 해당 객체는 생성되지 않는다.
class 밖에서 private속성 선언
<!DOCTYPE html>
<html>
  <head>
    <title></title>
    <script>
      // 사각형 클래스
      class Square {
        #length

        constructor (length) {
          if (length <= 0) {
            throw '길이는 0보다 커야 합니다.'
          }
          this.#length = length
        }
        getPerimeter () { return 4 * this.#length }
        getArea () { return this.#length * this.#length }
      }

      // 클래스 사용하기
      const square = new Square(10)
      square.#length = -10 //error
      console.log(`정사각형의 둘레: ${square.getPerimeter()}`)
      console.log(`정사각형의 넓이: ${square.getArea()}`)
    </script>
  </head>
  <body>
  </body>
</html>
예제 5 : getter, setter메소드
자바스크립트에서는 getter, setter메소드가 따로 존재한다.
-
get 메서드 이름(): 속성 값을 확인할 때 사용하는 메소드를 게터(getter) -
set 메서드 이름(): 속성에 값을 지정할 때 사용하는 메소드를 세터(setter) -
자바스크립트에서는 클래스의 getter, setter메서드에 대한 호출을 직접적으로 생략할 수 있다. 일반적인 속성처럼 접근 가능 >> get, set속성은 클래스 외부에서 직접적으로 접근할 수 없다.
<!DOCTYPE html>
<html>
<head>
  <title></title>
  <script>
    // 정사각형 클래스
    class Square {
      #length

      /*
      this.length에 값을 지정하면,
      set length(length) 메소드 부분이 호출된다.
      */
      constructor (length) {
        this.length = length
        // this.#length = length
      }

      get length () {
        return this.#length
      }

      get perimeter () {
        return this.#length * 4
      }

      get area () {
         return this.#length * this.#length
      }
      set length (length) {
        if (length <= 0) {
          throw '길이는 0보다 커야 합니다.'
        }
        this.#length = length
      }
    }

    // 클래스 사용하기
    const squareA = new Square(10)
    console.log(`한 변의 길이: ${squareA.length}`)//get length 호출
    console.log(`둘레: ${squareA.perimeter}`) //get perimeter 호출
    console.log(`넓이: ${squareA.area}`)//get area 호

    // 예외 발생시키기
    const squareB = new Square(-10)
  </script>
</head>
<body>
</body>
</html>
예제 6 : static 속성과 메소드
- 인스턴스를 만들지 않고 사용할 수 있는 속성과 메소드로, 그냥 일반적인 변수와 함수처럼 사용할 수 있다.
클래스이름.속성>> static선언 할 때는 속성 앞에 static 선언하면 된다.클래스이름.메소드()>> static선언 할 때는 메소드 앞에 static 선언하면 된다. (띄어쓰기 해야함)
<!DOCTYPE html>
<html>
  <head>
    <title></title>
    <script>
      class Square {
        #length
        static #conuter = 0       // private 특성과 static 특성은 한꺼번에 적용할 수도 있다.
        static get counter () {
          return Square.#conuter
        }
        constructor (length) {
          this.length = length //set length()호출
          Square.#conuter += 1
        }

        static perimeterOf (length) {
          return length * 4
        }
        static areaOf (length) {
          return length * length
        }

        get length () { return this.#length }
        get perimeter () { return this.#length * 4 }
        get area () { return this.#length * this.#length }

        set length (length) {
          if (length < 0) {
            throw '길이는 0보다 커야 합니다.'
          }
          this.#length = length
        }
      }

      // static 속성 사용하기
      const squareA = new Square(10)
      const squareB = new Square(20)
      const squareC = new Square(30)
      console.log(`지금까지 생성된 Square 인스턴스는 ${Square.counter}개입니다.`)//static get counter()호출
      // static 메소드 사용하기 >> 클래스 이름으로 호출
      console.log(`한 변의 길이가 20인 정사각형의 둘레는 ${Square.perimeterOf(20)}입니다.`)
      console.log(`한 변의 길이가 30인 정사각형의 둘레는 ${Square.areaOf(30)}입니다.`)
    </script>
  </head>
  <body>
  </body>
</html>- #counter라는 이름의 static 속성과 counter()라는 이름의 static 메소드(게터)를 만들었다.
- #counter라는 속성은 Square 객체의 생성자가 호출될 때마다 1씩 증가하도록 했다.
- perimeterOf() 메소드와 areaOf() 메소드를 추가했다 >> Square 객체를 생성하지 않고도 둘레와 넓이를 간단하게 구할 수 있게 해주는 메소드
- 어떤 속성과 함수가 클래스 내부에 귀속되어 있다는 것을 명시적으로 나타낼 수 있다.
- 어떤 속성과 함수가 클래스 내부에 귀속되어 있다는 것을 명시적으로 나타낼 수 있다.
예제 7 : 오버라이드(override)
-
오버라이드(override) : 부모 클래스가 갖고 있는 함수를 자식에서 다시 선언해서 덮은 것
<!DOCTYPE html> <html> <head> <title></title> <script> // 클래스를 선언합니다. class LifeCycle { call () { this.a() this.b() this.c() } a () { console.log('a() 메소드를 호출합니다.')} b () { console.log('b() 메소드를 호출합니다.')} c () { console.log('c() 메소드를 호출합니다.')} } class Child extends LifeCycle { a () { console.log('자식의 a() 메소드입니다.') } } // 인스턴스를 생성해 부모 클래스 메소드 사용 new Child().call() </script> </head> <body> </body> </html> -
자식의 a() 메소드입니다. b() 메소드를 호출합니다.c() 메소드를 호출합니다. >> 최종적으로 오버라이딩된거 출력
<!DOCTYPE html>
<html>
  <head>
    <title></title>
    <script>
      // 클래스를 선언합니다.
      class LifeCycle {
        call () {
          this.a()
          this.b()
          this.c()
        }

        a () { console.log('a() 메소드를 호출합니다.')}
        b () { console.log('b() 메소드를 호출합니다.')}
        c () { console.log('c() 메소드를 호출합니다.')}
      }

      class Child extends LifeCycle {
        a () {
          super.a()
          console.log('자식의 a() 메소드입니다.')
        }
      }

      // 인스턴스를 생성합니다.
      new Child().call()
    </script>
  </head>
  <body>
  </body>
</html>- a() 메소드를 호출합니다. 자식의 a() 메소드입니다. b() 메소드를 호출합니다. c() 메소드를 호출합니다. >> 출력 자식 클래스에서 super.a()를 호출했기 때문에
예제 8 : 오버라이드와 toString()
- toString() : 최상위 클래스인 object 클래스의 메소드로, toString() 이라는 메소드를 만들면 object클래스의 메소드를 오버라이드 하는 것이다.
- toString()메소드를 오버라이드하면 내부적으로 문자열로 변환되는 형태로 바꿀 수 있다.
<!DOCTYPE html>
<html>
  <head>
    <title></title>
    <script>
      class Pet {
        constructor (name, age) {
          this.name = name
          this.age = age
        }

        toString () {
          return `이름: ${this.name}\n나이: ${this.age}살`
        }
      }

      const pet = new Pet('구름', 6)
      alert(pet)
      console.log(pet + '')
    </script>
  </head>
  <body>
  </body>
</html>
클래스 문법 문제 2
- Rectangle 클래스를 만들자. 둘레와 넓이를 구하는 메소드를 만들자
<!DOCTYPE html>
<html lang="ko">

<head>
  <meta charset="UTF-8">
  <meta name="viewport" content="width=device-width, initial-scale=1.0">
  <title>Document</title>
</head>

<body>
  <script>
    class Rectangle {
      constructor(width, height) {
        this.width = width;
        this.height = height;
      }
      perimeter() {
        return 2 * (this.width + this.height);
      }
      area() {
        return this.width * this.height;
      }
    }
    const rec = new Rectangle(2, 3);
    console.log(`둘레 : ${rec.perimeter()}`);//10
    console.log(`넓이 : ${rec.area()}`);//6
  </script>
</body>

</html>- 1번에서만든 Rectangle 클래스를 상속하는 Square 클래스를 만들자.
Square 클래스는 정사각형을 형상화한 클래스이다.
생성자를 만드는데 매개변수를 하나받고 상위클래스의 생성자를 호출하도록 하자.
한변의 길이가 10인 Square 객체를 만들자.
그 객체의 둘레와 넓이를 구해서 출력하자.
<!DOCTYPE html>
<html lang="ko">

<head>
  <meta charset="UTF-8">
  <meta name="viewport" content="width=device-width, initial-scale=1.0">
  <title>Document</title>
</head>

<body>
  <script>
    class Rectangle {
      constructor(width, height) {
        this.width = width;
        this.height = height;
      }
      perimeter() {
        return 2 * (this.width + this.height);
      }
      area() {
        return this.width * this.height;
      }
    }

    class Square extends Rectangle{
      constructor(length){
        super(length,length);
      }
    }
    const sq = new Square(10);
    console.log(`둘레 : ${sq.perimeter()}`);//40
    console.log(`넓이 : ${sq.area()}`);//100
  </script>
</body>

</html>- 길이가 0보다 작으면 생성자에서 예외를 발생시키도록 하자
 // 정사각형 클래스
      class Square {
        constructor (length) {
            // 예외발생 코드 추가
          this.length = length
        }
        getPerimeter () { return 4 * this.length }
        getArea () { return this.length * this.length }
      }

      // 클래스 사용하기
      const square = new Square(-10)
      console.log(`정사각형의 둘레: ${square.getPerimeter()}`)
      console.log(`정사각형의 넓이: ${square.getArea()}`)
풀이
<!DOCTYPE html>
<html lang="ko">

<head>
  <meta charset="UTF-8">
  <meta name="viewport" content="width=device-width, initial-scale=1.0">
  <title>Document</title>
</head>

<body>
  <script>
    // 정사각형 클래스
    class Square {
        constructor (length) {
            // 예외발생 코드 추가
            if(length < 0){
              throw '길이가 0 이상이여야 합니다.';
            }
          this.length = length
        }
        getPerimeter () { return 4 * this.length }
        getArea () { return this.length * this.length }
      }

      // 클래스 사용하기
      const square = new Square(-10); //Example.html:17 Uncaught 길이가 0 이상이여야 합니다.
      console.log(`정사각형의 둘레: ${square.getPerimeter()}`)
      console.log(`정사각형의 넓이: ${square.getArea()}`)
  </script>
</body>

</html>- 정사각형 클래스 Square를 만들자.
한 변의 길이를 나타내는 속성을 private으로 선언하자.
생성자와 사각형의 둘레를 리턴하는 메소드, 사각형의 면적을 리턴하는 메소드를 만들자.
한변의 길이가 10인 정사각형 객체를 만들고 정사각형의 둘레와 넓이를 구하여 출력하자.
<!DOCTYPE html>
<html lang="ko">
<head>
  <meta charset="UTF-8">
  <meta name="viewport" content="width=device-width, initial-scale=1.0">
  <title>Document</title>
</head>

<body>
  <script>
    // 정사각형 클래스
    class Square {
      #length;
      constructor(length) {
        // 예외발생 코드 추가
        if (length < 0) {
          throw '길이가 0 이상이여야 합니다.';
        }
        this.length = length
      }
      getPerimeter() { return 4 * this.length }
      getArea() { return this.length * this.length }
    }

    // 클래스 사용하기
    const square = new Square(10);
    console.log(`정사각형의 둘레: ${square.getPerimeter()}`);//40
    console.log(`정사각형의 넓이: ${square.getArea()}`);//100

  </script>

</body>

</html>- 정사각형 클래스를 만들자
정사각형의 변의 길이를 private으로 선언한자.
생성자에서 변의 길이를 초기화하자.세터메소드가 호출되도록 하자.
게터메소드와 세터메서드로 변의 길이를 반환하고 변의 길이를 대입하도록하자.
세터메소드에서 변의 길이가 0보다 작으면 예외를 발생시키자.
변의 길이가 10인 사각형 객체를 만들자. 변의 길이, 둘레, 넓이를 출력하자.
한변의 길이가 -10인 객체를 만들자.그리고 예외가 발생하도록 하자.
<!DOCTYPE html>
<html lang="ko">

<head>
  <meta charset="UTF-8">
  <meta name="viewport" content="width=device-width, initial-scale=1.0">
  <title>Document</title>
</head>

<body>
  <script>
    // 정사각형 클래스
    class Square {
      #length;
      constructor(length) {

        this.length = length;//값을 지정하면 set메소드 호출
      }
      get length(){return this.#length;}
      get perimeter() { return 4 * this.#length }
      get area() { return this.length * this.#length }
      set length(length){
        if (length <= 0) {
          throw '길이가 0 이상이여야 합니다.';
        }
        this.#length = length;
      }
    }

    // 클래스 사용하기
    const square = new Square(10);
    const exSq = new Square(-10);//예외 발생
    console.log(`정사각형 변의 길이: ${square.length}`);//10
    console.log(`정사각형의 둘레: ${square.perimeter}`);//40
    console.log(`정사각형의 넓이: ${square.area}`);//100
  </script>
</body>

</html>- 예외 발생으로 square의 값은 나오지 않는다.
- get, set메소드를 사용할 때는 ()를 붙이지 않아도 된다.
- Square 클래스를 만든다.(정사각형을 형상화한 클래스)
length를 private으로 선언한다.
counter를 정적 private으로 선언한다.
counter를 반환하는 정적 메소드를 만든다.
생성자에서 length를 초기화한다.
생성자에서 counter를 1증가시킨다.
정사각형의 둘레를 구하는 정적 메소드를 만든다.
정사각형의 면적을 구하는 정적 메소드를 만든다.
길이를 반환하는 메소드를 만든다.
둘레를 반환하는 메소드를 만든다.
면적을 반환하는 메소드를 만든다.
길이값을 설정하는 세터메소드를 만든다. 길이가 0보다 작으면 예외를 발생시킨다.
Square 객체 3개를 생성한다.
객체의 갯수를 출력한다.
정적메소드로 길이가 20인 사각형의 둘레를 구한다.
정적메소드로 길이가 30인 사각형의 면적을 구한다.
<!DOCTYPE html>
<html lang="ko">

<head>
  <meta charset="UTF-8">
  <meta name="viewport" content="width=device-width, initial-scale=1.0">
  <title>Document</title>
</head>

<body>
  <script>
    class Square {
      #length;
      static #counter = 0;

      constructor(length) {
        this.length = length;
        Square.#counter++;
      }
      static get counter() {
        return Square.#counter; //this.counter도 가능
      }
      static perimeterOf(length) {
        return 4 * length;
      }
      static areaOf(length) {
        return length * length
      }

      set length(length) {//setter 메소드
        if (length <= 0) {
          throw '길이는 0 이상이여야 합니다.';
        }
        this.#length = length;
      }

      get length() { return this.#length }
      get perimeter() { return this.#length * 4 }
      get area() { return this.#length * this.#length }

    }
    // static 속성 사용하기
    const squareA = new Square(10);
    const squareB = new Square(20);
    const squareC = new Square(30);

    console.log(`지금까지 생성된 Square 인스턴스는 ${Square.counter}개입니다.`)//3개
    //static get counter()호출

    // static 메소드 사용하기 >> 클래스 이름으로 호출
      console.log(`한 변의 길이가 20인 정사각형의 둘레는 ${Square.perimeterOf(20)}입니다.`)//80
      console.log(`한 변의 길이가 30인 정사각형의 둘레는 ${Square.areaOf(30)}입니다.`)//900
  </script>
</body>

</html>- 메소드 오버라이딩의 정의와 예시를 드시오.
- 부모 클래스에 존재하는 메소드를 자식 클래스에서 재정의하는 것이다.
<!DOCTYPE html>
<html>
  <head>
    <title></title>
    <script>
      // 클래스를 선언합니다.
      class LifeCycle {
        call () {
          this.a()
          this.b()
        }

        a () { console.log('a() 메소드를 호출합니다.')}
        b () { console.log('b() 메소드를 호출합니다.')}
      }

      class Child extends LifeCycle {
        a () {
          super.a()
          console.log('자식의 a() 메소드입니다.')
        }
      }

      // 인스턴스를 생성합니다.
      new Child().call()
    </script>
  </head>
  <body>
  </body>
</html>- a() 메소드를 호출합니다. 자식의 a() 메소드입니다.b() 메소드를 호출합니다. 출력
- 다음 코드의 실행 결과를 적으시오.
   // 클래스를 선언합니다.
     class LifeCycle {
       call () {
         this.a()
         this.b()
         this.c()
       }

       a () { console.log('a() 메소드를 호출합니다.')}
       b () { console.log('b() 메소드를 호출합니다.')}
       c () { console.log('c() 메소드를 호출합니다.')}
     }

     class Child extends LifeCycle {
       a () {
         console.log('자식의 a() 메소드입니다.')
       }
     }

     // 인스턴스를 생성합니다.
new Child().call()- 자식의 a() 메소드입니다.b() 메소드를 호출합니다.c() 메소드를 호출합니다.
- 다음 코드의 실행결과를 적으시오.
   // 클래스를 선언합니다.
     class LifeCycle {
       call () {
         this.a()
         this.b()
         this.c()
       }

       a () { console.log('a() 메소드를 호출합니다.')}
       b () { console.log('b() 메소드를 호출합니다.')}
       c () { console.log('c() 메소드를 호출합니다.')}
     }

     class Child extends LifeCycle {
       a () {
         super.a()
         console.log('자식의 a() 메소드입니다.')
       }
     }

     // 인스턴스를 생성합니다.
new Child().call() - a() 메소드를 호출합니다. 자식의 a() 메소드입니다.b() 메소드를 호출합니다.c() 메소드를 호출합니다.
- 모든 클래스의 최상위 클래스는?
- object 클래스
- 10번 클래스의 toString() 메소드를 메소드 오버라이딩하는 예시를 작성하시오.
<!DOCTYPE html>
<html>
  <head>
    <title></title>
    <script>
       class Example{
        constructor(num){
          this.num = num;
        }
        toString(){
          return `당신이 입력한 숫자는 ${this.num} 입니다`;
        }
       }

      // 인스턴스를 생성합니다.
      const ex = new Example(30);
      console.log(ex.toString()); //당신이 입력한 숫자는 30 입니다
    </script>
  </head>
  <body>
  </body>
</html>
Jquery
모질라 사의 자바스크립트 개발자였던 존 레식(John Resig)이 자바스크립트를 이용해 만든 라이브러리 언어 >> javascript로 만들어진 다양한 함수들의 집합
연동하기
-
제이쿼리 다운로드 : https://jquery.com/download/
- 원하는 라이브러리 파일을 저장해서 script src ="저장한 경로" /script로 넣어주면 된다.
-
cdn 방식 : https://code.jquery.com/
- 원하는 버전을 누르면 복사할 수 있는 코드가 나오고 이 코드를 그래도 html 문서에 넣으면 된다.(title아래)
<head>
<meta charset="UTF-8">
<title> 선택자 </title>
<script src="js/jquery.js"></script>
<script>
    $(function(){//html이 모두 로드된
        $("*").css("border","1px solid blue"); //전체에 css실
    });
</script>
</head>
<body>
    <h1>제이쿼리</h1>
    <h2>선택자</h2>
    <h3>직접 선택자</h3>
</body>
아이디 선택자
-
$("#아이디명")<head> <meta charset="UTF-8"> <title> 선택자 </title> <script src="js/jquery.js"></script> <script> $(function(){ $("#tit").css("background-color","#ff0") .css("border", "2px solid #f00"); }); </script> </head> <body> <h1>제이쿼리</h1> <h2 id="tit">선택자</h2> <h3>직접 선택자</h3> </body>
클래스 선택자 및 체이닝 기법
-
$(".클래스명")<head> <meta charset="UTF-8"> <title> 선택자 </title> <script src="js/jquery.js"></script> <script> $(function(){ $(".tit").css("background-color","#ff0") .css("border", "2px dashed #f00"); }); </script> </head> <body> <h1>제이쿼리</h1> <h2 class="tit">선택자</h2> <h3>직접 선택자</h3> </body>
태그 선택자
-
$("요소명")<head> <meta charset="UTF-8"> <title> 선택자 </title> <script src="js/jquery.js"></script> <script> $(function(){ $("h2").css("background-color","#0ff") .css("border", "2px dashed #f00"); }); </script> </head> <body> <h1>제이쿼리</h1> <h2>선택자</h2> <h3>직접 선택자</h3> </body>
그룹 선택자
- 한 번에 여러 개의 요소를 선택할 때 사용 >> 컴마를 통해
$("요소선택1, 요소선택2, 요소선택3,...요소선택n");
<!DOCTYPE html>
<html lang="ko">
<head>
<meta charset="UTF-8">
<title> 선택자 </title>
<script src="js/jquery.js"></script>
<script>
    $(function(){
        $("h1, #tit3").css("background-color","#0ff")
        .css("border", "2px dashed #f00");
    });
</script>
</head>
<body>
    <h1>제이쿼리</h1>
    <h2>선택자</h2>
    <h3 id="tit3">직접 선택자</h3>
    <h3>인접 선택자</h3>
</body>
</html>
종속 선택자
- 선택한 요소의 id 또는 class 값이 일치하는 요소를 선택할 때 사용
$("요소명#id값")/$("요소명.class값")- 종속 선택자는 요소명과 id 값 사이에 공백이 없지만 하위 선택자는 공백이 있다.
<!DOCTYPE html>
<html lang="ko">
<head>
<meta charset="UTF-8">
<title> 선택자 </title>
<script src="js/jquery.js"></script>
<script>
    $(function(){ //css를 하나씩 주는 방법 > 메소드 체이닝 형태
        $("h1.tit").css("background-color","#0ff") //h1태그에 클래스가 tit인
        .css("border", "2px dashed #f00");
    });
</script>
</head>
<body>
    <h1 class="tit">제이쿼리</h1>
    <h2>선택자</h2>
    <h3 class="tit">직접 선택자</h3>
</body>
</html>
인접 관계 연산자, 부모 요소 선택자
- 인접 관계 선택자 : 직접 선택자로 요소를 먼저 선택하고 그 다음 선택한 요소와 가까이에 있는(이전과 다음 요소)요소를 선택할 때 사용
- 부모 요소 선택자 : 선택한 요소를 감싸고 있는 부모 요소를 선택
$("요소 선택").parent();
<!DOCTYPE html>
<html lang="ko">
<head>
<meta charset="UTF-8">
<title> 선택자 </title>
<script src="js/jquery.js"></script>
<script>
    $(function(){
        $("#list_1").parent() //class가 list_1인 부모 요소를 선택
        .css("border", "2px dashed #f00");
    });
</script>
</head>
<body>
    <h1>인접 관계 선택자</h1>
    <ul id="wrap">
        <li>리스트1
            <ul>
                <li id="list_1">리스트1-1</li>
                <li>리스트1-2</li>
            </ul>
        </li>
        <li>리스트2</li>
        <li>리스트3</li>
    </ul>
</body>
</html>
하위 요소 선택자 == 후손
- 기준 요소로 선택한 하위 요소만 선택
$("기준요소선택1 요소선택2")
<!DOCTYPE html>
<html lang="ko">
<head>
<meta charset="UTF-8">
<title> 선택자 </title>
<script src="js/jquery.js"></script>
<script>
    $(function(){
        $("#wrap  h1")//후손
        .css({ //css를 객체 형태로 주는 방법도 있다. 이게 더 편리하긴 할듯
            "background-color":"yellow",
            "border":"2px dashed #f00"
        });
    });
</script>
</head>
<body>
    <div id="wrap">
        <h1>인접 관계 선택자</h1>
        <p>내용1</p>
        <section>
            <h1>하위 요소 선택자</h1>
            <p>내용2</p>
        </section>
    </div>
</body>
</html>
자식 요소 선택자
$("요소선택 > 자식요소선택")$("요소선택").children("자식요소선택")>> 1번, 2번 모두 선택한 요소를 기준으로 지정한 자식 요소만 선택$("요소선택").children()>> 선택한 요소를 기준으로 모든 자식 요소를 선택
<!DOCTYPE html>
<html lang="ko">
<head>
<meta charset="UTF-8">
<title> 선택자 </title>
<script src="js/jquery.js"></script>
<script>
    $(function(){
        $("#wrap > h1").css("border","2px dashed #f00");

        $("#wrap > section").children( )
        .css({
            "background-color":"yellow",
            "border":"2px solid #f00"
        });
    });
</script>
</head>
<body>
    <div id="wrap">
        <h1>인접 관계 선택자</h1>
        <p>내용1</p>
        <section>
            <h1>자식 요소 선택자</h1>
            <p>내용2</p>
        </section>
    </div>
</body>
</html>
형(이전) / 동생(다음)요소 선택자
- 형 요소 선택자 : 선택한 요소를 기준으로 바로 이전 형제 요소만 선택
- 동생 요소 선택자 : 선택한 요소를 기준으로 바로 다음 형제 요소만 선택
$("요소선택").prev(): 선택한 요소를 기준으로 이전에 오는 형제 요소만 선택$("요소선택").next(): 선택한 요소를 기준으로 다음에 오는 형제 요소만 선택$("요소선택1 + 요소선택2"): 선택한 요소를(요소선택1) 기준으로 바로 다음에 오는 선택한 요소(요소선택2)만 선택
<!DOCTYPE html>
<html lang="ko">
<head>
<meta charset="UTF-8">
<title> 선택자 </title>
<script src="js/jquery.js"></script>
<script>
    $(function(){
        var style_1 = {
            "background-color":"#0ff",
            "border":"2px solid #f00"
        }
        var style_2 = {
            "background-color":"#ff0",
            "border":"2px dashed #f00"
        }

        $(".txt").prev()
        .css(style_1);

        $(".txt + p").css(style_2);

        $(".txt").next().next()
        .css(style_2);
    });
</script>
</head>
<body>
    <div id="wrap">
        <h1>인접 관계 선택자</h1>
        <p>내용1</p>
        <p class="txt">내용2</p>
        <p>내용3</p>
        <p>내용4</p>
    </div>
</body>
</html>
전체 형(이전) / 동생(다음)요소 선택자
- 전체 형 요소 선택자 : 선택한 요소를 기준으로 이전에 오는 전체 형제 요소를 선택
$("요소선택").prevAll()
- 전체 동생 요소 선택자 : 선택한 요소를 기준으로 다음에 오는 전체 형제 요소를 선택
$("요소선택").nextAll()
<!DOCTYPE html>
<html lang="ko">
<head>
<meta charset="UTF-8">
<title> 선택자 </title>
<script src="js/jquery.js"></script>
<script>
    $(function(){
        var style_1 = {
            "background-color":"#0ff",
            "border":"2px solid #f00"
        }
        var style_2 = {
            "background-color":"#ff0",
            "border":"2px dashed #f00"
        }

        $(".txt").prevAll( )
        .css(style_1);

        $(".txt").nextAll( )
        .css(style_2);
    });
</script>
</head>
<body>
    <div id="wrap">
        <h1>인접 관계 선택자</h1>
        <p>내용1</p>
        <p class="txt">내용2</p>
        <p>내용3</p>
        <p>내용4</p>
    </div>
</body>
</html>
전체 형제 요소 선택자
- 선택한 요소의 모든 형제 요소를 선택
$("요소선택").siblings();
<!DOCTYPE html>
<html lang="ko">
<head>
<meta charset="UTF-8">
<title> 선택자 </title>
<script src="js/jquery.js"></script>
<script>
    $(function(){
        var style_1 = {
            "background-color":"#0ff",
            "border":"2px solid #f00"
        }

        $(".txt").siblings( )
        .css(style_1);
    });
</script>
</head>
<body>
    <div id="wrap">
        <h1>인접 관계 선택자</h1>
        <p>내용1</p>
        <p class="txt">내용2</p>
        <p>내용3</p>
        <p>내용4</p>
    </div>
</body>
</html>
범위 제한 전체형/동생 요소 선택자
- 선택한 요소를 기준으로 형제 요소 중 지정한 범위 내의 전체 형 요소 또는 전체 동생 요소를 선택
$("요소선택").prevUntil("범위제한요소선택"): 선택한 요소를 기준으로 범위 제한 요소까지 전체 형 요소를 선택$("요소선택").nextUntil("범위제한요소선택"): 선택한 요소를 기준으로 범위 제한 요소까지 전체 동생 요소를 선택
<!DOCTYPE html>
<html lang="ko">
<head>
<meta charset="UTF-8">
<title> 선택자 </title>
<script src="js/jquery.js"></script>
<script>
    $(function(){
        var style_1 = {
            "background-color":"#0ff",
            "border":"2px solid #f00"
        }

        $(".txt3").prevUntil(".title")
        .css(style_1);

        $(".txt3").nextUntil(".txt6")
        .css(style_1);
    });
</script>
</head>
<body>
<div id="wrap">
    <h1 class="title">선택자</h1>
    <p>내용1</p>
    <p>내용2</p>
    <p class="txt3">내용3</p>
    <p>내용4</p>
    <p>내용5</p>
    <p class="txt6">내용6</p>
</div>
</body>
</html>
상위 요소 선택자
- 선택한 요소를 기준으로 모든 상위 요소를 선택하거나 상위 요소 중 선택하고자 하는 요소만 선택할 때 사용
$("요소선택").parents(): 선택한 요소를 기준으로 상위 요소를 모두 선택$("요소선택").parents("요소선택"): 선택한 요소를 기준으로 상위 요소 중 선택한 요소만 선택합니다.
<!DOCTYPE html>
<html lang="ko">
<head>
<meta charset="UTF-8">
<title> 선택자 </title>
<script src="js/jquery.js"></script>
<script>
    $(function(){
        $(".txt1").parents()
        .css({
            "border":"2px dashed #00f"
        });

        $(".txt2").parents("div")
        .css({
            "border":"2px solid #f00"
        });
    });
</script>
</head>
<body>
    <h1 class="title">선택자</h1>
    <section>
        <div>
            <p class="txt1">내용</p>
        </div>
    </section>
    <section>
        <div>
            <p class="txt2">내용</p>
        </div>
    </section>
</body>
</html>
가장 가까운 상위 요소 선택자
- 선택한 요소를 기준으로 가장 가까운 상위 요소만 선택할 때 사용
$("요소선택").closest("요소선택")
<!DOCTYPE html>
<html lang="ko">
<head>
<meta charset="UTF-8">
<title> 선택자 </title>

<script src="js/jquery.js"></script>
<script>
    $(function(){
        $(".txt1").closest("div")
        .css({
            "border":"2px solid #f00"
        });
    });
</script>
</head>
<body>
    <h1 class="title">선택자</h1>
    <div>
        <div> <!--이 부분 closest 해당-->
            <p class="txt1">내용</p>
        </div>
    </div>
</body>
</html>
인자값으로 css속성 값을 전달하는 방식
- 인자 값을 사용해 CSS 속성과 값을 전달하는 방식
$("요소선택").css("속성명1", "값1").css("속성명2", "값2");
- 객체를 사용해 CSS 속성과 값을 전달하는 방식
$("요소 선택").css({"속성명1" : "값1", "속성명2" : "값2" ... "속성명n":"값n"});
Jquery 문제
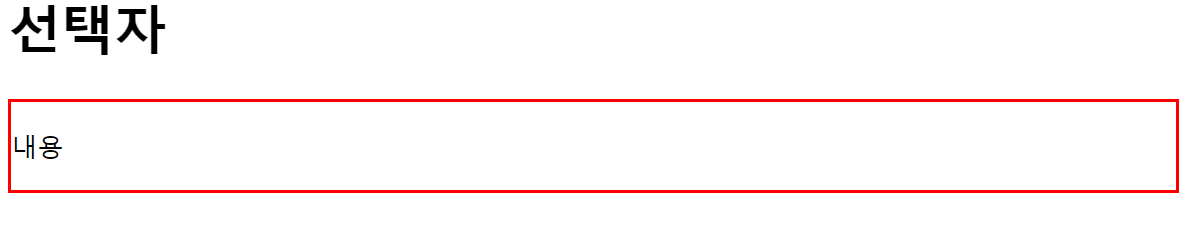
- 아이디가 txt인 것의 글자 색상을 빨간색으로
<!DOCTYPE html>
<html lang="ko"

<head>
  <meta charset="UTF-8">
  <title> 선택자 </title>
  <script src="js/jquery.js"></script>
  <script>
    $(function () {
      $("#txt").css("color", "red");
    })
  </script>
</head>

<body>
  <p id="txt">내용</p>
</body>

</html>- 전체 선택자를 이용하여 보더를 1px solid blue로 주자.
<!DOCTYPE html>
<html lang="ko">

<head>
  <meta charset="UTF-8">
  <title> 선택자 </title>
  <script src="js/jquery.js"></script>
  <script>
    $(function () {
      $("*").css("border", "1px solid blue");
    });
  </script>
</head>

<body>
  <h1>제이쿼리</h1>
  <h2>선택자</h2>
  <h3>직접 선택자</h3>
</body>

</html>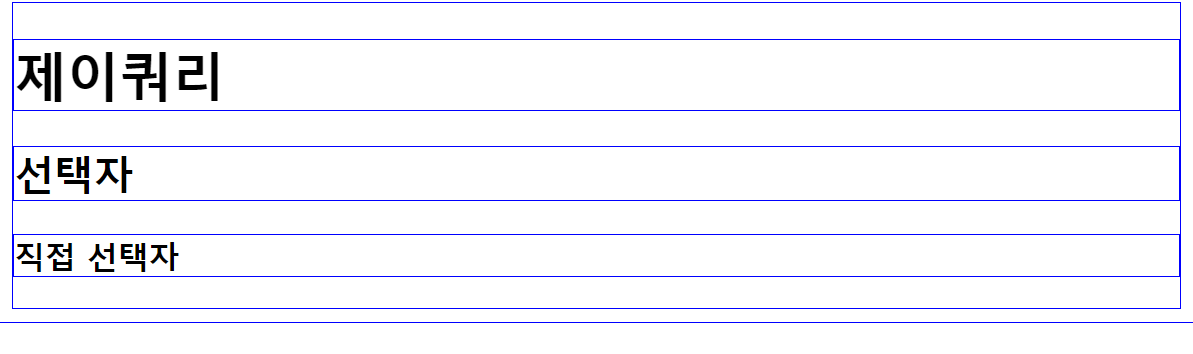
- 아이디 선택자를 이용하여 아이디가 tit인 것의 배경색을 "#ff0", border를 2px solid #f00으로 주자.
<!DOCTYPE html>
<html lang="ko">

<head>
  <meta charset="UTF-8">
  <title> 선택자 </title>
  <script src="js/jquery.js"></script>
  <script>
    $(function () {
      $("#tit").css({
        "background": "#ff0", "border": "2px solid #f00"
      });
    });
  </script>
</head>

<body>
  <h1>제이쿼리</h1>
  <h2 id="tit">선택자</h2>
  <h3>직접 선택자</h3>
</body>

</html>
- 클래스 선택자를 이용하여 클래스가 tit인 것의 배경색을 "#ff0", border를 2px dashed #f00으로 주자.
<!DOCTYPE html>
<html lang="ko">

<head>
  <meta charset="UTF-8">
  <title> 선택자 </title>
  <script src="js/jquery.js"></script>
  <script>
    $(function () {
      $(".tit").css({
        "backgroundColor": "#ff0", "border": "2px dashed #f00"
      });
    });
  </script>
</head>

<body>
  <h1>제이쿼리</h1>
  <h2 class="tit">선택자</h2>
  <h3>직접 선택자</h3>
</body>

</html>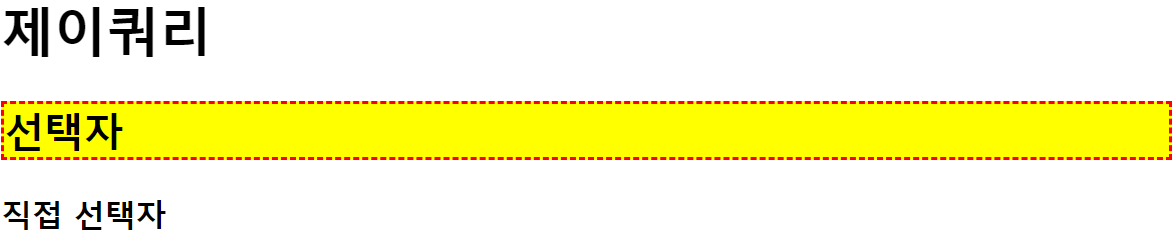
- 태그 선택자를 이용하여 h2 태그를 선택 배경색을 "#ff0", border를 2px dashed #f00으로 주자.
<!DOCTYPE html>
<html lang="ko">

<head>
  <meta charset="UTF-8">
  <title> 선택자 </title>
  <script src="js/jquery.js"></script>
  <script>
    $(function () {
      $("h2").css("background-color", "#0ff").css("border", "2px dashed #f00");
    });
  </script>
</head>

<body>
  <h1>제이쿼리</h1>
  <h2>선택자</h2>
  <h3>직접 선택자</h3>
</body>

</html>
- 태그가 h3이면서 아이디가 tit3인것의 배경색을 "#ff0", border를 2px dashed #f00으로 주자.
<!DOCTYPE html>
<html lang="ko">

<head>
  <meta charset="UTF-8">
  <title> 선택자 </title>
  <script src="js/jquery.js"></script>
  <script>
    $(function () {
      $("h3#tit3").css("background-color", "#0ff").css("border", "2px dashed #f00");
    });
  </script>
</head>

<body>
  <h1>제이쿼리</h1>
  <h2>선택자</h2>
  <h3 id="tit3">직접 선택자</h3>
  <h3>인접 선택자</h3>
</body>

</html>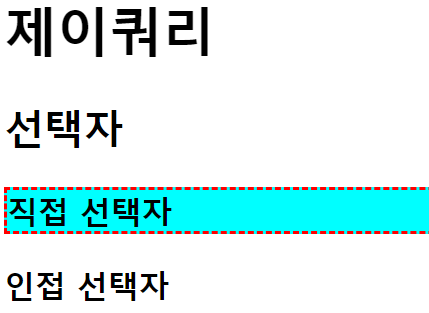
- 태그가 h3이면서 클래스가 tit인 요소의 배경색을 "#0ff", border를 2px dashed #f00으로 주자.
<!DOCTYPE html>
<html lang="ko">

<head>
  <meta charset="UTF-8">
  <title> 선택자 </title>
  <script src="js/jquery.js"></script>
  <script>
    $(function () {
      $("h3.tit").css("background-color", "#0ff").css("border", "2px dashed #f00");
    });
  </script>
</head>

<body>
  <h1 class="tit">제이쿼리</h1>
  <h2>선택자</h2>
  <h3 class="tit">직접 선택자</h3>
</body>

</html>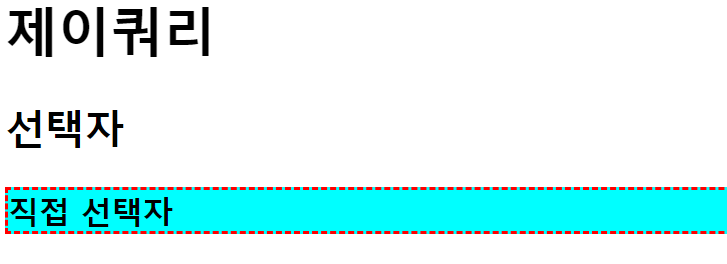
- 아이디가 list_1인 것의 부모요소에 border를 2px dashed #f00으로 주자.
<!DOCTYPE html>
<html lang="ko">

<head>
  <meta charset="UTF-8">
  <title> 선택자 </title>
  <script src="js/jquery.js"></script>
  <script>
    $(function () {
      $("#list_1").css("border", "2px dashed #f00");
    });
  </script>
</head>

<body>
  <h1>인접 관계 선택자</h1>
    <ul id="wrap">
        <li>리스트1
            <ul>
                <li id="list_1">리스트1-1</li>
                <li>리스트1-2</li>
            </ul>
        </li>
        <li>리스트2</li>
        <li>리스트3</li>
    </ul>
</body>

</html>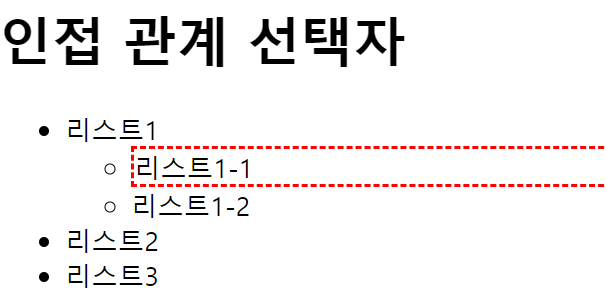
- 아이디가 wrap인 요소의 후손 h1을 선택하여 배경색을 노랑색으로 border를 2px dashed #f00주자
<!DOCTYPE html>
<html lang="ko">

<head>
  <meta charset="UTF-8">
  <title> 선택자 </title>
  <script src="js/jquery.js"></script>
  <script>
    $(function () {
      $("#wrap h1").css("background-color", "yellow").css("border", "2px dashed #f00");
    });
  </script>
</head>

<body>
  <div id="wrap">
    <h1>인접 관계 선택자</h1>
    <p>내용1</p>
    <section>
      <h1>하위 요소 선택자</h1>
      <p>내용2</p>
    </section>
  </div>
</body>

</html>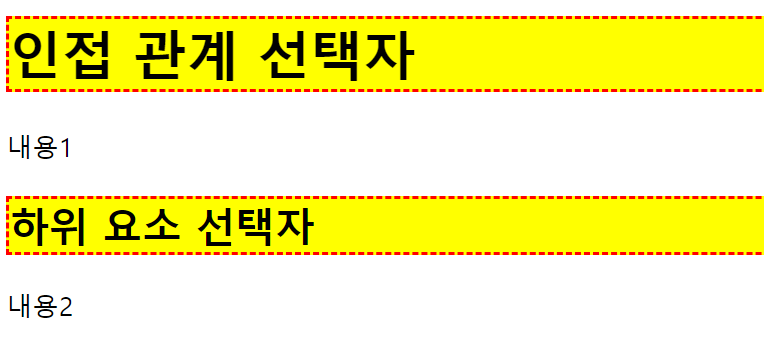
- 아이디가 wrap인 요소의 자손 h1을 선택하여 border를 2px dashed #f00주자.
아이디가 wrap인 요소의 자손 section의 자손들을 배경색 노랑색, border를 2px dashed #f00주자.
<!DOCTYPE html>
<html lang="ko">

<head>
  <meta charset="UTF-8">
  <title> 선택자 </title>
  <script src="js/jquery.js"></script>
  <script>
    $(function () {
      $("#wrap > h1").css("border", "2px dashed #f00");

      $("#wrap > section").children()
        .css({
          "background-color": "yellow",
          "border": "2px solid #f00"
        });
    });
  </script>
</head>

<body>
  <div id="wrap">
    <h1>인접 관계 선택자</h1>
    <p>내용1</p>
    <section>
      <h1>자식 요소 선택자</h1>
      <p>내용2</p>
    </section>
  </div>
</body>

</html>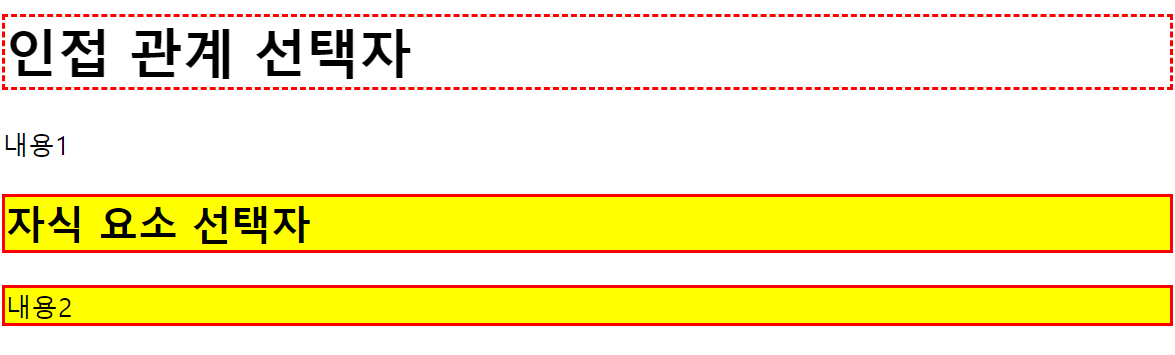
- 클래스txt의 이전 형제요소에 저장되어있는 style_1을 적용하자.
클래스txt의 다음 형제요소에 저장되어있는 style_2를 적용하자.
클래스txt의 다음 형제요소에 저장되어있는 style_2를 적용하자.(위와는 다른 방법).
클래스txt의 다음, 다음 형제 요소에 저장되어 있는 style_2를 적용하자.
<!DOCTYPE html>
<html lang="ko">

<head>
  <meta charset="UTF-8">
  <title> 선택자 </title>
  <script src="js/jquery.js"></script>
  <script>
    $(function () {
      var style_1 = {
        "background-color": "#0ff",
        "border": "2px solid #f00"
      }
      var style_2 = {
        "background-color": "#ff0",
        "border": "2px dashed #f00"
      }
      //txt 이전 형제 요소
      $(".txt").prev().css(style_1);

      //txt 다음 형제 요소
      $(".txt").next().css(style_2);
      //다른 방법
      $(".txt + p").css(style_2);

      //txt다음 다음 요소
      $(".txt").next().next().css(style_2);

    });
  </script>
</head>

<body>
  <div id="wrap">
    <h1>인접 관계 선택자</h1>
    <p>내용1</p>
    <p class="txt">내용2</p>
    <p>내용3</p>
    <p>내용4</p>
  </div>
</body>

</html>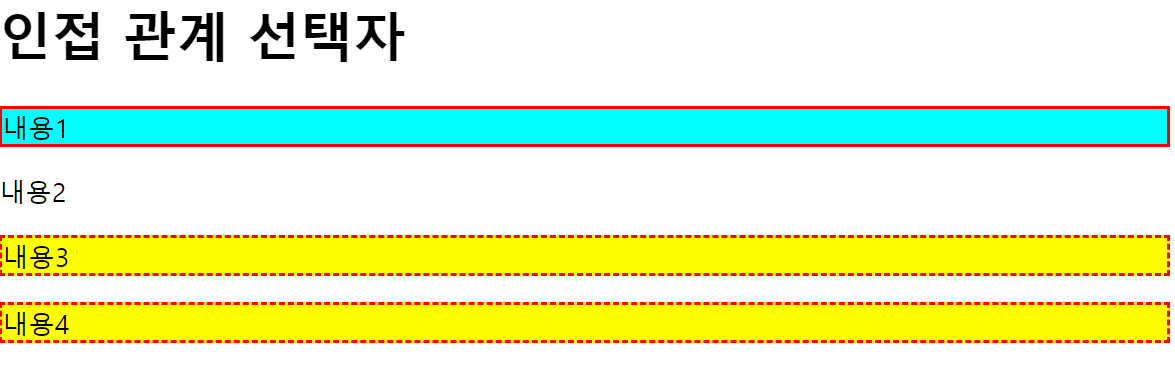
- 클래스가 txt인 것의 이전 형제요소들을 모두 선택하여 저장되어 있는 style_1을 적용하자.
클래스가 txt인 것의 다음 형제요소들을 모두 선택하여 저장되어 있는 style_2를 적용하자.
<!DOCTYPE html>
<html lang="ko">

<head>
  <meta charset="UTF-8">
  <title> 선택자 </title>
  <script src="js/jquery.js"></script>
  <script>
    $(function () {
      var style_1 = {
        "background-color": "#0ff",
        "border": "2px solid #f00"
      }
      var style_2 = {
        "background-color": "#ff0",
        "border": "2px dashed #f00"
      }
      //txt 이전 형제 요소 전체 선택
      $(".txt").prevAll().css(style_1);

      //txt 다음 형제 요소 전체 선택
      $(".txt").nextAll().css(style_2);


    });
  </script>
</head>

<body>
  <div id="wrap">
    <h1>인접 관계 선택자</h1>
    <p>내용1</p>
    <p class="txt">내용2</p>
    <p>내용3</p>
    <p>내용4</p>
  </div>
</body>

</html>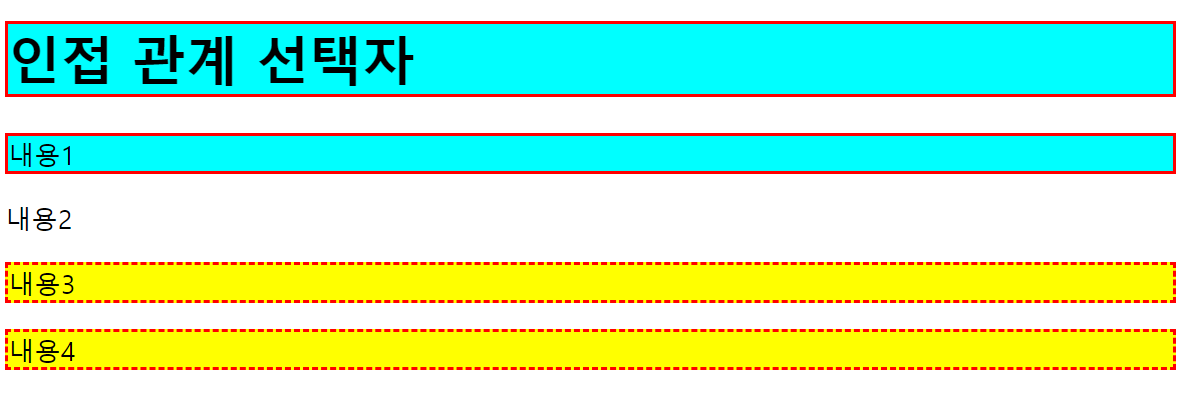
- 클래스가 txt인 요소의 모든 형제를 선택하여. css에 저장되어 있는 style_1을 적용하자.
<!DOCTYPE html>
<html lang="ko">

<head>
  <meta charset="UTF-8">
  <title> 선택자 </title>
  <script src="js/jquery.js"></script>
  <script>
    $(function () {
      var style_1 = {
        "background-color": "#0ff",
        "border": "2px solid #f00"
      }

      //txt의 모든 형제 선택
      $(".txt").siblings().css(style_1);

    });
  </script>
</head>

<body>
  <div id="wrap">
    <h1>인접 관계 선택자</h1>
    <p>내용1</p>
    <p class="txt">내용2</p>
    <p>내용3</p>
    <p>내용4</p>
  </div>
</body>

</html>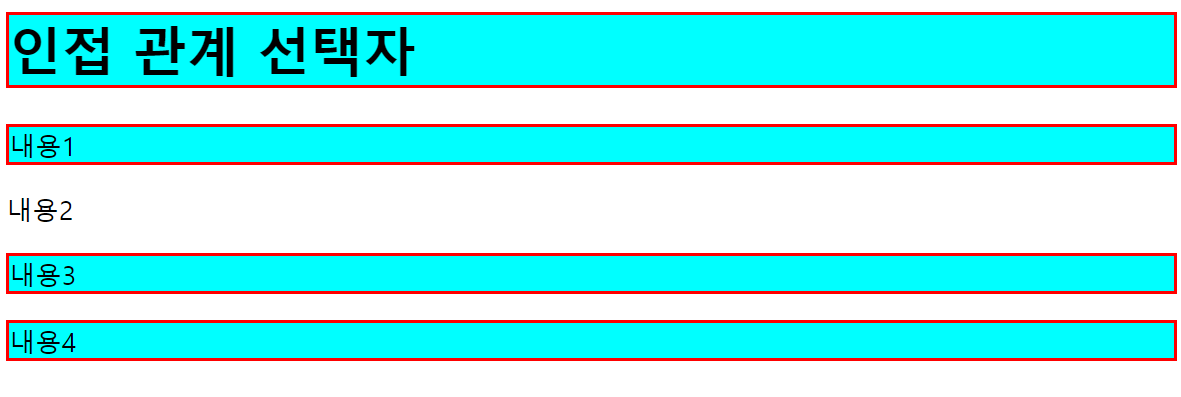
- 클래스가 txt3 이전형제들 중에 클래스 title 전까지 css에 저장된 style_1을 적용한다.
클래스가 txt3 다음형제들 중에 클래스가 txt6 전까지 css에 저장된 style_1을 적용한다.
<!DOCTYPE html>
<html lang="ko">

<head>
  <meta charset="UTF-8">
  <title> 선택자 </title>
  <script src="js/jquery.js"></script>
  <script>
    $(function () {
      var style_1 = {
        "background-color": "#0ff",
        "border": "2px solid #f00"
      }

      //txt3 이전 형제들 부터 title전 까지
      $(".txt3").prevUntil(".title").css(style_1);

      //txt3 다음 형제들부터 txt6전 까지
      $(".txt3").nextUntil(".txt6").css(style_1);

    });
  </script>
</head>

<body>
  <div id="wrap">
    <h1 class="title">선택자</h1>
    <p>내용1</p>
    <p>내용2</p>
    <p class="txt3">내용3</p>
    <p>내용4</p>
    <p>내용5</p>
    <p class="txt6">내용6</p>
  </div>
</body>

</html>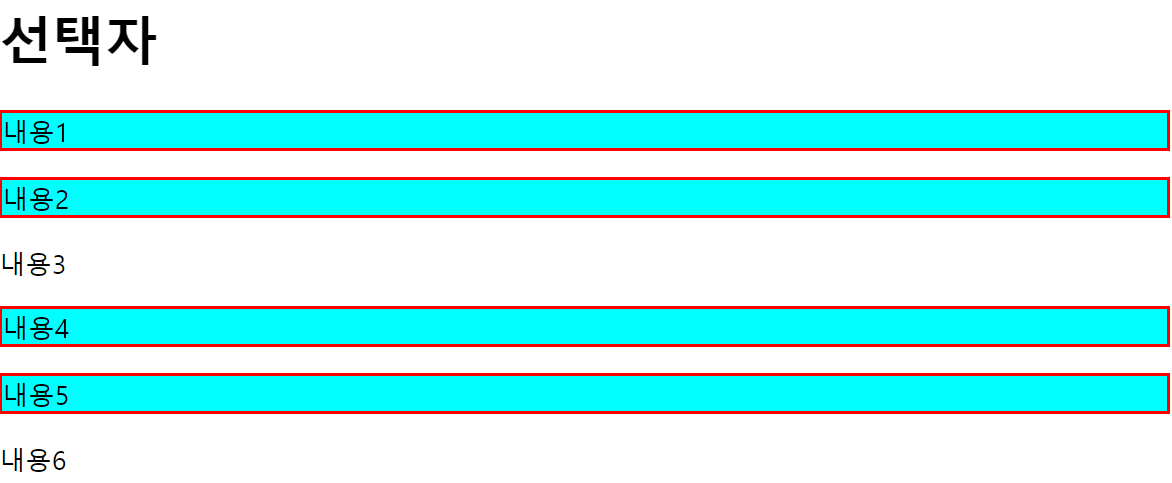
- 클래스가 txt1인 요소의 전체 상위 요소를 선택 하여 border를 2px dashed #00f로 하자.
클래스가 txt2인 요소의 상위 요소인 div를 선택 하여 border를 2px solid #f00으로 하자.
<!DOCTYPE html>
<html lang="ko">

<head>
  <meta charset="UTF-8">
  <title> 선택자 </title>
  <script src="js/jquery.js"></script>
  <script>
    $(function () {
      $(".txt1").parents().css("border", "2px dashed #00f");

      $(".txt2").parents("div").css("border", "2px solid #f00");//상위 요소중 선택한 요소만 선택

    });
  </script>
</head>

<body>
  <h1 class="title">선택자</h1>
    <section>
        <div>
            <p class="txt1">내용</p>
        </div>
    </section>
    <section>
        <div>
            <p class="txt2">내용</p>
        </div>
    </section>
</body>

</html>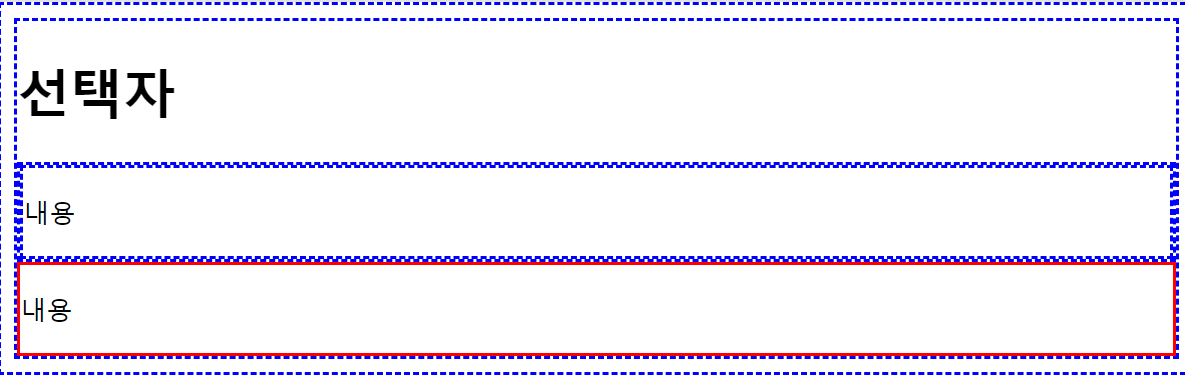
- 클래스가 txt1인 것의 가장 가까운 div를 선택 하여 border를 2px solid #f00으로 하자
<!DOCTYPE html>
<html lang="ko">

<head>
  <meta charset="UTF-8">
  <title> 선택자 </title>
  <script src="js/jquery.js"></script>
  <script>
    $(function () {
      $(".txt1").closest("div").css("border", "2px solid #f00");

    });
  </script>
</head>

<body>
  <h1 class="title">선택자</h1>
    <div>
        <div>
            <p class="txt1">내용</p>
        </div>
    </div>
</body>

</html>