결과물은 stripe2933/WpfHelper에서 확인하실 수 있습니다.
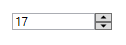
WPF에서는 WinForm과 달리 NumericUpDown이 주어지지 않습니다.
물론 텍스트 박스와 버튼을 이용하여 이를 묘사할 수 있고, 다양한 커스터마이징도 가능하지만 바인딩 처리나 유효성 검사 등 골치 아픈 부분이 존재하므로 이를 따로 뗴어 컨트롤로 만들면 확장성 측면에서도 도움이 될 것입니다.
구현 항목
Maximum,Minimum,Value,Increment등 NumericUpDown의 기본 속성- 엔터 시 바인딩 구현
- 유효성 검사를 이용하여 입력 값 범위를 벗어나거나 정수가 아닌 경우 오류 반환 및 바인딩 미수행
ValueChanged이벤트 실행- MVVM 원칙을 따름
도움이 될 만한 코드
1. EnterBindingUpdater.cs
UIElement에 엔터 키를 눌렀을 때 설정한 DP와의 바인딩을 업데이트하는 Behavior 입니다.
/// <summary>
/// Update Binding of given DependencyProperty source when enter key pressed.
/// </summary>
public class EnterBindingUpdater : DependencyObject
{
	#region DependencyProperty

	public static DependencyProperty GetBindingSource(DependencyObject obj)
	{
		return (DependencyProperty)obj.GetValue(BindingSourceProperty);
	}

	public static void SetBindingSource(DependencyObject obj, DependencyProperty value)
	{
		obj.SetValue(BindingSourceProperty, value);
	}

	public static readonly DependencyProperty BindingSourceProperty =
		DependencyProperty.RegisterAttached("BindingSource", typeof(DependencyProperty), typeof(EnterBindingUpdater), new PropertyMetadata(OnBindingSourceChanged));

	private static void OnBindingSourceChanged(DependencyObject obj, DependencyPropertyChangedEventArgs e)
	{
		if (obj is UIElement element)
		{
			if (e.OldValue != null)
			{
				element.PreviewKeyDown -= Target_PreviewKeyDown;
			}
			if (e.NewValue != null)
			{
				element.PreviewKeyDown += new KeyEventHandler(Target_PreviewKeyDown);
			}
		}
	}

	#endregion

	private static void Target_PreviewKeyDown(object sender, KeyEventArgs e)
	{
		if (e.Key == Key.Enter)
		{
			UpdateBindingSource(e.Source);
		}
	}

	private static void UpdateBindingSource(object source)
	{
		if (GetBindingSource(source as DependencyObject) is DependencyProperty property &&
			source is UIElement element &&
			BindingOperations.GetBindingExpression(element, property) is BindingExpression binding)
		{
			binding.UpdateSource();
		}
	}
}
사용례
<!-- 텍스트 박스에 포커스가 있는 상태에서 엔터 키를 누르면 Text 바인딩이 업데이트된다. -->
<TextBox Text="{Binding}" behavior:EnterBindingUpdater.BindingSource="TextBox.Text"/>
2. IntRangeRule.cs, IntRangeRuleWrapper.cs
주어진 상한, 하한에 대해 요소의 값을 평가하는 ValidationRule입니다.
만일 Maximum, Minimum이 상수로 주어질 경우에는 래퍼 클래스가 필요하지 않습니다. 지저분한 래퍼 클래스가 있는 이유는 이들을 다른 프로퍼티에 바인딩 하기 위해서이고, 클래스가 DependencyObject가 될 수 없으므로 이를 상속하는 래퍼 클래스를 만들었습니다. 반환된 ValidationResult의 메시지는 텍스트 박스의 ToolTip으로 표시됩니다.
사용례
다음과 같은 글의 답변을 보면 ToolTip 설정시 (Validation.Errors)[0].ErrorContent로 바인디앟는 경우가 많습니다. 유효성 검사에 통과했다면 인덱스 에러를 반환하므로 하기의 방법이 더 유지 보수 측면에서 좋을 것입니다.
<TextBox>
    <TextBox.Style>
        <Style TargetType="TextBox">
            <Style.Triggers>
                <Trigger Property="Validation.HasError" Value="True">
                    <Setter Property="ToolTip" Value="{Binding (Validation.Errors)/ErrorContent, RelativeSource={RelativeSource Self}}"/>
                </Trigger>
            </Style.Triggers>
        </Style>
    </TextBox.Style>

    <TextBox.Text>
        <Binding>
            <Binding.ValidationRules>
                <valid:IntRangeRule>
                    <valid:IntRangeRule.Wrapper>
                        <valid:IntRangeRuleWrapper Maximum="{Binding Maximum}" Minimum="{Binding Minimum}"/>
                    </valid:IntRangeRule.Wrapper>
                </valid:IntRangeRule>
            </Binding.ValidationRules>
        </Binding>
    </TextBox.Text>
</TextBox>
3. ConverterExtension.cs
보통 Converter를 사용하려면 Resoruce에 등록해야 하고, 이 과정이 은근히 귀찮을 때가 많습니다. ConverterExtension 클래스를 이용하여 이를 마크업 익스텐션으로 만들면 {assembly:classname}의 형식으로 바로 사용할 수 있습니다. 뿐만 아니라 Converter를 static하게 생성하여 자원 절약도 가능합니다. 원래의 코드는 [기본기] T 타입의 static 멤버는 st.. : 네이버블로그 (naver.com)를 참조하였으며, ConvertBack이 구현되지 않아 이를 추가하였습니다.
사용례
<!-- 시스템 지정 세로 방향 스크롤바의 너비를 갖는 Column 생성 -->
<ColumnDefinition Width="{Binding Source={x:Static SystemParameters.VerticalScrollBarWidth}, Converter={conv:DoubleGridLengthConverter}}"/>
4. RelayCommand.cs
일반적으로 MVVM Light Toolkit을 추가하여 사용하나, 커스텀 컨트롤이므로 직접 구현하였습니다. ConverterParameter가 있는 것과 없는 것으로 나누었습니다.
