ThreeJs+React로 마인크래프트 만들기 번역(by Daniel Bark from freeCodeCamp) - Player & input with Movement ...etc
react-threeJs-minecraft
이번에는 Player와 Player를 구성하는 1인 뷰 및 keyboard input과 관련된 처리를 하고자 한다.
먼저 src/components 경로에 Player.js라는 파일을 만들고 다음과 같이 구성하자
// src/components/Player.js
import { useEffect, useRef } from "react";
import { useFrame, useThree } from "@react-three/fiber";
import { useSphere } from "@react-three/cannon";
import { Vector3 } from "three";
export const Player = () => {
  const { camera } = useThree();
  const [ref, api] = useSphere(() => ({
    mass: 1,
    type: "Dynamic",
    position: [0, 0, 0],
  }));

  const pos = useRef([0, 0, 0]);
  useEffect(() => {
    api.position.subscribe((p) => (pos.current = p));
  }, [api.position]);
  useFrame(() => {
    camera.position.copy(
      new Vector3(pos.current[0], pos.current[1], pos.current[2])
    );
  });
  return <mesh ref={ref}></mesh>;
};
일단은 작성한 코드를 반영하기 위해서 App.js에도 Player 사항을 추가해주자
// src/App.js
import { Canvas } from "@react-three/fiber";
import { Sky } from "@react-three/drei";
import { Physics } from "@react-three/cannon";
import { Ground } from "./components/Ground";
import { Player } from "./components/Player"; // + 새로 만든 Player를 import

function App() {
  return (
    <>
      <Canvas>
        <Sky sunPosition={[100, 100, 20]} />
        <ambientLight intensity={0.5} />
        <Physics>
          <Player /> // + 물리적인 영향을 받으니 Physics 내부에 추가해준다.
          <Ground />
        </Physics>
      </Canvas>
    </>
  );
}

export default App;
본격적으로 Player에 대해 설명을 시작하면서 선언부 부터 새로운 개념을 하나씩 알아보자
먼저 우리는 @react-three/fiber에 useThree를 통해 camera라는 요소에 접근을 했다.
useThree는 기본 렌더러, 장면, 카메라 등의 상태 모델에 액세스를 지원하는 hook이다.
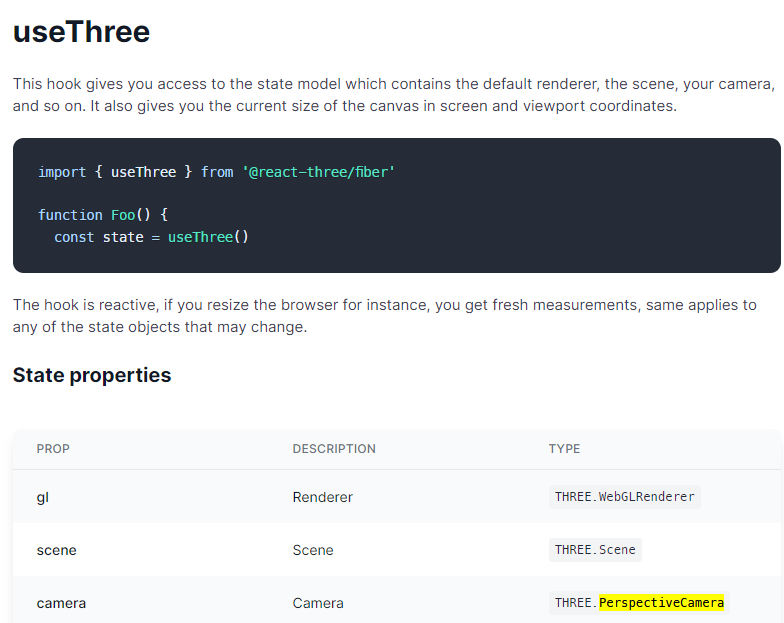
camera에 대해서는 나중에 실제 사용 부분에서 좀더 설명을 하겠다.
이제 다음 코드를 살펴보면 useSphere가 사용되었다.
threeJs에서 Sphere는 구체 혹은 입체적인 형체를 뜻한다.
다만 cannon 라이브러리에 요소이기 때문에 시각적인 요소가 아닌 물리적 계산에 관련된 개념으로 이해하면 될 것 같다.
우리는 인자값으로 mass, type, position을 준다.
mass는 질량을 의미하며 충돌 계산 또는 중력에 의한 물리적 계산에 영향을 미친다.
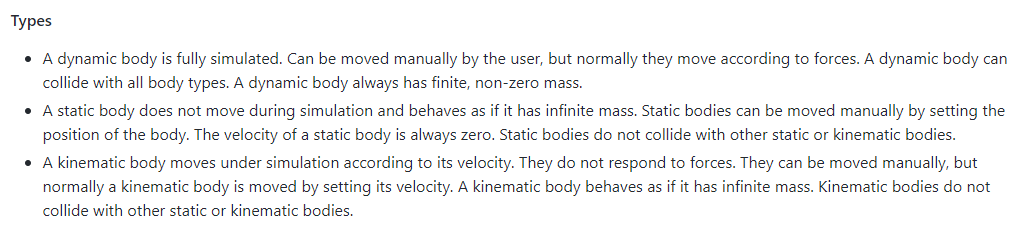
type은 공식 github FAQ에 명시되어 있으며, 우리가 준 dynamic 속성의 경우
유저의 의해 움직일 수 있으며, 0이 아닌 질량을 가진 채로 다른 요소들과 충돌이 가능하다.
즉, 사용자 input에 따라 조작 가능한 요소를 지정할때 알맞은 type이다.
우리는 시야를 위한 camera가 존재하고, 플레이어를 위한 물리적 대상(useSphere)이 존재한다.
이제 이 두가지를 결합하자
먼저 우리는 좌표를 계산하기 위해
const pos = useRef([0, 0, 0]);를 선언했다.
useEffect(() => {
api.position.subscribe((p) => (pos.current = p));
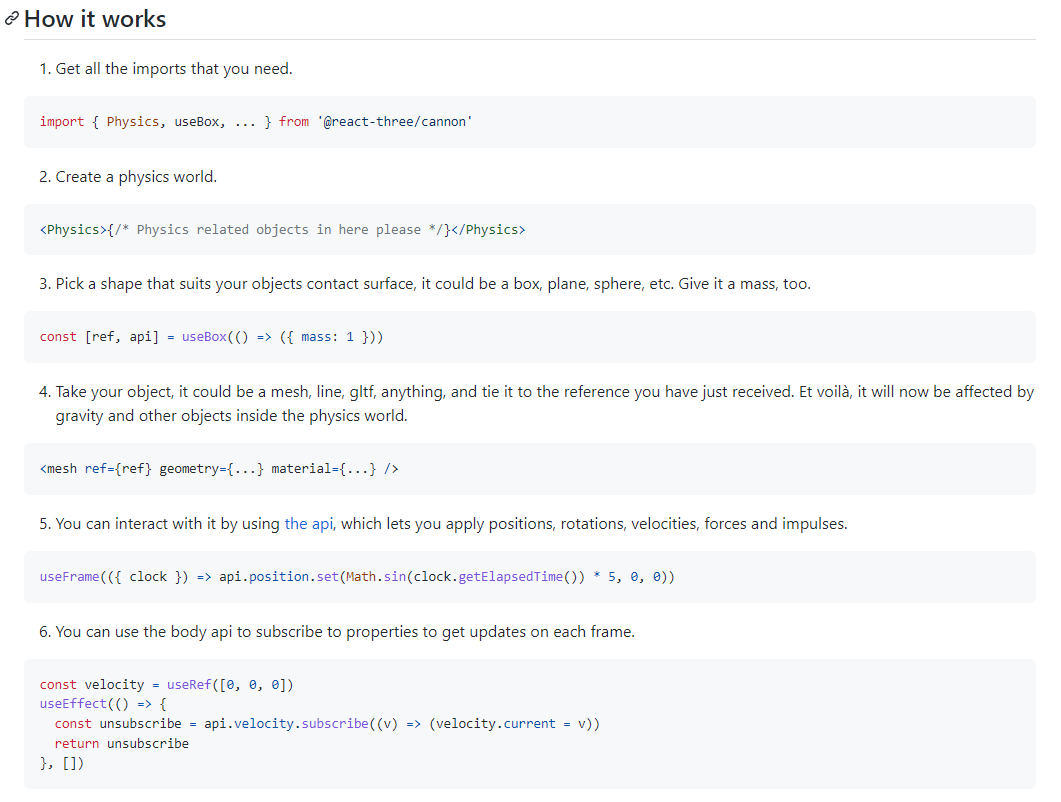
}, [api.position]);이 구문은 우리가 생성한 물리적인 Player의 위치값을 pos 변수에 지속적으로 update하기 위한 구문이다.
api 및 position, subscribe 등의 내용은 github readme를 참조하면 알 수 있다.
그 다음 코드를 살펴보자.
useFrame(() => {
  camera.position.copy(
    new Vector3(pos.current[0], pos.current[1], pos.current[2])
  );
});useFrame은 effect가 실행되거나 update가 발생하는 등의 모든 frame에 대한 렌더링이 발생하면, 내부에 코드를 실행시킨다.

우리의 예제 상으로는 렌더링이 발생하면 pos에 담긴 Player의 위치값을 camera에 position값으로 복사해준다.
즉, 우리가 Player에 대한 상호작용을 통해 위치값이 변화한다면, 우리의 시점을 Player에 위치값과 일치시켜 시야가 Player를 따라다니도록 하는 것이다.
마지막으로 물리적인 상호작용을 위해서는 실제 물체가 필요하기에 mesh를 선언하고 Player의 물리적인 상태를 ref로 연결해준다.
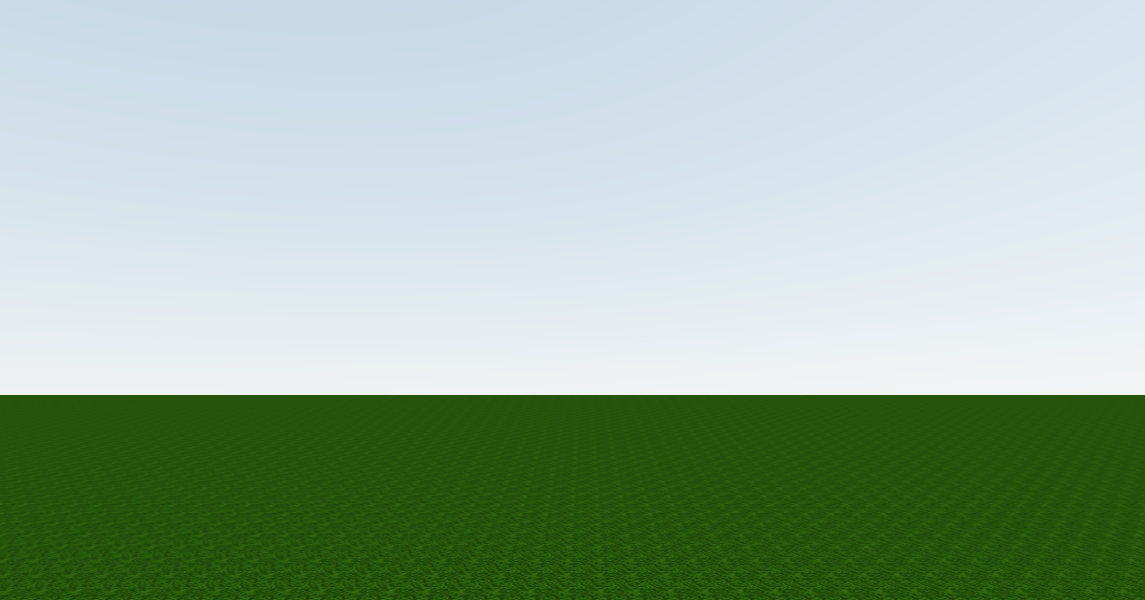
return <mesh ref={ref}></mesh>;이제 실제로 어떻게 동작하는지 실행을 해보자
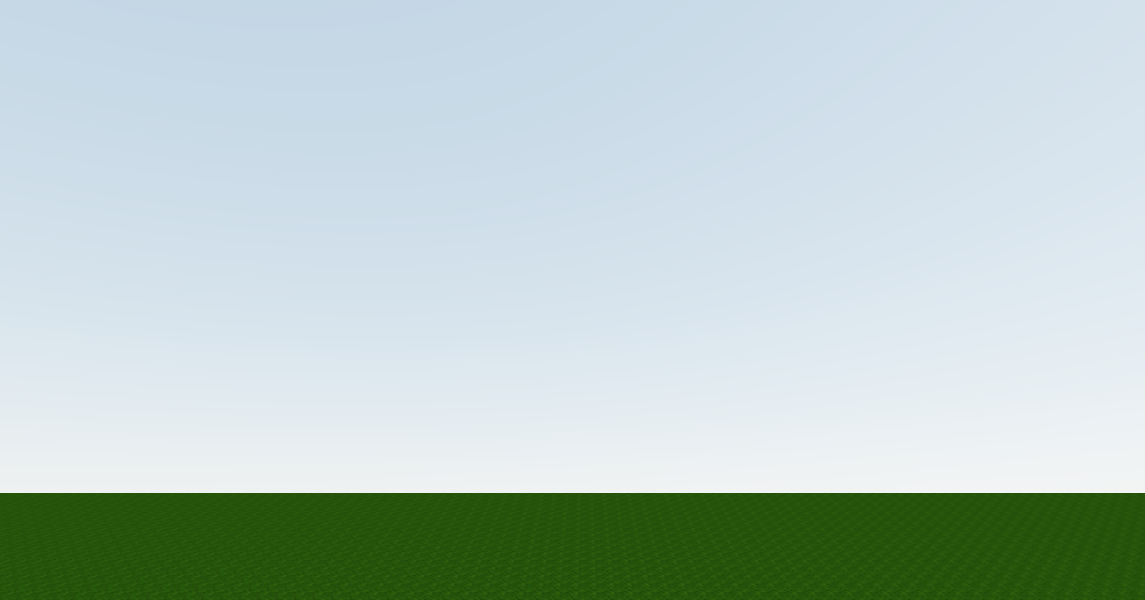
상호작용은 아직 불가능 하지만 우리는 Player를 생성했다.
처음 실행을 시켜보면 위로 튀어오르고, 다시 땅으로 내려오는 모습을 보게 될 것이다.
Player에 위치값을 0으로 설정하면서 지면과 충돌이 발생해 반발력에 의해 위로 튀어오르고, 질량(mass)에 의해서 중력에 영향으로 다시 아래로 떨어지기 때문이다.
높이에 대한 처리를 위해 Player.js를 다음과 같이 변경하자
// src/components/Player.js
import { useEffect, useRef } from "react";
import { useFrame, useThree } from "@react-three/fiber";
import { useSphere } from "@react-three/cannon";
import { Vector3 } from "three";
export const Player = () => {
  const { camera } = useThree();
  const [ref, api] = useSphere(() => ({
    mass: 1,
    type: "Dynamic",
    position: [0, 1, 0], // position에 높이에 해당되는 두번째 인자를 1로 변경
  }));

  // + 추후에 Player에 대한 Event 처리를 위해 아래에 코드를 추가하자
  const vel = useRef([0, 0, 0]);
  useEffect(() => {
    api.velocity.subscribe((v) => (vel.current = v));
  }, [api.velocity]);

  const pos = useRef([0, 0, 0]);
  useEffect(() => {
    api.position.subscribe((p) => (pos.current = p));
  }, [api.position]);

  useFrame(() => {
    camera.position.copy(
      new Vector3(pos.current[0], pos.current[1], pos.current[2])
    );
  });
  return <mesh ref={ref}></mesh>;
};
간단히 Player의 position 값을 변경해주는 것으로 튕기는 현상은 사라졌다.
새롭게 추가된 코드 중 velocity가 존재하는데, 우리가 Player에 대한 조작(이동, 점프 등) 시 그 속도를 처리하기 위한 상태값이다.
Player를 준비했으니 이제 key input 관련 상호작용을 만들어보자.
src/hooks/ 경로에 새롭게 useKeyboard.js 라는 이름의 파일을 생성하고 다음과 같이 구성하자
// src/hooks/useKeyboard.js
import { useCallback, useEffect, useState } from "react";

  // key Action 종류에 따라서 반환할 값을 Map 형태로 준비
function actionByKey(key) {
  const keyActionMap = {
    KeyW: "moveForward",
    KeyS: "moveBackward",
    KeyA: "moveLeft",
    KeyD: "moveRight",
    Space: "jump",
    Digit1: "dirt",
    Digit2: "grass",
    Digit3: "glass",
    Digit4: "wood",
    Digit5: "log",
  };
  return keyActionMap[key];
}
export const useKeyboard = () => {

 // Key 입력에 대한 상태를 관리하기 위한 State
  const [actions, setActions] = useState({
    moveForward: false,
    moveBackward: false,
    moveLeft: false,
    moveRight: false,
    jump: false,
    dirt: false,
    grass: false,
    glass: false,
    wood: false,
    log: false,
  });

  // Key 입력이 발생하면 해당 Key에 대응되는 actions에 state를 true로 변경
  const handleKeyDown = useCallback((e) => {
    const action = actionByKey(e.code);
    if (action) {
      setActions((prev) => {
        return {
          ...prev,
          [action]: true,
        };
      });
    }
  }, []);

// Key 해제가 발생하면 해당 Key에 대응되는 actions에 state를 false로 변경
  const handleKeyUp = useCallback((e) => {
    const action = actionByKey(e.code);
    if (action) {
      setActions((prev) => {
        return {
          ...prev,
          [action]: false,
        };
      });
    }
  }, []);

  // Key 이벤트를 반영
  useEffect(() => {
    document.addEventListener("keydown", handleKeyDown);
    document.addEventListener("keyup", handleKeyUp);
    return () => {
      document.removeEventListener("keydown", handleKeyDown);
      document.removeEventListener("keyup", handleKeyUp);
    };
  }, [handleKeyDown, handleKeyUp]);
  return actions;
};
이번에는 threeJs 관련된 사항은 없기 때문에 자세한 설명은 생략하겠다.
사용자의 Key 이벤트가 발생하면, 해당 Key의 종류를 판별해 사전에 명시한 keyActionMap의 값을 반환하고, 해당 값을 기준으로 actions state를 true, false를 전환한다.
즉, 특정 키가 눌리면, 해당 key에 대응되는 state를 true로 전환하고,
keyup(키가 해제) 되면 해당 key에 대응되는 state를 false로 전환한다.
사용자 input에 대한 처리가 끝났으니 실제로 해당 hook을 가져와 반영을 해보자
src/components/에 Player를 다음과 같이 수정하자
// src/components/Player.js
import { useEffect, useRef } from "react";
import { useFrame, useThree } from "@react-three/fiber";
import { useSphere } from "@react-three/cannon";
import { Vector3 } from "three";
import { useKeyboard } from "../hooks/useKeyboard"; // + 만들어 둔 hook을 추가하자
const JUMP_FORCE = 4; // + Player JUMP 발생시 적용할 힘의 값

export const Player = () => {
  const { camera } = useThree();
  const [ref, api] = useSphere(() => ({
    mass: 1,
    type: "Dynamic",
    position: [0, 1, 0],
  }));


  const vel = useRef([0, 0, 0]);
  useEffect(() => {
    api.velocity.subscribe((v) => (vel.current = v));
  }, [api.velocity]);

  const pos = useRef([0, 0, 0]);
  useEffect(() => {
    api.position.subscribe((p) => (pos.current = p));
  }, [api.position]);

  useFrame(() => {
    camera.position.copy(
      new Vector3(pos.current[0], pos.current[1], pos.current[2])
    );

    // + 가져온 actions hook에서 jump의 값이 true인 경우(key down이 발생한 경우) 실행
    if (actions.jump) {
      // Player의 속도값 중 y축의 값 즉, 높이를 JUMP_FORCE = 4 만큼 적용시킨다.
      api.velocity.set(vel.current[0], JUMP_FORCE, vel.current[2]);
    }

  });
  return <mesh ref={ref}></mesh>;
};
모든 구성이 끝났다면 적용시켜 확인해보자
space를 누르는 순간 Player가 성공적으로 점프를 한다.
다만 한가지 문제가 있다면, Space를 연타해서 누르는 만큼 점프가 멈추지 않고 계속 상위로 올라간 다는 것이다.
우리는 현재 Key input 값이 true인지만 확인하고 true라면 지속적으로 속도값이 update되기 때문이다.
연속적인 jump를 방지하기 위해 Player.js를 다시 수정해주자.
// src/components/Player.js
import { useEffect, useRef } from "react";
import { useFrame, useThree } from "@react-three/fiber";
import { useSphere } from "@react-three/cannon";
import { Vector3 } from "three";
import { useKeyboard } from "../hooks/useKeyboard";
const JUMP_FORCE = 4;

export const Player = () => {
  const actions = useKeyboard();
  const { camera } = useThree();
  const [ref, api] = useSphere(() => ({
    mass: 1,
    type: "Dynamic",
    position: [0, 1, 0],
  }));

  const vel = useRef([0, 0, 0]);
  useEffect(() => {
    api.velocity.subscribe((v) => (vel.current = v));
  }, [api.velocity]);

  const pos = useRef([0, 0, 0]);
  useEffect(() => {
    api.position.subscribe((p) => (pos.current = p));
  }, [api.position]);

  useFrame(() => {
    camera.position.copy(
      new Vector3(pos.current[0], pos.current[1], pos.current[2])
    );

    // + if 제약조건에 Math.abs(vel.current[1]) < 0.05를 추가하자
    if (actions.jump && Math.abs(vel.current[1]) < 0.05) {
      api.velocity.set(vel.current[0], JUMP_FORCE, vel.current[2]);
    }
  });
  return <mesh ref={ref}></mesh>;
};
만약 속도값이 올라가든(+) 내려가든(-) 절대값(Math.abs)을 기반으로 0.05 미만인 경우에만 JUMP_FORCE 속도값을 적용시켜준다.
물론 점프 후 상공에서 속도값이 정지하는 정확한 타이밍에 space바를 누른다면 계속 상승하겠지만 어느정도는 상쇄했다.
이제는 Player에 움직임을 적용할 차례이다.
Player.js를 다음과 같이 수정해보자
// src/components/Player.js
import { useEffect, useRef } from "react";
import { useFrame, useThree } from "@react-three/fiber";
import { useSphere } from "@react-three/cannon";
import { Vector3 } from "three";
import { useKeyboard } from "../hooks/useKeyboard";
const JUMP_FORCE = 4;
const SPEED = 4; // + 이동 SPEED를 위해 추가
export const Player = () => {
  const { moveBackward, moveForward, moveLeft, moveRight, jump } =
    useKeyboard(); // + 기존에 actions로 통칭되던 요소를 개별요소를 직접 다 가져오도록 변경
  const { camera } = useThree();
  const [ref, api] = useSphere(() => ({
    mass: 1,
    type: "Dynamic",
    position: [0, 1, 0],
  }));

  const vel = useRef([0, 0, 0]);
  useEffect(() => {
    api.velocity.subscribe((v) => (vel.current = v));
  }, [api.velocity]);

  const pos = useRef([0, 0, 0]);
  useEffect(() => {
    api.position.subscribe((p) => (pos.current = p));
  }, [api.position]);

  useFrame(() => {
    camera.position.copy(
      new Vector3(pos.current[0], pos.current[1], pos.current[2])
    );
    // + 여기서부터 새로 추가될 코드들

    const direction = new Vector3();

    // z(정면)축 기준으로 이동 계산
    // 만약 앞+뒤가 동시에 눌리면 -를 통해 값을 0으로 만들어 이동하지 않음
    const frontVector = new Vector3(
      0,
      0,
      (moveBackward ? 1 : 0) - (moveForward ? 1 : 0)
    );

    // x축 기준 이동 계산
    const sideVector = new Vector3(
      (moveLeft ? 1 : 0) - (moveRight ? 1 : 0),
      0,
      0
    );

    direction
      .subVectors(frontVector, sideVector)
      .normalize()
      .multiplyScalar(SPEED)
      .applyEuler(camera.rotation);

    // 이동 속도를 반영
    api.velocity.set(direction.x, vel.current[1], direction.z);
    // 여기까지 추가!

    // 아래 if 조건에서 기존에 actions.jump를 그냥 jump로 대체
    if (jump && Math.abs(vel.current[1]) < 0.05) {
      api.velocity.set(vel.current[0], JUMP_FORCE, vel.current[2]);
    }
  });
  return <mesh ref={ref}></mesh>;
};
새롭게 subVectors, normalize, multiplyScalar, applyEuler 등이 보인다.
하나씩 알아보도록 하자
subVectors는 2개의 Vector3(a와 b)를 인자로 받아 현재 Vector를 a-b의 Vector로 설정한다.

즉 우리는 앞뒤(frontVector) 움직임과 양옆(sideVector)를 움직임을 같이 고려해 대각선의 Vector 이동을 계산하기 위해서 사용한다.
normalize는 현재 Vector를 unit vector로 변경해준다.

Vector는 좌표를 나타내기도 하지만, 방향을 나타내기도 한다.
우린 frontVector, sideVector의 subVectors를 통해 Vector의 방향을 가지게 되었다.
unit vector는 길이가 1인 vector를 뜻하며, normalize를 통해 우리의 방향을 가진 Vector의 길이는 1이 되는 것이다.
multiplyScalar는 현재 vector에 scalar 값을 곱하는데,
vector는 크기와 방향을 가지고, scalar는 방향이 없이 크기만 가지고 있다.
이는 속도(velocity)와 속력(speed)의 차이로, 우리는 SPEED = 4 를 통해 4의 값을 넘겨줌으로, 현재 방향이 계산된 Vector에 4의 속력을 곱해주는 개념이다.
applyEuler는 Euler 객체를 Quaternion으로 변환하고 현재 Vector에 Euler 변화를 적용시킨다.
Euler, Quaternion 모두 3D 변환에서 회전을 표현하는 방식이다.
Euler 각도는 x,y,z의 3개 축을 기준으로 회전시키는 각도계를 의미한다.
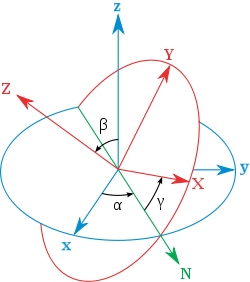
다만 회전 중 같은 방향으로 오브젝트의 두 회전 축이 겹치는 짐벌락 현상이 발생하는 문제가 존재하고, 그 한계를 보완하기 위해 벡터(x,y,z)에 스칼라(w)를 더한 Quaternion이 등장했다.
이 부분은 복잡하고 내 지식이 미흡하기에 간단히 넘어가자면, 우리가 이동을 위해 계산한 Vector에 현재 camera의 회전값을 적용시키는 것으로 이동시 회전 정보를 반영시킨다.
설명이 좀 길어졌으니 이제 실행을 해봐서 테스트를 해보자
별다른 사진은 첨부하지 않았지만, w,a,s,d를 통해서 사용자의 위치를 이동시킬 수 있을 것이다.
다만 우리가 방금 이야기한 camera의 회전값은 적용이 되지 않았는데, camera에 회전 이벤트가 존재하지 않기 때문이다.
이제 Player에 마우스기반 1인칭 뷰를 추가해보자
먼저 src/components/ 경로에 FPV.js 파일을 생성하고 다음과 같이 구성하자
// src/components/FPV.js
import { PointerLockControls } from "@react-three/drei";
import { useThree } from "@react-three/fiber";

export const FPV = () => {
  const { camera, gl } = useThree();

  return <PointerLockControls args={[camera, gl.domElement]} />;
};
또한 새로 추가된 FPV를 반영하기 위해 App.js를 열어 코드를 추가하자
// src/App.js
import { Canvas } from "@react-three/fiber";
import { Sky } from "@react-three/drei";
import { Physics } from "@react-three/cannon";
import { Ground } from "./components/Ground";
import { Player } from "./components/Player";
import { FPV } from "./components/FPV"; // + 컴포넌트 추가

function App() {
  return (
    <>
      <Canvas>
        <Sky sunPosition={[100, 100, 20]} />
        <ambientLight intensity={0.5} />
        <FPV /> // + 물리적 영향을 받는 요소가 아니기에 Physics 외부에 추가
        <Physics>
          <Player />
          <Ground />
        </Physics>
      </Canvas>
    </>
  );
}

export default App;
다시 FPV.js로 돌아가 주요 요소에 대해서 알아보자
useThree를 통해 가져온 gl은 Renderer를 참조하는 prop으로 threeJs에 WebGLRenderer type을 기반으로 한다.
추후에 PointerLockControls를 통해 인자로 넘겨지는 gl.domElemnet는 Renderer가 출력을 그리는 canvas다
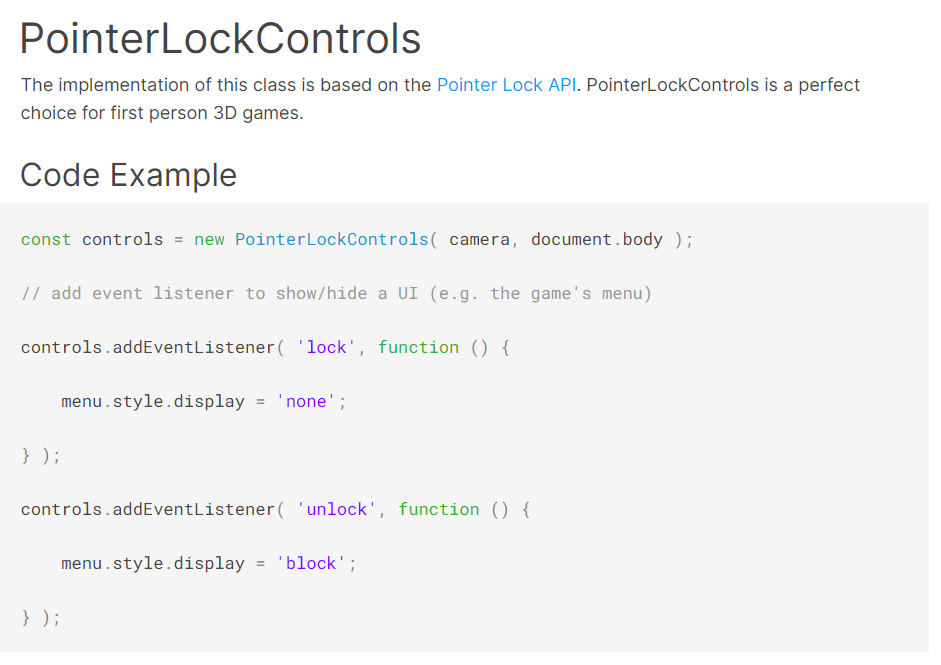
PointerLockControls은 drei에 제공되는 Control 방식 중, 마우스 포인터를 잠근채로 마우스로 컨트롤을 하는 방식이다.
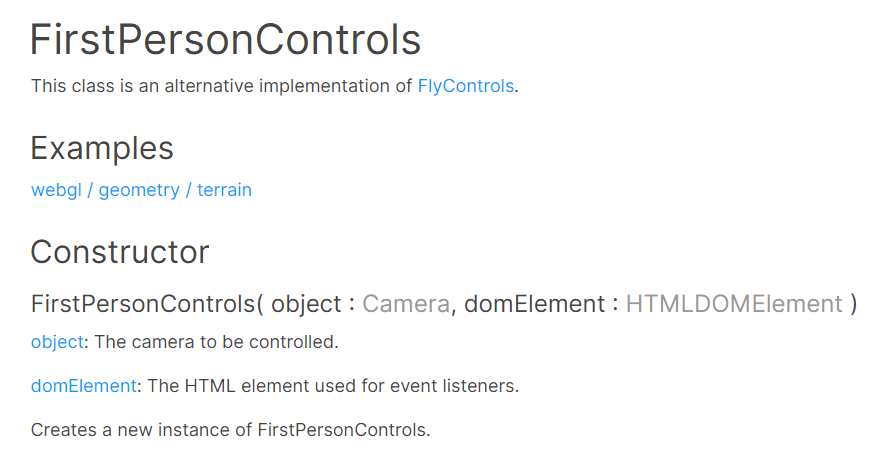
drei의 control들은 ThreeJs의 control을 참조함으로 ThreeJs의 PointerLockControls 과 FirstPersonControls 문서를 첨부하는 것으로 Props에 대한 설명을 생략하겠다.
모든 구성이 끝났다면 우리는 마우스 회전에 따라 시야가 회전하는 Player 컨트롤을 가지게 된다.
하지만 조준점이 없으면 허전하니 조준점을 간단히 추가해보자
// src/App.js
import { Canvas } from "@react-three/fiber";
import { Sky } from "@react-three/drei";
import { Physics } from "@react-three/cannon";
import { Ground } from "./components/Ground";
import { Player } from "./components/Player";
import { FPV } from "./components/FPV";

function App() {
  return (
    <>
      <Canvas>
        <Sky sunPosition={[100, 100, 20]} />
        <ambientLight intensity={0.5} />
        <FPV />
        <Physics>
          <Player />
          <Ground />
        </Physics>
      </Canvas>
      <div className="absolute centered cursor">+</div> // + 간단한 조준점을 추가하자
    </>
  );
}

export default App;
조준점에 대한 CSS를 추가해야하니
src/index.css에 가장 아래에 다음과 같은 내용을 추가하자
.centered {
  top: 50%;
  left:50%;
  transform: translate(-50%,-50%);
}
.cursor {
  color: white;
}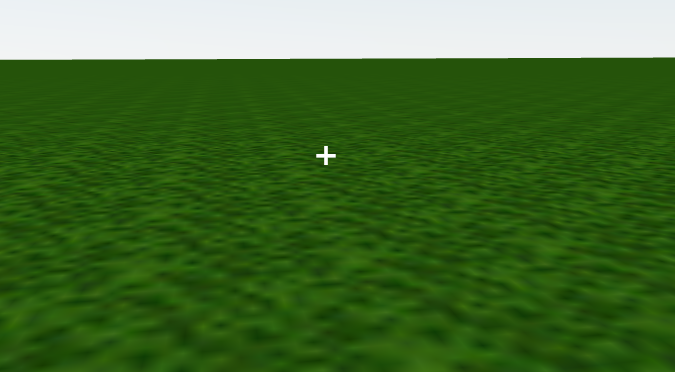
드디어 Player 구성이 끝났다.
다음번에는 실제로 마인크래프트 블럭을 설치해보자