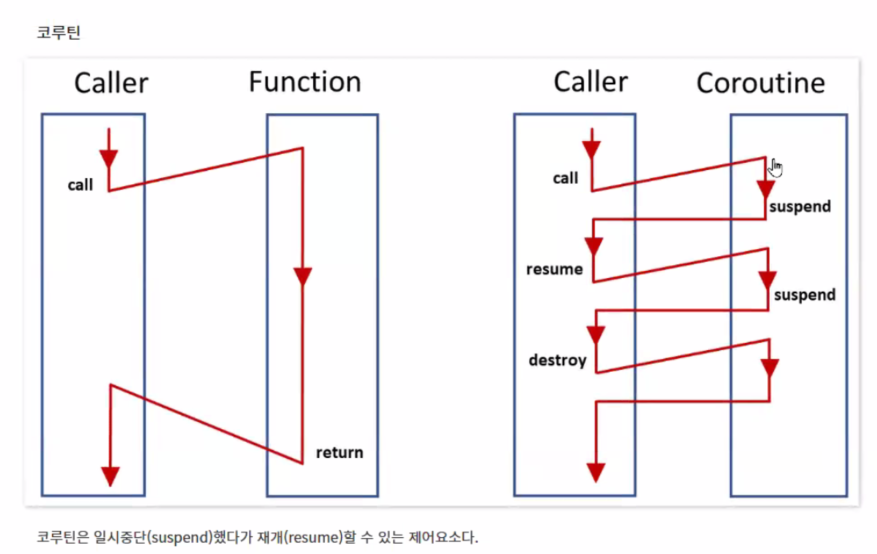
코루틴(Coroutine)
코루틴은 함수를 호출하고 난 후에 해당 함수를 전부 다 실행하지 않고 중간 중간 실행했으면 좋겠다는 생각으로 개발되었다. 우리가 지금 쓰는 함수는 중단 재개가 없는 코루틴이라고 부를 수 있다.
코루틴의 경우, 단순히 설게하면 IEnumerator 객체와 WaitForSeconds 객체가 계속 생성되기 때문에 메모리 낭비가 발생하기 때문에 최적화하는 별도의 과정도 구현해주어야 한다.
IEnumrator변수 선언후에 IEnumrator를 연결해 준 후에 해당 변수로StartCoroutine(변수명)하기WaitForSecnods(n)을 변수에 담아서 이 변수로yield return 변수명해주기

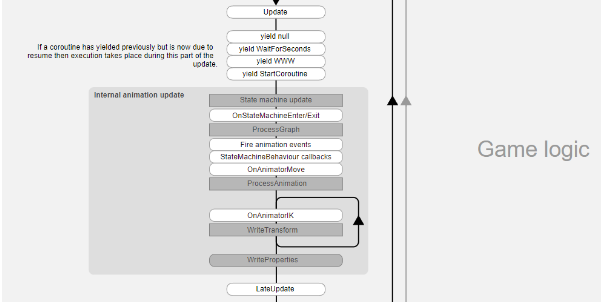
코루틴은 Update 문 다음에 실행된다.
Start를 코루틴으로 만들 수도 있다.
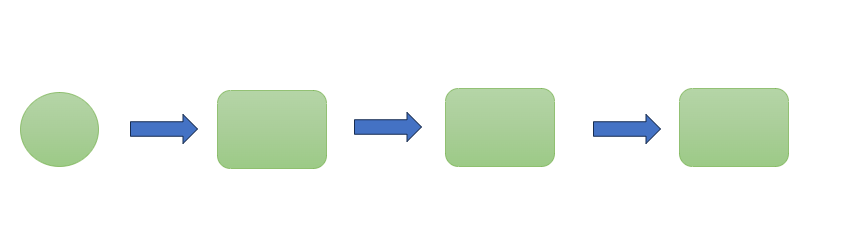
코루틴은 말했다시피 중간중간 멈추면서 실행된다. 그렇기 때문에 한 번 실행된 코드는 다시 실행되지 않는다. 즉, 다시 위에 있는 구문부터 실행하게 만들고 싶으면, 다시 위로 올라갈 수 있도록 로직을 만들어야 한다. 코루틴 함수 내부에 while문을 만들어서 이런 문제를 해결한다.
코루틴에 대해 이해하기 위해 동기와 비동기의 개념을 알아야 한다.
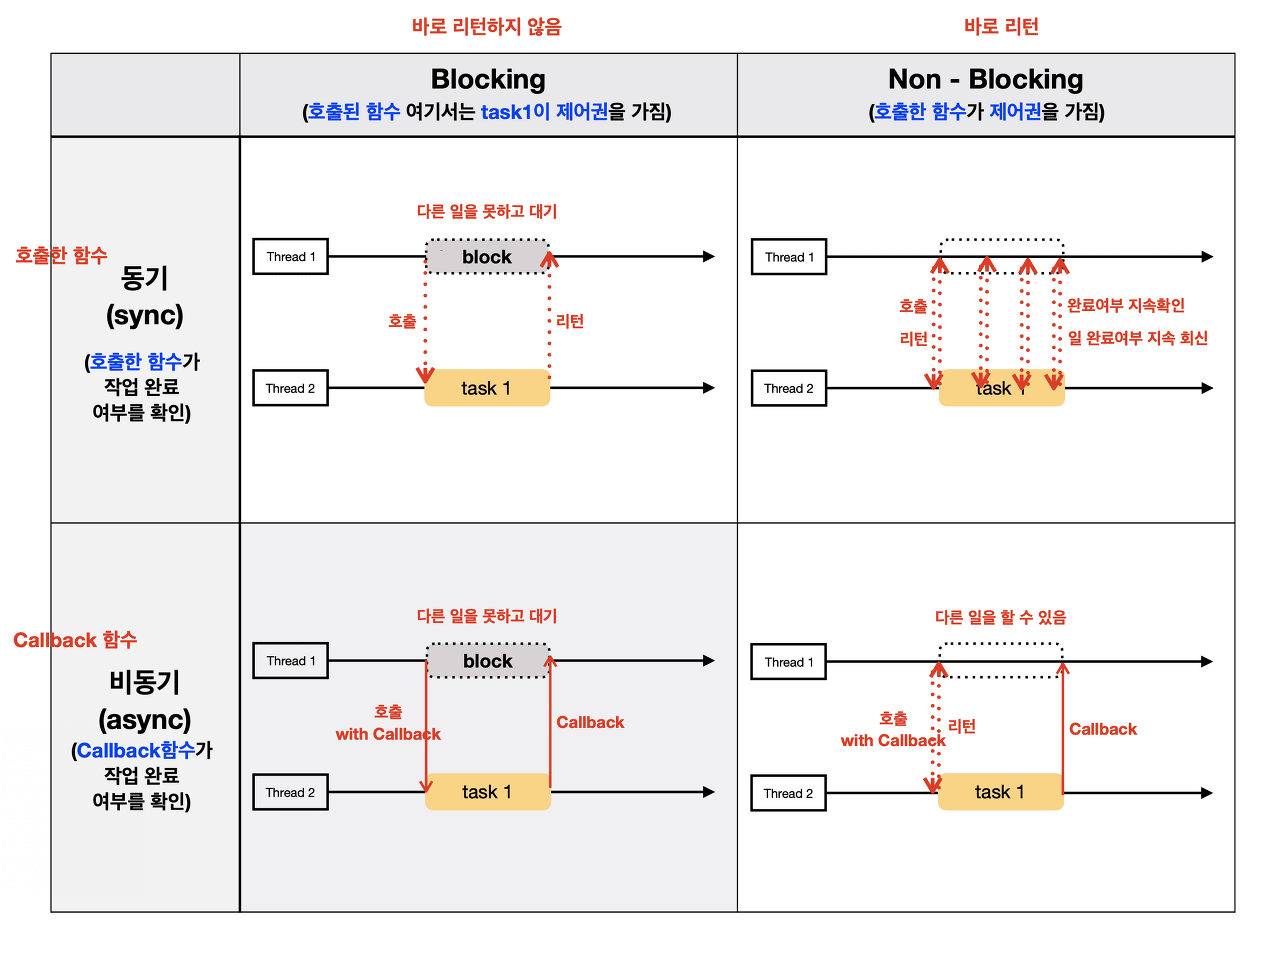
동기
- 함수가 자신의 코드를 다 수행할 때 까지는 다음 코드를 진행하지 않는다.
- 즉, 반환 시점과 완료 시점이 같다.
- 작업의 완료 시점과 함수 호출이 끝난 시점이 같은 것
- 우리가 흔히 함수를 호출하는 방식을 생각하면 된다. - 코루틴은 동기적으로 작업이 실행된다.
비동기
- 함수가 끝났는지 끝나지 않았는지 모른다.
- 함수의 시점이 동일하지 않다. 즉, 반환 시점과 완료 시점이 다르다.
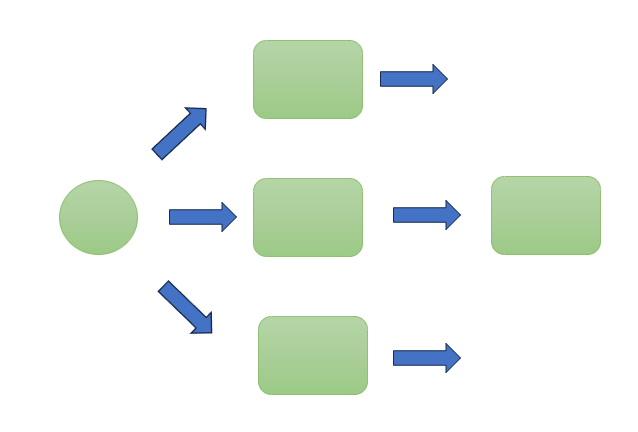
- 멀티 스레드는 비동기식으로 진행된다. 비동기는 병렬적으로 진행된다.
이 외에도 선점형, 비선점형, Async, Await에 대해 다룬 문서가 있어서 참고하면 좋다.
다시 한 번 말하지만 중요한 것은 코루틴은 동기적으로 실행된다는 것이다.
유니태스크(UniTask)
유니티에서는 비동기 방식을 지원하지 않기 때문에, 대부분 개발 과정에서 코루틴으로 다 해결하도록 만들었다. 코루틴에 단점은 위에서 언급했듯이 가비지 생성, 메모리 낭비가 중요한다. 그래서 등장한 것이 바로 UniTask이다.
Cysharp라는 일본의 회사에서 만들었다.
UniTask 는 유니티용 async-await 통합 패키지이다. C#의 Task, async-await 를 유니티에 맞게 더 최적화 하고, 유니티에서 사용하기 편하도록 더 많은 기능을 추가한 느낌이라고 생각하면 된다. 근데 C#의 Task가 아니라 굳이 UniTask를 쓰는 이유는 뭘까? 아래 UniTask 개발자의 설명을 보면 알 수 있다.
UniTask 개발자는 UniTask를 이렇게 요약 설명 하고 있다.
- UniTask\는 struct base이다. 즉, heap에 할당되지 않으므로 zero allocation이라는 말이 됩니다.(C#의 기본 Task는 class로 되어있습니다. 개발자는, 기본 비동기 Task보다 UniTask가 더 가볍다고 설명한다.)
- 유니티의 AsyncOperations (어드레서블 async같은) 작업이나 코루틴 작업을 await으로 대기할 수 있다.
- 유니티 메인 쓰레드(Player Loop) 기반으로 작업하여 코루틴을 대체할 수 있다. (UniTask.Yield, UniTask.Delay, UniTask.DelayFrame)
- 모노비헤이어 메시지, 이벤트, ugui의 메세지 이벤트를 대기하거나 비동기 열거가 가능하다.
- 유니티 메인 쓰레드(플레이어 루프)에서 실행되므로 WebGL/WASM 등에서도 사용할 수 있다.
- Asynchronous LINQ, with Channel and Async ReactiveProperty
- 메모리 누수를 방지하기 위한 task tracker를 제공한다.
이처럼 많은 장점들이 있는데 제일 중요한 점은 UniTask의 경우 Zero Allocation이라서 가비지 부담이 적다라는 점이다.
Zerro Allocation?
코루틴은 메모리 할당을 필요로 한다.** 예를 들어yield return new WaitForSeconds(0.1f);에서는 0.1초마다 메모리 할당이 발생한다. 하지만 UniTask는 메모리 할당이 발생하지 않는다!
또한 비동기 작업을 사용하기 위해 필요하다!
무거운 작업(씬 로드, 맵 로드 등, 등)을 해야 하는데 실시간 성을 확보하고 싶을 때 사용한다. 실제로 게임을 할 때 씬이 넘어갈 때 로딩 바나 로딩 아이콘이 있는 경우가 있는데 이럴 때 일회용 스레드를 생성하고 그 스레드 안에서 맵을 불러오는 등의 작업을 수행한다. 이런 스레드를 만든느 작업을 편하게 도와주는 것이 Task이며 async와 await은 Task와 함께 사용하는 키워드이다.
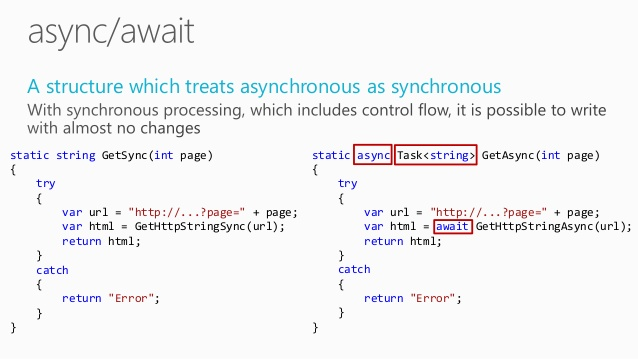
Async-Await?
아까부터 await-async라는 단어가 계속해서 등장하는데 이게 뭐지?
async는 비동기식의 줄임말로 메서드 앞에 async라고 지정해주면 비동기 함수로 만들어 줄 수 있다. 그 함수 내부에는 await이 반드시 있어야 하는데 await은 작업을 기다린다는 의미로 await 뒤에 따라오는 함수나 코드가 끝날 때까지 그 시점에서 정지된다.
Points
0. UniTask vs UniTaskVoid
UniTaskVoid는 호출한 후 다음 코드로 넘어가고, UniTask는 비동기 작업을 호출하도 비동기 작업이 끝날 때까지 기다린다.
public async UniTaskVoid FireAndForget()
{
    await UniTask.Delay(TimeSpan.FromSeconds(2));
    Debug.Log("Fire and forget task completed");
}

public void StartOperation()
{
    FireAndForget().Forget();
    Debug.Log("Started fire and forget task, not waiting for it");
}
FireAndForget 비동기를 호출하면"Started fire and forget task, not waiting for it" Log가 바로 출력된다.
public async UniTask Fire()
{
    await UniTask.Delay(TimeSpan.FromSeconds(2));

    Debug.Log("Fire and forget task completed");
}

public async void StartOperation()
{
    await Fire();
    Debug.Log("Started fire and forget task, not waiting for it");
}
Fire 비동기를 호출하고 2초 대기 후, "Fire and forget task completed", "Started fire and forget task, not waiting for it" Log가 순차적으로 출력됩니다.
1. Task 중단 (CancellationTokenSource)
private CancellationTokenSource cancel = new CancellationTokenSource();

private void Update()
{
    if (~~)
    {
        cancel.Cancel();
    }
}

async UniTaskVoid UniWait()
{
    await UniTask.Delay(TimeSpan.FromSeconds(3), cancellationToken: cancel.Token);
}
만약 특정 조건이 만족될 때까지 실행되는 while문의 경우 CancellationToken이 Cancel 될 때 while문을 종료해 주는 로직을 따로 작성해주어야 한다.
private async UniTask WaitUntilInitializedAsync(CancellationToken cancellationToken)
{
     while (true)
     {
          if (cancellationToken.IsCancellationRequested)
          {
              break;
          }

          /~

          ~/

          await UniTask.Delay(100, ignoreTimeScale:true, cancellationToken: cancellationToken);
     }
}IsCancellationRequested은 CancellationToken이 취소 요청을 받았는지 여부를 나타낸다. CancellationToken의 Cancel 메서드가 호출되면 IsCancellationRequested이 true로 설정된다.
2. 별도의 스레드에서 비동기 실행
using Cysharp.Threading.Tasks;
using UnityEngine;

public class UniTaskRunExample : MonoBehaviour
{
    private async UniTaskVoid Start()
    {
        int result = await UniTask.Run(() => Compute());
    }

    private int Compute()
    {
        int sum = 0;
        for (int i = 0; i < 1000000; i++)
        {
            sum += i;
        }
        return sum;
    }
}
UniTask.Run을 이용해서 동기식 코드를 스레드풀에서 비동기식으로 실행시킬 수 있다.
메인 스레드가 멈추는 것을 방지하기 위해 백그라운드 스레드에서 실행하려는 CPU 바운드 작업이 있을 때 유용하다.
3. Error-Handling
using Cysharp.Threading.Tasks;
using UnityEngine;

public class ErrorHandlingExample : MonoBehaviour
{
    private async UniTaskVoid Start()
    {
        try
        {
            await UniTask.Run(() => ThrowException());
        }
        catch (System.Exception e)
        {
            Debug.LogError(e.Message);
        }
    }

    private void ThrowException()
    {
        throw new System.Exception("An error occurred!");
    }
}
4. Time Out Handling
var cancel = new CancellationTokenSource();
cancel.CancelAfterSlim(TimeSpan.FromSeconds(5));

try
{
    await UnityWebRequest.Get("http://~~").SendWebRequest().WithCancellation(cancel.Token);
}
catch (OperationCanceledException ex)
{
    if (ex.CancellationToken == cancel.Token)
    {
        Debug.Log("Timeout");
    }
}
5초 기다리는 동안 Task를 성공적으로 마무리하지 못하면 예외처리 하는 로직
5. Frame 대기
// replacement of yield return null
await UniTask.Yield();
await UniTask.NextFrame();
// replacement of WaitForEndOfFrame(requires MonoBehaviour(CoroutineRunner))
await UniTask.WaitForEndOfFrame(this)6. 오브젝트가 파괴될 때 UniTask 취소
var token = this.GetCancellationTokenOnDestroy();
await UniTask.Delay(1000, cancellationToken: token);
GetCancellationTokenOnDestroy 함수는 UniTask 라이브러리의 일부로 제공되며, GameObject나 Component가 파괴될 때 발생하는 취소 토큰을 가져온다. 이 함수를 사용하면 GameObject나 Component가 파괴된 시점에 UniTask를 취소할 수 있다.
위 코드를 예시로 들면, UniTask.Delay는 1초 후에 완료되도록 예정되어 있지만, 해당 GameObject가 그전에 파괴되면 UniTask는 취소된다.
How To Use UniTask!
사용 방법도 굉장히 쉬운데, await-async에 대한 개념에 대해서 어느정도 이해만 한다면 API를 확인해보고 필요한 것들만 가져가서 사용할 수 있다.
UniTask Import
Package Manager > Add package from git URL... > 링크
링크는 공식 깃허브 링크의 Install via git URL에 공개되어 있다.
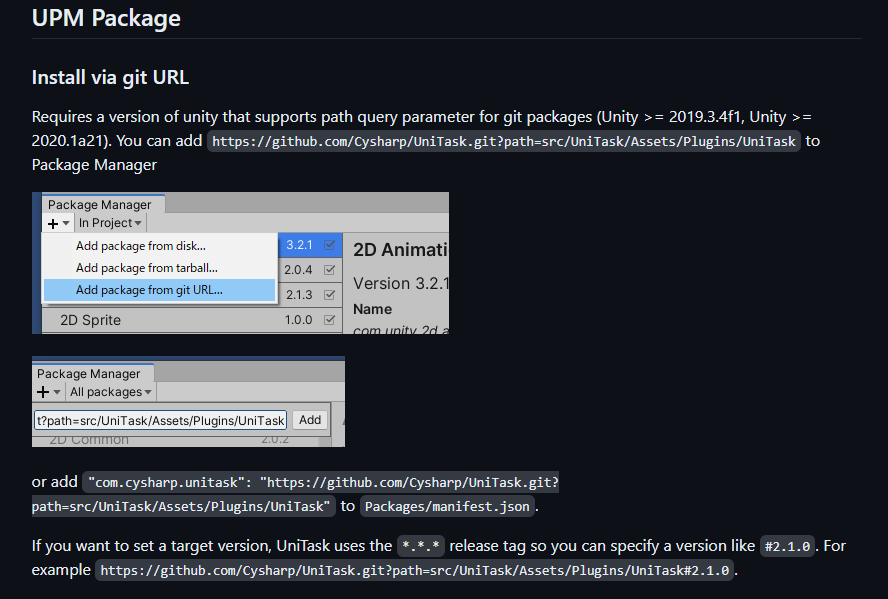
필요하면 아래 링크를 복사해서 사용하자.
https://github.com/Cysharp/UniTask.git?path=src/UniTask/Assets/Plugins/UniTask
UniTask Example
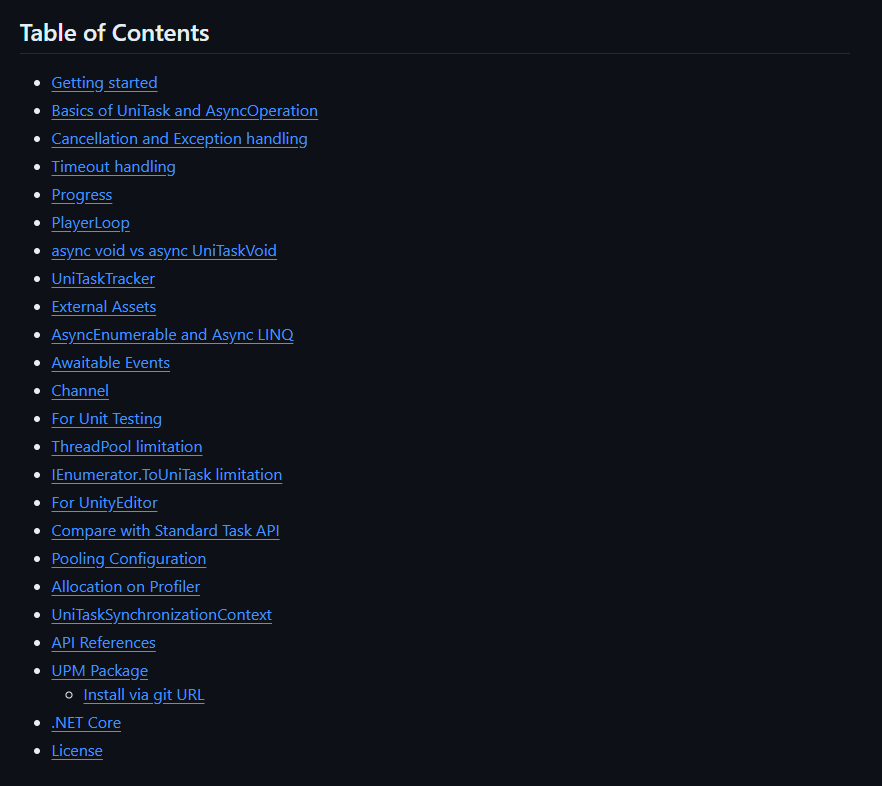
많이 사용할 것 같은 예제 위주, 모든 예제와 더 자세한 내용은 깃허브 페이지를 확인하자.
Unity's AsyncObject
var asset = await Resources.LoadAsync<TextAsset>("foo");

await SceneManager.LoadSceneAsync("scene2");
Delay
// 100 Frames
await UniTask.DelayFrame(100);

// 1000 ms
await UniTask.Delay(1000);

// replacement of yield return new WaitForSeconds/WaitForSecondsRealtime
await UniTask.Delay(TimeSpan.FromSeconds(10), ignoreTimeScale: false);
WaitUntil
// replacement of yield return WaitUntil
await UniTask.WaitUntil(() => isActive == false);

// special helper of WaitUntil
await UniTask.WaitUntilValueChanged(this, x => x.isActive);
IEnumerator coroutine
// You can await IEnumerator coroutine
await FooCoroutineEnumerator();
Standard Task
// You can await standard task
await Task.Run(() => 100);
WebRequest
// get async webrequest
async UniTask<string> GetTextAsync(UnityWebRequest req) {
    var op = await req.SendWebRequest();
    return op.downloadHandler.text;
}

var task1 = GetTextAsync(UnityWebRequest.Get("http://google.com"));
UniTask.WhenAll & UniTask.WhenAny
public async UniTaskVoid LoadManyAsync() {
    // parallel load.
    var (a, b, c) = await UniTask.WhenAll(
        LoadAsSprite("foo"),
        LoadAsSprite("bar"),
        LoadAsSprite("baz"));
}

async UniTask<Sprite> LoadAsSprite(string path) {
    var resource = await Resources.LoadAsync<Sprite>(path);
    return (resource as Sprite);
}
Timeout
// You can handle timeout easily
await GetTextAsync(UnityWebRequest.Get("http://unity.com"))
		.Timeout(TimeSpan.FromMilliseconds(300));
Cancellation and Exception handling
await-async 를 사용할 때 가장 기본적인 사용은 await 를 호출하는 가장 최상단에서 try-catch 로 로직을 감싸는 것!
public void OnClickGetTextFromGoogle() {
    GetTextFromGoogleAsync().Forget();
}

private async UniTaskVoid GetTextFromGoogleAsync() {
    var uri = "http://google.com";
    try {
        var result = await GetTextAsync(uri);
        Debug.Log(result);
    }
    catch (Exception e) {
        Debug.LogException(e);
    }
}

private async UniTask<string> GetTextAsync(string uri) {
    var uwr = UnityWebRequest.Get(uri);

    await uwr.SendWebRequest();

    if (uwr.isHttpError || uwr.isNetworkError) {
        // 실패시 예외 throw
        throw new Exception(uwr.error);
    }

    return uwr.downloadHandler.text;
}
비동기 작업 호출시 취소 토큰을 인자로 같이 보내 진행중인 비동기 작업을 취소할 수 있다.
// 취소 버튼을 눌렀을 때 진행한 비동기 작업 취소하기
var cts = new CancellationTokenSource();

cancelButton.onClick.AddListener(() => {
    cts.Cancel();
});

await UnityWebRequest.Get("http://google.co.jp")
		.SendWebRequest().WithCancellation(cts.Token);

await UniTask.DelayFrame(1000, cancellationToken: cts.Token);
만약 async UniTask 함수 안에서 작업을 취소하고 싶다면, OperationCanceledException 에러를 보내면 된다.
public async UniTask<int> FooAsync() {
    await UniTask.Yield();
    throw new OperationCanceledException();
}
만약 exception 을 핸들링 하는데, 작업 취소 에러는 핸들링 하고 싶지 않을 때
public async UniTask<int> BarAsync() {
    try {
        var x = await FooAsync();
        return x * 2;
    }
    catch (Exception ex) when (!(ex is OperationCanceledException)) {
        return -1;
async void vs async UniTaskVoid
async void 는 사용하지 않는 편이 좋다. async UniTaskVoid 는 async UniTask 보다 더 가볍다. 만약 await 할 필요가 없다면 async UniTaskVoid 를 사용하는 것이 좋다. 만약 경고를 무시하려면 Forget() 를 사용한다.
public void OnClickLoadSprite() {
    LoadSpriteAsync("hello").Forget();
}

public async UniTaskVoid LoadSpriteAsync(string path) {
    var resource = await Resources.LoadAsync<Sprite>(path);
    spriteRender.sprite = resource as Sprite;
}
예시
public void OnClickDelaySecond() {
    Debug.Log("delay start!");
    Delay(1000).Forget();
    Debug.Log("delay end!");
}

public async UniTaskVoid Delay(int ms) {
    await UniTask.Delay(ms);
    Debug.Log($"delay {ms} ms!");
}

// 실행 결과
// delay start!
// delay end!
// ... 1초 후
// delay 1000 ms!
람다식에서 async 를 사용하면 기본적으로 async void 를 사용하게 된다. 이를 피하기 위해 UniTask.Action 또는 UniTask.UnityAction 을 통해 async UniTaskVoid 대리자를 만들 수 있다.
Action actEvent;
UnityAction unityEvent; // especially used in uGUI

// Bad: async void
actEvent += async () => { };
unityEvent += async () => { };

// Ok: create Action delegate by lambda
actEvent += UniTask.Action(async () => { await UniTask.Yield(); });
unityEvent += UniTask.UnityAction(async () => { await UniTask.Yield(); });
UniTask 는 TextMeshPro, uGUI, DOTween, Addressables의 비동기 처리도 지원한다. 자세한 내용은 공식 깃헙 페이지에서 확인. 당연히 UniRx와 같이 사용 가능!