
Android fundamentals 03.1:The debugger
이 포스팅은 아래 구글 코드랩을 개인 학습용으로 정리한 글입니다.
1. Welcome
-
Adding logging statements to your app is one way to find errors and improve your app's operation.
-
Another way is to use the debugger built into Android Studio.
2. App OverView
3. Task 1: Explore the SimpleCalc project and app
1.1 Download and Open the SimpleCalc Project
➕ 프로젝트 코드 다운로드:
SimpleCalc Repository Fork -> Code -> Download ZIP
➕ 프로젝트 빌드 오류 해결:
- implementation 'com.android.support:appcompat-v7:28.0.0'에 빨간 줄
-> Refactor > Migrate to AndroidX- Could not find method compileSdk() for arguments [33]
-> rename "compileSdk" to "compileSdkVersion"
-> rename "targetSdk" to "targetSdkVersion"
build.gradle(Module:SimpleCalc.app)
android {
    compileSdkVersion 33
    defaultConfig {
        applicationId "com.example.android.SimpleCalc"
        minSdkVersion 15
        targetSdkVersion 33
        versionCode 1
        versionName "1.0"
        testInstrumentationRunner 'androidx.test.runner.AndroidJUnitRunner'
    }
    ...
}
...
dependencies {
    implementation fileTree(dir: 'libs', include: ['*.jar'])
    implementation 'androidx.appcompat:appcompat:1.0.0'
    implementation 'androidx.annotation:annotation:1.0.0'
    testImplementation 'junit:junit:4.12'
    testImplementation 'org.hamcrest:hamcrest-library:1.3'
}
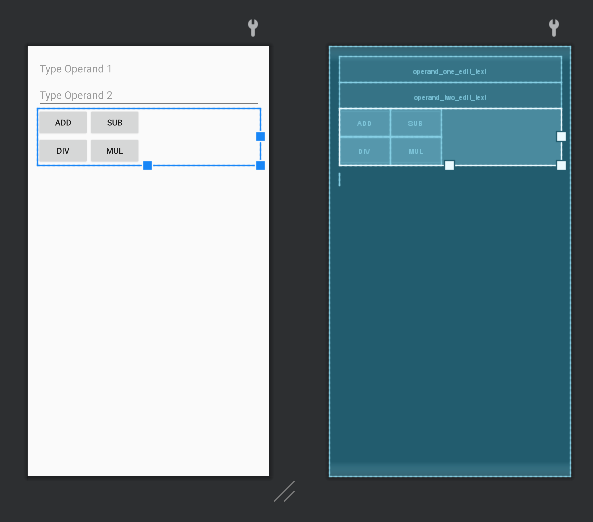
1.2 Explore the Layout
1.3 Explore the app code
1.4 Run the app
➕ Java to Kotlin 변환
- Code > Convert Java File to Kotlin File
- ⚡apply plugin: 'org.jetbrains.kotlin.android' 오류
➕ ⚡Unsupported class file major version 55
✍...
📌참고자료

Be able to be vulnerable, in search of truth