
Android fundamentals 04.1:Clickable images
이 포스팅은 아래 구글 코드랩을 개인 학습용으로 정리한 글입니다.
1. Welcome
-
The user interface (UI) consists of a hierarchy of objects called views.
-
Every element of the screen is a View.
-
View is the base class for classes that provide interactive UI components.
➖
-
You can turn any View into a UI element that can be tapped or clicked.
-
You must store the image for the ImageView in the drawables folder of your project.
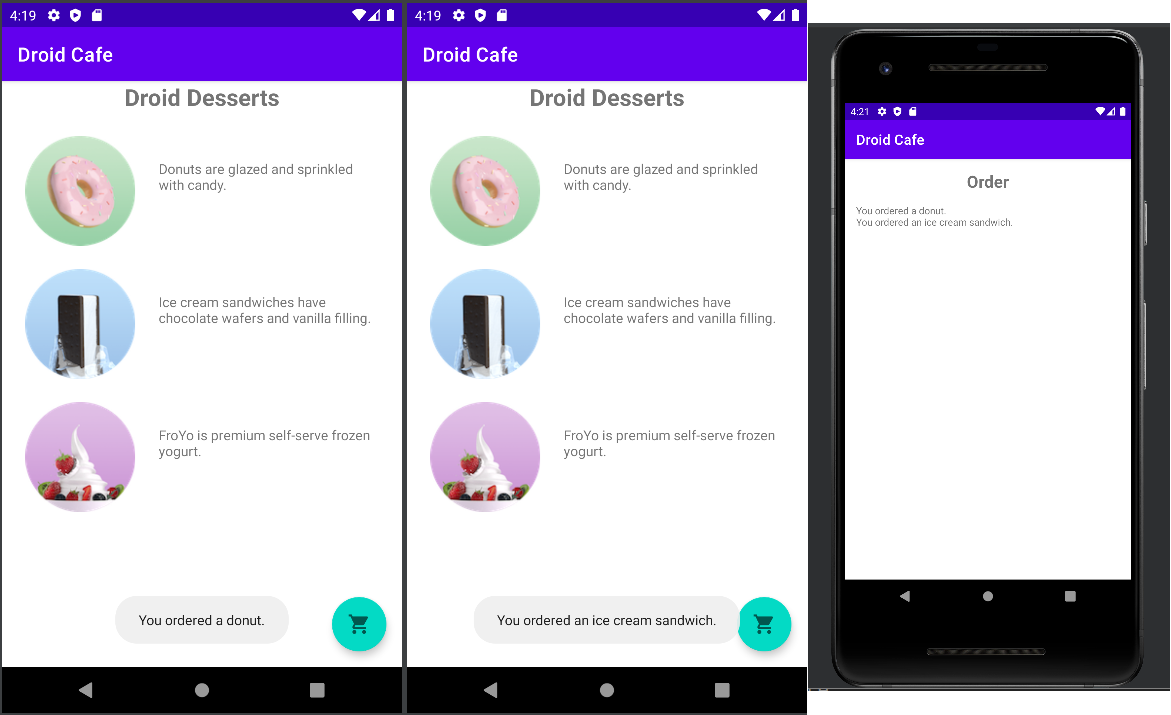
2. App overview
-
Basic Activity template that imitates a dessert-ordering app.
-
The user can tap an image to perform an action
-> display a Toast message -
The user can also tap a shopping-cart button
-> proceed to the next Activity.
3. Task 1: Add images to the layout
- You can make a view clickable, as a button, by adding the android:onClick attribute in the XML layout.
1.1 Start the new project
➕ 이 코드랩에서는 Basic Activity 템플릿을 이용해 새 프로젝트를 시작하였지만,
안드로이드 스튜디오의 새로 업데이트된 Basic Activity 템플릿은 코드랩과 상이함
-> 따라서 Empty Activity로 진행하였음
1.2 Add the images
1.3 Add the text descriptions
activity_main.xml
  <TextView
        android:id="@+id/textintro"
        android:layout_width="wrap_content"
        android:layout_height="wrap_content"
        android:text="@string/intro_text"
        android:textSize="24sp"
        android:textStyle="bold"
        app:layout_constraintEnd_toEndOf="parent"
        app:layout_constraintStart_toStartOf="parent"
        app:layout_constraintTop_toTopOf="parent" />

    <ImageView
        android:id="@+id/donut"
        android:layout_width="wrap_content"
        android:layout_height="wrap_content"
        android:layout_marginStart="24dp"
        android:layout_marginTop="24dp"
        android:background="@drawable/donut_circle"
        android:contentDescription="@string/donuts"
        app:layout_constraintStart_toStartOf="parent"
        app:layout_constraintTop_toBottomOf="@id/textintro" />

    <TextView
        android:id="@+id/donut_description"
        android:layout_width="0dp"
        android:layout_height="wrap_content"
        android:layout_marginStart="24dp"
        android:layout_marginTop="24dp"
        android:layout_marginEnd="24dp"
        android:text="@string/donuts"
        app:layout_constraintEnd_toEndOf="parent"
        app:layout_constraintStart_toEndOf="@id/donut"
        app:layout_constraintTop_toTopOf="@id/donut" />

    <ImageView
        android:id="@+id/ice_cream"
        android:layout_width="wrap_content"
        android:layout_height="wrap_content"
        android:layout_marginStart="24dp"
        android:layout_marginTop="24dp"
        android:background="@drawable/icecream_circle"
        android:contentDescription="@string/ice_cream_sandwiches"
        app:layout_constraintStart_toStartOf="parent"
        app:layout_constraintTop_toBottomOf="@id/donut" />

    <TextView
        android:id="@+id/ice_cream_description"
        android:layout_width="0dp"
        android:layout_height="wrap_content"
        android:layout_marginStart="24dp"
        android:layout_marginTop="24dp"
        android:layout_marginEnd="24dp"
        android:text="@string/ice_cream_sandwiches"
        app:layout_constraintEnd_toEndOf="parent"
        app:layout_constraintStart_toEndOf="@id/ice_cream"
        app:layout_constraintTop_toTopOf="@id/ice_cream" />

    <ImageView
        android:id="@+id/froyo"
        android:layout_width="wrap_content"
        android:layout_height="wrap_content"
        android:layout_marginStart="24dp"
        android:layout_marginTop="24dp"
        android:background="@drawable/froyo_circle"
        android:contentDescription="@string/froyo"
        app:layout_constraintStart_toStartOf="parent"
        app:layout_constraintTop_toBottomOf="@id/ice_cream" />

    <TextView
        android:id="@+id/froyo_description"
        android:layout_width="0dp"
        android:layout_height="wrap_content"
        android:layout_marginStart="24dp"
        android:layout_marginTop="24dp"
        android:layout_marginEnd="24dp"
        android:text="@string/froyo"
        app:layout_constraintEnd_toEndOf="parent"
        app:layout_constraintStart_toEndOf="@id/froyo"
        app:layout_constraintTop_toTopOf="@id/froyo" />
strings.xml
<resources>
    <string name="app_name">Droid Cafe</string>

    <string name="intro_text">Droid Desserts</string>

    <string name="ice_cream_sandwiches">Ice cream sandwiches have chocolate wafers and vanilla filling.</string>
    <string name="froyo">FroYo is premium self-serve frozen yogurt.</string>
    <string name="donuts">Donuts are glazed and sprinkled with candy.</string>
</resources>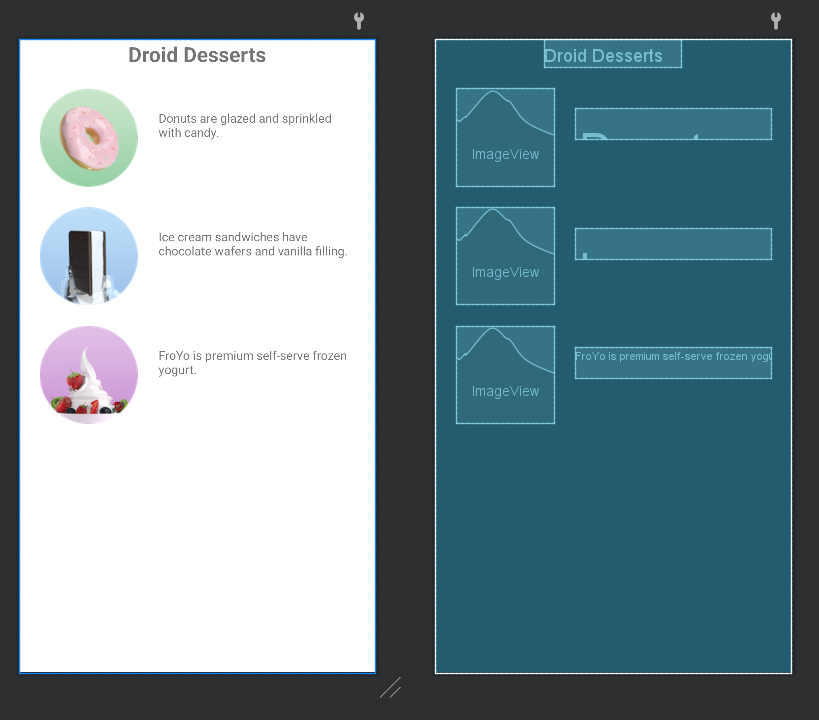
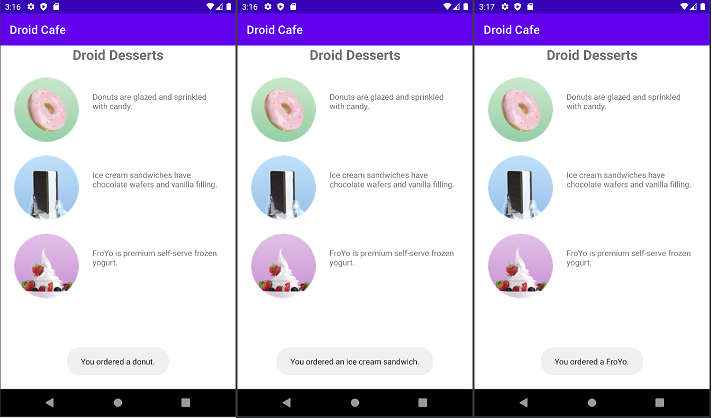
4. Task 2: Add onClick methods for images
2.1 Create a Toast method
MainActivity.kt
fun displayToast(message: String) {
        Toast.makeText(applicationContext, message, Toast.LENGTH_SHORT).show()
    }
➕ Toast 메세지 안보일 땐 AVD Wipe Data 후 재시도
2.2 Create click handlers
- ImageView에 android:onClick 속성 추가
strings.xml
   <string name="donut_order_message">You ordered a donut.</string>
   <string name="ice_cream_order_message">You ordered an ice cream sandwich.</string>
   <string name="froyo_order_message">You ordered a FroYo.</string>
MainActivity.kt
    fun showDonutOrder(view: View) {
        displayToast(getString(R.string.donut_order_message))
    }
    fun showIceCreamOrder(view: View) {
        displayToast(getString(R.string.ice_cream_order_message))
    }
    fun showFroyoOrder(view: View) {
        displayToast(getString(R.string.froyo_order_message))
    }

    private fun displayToast(message: String) {
        Toast.makeText(applicationContext, message, Toast.LENGTH_SHORT).show()
    }
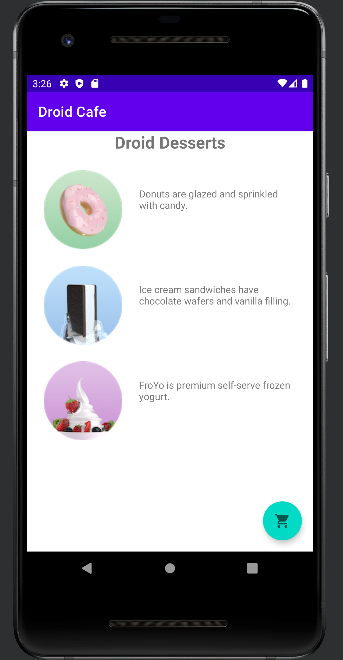
5. Task 3: Change the floating action button
➕ activity_main.xml에 floating action button 추가
activity_main.xml
    <com.google.android.material.floatingactionbutton.FloatingActionButton
        android:id="@+id/fab"
        android:layout_width="wrap_content"
        android:layout_height="wrap_content"
        android:layout_gravity="bottom|end"
        android:layout_marginEnd="16dp"
        android:layout_marginBottom="16dp"
        app:layout_constraintBottom_toBottomOf="parent"
        app:layout_constraintEnd_toEndOf="parent" />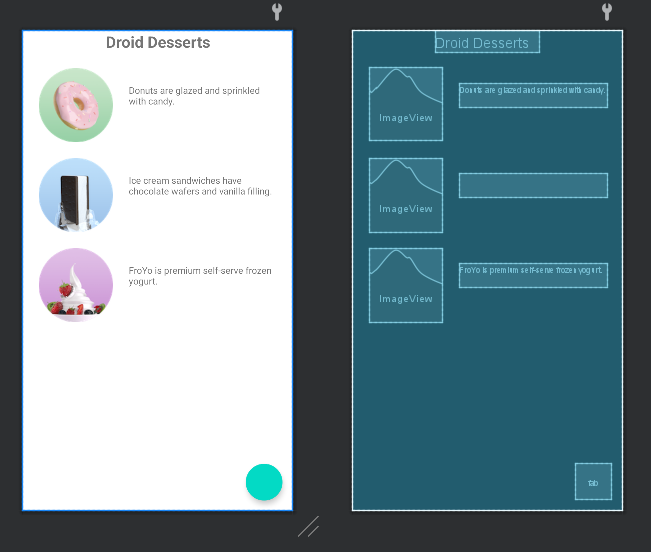
3.1 Add a new icon
-
right-click the drawable folder.
-> Choose New > Image Asset -
The Configure Image Asset dialog appears.
-> Choose Action Bar and Tab Icons
-> Change the Name field to ic_shopping_cart.
-> Click the clip art image to select a clip art image
-> Choose HOLO_DARK from the Theme
-> Click Next
-> Click Finish
➕ floating action button에 새 아이콘 적용 방법:
setImageResource() 함수 사용
MainActivity.kt
    override fun onCreate(savedInstanceState: Bundle?) {
        super.onCreate(savedInstanceState)
        setContentView(R.layout.activity_main)

        val fab = findViewById<FloatingActionButton>(R.id.fab)
        fab.setImageResource(R.drawable.ic_shopping_cart)
    }
3.2 Add an Activity
3.3 Change the action
MainActivity.kt
	val fab = findViewById<FloatingActionButton>(R.id.fab)
        fab.apply{
            setImageResource(R.drawable.ic_shopping_cart)
            setOnClickListener {
                val intent = Intent(context, OrderActivity::class.java)
                startActivity(intent)
            }
        }
6. Coding challenge
- Change the app to send the order message for the selected dessert in MainActivity to a new TextView at the top of the OrderActivity layout.
MainActivity.kt
-
인텐트 엑스트라 키 EXTRA_ORDER_MESSAGE 추가
-
이미지 별 클릭 이벤트 처리 함수 showDonutOrder(),showIceCreamOrder(), showFroyoOrder()
-> 하나의 함수 showOrder()로 통일 -
floating action button 클릭 시 인텐트에 엑스트라 추가 후 OrderActivity 시작
const val EXTRA_ORDER_MESSAGE :String = "googlecodelabs.droidcafe.extra.ORDER_MESSAGE"

class MainActivity : AppCompatActivity() {

    private var mOrderMessageArray : Array<String> = arrayOf()

    override fun onCreate(savedInstanceState: Bundle?) {
        ...
        fab.apply{
            setImageResource(R.drawable.ic_shopping_cart)
            setOnClickListener {
                val intent = Intent(context, OrderActivity::class.java)
                intent.putExtra(EXTRA_ORDER_MESSAGE, mOrderMessageArray)
                startActivity(intent)
            }
        }
    }

    fun showOrder(view: View) {
        val orderMessage = when(view.id){
            R.id.donut -> getString(R.string.donut_order_message)
            R.id.ice_cream -> getString(R.string.ice_cream_order_message)
            R.id.froyo -> getString(R.string.froyo_order_message)
            else -> {
                throw Exception("cannot get order message")
                return
            }
        }

        mOrderMessageArray = mOrderMessageArray.plus(orderMessage)
        displayToast(orderMessage)
    }
	...
}
OrderActivity.kt
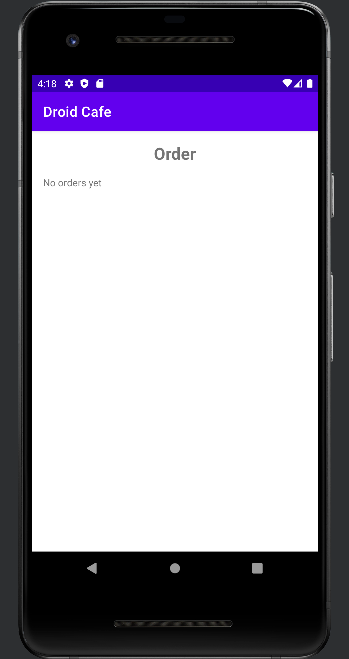
- 자신을 시작시틴 인텐트 엑스트라에 저장된 주문 정보 orderMessageArray 받기
-> 주문 정보 없다면 No orders yet
-> 주문 정보 있다면 한 줄씩 띄어서 화면에 표시
class OrderActivity : AppCompatActivity() {

    lateinit var orderTextView : TextView

    override fun onCreate(savedInstanceState: Bundle?) {
        super.onCreate(savedInstanceState)
        setContentView(R.layout.activity_order)

        orderTextView = findViewById(R.id.order_text_view)

        val intent = intent
        val orderMessageArray = intent.getStringArrayExtra(EXTRA_ORDER_MESSAGE)

        if(orderMessageArray?.isEmpty() == true){
            orderTextView.text = "No orders yet"
        }
        else{
            var orderTextBody = ""
            orderMessageArray?.forEach {
                orderTextBody = orderTextBody + it + "\n"
            }

            orderTextView.text = orderTextBody
        }
    }
}
➕ 구성 변경 시 주문 정보 저장되도록 instance state 저장해야 함

MainActivity.kt
	override fun onCreate(savedInstanceState: Bundle?) {
        super.onCreate(savedInstanceState)
        setContentView(R.layout.activity_main)

        if(savedInstanceState != null){
            mOrderMessageArray = savedInstanceState.getStringArray("mOrderMessageArray") as Array<String>
        }
        ...
    }

    override fun onSaveInstanceState(outState: Bundle) {
        super.onSaveInstanceState(outState)

        if(!mOrderMessageArray.isEmpty()){
           outState.putStringArray("mOrderMessageArray", mOrderMessageArray)
        }
    }
📌참고자료
- Fragment에서는 Activity에서 사용하던 방식으로 사용하면 동작하지 않습니다
-> context인자로 this를 주면 이런 오류메시지를 출력합니다- Fragment에서는 context인자로 this가 아닌 getActivity()를 넘겨주어야 합니다
- 프래그먼트에는 onClicked 함수를 정의할 수 없다
- 따라서 메인 액티비티에 프래그먼트를 정의 or onCreateView함수를 오버라이딩해 그 안에 onClick을 정의해야 한다