
Android fundamentals 04.2:Input controls
이 포스팅은 아래 구글 코드랩을 개인 학습용으로 정리한 글입니다.
1. Welcome
-
EditText element
-> enable the user to enter text or numbers -
EditText attributes
-> define the type of keyboard that appears
-> make entering data easier for users -
ex. android:inputType = "phone"
-> show a numeric keypad -
RadioButton elements
-> enable a user to select one (and only one) item from a set of items
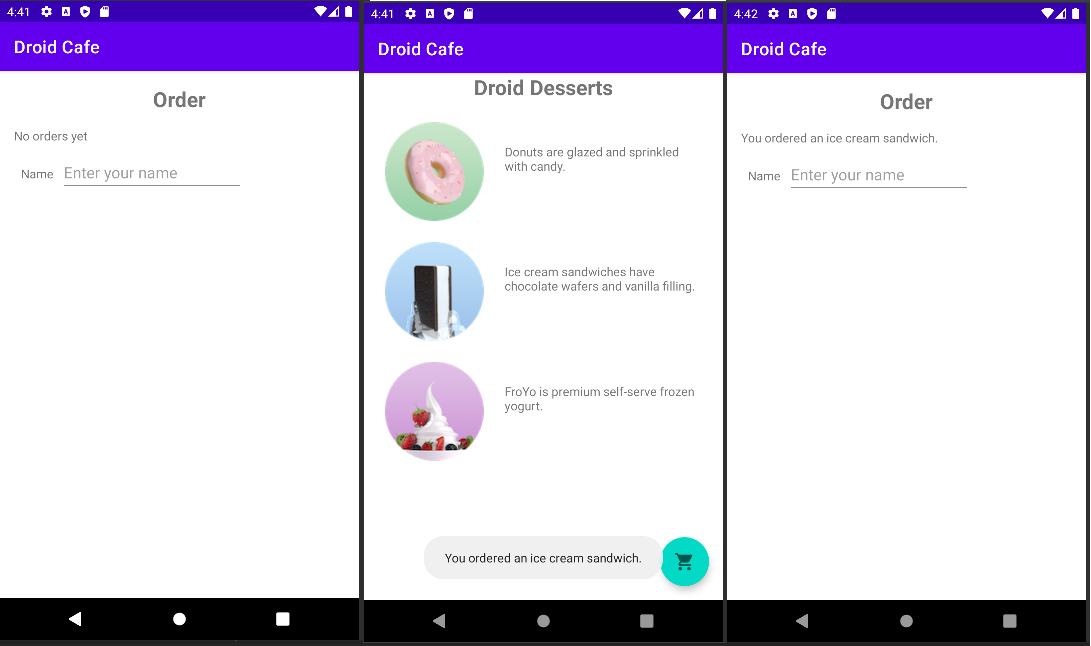
2. App overview
- you add more features to the DroidCafe app from the lesson on using clickable images.
3. Task 1: Experiment with text entry attributes
-
An editable text field expects a certain type of text input
-> ex. plain text, email address, phone number, or password -
It's important to specify the input type for each text field in your app
-> the system displays the appropriate soft input method
-> ex. an on-screen keyboard for plain text, or a numeric keypad for entering a phone number.
1.1 Add an EditText for entering a name
activity_order.xml
<TextView
        android:id="@+id/name_label"
        android:layout_width="wrap_content"
        android:layout_height="wrap_content"
        android:layout_marginStart="24dp"
        android:layout_marginLeft="24dp"
        android:layout_marginTop="24dp"
        android:text="@string/name_label_text"
        app:layout_constraintStart_toStartOf="parent"
        app:layout_constraintTop_toBottomOf="@id/order_text_view" />

    <EditText
        android:id="@+id/name_edit_text"
        android:layout_width="wrap_content"
        android:layout_height="wrap_content"
        android:layout_marginStart="8dp"
        android:layout_marginLeft="8dp"
        android:ems="10"
        android:hint="@string/enter_name_hint"
        android:inputType="textPersonName"
        app:layout_constraintBaseline_toBaselineOf="@id/name_label"
        app:layout_constraintStart_toEndOf="@id/name_label" />
strings.xml
<resources>
	...
    <string name="name_label_text">Name</string>
    <string name="enter_name_hint">Enter your name</string>
</resources>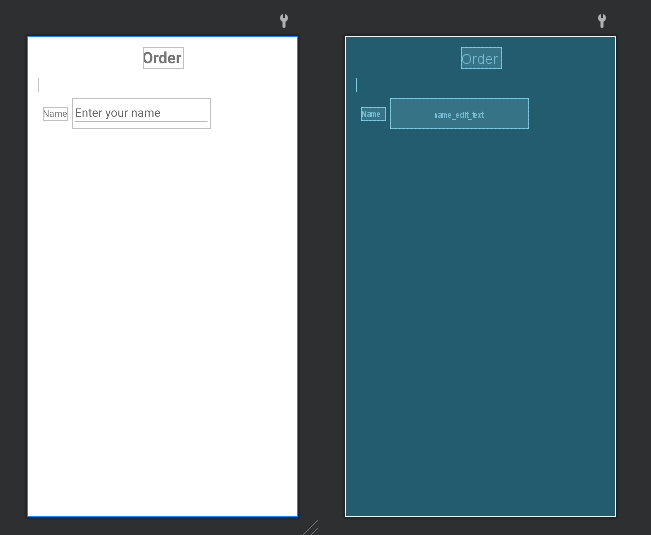
1.2 Add a multiple-line EditText
activity_order.xml
<TextView
        android:id="@+id/address_label"
        android:layout_width="wrap_content"
        android:layout_height="wrap_content"
        android:layout_marginStart="24dp"
        android:layout_marginLeft="24dp"
        android:layout_marginTop="24dp"
        android:text="@string/address_label_text"
        app:layout_constraintStart_toStartOf="parent"
        app:layout_constraintTop_toBottomOf="@id/name_label" />

    <EditText
        android:id="@+id/address_edit_text"
        android:layout_width="wrap_content"
        android:layout_height="wrap_content"
        android:layout_marginStart="8dp"
        android:layout_marginLeft="8dp"
        android:ems="10"
        android:hint="@string/enter_address_hint"
        android:inputType="textMultiLine"
        app:layout_constraintBaseline_toBaselineOf="@id/address_label"
        app:layout_constraintStart_toEndOf="@id/address_label" />
strings.xml
<resources>
	...
    <string name="address_label_text">Address</string>
    <string name="enter_address_hint">Enter your address</string>
</resources>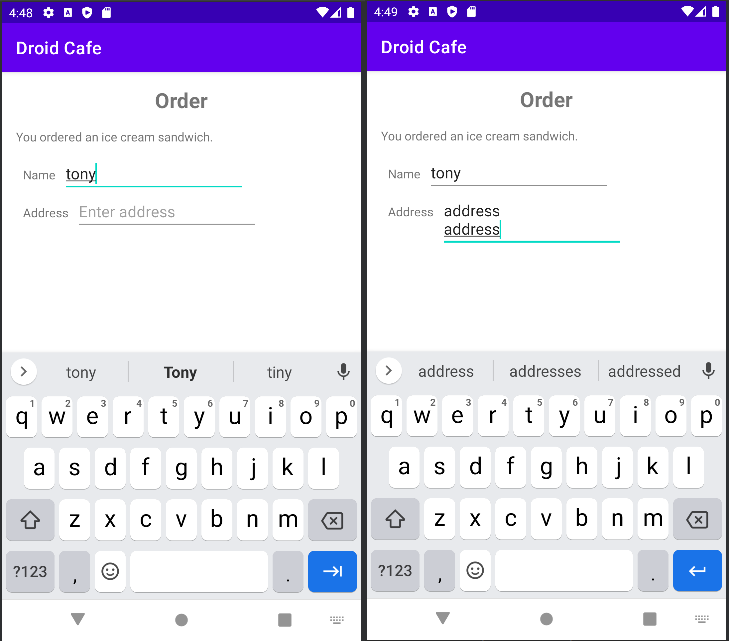
1.3 Use a keypad for phone numbers
activity_order.xml
 <TextView
        android:id="@+id/phone_label"
        android:layout_width="wrap_content"
        android:layout_height="wrap_content"
        android:layout_marginStart="24dp"
        android:layout_marginLeft="24dp"
        android:layout_marginTop="24dp"
        android:text="@string/phone_label_text"
        app:layout_constraintStart_toStartOf="parent"
        app:layout_constraintTop_toBottomOf="@id/address_label" />

    <EditText
        android:id="@+id/phone_edit_text"
        android:layout_width="wrap_content"
        android:layout_height="wrap_content"
        android:layout_marginStart="8dp"
        android:layout_marginLeft="8dp"
        android:ems="10"
        android:hint="@string/enter_phone_hint"
        android:inputType="phone"
        app:layout_constraintBaseline_toBaselineOf="@id/phone_label"
        app:layout_constraintStart_toEndOf="@id/phone_label" />
strings.xml
<resources>
	...
    <string name="phone_label_text">Phone</string>
    <string name="enter_phone_hint">Enter your phone</string>
</resources>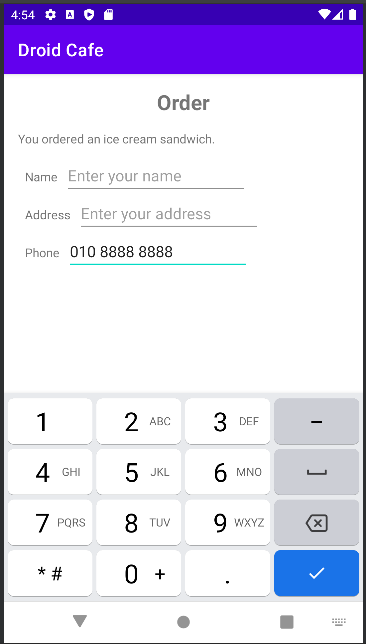
1.4 Combine input types in one EditText
activity_order.xml
    <TextView
        android:id="@+id/note_label"
        android:layout_width="wrap_content"
        android:layout_height="wrap_content"
        android:layout_marginStart="24dp"
        android:layout_marginLeft="24dp"
        android:layout_marginTop="24dp"
        android:text="@string/note_label_text"
        app:layout_constraintStart_toStartOf="parent"
        app:layout_constraintTop_toBottomOf="@id/phone_label" />

    <EditText
        android:id="@+id/note_edit_text"
        android:layout_width="wrap_content"
        android:layout_height="wrap_content"
        android:layout_marginStart="8dp"
        android:layout_marginLeft="8dp"
        android:ems="10"
        android:hint="@string/enter_note_hint"
        android:inputType="textCapSentences|textMultiLine"
        app:layout_constraintBaseline_toBaselineOf="@id/note_label"
        app:layout_constraintStart_toEndOf="@id/note_label" />
strings.xml
<resources>
	...
    <string name="note_label_text">Note</string>
    <string name="enter_note_hint">Enter note</string>
</resources>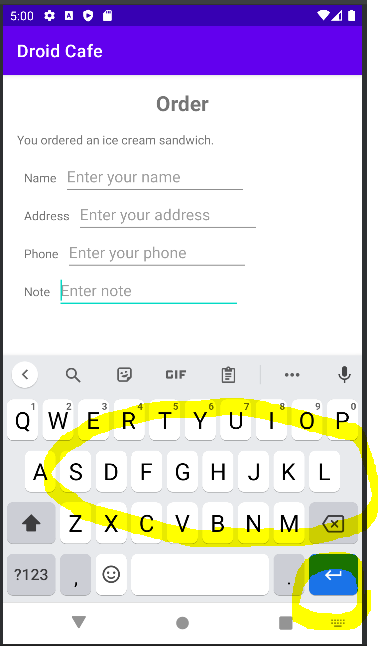
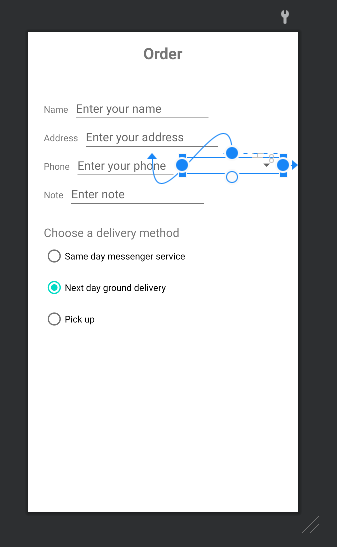
4. Task 2: Use radio buttons
- In this task you add a group of radio buttons for setting the delivery options for the dessert order.
2.1 Add a RadioGroup and radio buttons
- radio button selections are mutually exclusive
-> you group them together inside a RadioGroup
-> the Android system ensures that only one radio button can be selected at a time.
activity_order.xml
 <TextView
        android:id="@+id/delivery_label"
        android:layout_width="wrap_content"
        android:layout_height="wrap_content"
        android:layout_marginStart="24dp"
        android:layout_marginLeft="24dp"
        android:layout_marginTop="24dp"
        android:text="@string/delivery_label_text"
        android:textSize="18sp"
        app:layout_constraintStart_toStartOf="parent"
        app:layout_constraintTop_toBottomOf="@id/note_edit_text"/>

    <RadioGroup
        android:layout_width="wrap_content"
        android:layout_height="wrap_content"
        android:layout_marginStart="24dp"
        android:layout_marginLeft="24dp"
        android:orientation="vertical"
        app:layout_constraintStart_toStartOf="parent"
        app:layout_constraintTop_toBottomOf="@id/delivery_label">

        <RadioButton
            android:id="@+id/sameday_radio_button"
            android:layout_width="wrap_content"
            android:layout_height="wrap_content"
            android:onClick="onRadioButtonClicked"
            android:text="@string/same_day_messenger_service"/>
        <RadioButton
            android:id="@+id/nextday_radio_button"
            android:layout_width="wrap_content"
            android:layout_height="wrap_content"
            android:onClick="onRadioButtonClicked"
            android:text="@string/next_day_ground_delivery"/>
        <RadioButton
            android:id="@+id/pickup_radio_button"
            android:layout_width="wrap_content"
            android:layout_height="wrap_content"
            android:onClick="onRadioButtonClicked"
            android:text="@string/pick_up"/>
    </RadioGroup>
strings.xml
<resources>
	...
 	 <string name="delivery_label_text">Choose a delivery method</string>
    <string name="same_day_messenger_service">Same day messenger service</string>
    <string name="next_day_ground_delivery">Next day ground delivery</string>
    <string name="pick_up">Pick up</string>
</resources>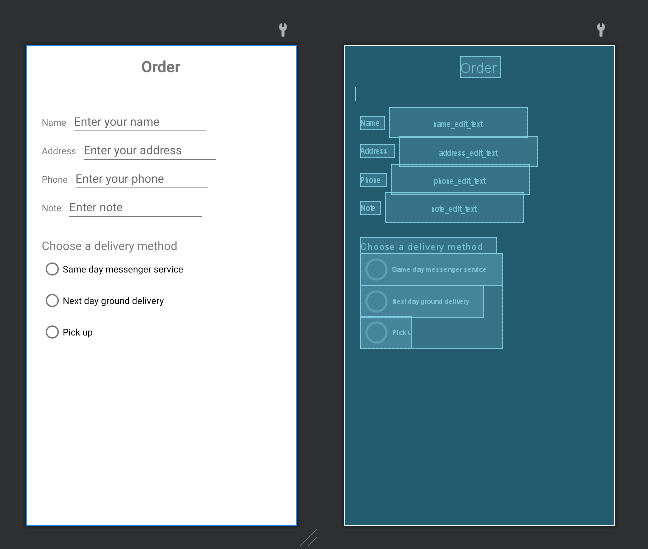
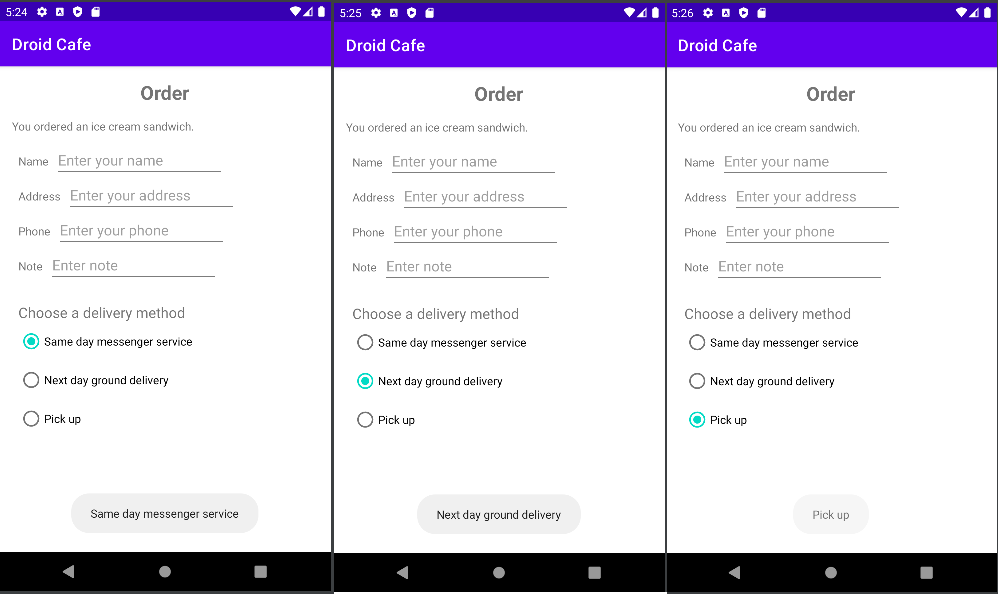
2.2 Add the radio button click handler
OrderActivity.kt
 	fun onRadioButtonClicked(view: View) {
        val checked:Boolean = (view as RadioButton).isChecked
        when(view.id){
            R.id.sameday_radio_button -> if (checked) displayToast(getString(R.string.same_day_messenger_service))
            R.id.nextday_radio_button -> if (checked) displayToast(getString(R.string.next_day_ground_delivery))
            R.id.pickup_radio_button -> if (checked) displayToast(getString(R.string.pick_up))
        }
    }
    private fun displayToast(message: String) {
        Toast.makeText(applicationContext, message, Toast.LENGTH_SHORT).show()
    }
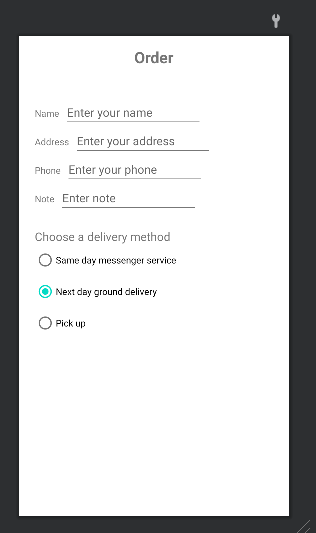
5. Coding challenge
-
Challenge: The radio buttons for delivery choices in the DroidCafeInput app first appear unselected
-
Change the radio buttons so that one of them (such as nextday) is selected as the default when the radio buttons first appear.
activity_order.xml
<RadioButton
     android:id="@+id/nextday_radio_button"
	 android:checked="true"
     .../>
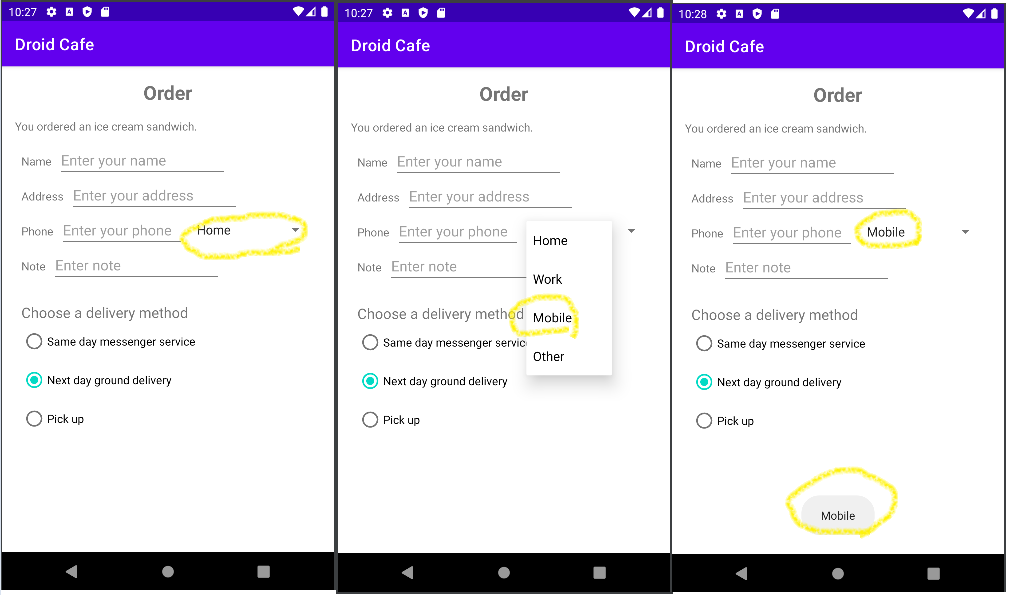
6. Task 3: Use a spinner for user choices
-
Spinner: a quick way to select one value from a set.
-> displays a drop-down list with all available values -
If you are providing only two or three choices
-> use radio buttons for the choices -
With more than three choices a Spinner works very well
-> takes up little room in your layout
3.1 Add a spinner to the layout
activity_order.xml
	<EditText
        android:id="@+id/phone_edit_text"
        android:layout_width="0dp"
        android:layout_height="wrap_content"
        ...
        app:layout_constraintEnd_toStartOf="@id/phone_label_spinner"
        app:layout_constraintBaseline_toBaselineOf="@id/phone_label"
        app:layout_constraintStart_toEndOf="@id/phone_label" />

    <Spinner
        android:id="@+id/phone_label_spinner"
        android:layout_width="0dp"
        android:layout_height="wrap_content"
        android:layout_marginStart="8dp"
        android:layout_marginLeft="8dp"
        android:layout_marginTop="8dp"
        android:layout_marginEnd="24dp"
        android:layout_marginRight="24dp"
        app:layout_constraintEnd_toEndOf="parent"
        app:layout_constraintStart_toEndOf="@id/phone_edit_text"
        app:layout_constraintTop_toBottomOf="@id/address_edit_text" />
3.2 Add code to activate the Spinner and its listener⭐
- Define the selectable values (Home, Work, Mobile, and Other) for the Spinner in strings.xml as the string array
strings.xml
<string-array name="phone_labels_array">
        <item>Home</item>
        <item>Work</item>
        <item>Mobile</item>
        <item>Other</item>
</string-array>- To define the selection callback for the Spinner, change your OrderActivity class to implement the AdapterView.OnItemSelectedListener interface
- you need the AdapterView because you need an adapter(an ArrayAdapter) to assign the array to the Spinner
OrderActivity.kt
class OrderActivity : AppCompatActivity(), AdapterView.OnItemSelectedListener {
	...
   override fun onItemSelected(p0: AdapterView<*>?, p1: View?, p2: Int, p3: Long) {
        TODO("Not yet implemented")
    }

    override fun onNothingSelected(p0: AdapterView<*>?) {
        TODO("Not yet implemented")
    }
}- onItemSelected() and onNothingSelected() callback methods
-> use the parameter AdapterView?
- The ? is a Java type wildcard
-> enabling the method to accept any type of AdapterView as an argument
- Instantiate a Spinner in the onCreate() method and set its listener (spinner.setOnItemSelectedListener)
 	override fun onCreate(savedInstanceState: Bundle?) {
    	...
        val spinner : Spinner = findViewById(R.id.phone_label_spinner)
        spinner?.apply{
            onItemSelectedListener = this@OrderActivity
        }
}- Add a statement that creates the ArrayAdapter with the string array (labels_array) using the Android-supplied Spinner layout for each item (layout.simple_spinner_item)
	override fun onCreate(savedInstanceState: Bundle?) {
    	...
		val arrayAdapter : ArrayAdapter<CharSequence> = ArrayAdapter.createFromResource(
            this,
            R.array.phone_labels_array,
            android.R.layout.simple_spinner_item)
}- Specify the layout for the Spinner choices to be simple_spinner_dropdown_item, and then apply the adapter to the Spinner
	override fun onCreate(savedInstanceState: Bundle?) {
    	...
        val spinner : Spinner = findViewById(R.id.phone_label_spinner)

        val arrayAdapter : ArrayAdapter<CharSequence> = ArrayAdapter.createFromResource(
            this,
            R.array.phone_labels_array,
            android.R.layout.simple_spinner_item)

        arrayAdapter.setDropDownViewResource(android.R.layout.simple_spinner_dropdown_item)

        spinner?.apply{
            onItemSelectedListener = this@OrderActivity
            adapter = arrayAdapter
        }
    }
3.3 Add code to respond to Spinner selections⭐
OrderActivity.kt
  override fun onItemSelected(adapterView: AdapterView<*>?, view: View?, i: Int, l: Long) {
        val spinnerLabel : String = adapterView?.getItemAtPosition(i).toString()
        displayToast(spinnerLabel)
    }

    override fun onNothingSelected(p0: AdapterView<*>?) {
        //no need to implement in this codelab
    }
7. Coding challenge 2
- Challenge: Write code to perform an action directly from the keyboard by tapping a Send key, such as for dialing a phone number
-> 1. Enter the phone number in the EditText field
-> 2. Tap the Send key to launch the phone dialer
activity_main.xml
- android:imeOptions="actionSend"
 <EditText
        android:id="@+id/phone_edit_text"
        android:layout_width="match_parent"
        android:layout_height="wrap_content"
        android:layout_marginStart="16dp"
        android:layout_marginLeft="16dp"
        android:layout_marginEnd="16dp"
        android:layout_marginRight="16dp"
        android:hint="@string/enter_phone_to_dial"
        android:imeOptions="actionSend"
        android:inputType="phone"
        app:layout_constraintBottom_toBottomOf="parent"
        app:layout_constraintEnd_toEndOf="parent"
        app:layout_constraintStart_toStartOf="parent"
        app:layout_constraintTop_toTopOf="parent" />
strings.xml
<resources>
    <string name="app_name">KeyBoardDialPhone</string>
    <string name="enter_phone_to_dial">Enter phone to dial</string>
</resources>
MainActivity.kt⭐
class MainActivity : AppCompatActivity() {

    lateinit var phoneEditText: EditText

    override fun onCreate(savedInstanceState: Bundle?) {
        super.onCreate(savedInstanceState)
        setContentView(R.layout.activity_main)

        phoneEditText = findViewById(R.id.phone_edit_text)
        phoneEditText.apply {
            setOnEditorActionListener { _, actionId, _ ->
                var handled = false
                if(actionId == EditorInfo.IME_ACTION_SEND){
                    dialNumber()
                    handled = true
                }
                return@setOnEditorActionListener handled
            }
        }
    }

    private fun dialNumber(){
        val phoneNum : String = "tel: ${phoneEditText.text}"

        val intent = Intent(Intent.ACTION_DIAL, Uri.parse(phoneNum))

        if(intent.resolveActivity(packageManager) != null) {
            startActivity(intent)
        }else{
            Log.d("Implicit Intents", "Can't handle this intent!")
        }
    }
}
AndroidManifest.xml
	<queries>
        <intent>
            <action android:name="android.intent.action.DIAL" />
        </intent>
    </queries>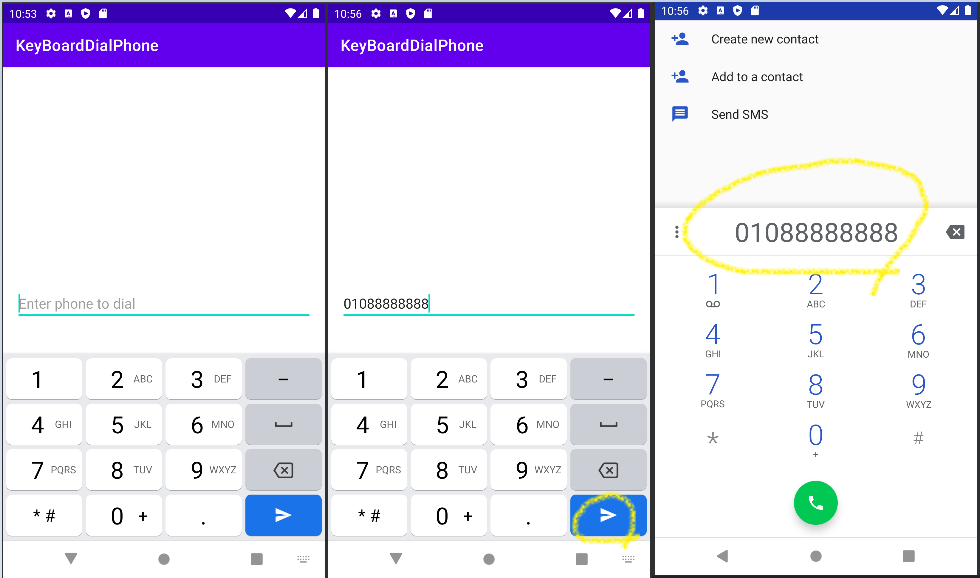
📌참고자료