# Concentration struct 로 바꾸기
- ViewController 에 Concentration 을 한번 선언하면 어디 넘기거나 하지 않고 그대로 있으므로 struct 로 바꿔주면 이제 포인터가 아닌 완전한 복사본 하나를 ViewController 내부에 embed 할 수 있으므로 오히려 더 좋을 수도 있다.
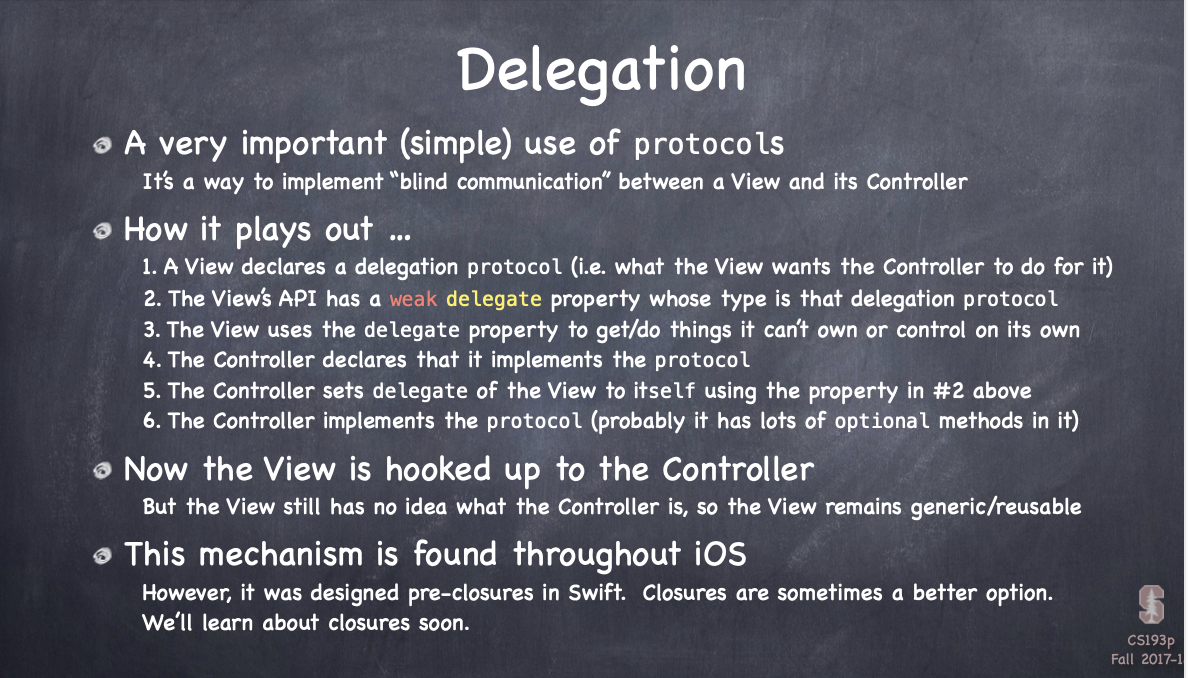
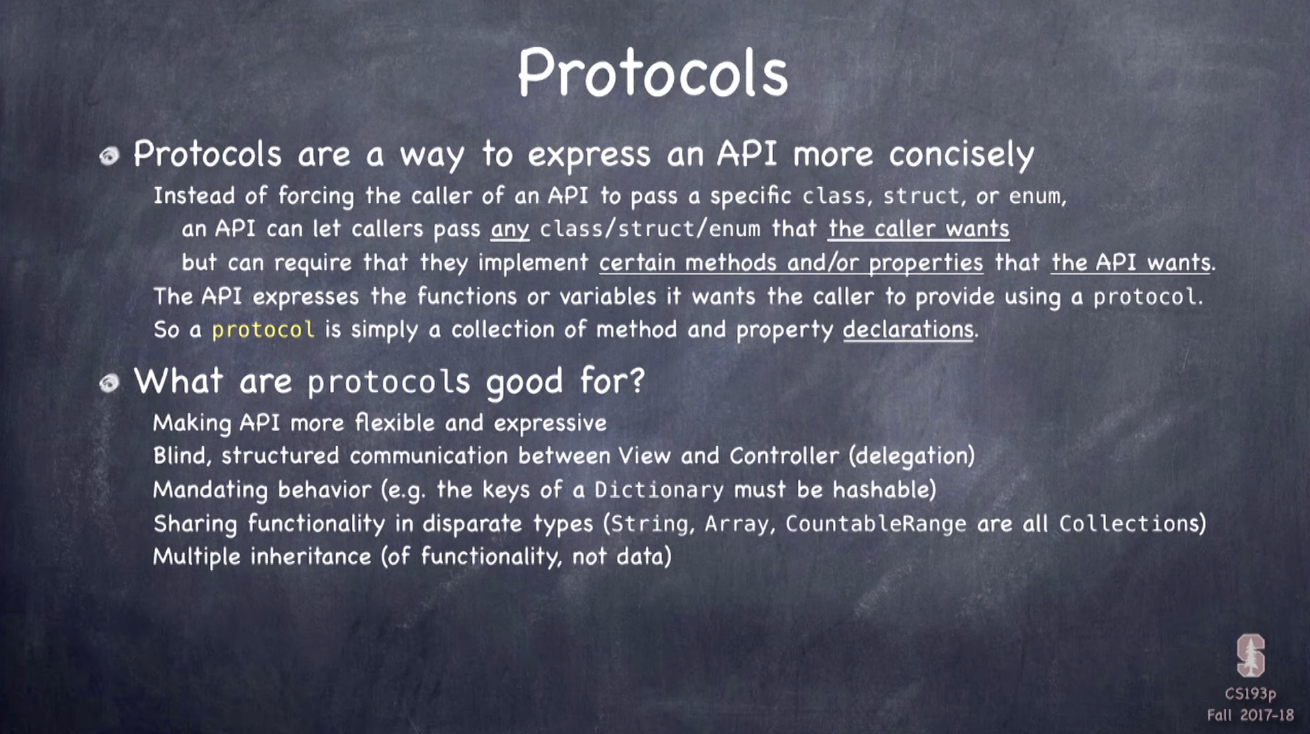
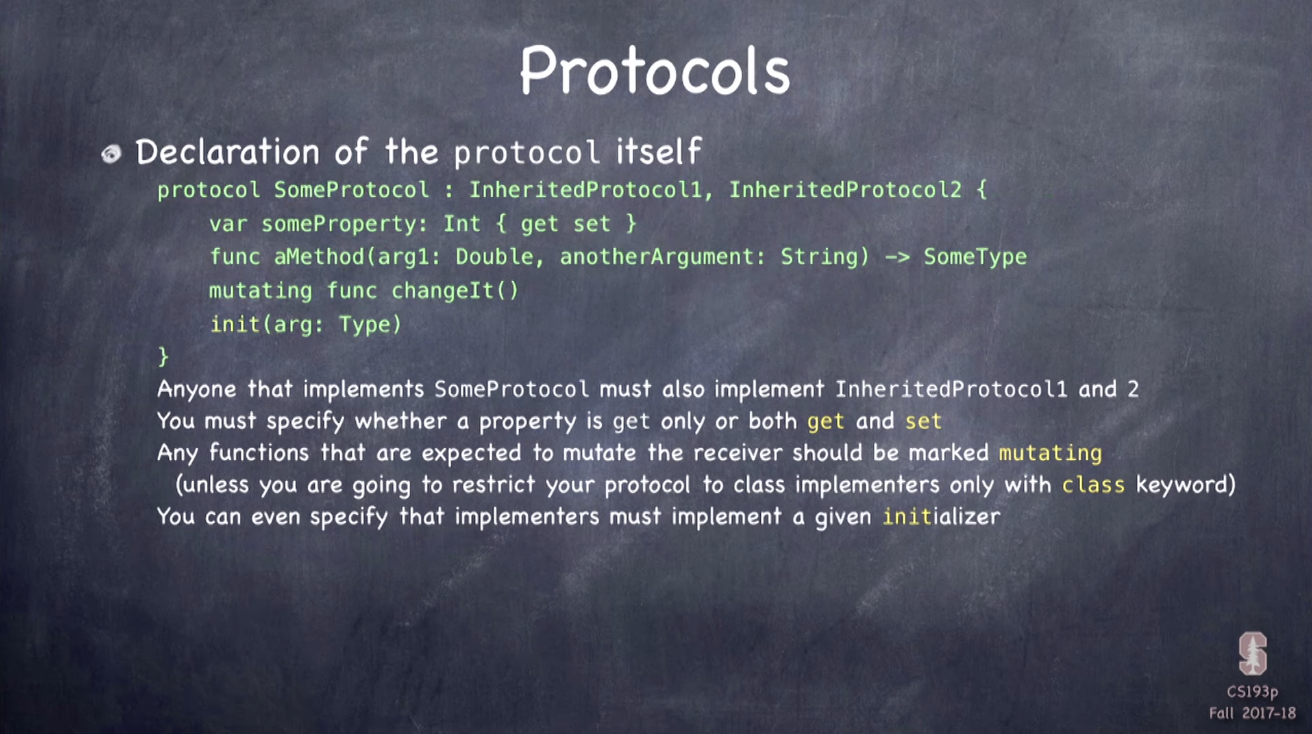
# 프로토콜
-
String, Int 등과 마찬가지로 하나의 타입으로 메서드와 프로퍼티를 선언한 리스트(구현 x)
-
functionality 만을 상속
-
delegation(blind, structured communication b/w view and controller)에 용이
-
objective-c 의 프로토콜들의 경우 일부 프로퍼티/메서드만 구현해도 순응하는 것으로 인정하나, Swift 에서는 반드시 특정 프로토콜에 따르려면 해당 프로토콜의 모든 프로퍼티/메서드를 구현해야 함
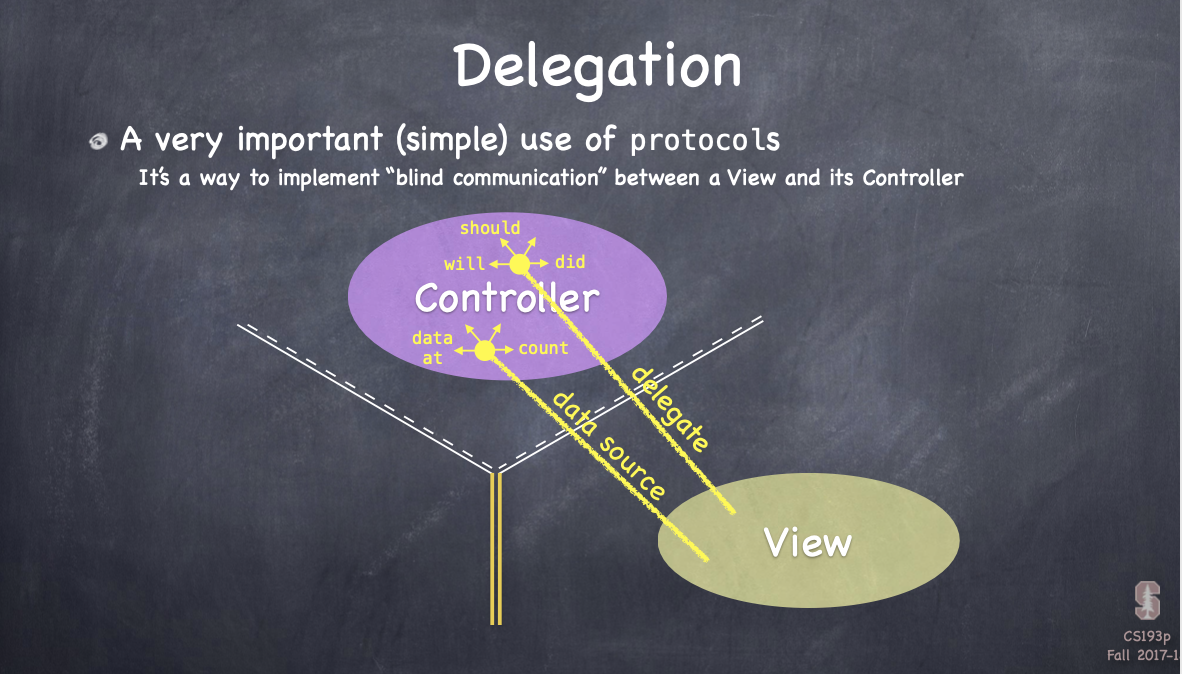
Delegation
- 아직 정리할 정도로 이해가 안 가서 일단 슬라이드만...다음 주차 강의 때 직접 해본다고 한다
# Hashable
- 딕셔너리의 Key 로 쓰려면 Hashable 프로토콜을 따라야 한다
- 각 카드에 사용할 이모지를 저장하는 emoji 딕셔너리의 key 를 card 의 identifier 가 아닌 Card 인스턴스 자체로 바꿔주기 위해 Card 를 Hashable 하게 만들어준다. 강의에서는
hashvalue와==을 직접 정의했지만, Card 의 모든 프로퍼티가 이미 Hashable 하기 때문에struct Card: Hashble { // some code }라고 선언만 해주면 Swift 가 알아서 해준다.
class ViewController: UIViewController {
	private func emoji(for card: Card) -> String {
		if emoji[card] == nil, emojiChoices.count > 0 {
			let stringIndex = emojiChoices.index(emojiChoices.startIndex, offsetBy: emojiChoices.count.arc4Random)
			emoji[card] = String(emojiChoices.remove(at: stringIndex))
		}
		return emoji[card] ?? "?"
	}
}
# NSAtrributedString
-
모든 character 가 자신을 스크린에 어떻게 나타낼 지(e.g. 폰트, 색깔 등)에 관한 딕셔너리를 갖고 있는 String 으로 UILable, UIButton 등에 사용할 수 있다. 참고로 read-only
- set 도 하려면 NSMutableAttributedString 을 사용해야 한다.
- set 도 하려면 NSMutableAttributedString 을 사용해야 한다.
-
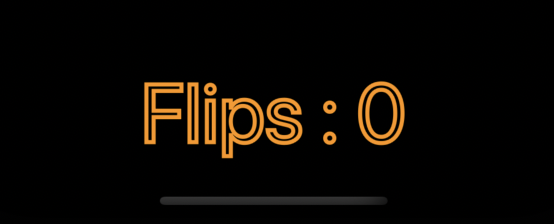
아래와 같이 flipCountLabel 에 아웃라인 효과를 주기 위해 NSAttributedString 을 사용할거다!
-
NSAttributedString(string:,
attributes:) 은 [NSAttributedStringKey:Any] 의 형태로 attribute 들을 받아서 NSAttributedString 을 만드는 init 이다. 따라서 아래와 같이 attributes 라는 별도의 딕셔너리를 선언해서 text 에 적용하고 싶은 attribute 들을 설정하고 앞서 말한 init 을 사용하면 NSAttributedString 을 만들 수 있다.- Any 타입은 objective-c 와의 연결 목적 외에는 사용하지 말 것
- Any가 필요한 경우에는 enum with associated value를 사용하면 된다
class ViewController: UIViewController {
    private func updateFlipCountLabel() {
        let attributes: [NSAttributedStringKey: Any] = [
            .strokeWidth: 5.0,
            .strokeColor: #colorLiteral(red: 1, green: 0.5763723254, blue: 0, alpha: 1)
        ]
        let attributedString = NSAttributedString(string: "Flips: \(flipCount)",
            attributes: attributes)

        flipCountLabel.attributedText = attributedString
    }
}- 주의할 점은 flipCount 가 초기화될 때는 didSet 이 이를 감지하지 못하므로 우리가 설정한 속성들이 적용되지 않는다. 따라서 처음부터 속성들이 적용될 수 있도록 해야하는 데 바로 flipCountLabel 에서 didSet 을 사용하면 된다. UI 에서 view 와 outlet 간에 최초로 연결이 이루어질 때, 즉 iOS 가 outlet 을 설정할 때 didSet 이 트리거되기 때문!
private(set) var flipCount = 0 {
didSet {
updateFlipCountLabel()
}
}
@IBOutlet private weak var flipCountLabel: UILabel! {
didSet {
updateFlipCountLabel()
}
}
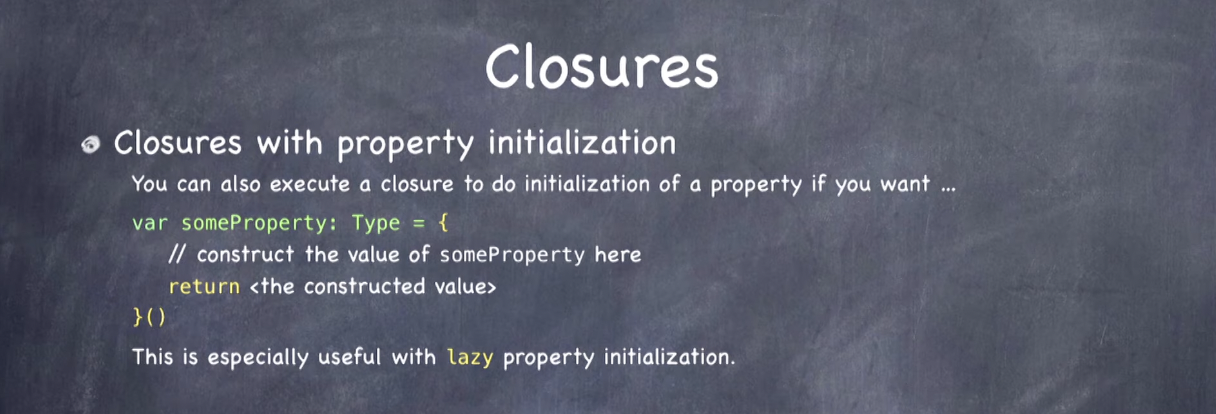
}# Closures
-
reference type 으로 자신이 사용하는 variable 들도 캡쳐해서 힙에 보관하기 때문에 reference cycle 을 발생시킬 수 있다
-
다음과 같은 방식으로 프로퍼티 초기화에도 사용할 수 있는데, lazy 키워드와 함께 사용하면 해당 프로퍼티가 호출되기 전까지 클로저가 실행되지 않으므로 매우 유용한다
var someProperty: Type = {
    // construct the value of someProperty here
    retun <the constructed value>
}()
# Element
- 기존의 indexOfOneAndOnlyFaceUpCard 를 filter(_:) 와 extension 을 이용해 간결하게 리팩토링했다. 코드 자체는 별 거 없지만 extension 에서 Collection 의 각 요소에 대한 generic 으로 Element 를 사용할 수 있다는 점이 인상적이었다!
struct Concentration {
    private var indexOfOneAndOnlyFaceUpCard: Int? {
        get { cards.indices.filter { cards[$0].isFaceUp }.oneAndOnly }
}

extension Collection {
    var oneAndOnly: Element? {
        count == 1 ? first : nil
    }
}
☀️ 느낀점
- 아직까지는 할만한데...5강부터가 진짜겠지...
protocols
- only inherits funtionality no storage
- types like String, Int
good for - blind, structured communication b/w View and Controller (delegation)
NSAttributedString
-
a String that every character has a little dictionary associated with it, and that Dictionary can have lots of little keys and values that say how to draw that character on screen(e.g. font, color etc.)
-
Any를 Objective-c 와의 연결 목적 외에는 절대 사용하지 말 것!
- enum with associated value 를 대신 사용
Closures
- reference type