run
더 확장성 있게 사용하기 위해서 class의 staticMethod가 아닌 인스턴스를 만들어서 설정합니다.
// before
public static void main(String[] args) {
   SpringApplication.run(DemoApplication.class, args);
}

// after1
public static void main(String[] args) {
    SpringApplication app = new SpringApplication(DemoApplication.class);
    app.run(args);
}

// after2
public static void main(String[] args) {
	new SpringApplicationBuilder()
       		.sources(DemoApplication.class)
       		.run(args);
}
banner
런할 때 콘솔에 찍히는 처음 화면부분에 배너를 넣을 수 있습니다.
기본은 스프링이라는 글자로 찍혀 나옵니다. 글자, png, jpg, gif 다 됩니다.
기본 위치는 /src/main/resources/ 안에 banner.txt로 만드시면 됩니다.
다른 경로에 넣고 싶으시면 원하는 경로에 넣고 application.properties안에
spring.banner.location=classpath:~~~~~~.banner.txt로 경로 설정을 해줍니다.
위에처럼 파일이 아닌 코드로 배너를 만들고 싶다면,
SpringApplication app = new SpringApplication(DemoApplication.class);
app.setBanner((Environment environment, Class<?> sourceClass, PrintStream out) -> {
	out.println("============SUJEONG===========");
});
파일과 코드가 같이 있다면 파일이 우선 순위가 높습니다.
배너를 끄고 싶다면,
public static void main(String[] args) {
    SpringApplication app = new SpringApplication(DemoApplication.class);
    app.setBannerMode(Banner.Mode.OFF);
    app.run(args);
}
Application Events and Listeners
ApplicationListener를 상속받으면 이벤트 리스너를 만들 수 있습니다.
주의할 점은, ApplicationContext를 만들기 전에 발생하는 이벤트는 @Bean으로 등록할 수 없어서 다른 설정을 해주어야 합니다.
일단 일반적인 설정부터 살펴보죠.
새로운 클래스를 만들고 아래와 같이 적습니다.
@Component 어노테이션으로 빈으로 등록을 하여 해당 이벤트가 발생할 때 이 코드가 실행됩니다.
package com.example.demo;

import org.springframework.boot.context.event.ApplicationStartedEvent;
import org.springframework.context.ApplicationListener;
import org.springframework.stereotype.Component;

@Component
public class SampleListener implements ApplicationListener<ApplicationStartedEvent> {
    @Override
    public void onApplicationEvent(ApplicationStartedEvent applicationStartedEvent) {
        System.out.println("=======================");
        System.out.println("started");
        System.out.println("=======================");
    }
}
ApplicationContext만들기 전 이벤트의 경우는 아래와 같습니다.
package com.example.demo;

import org.springframework.boot.context.event.ApplicationStartingEvent;
import org.springframework.context.ApplicationListener;

public class SampleListener implements ApplicationListener<ApplicationStartedEvent> {
    @Override
    public void onApplicationEvent(ApplicationStartingEvent applicationStartingEvent) {
        System.out.println("=======================");
        System.out.println("Application is starting");
        System.out.println("=======================");
    }
}

// main에서 addListeners로 이벤트리스너를 등록해 줍니다.
package com.example.demo;

import org.springframework.boot.SpringApplication;
import org.springframework.boot.autoconfigure.SpringBootApplication;

@SpringBootApplication
public class DemoApplication {

    public static void main(String[] args) {

        SpringApplication app = new SpringApplication(DemoApplication.class);
        app.addListeners(new SampleListener());
        app.run(args);

    }
}
setWebApplicationType
NONE: 아래 두 개가 다 없을경우 지정됩니다.
REACTIVE: servlet이 없고 spring Web Flux가 들어있으면 리액티브 타입으로 지정됩니다.
SERVLET: webMVC가 있다면 기본적으로 서블릿으로 타입이 지정됩니다.
ApplicationArguments
메인 메소드에서 늘 파라미터로 받던 그 args의 정체는..! 이 앱(자바 코드 전체)을 실행할 때 파라미터로 넘겨주는 값입니다.
예를 들어 java -jar DemoApplication.jar --foo 에서 "--foo" 이 부분입니다.
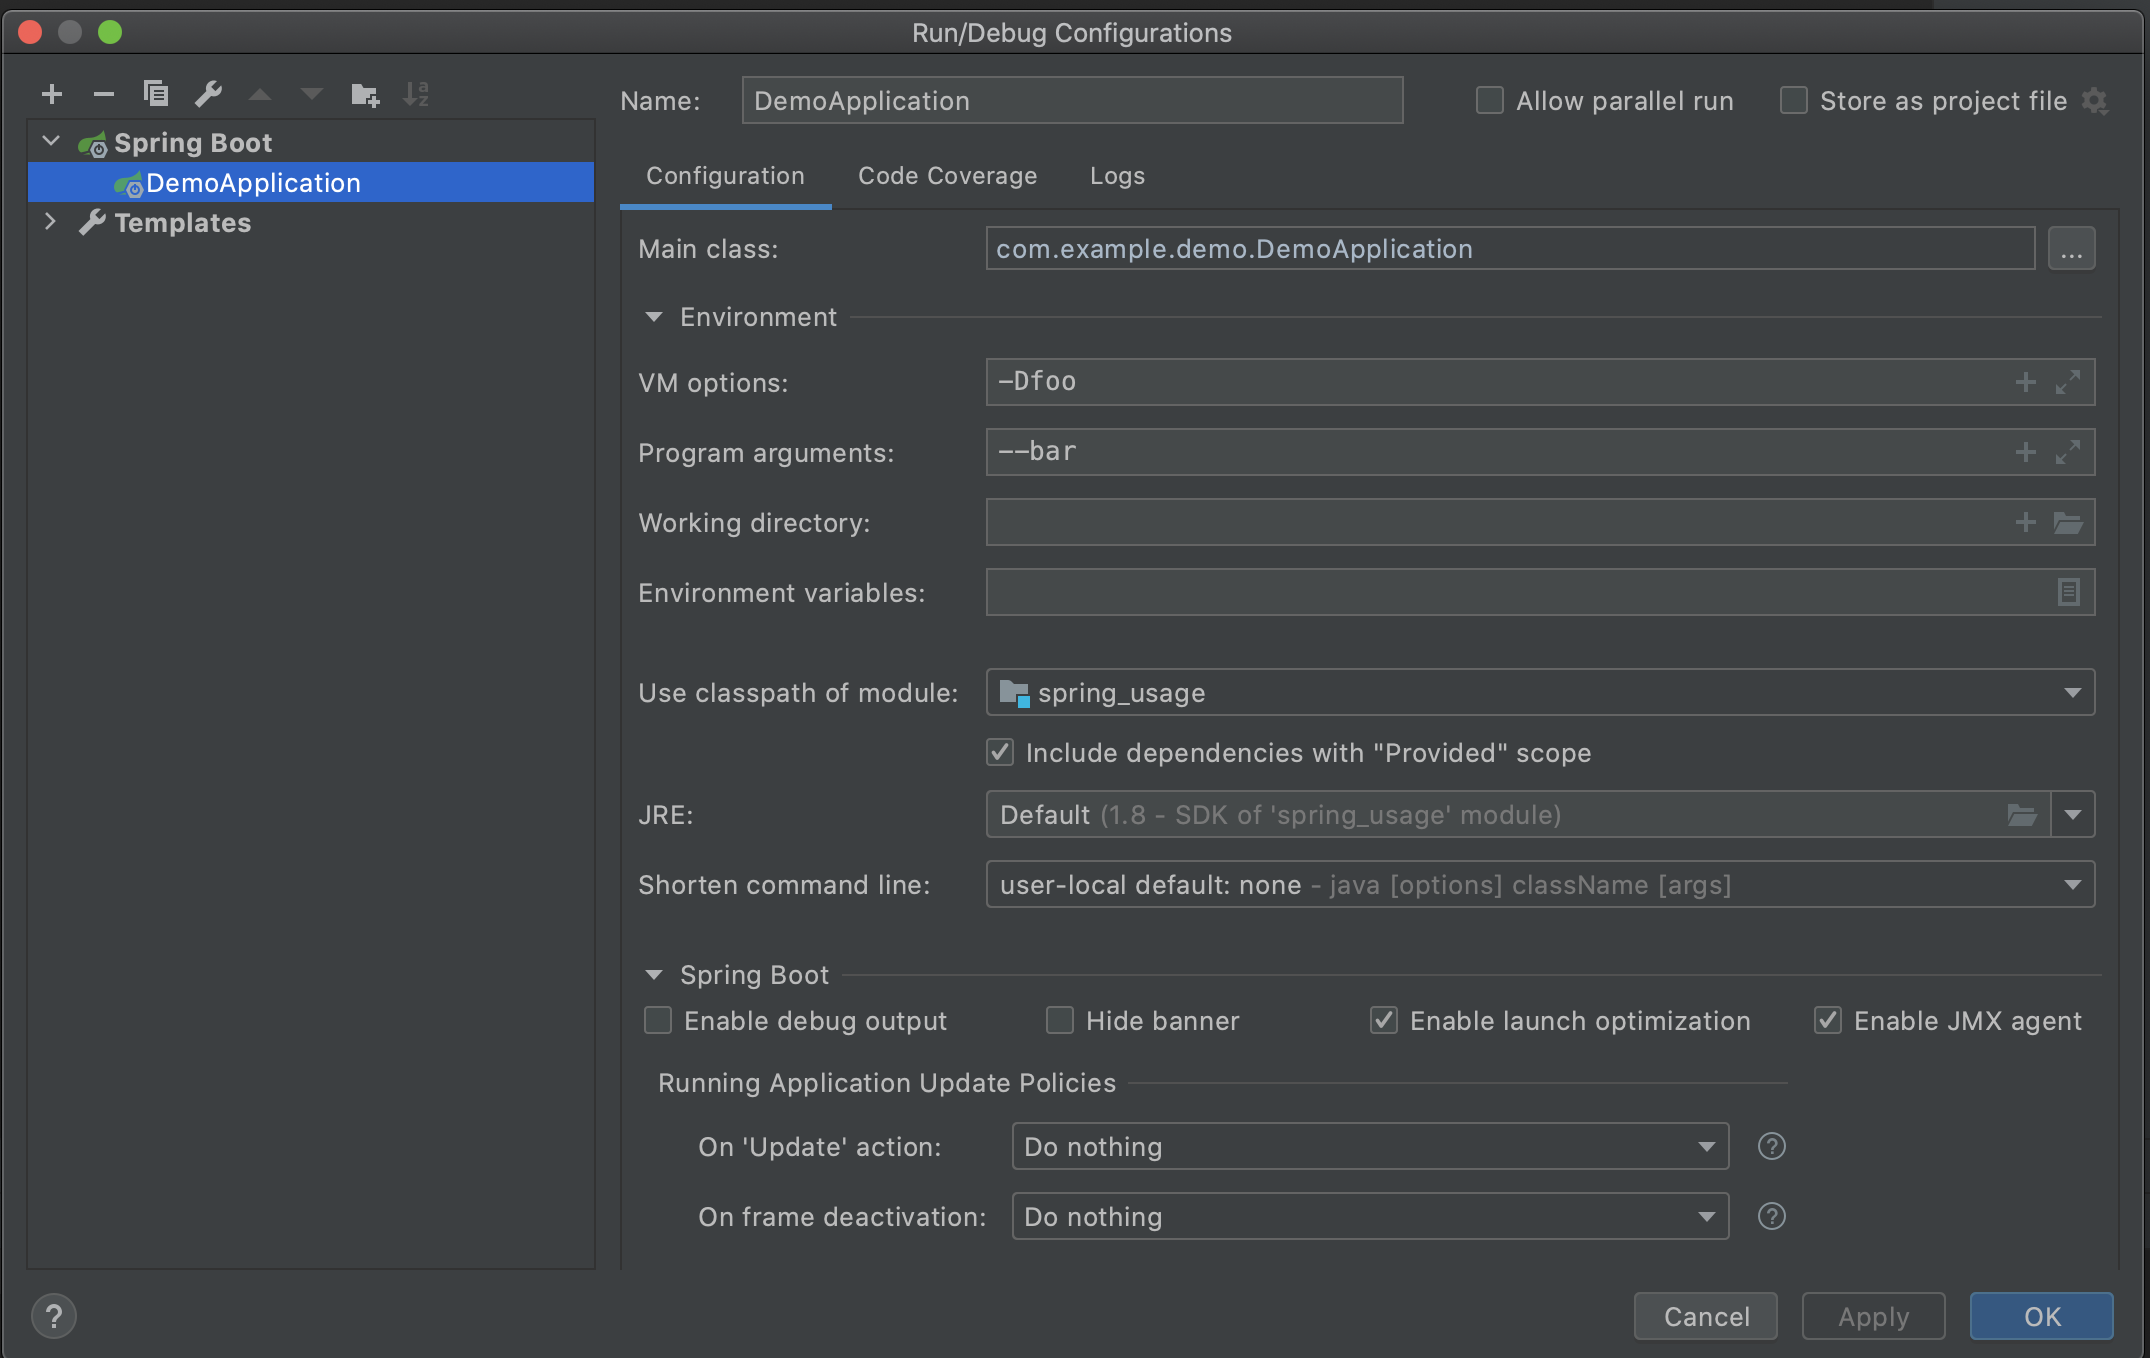
인텔리제이에서는 아래 부분의 --bar 입니다.
받아서 사용하는 코드는
package com.example.demo;

import org.springframework.boot.ApplicationArguments;
import org.springframework.stereotype.Component;

@Component
public class SampleComponent {
    public SampleComponent(ApplicationArguments arguments) {
        System.out.println("bar: " + arguments.containsOption("bar"));
    }
}
앱 실행한 뒤 뭔가 실행하고 싶을 때
ApplicationRunner(추천) 또는 CommandLineRunner를 사용합니다.
이걸 여러개 사용했다면 @Order(n)으로 순서를 지정해줄 수도 있습니다. 숫자가 작을수록 먼저 실행됩니다.
package com.example.demo;

import org.springframework.boot.ApplicationArguments;
import org.springframework.boot.ApplicationRunner;
import org.springframework.stereotype.Component;

@Component
@Order(1)
public class SampleListener implements ApplicationRunner {
    @Override
    public void run(ApplicationArguments args) throws Exception {
        System.out.println("foo: " + args.containsOption("foo"));
        System.out.println("bar: " + args.containsOption("bar"));
    }
}