
📍 DLL 파일 생성
① Visual Studio에서 클래스 라이브러리(.NET Framework)로 프로젝트를 생성한다.
(DLL 파일을 만드려면 프로젝트 템플릿은 꼭 클래스 라이브러리(.NET Framework)여야 한다.)

② 프로젝트 생성 후 DLL로 만들고자 하는 코드를 작성한다.
(ex. 로그파일 저장하는 코드를 작성)
public string dateLog() // 날짜 출력
{
string log = DateTime.Now.ToString("yyyy-MM-dd HH:mm:ss fff");
return log;
}
public void saveLog(string date, string unit, string btn)
{
string DirPath = $"D://TestLog/test/{DateTime.Now.ToString("yyyy-MM-dd")}/{unit}";
string FilePath = $"{DirPath}/{unit}_{DateTime.Now.ToString("dd")}.log";
string temp;
DirectoryInfo directoryInfo = new DirectoryInfo(DirPath);
FileInfo fileInfo = new FileInfo(FilePath);
try
{
if (!directoryInfo.Exists) Directory.CreateDirectory(DirPath);
if (!fileInfo.Exists)
{
using (StreamWriter streamWriter = new StreamWriter(FilePath))
{
streamWriter.WriteLine($"{date} {unit} : {btn}-Click");
streamWriter.Close();
}
}
else
{
using (StreamWriter streamWriter = File.AppendText(FilePath))
{
streamWriter.WriteLine($"{date} {unit} : {btn}-Click");
streamWriter.Close();
}
}
}
catch (Exception ex)
{
// pass
}
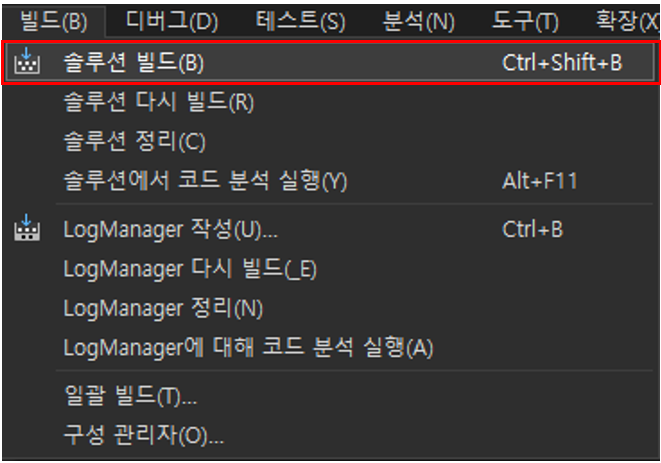
}③ 코드 작성 완료 후 [빌드] - [솔루션 빌드]를 클릭한다.
④ 여기까지 왔으면 [프로젝트 폴더] - [bin] - [Debug]에 들어가면 프로젝트 이름.dll 파일이 생성 되어있다.

📍 DLL 파일 참조
① Visual Studio에서 프로젝트를 생성해준다.
(ex. Windows Forms 앱(.NET Framework) 생성했다.)
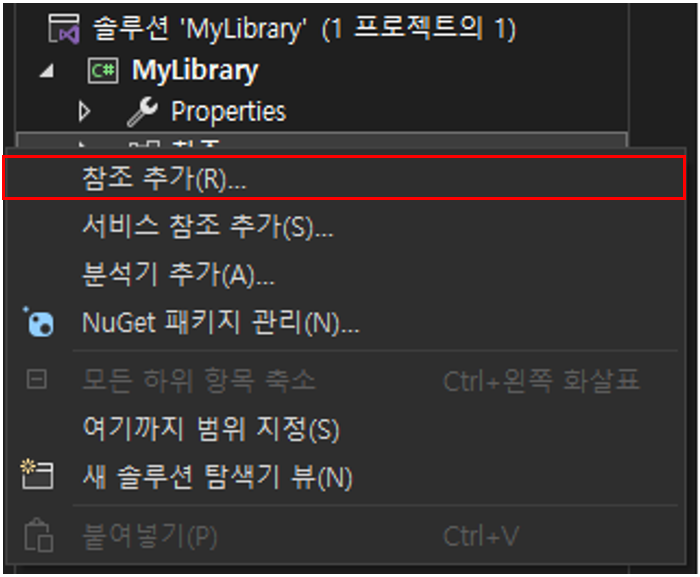
② 생성한 프로젝트에서 [솔루션 탐색기] - [참조]에서 오른쪽 마우스를 클릭하고 [참조 추가]를 클릭한다.
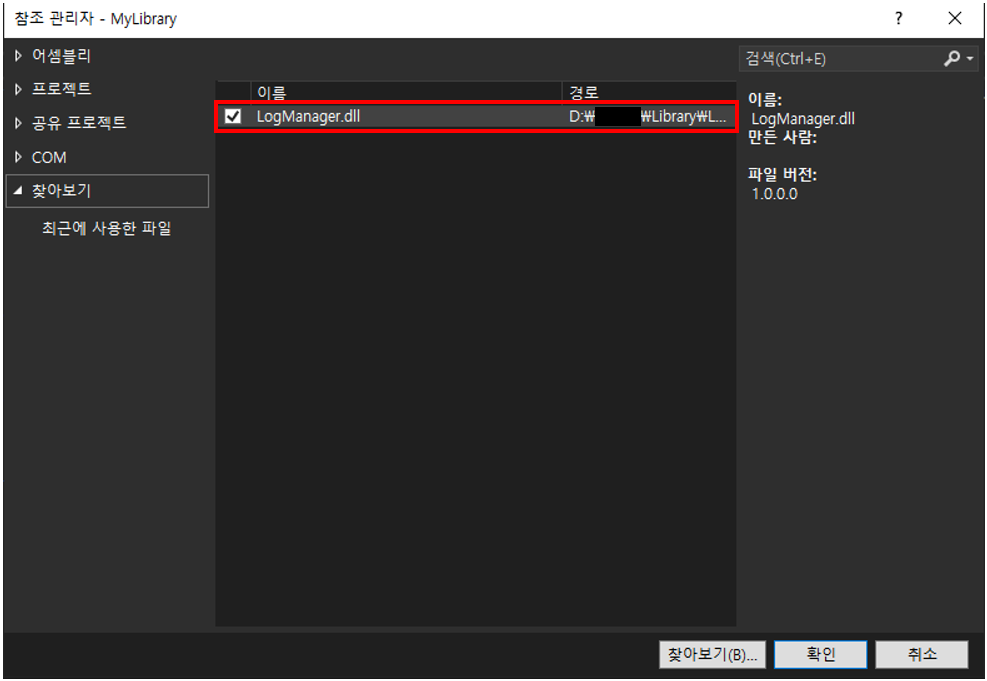
③ [참조 관리자] 창에서 [찾아보기] 버튼을 클릭 후 아까 생성한 dll파일을 참조해준다.
④ 완료! 위의 방법으로 DLL 파일을 추가하면 라이브러리에 포함되어있는 함수, 클래스 등을 끌어다 쓸 수 있다.
📍 오류가 난다면?
DLL을 참조하지 못한다는 오류는 .NET Framework가 맞지 않을 경우 생겼다.
클래스 라이브러리와 라이브러리를 사용하려는 프로젝트는 .NET Framework를 일치시켜주자!

언어는 거들 뿐...