Django Template – Template 상속
이제 nav item별로 페이지들의 path를 설정해야한다.
그전에, Django Template에서는 상속이 가능하다.
즉, 메소드 오버라이딩을 할수 있다. 코드를 간결하게 만들기 위해
html 파일들의 구조를 변경해보자.
- Templete 상속은 문법 중에서 가장 복잡하지만, 강력한 기능
- 사이트의 Look and Feel 의 일관성 확보
- 부모 템플릿은 템플릿의 뼈대를 만들어 줌
- {% block %} 태그를 통해 하위에서 채울 부분 지정
- 자식 템플릿은 부모 템플릿의 뼈대는 그대로 재사용
- 하위 템플릿에서 {% block %}부분만 채워주면 됨
템플릿 상속을 정의할 때 유의 사항
- {% extends %} 태그는 사용하는 태그 중 최상단에 위치
- 템플릿의 공통 사항을 가능하면 많이 뽑아서 1단계 부모 템플릿에
{% block %} 태그가 많아질수록 좋음 - 부모 템플릿의 {% block %} 안에 있는 내용을 그대로 사용하고
싶다면 {{ block.super }} 변수 사용. - 부모 템플릿의 내용을 그대로 사용하면서 자식 템플릿에서 내용을 추가하는 경우 사용
- 가독성을 높이기 위하여 {% endblock countent %}처럼 블록명을 기입해도 됨
상속 적용하기
- community/templates/community/list.html
<!DOCTYPE html>
<html lang="en">
<head>
    <meta charset="UTF-8">
    <meta http-equiv="X-UA-Compatible" content="IE=edge">
    <meta name="viewport" content="width=device-width, initial-scale=1.0">
    <title>Document</title>
</head>
<body>

    <h1>전체 List</h1>

    <p>no | 제목 | 이름 | 내용 | 작성 날짜</p>
    <ul>
        {% for article in article_list %}
            <p> <a href="/community/view_detail/{{ article.id }}">{{article.id}}</a> | {{ article.title }} |
                 {{ article.name }} | {{ article.contents }} | {{ article.cdate|date:"Y년 M d일 D"}} </p>
    </ul>

</body>
</html>
list.html의 코드이다.
템플릿 상속 구조를 짜기 위해서는 피상속자를 받는 부모가 필요하다.
부모는 base.html로 생각한다. 여기서 피상속자들은 {% extends 'partials/base.html' %} 코드를 상위에 작성해야한다. 또한 피상속자가 상속하는 코드는 자주쓰이는 코드이다. 예를들어 위 코드에서 상속되어서 늘 쓰이는 코드는
<!DOCTYPE html>
<html lang="en">
<head>
    <meta charset="UTF-8">
    <meta http-equiv="X-UA-Compatible" content="IE=edge">
    <meta name="viewport" content="width=device-width, initial-scale=1.0">
    <title>Document</title>
</head>
<body>

</body>
</html>
정도 될것이다. <body></body>안에 코드들은 list를 나타내기 때문에 그대로 두어야한다. 그다음 Template을 상속 받는다고 표현해주면된다. block list
{% extends 'partials/base.html' %}
{% block list %}
    <h1>전체 List</h1>

    <p>no | 제목 | 이름 | 내용 | 작성 날짜</p>
    <ul>
        {% for article in article_list %}
            <p> <a href="/community/view_detail/{{ article.id }}">{{article.id}}</a> | {{ article.title }} |
                 {{ article.name }} | {{ article.contents }} | {{ article.cdate|date:"Y년 M d일 D"}} </p>
        {% endfor %}
    </ul>
{% endblock list %}
이와같이 부모템플릿에 상속받는 템플릿들을 수정하자
- view_detail.html
{% extends 'partials/base.html' %}
{% block view_detail %}
<table>
    <tr>
        <td>no: </td>
        <td>{{ article_detail.pk }}</td>
    </tr>
    <tr>
        <td>제목: </td>
        <td>{{ article_detail.title }}</td>
    </tr>
    <tr>
        <td>저자: </td>
        <td>{{ article_detail.name }}</td>
    </tr>
    <tr>
        <td>내용: </td>
        <td>{{ article_detail.contents }}</td>
    </tr>
    <tr>
        <td>Email: </td>
        <td>{{ article_detail.email }}</td>
    </tr>
</table>
{% endblock view_detail %}- write.html
{% extends 'partials/base.html' %}
{% block write %}
<form action="" method="post">
    <table>
        {{form}} {% csrf_token %}
        <!-- 데이터를 서버로 넘길때 필요한 토큰
        csrf 공격을 받지 않게 하기위해 사용-->
    </table>
    <button type="submit"><a href="/">확인</button></a>
</form>
{% endblock write %}- index.html
<!-- base.html의 피상속자 index -->
{% extends 'partials/base.html' %}

{% block content %}
<h1>환상의 나라 대륭테크노타운</h1>
<div style="text-align: center;"></div>
<ul>
    <table class="table table-hover">
        <thead>
            <tr class="text-center">
                <th scope="col">no</th>
                <th scope="col">제목</th>
                <th scope="col">이름</th>
                <th scope="col">내용</th>
                <th scope="col">작성 날짜</th>
            </tr>
        </thead>
        <tbody>
            {% for article in latest_article_list %}
            <tr>
                <th scope="row"><a href="/community/view_detail/{{ article.id }}">{{ article.id }}</a></th>
                <td>{{article.title}}</td>
                <td>{{ article.name }}</td>
                <td>{{ article.contents }}</td>
                <td>{{ article.cdate|date:"Y년 M d일 D"}}</td>
            </tr>
            {% endfor %}
        </tbody>
    </table>
</ul>
<button type="button" class="btn btn-success"><a href="/community/write">메모작성하기</a></button>

<div class="accordion" id="accordionExample">
    <div class="accordion-item">
        <h2 class="accordion-header" id="headingOne">
            <button class="accordion-button" type="button" data-bs-toggle="collapse" data-bs-target="#collapseOne"
                aria-expanded="true" aria-controls="collapseOne">
                Accordion Item #1
            </button>
        </h2>
        <div id="collapseOne" class="accordion-collapse collapse show" aria-labelledby="headingOne"
            data-bs-parent="#accordionExample">
            <div class="accordion-body">
                <strong>This is the first item's accordion body.</strong> It is shown by default, until the
                collapse plugin adds the appropriate classes that we use to style each element. These classes
                control the overall appearance, as well as the showing and hiding via CSS transitions. You can
                modify any of this with custom CSS or overriding our default variables. It's also worth noting
                that just about any HTML can go within the <code>.accordion-body</code>, though the transition
                does limit overflow.
            </div>
        </div>
    </div>
    <div class="accordion-item">
        <h2 class="accordion-header" id="headingTwo">
            <button class="accordion-button collapsed" type="button" data-bs-toggle="collapse"
                data-bs-target="#collapseTwo" aria-expanded="false" aria-controls="collapseTwo">
                Accordion Item #2
            </button>
        </h2>
        <div id="collapseTwo" class="accordion-collapse collapse" aria-labelledby="headingTwo"
            data-bs-parent="#accordionExample">
            <div class="accordion-body">
                <strong>This is the second item's accordion body.</strong> It is hidden by default, until the
                collapse plugin adds the appropriate classes that we use to style each element. These classes
                control the overall appearance, as well as the showing and hiding via CSS transitions. You can
                modify any of this with custom CSS or overriding our default variables. It's also worth noting
                that just about any HTML can go within the <code>.accordion-body</code>, though the transition
                does limit overflow.
            </div>
        </div>
    </div>
    <div class="accordion-item">
        <h2 class="accordion-header" id="headingThree">
            <button class="accordion-button collapsed" type="button" data-bs-toggle="collapse"
                data-bs-target="#collapseThree" aria-expanded="false" aria-controls="collapseThree">
                Accordion Item #3
            </button>
        </h2>
        <div id="collapseThree" class="accordion-collapse collapse" aria-labelledby="headingThree"
            data-bs-parent="#accordionExample">
            <div class="accordion-body">
                <strong>This is the third item's accordion body.</strong> It is hidden by default, until the
                collapse plugin adds the appropriate classes that we use to style each element. These classes
                control the overall appearance, as well as the showing and hiding via CSS transitions. You can
                modify any of this with custom CSS or overriding our default variables. It's also worth noting
                that just about any HTML can go within the <code>.accordion-body</code>, though the transition
                does limit overflow.
            </div>
        </div>
    </div>
</div>
{% endblock content %}
그렇다면 부모html의 코드는 피상속자들이 공통으로 가진 코드가 있어야하고, 또한 상속관계이므로 피상속자들을 불러야한다. 과연 어떻게 부를까?
- base.html
<!-- 모든 page에 공통적으로 들어가는것들! -->
<!DOCTYPE html>
<html lang="en">

<head>
    <meta charset="UTF-8">
    <meta http-equiv="X-UA-Compatible" content="IE=edge">
    <meta name="viewport" content="width=device-width, initial-scale=1.0">
    <!-- CSS -->
    <link rel="stylesheet" href="https://cdn.jsdelivr.net/npm/bootstrap@5.2.3/dist/css/bootstrap.min.css">
    <!-- JS -->

    <title>Document</title>
</head>

<body>
    {% include 'partials/navbar.html' %}

    {% block content %}
    <div class="container">
    <!-- Template 상속 -->
    <!-- block~endblock을 명시하고 content변수로 지정 -->
    <!-- 피상속자에게 오버라이딩하기위해 부모상속자에서 메소드 정의  -->

    </div>
    {% endblock content %}

    {% include 'partials/footer.html' %}
</body>

</html>
<script src="https://cdn.jsdelivr.net/npm/bootstrap@5.2.3/dist/js/bootstrap.bundle.min.js"></script>
{% block script %}

{% endblock script %}
먼저 왜 CSS와 JS 둘의 위치는 다른걸까? 단순하다. JS는 상속받지 않는 관계에서도 쓰이기 때문이다.
<body></body>안에서 <div class="container"></div>기준으로 바깥 위와 바깥아래엔 navbar 코드와 footer코드가 상속되어야한다. 그래서 {% include ' ' %}을 사용했다. 다음 container안에는 우리가 block으로 지정한 변수로 지정하면된다. 그렇다면 맨 마지막 block script는 무엇일까? 이따 만들 템플릿 dashboard.html의 상속된 코드이다. html안에서는 script 코드를 메소드오버라이딩 하지못하기때문에 맨 아래로 빼둔것이다.
다음과 같이 정의하자.
...

    <title>
        {% block title %}
        COZLAB 홈페이지
        {% endblock title %}
    </title>
</head>

<body>
<!-- navbar -->
{% include 'partials/navbar.html' %}
    <div class="container">
<!-- content -->
        {% block content %}

        {% endblock content %}

<!-- write -->
        {% block write %}

        {% endblock write %}

<!-- list -->
        {% block list %}

        {% endblock list %}

<!-- view_detail -->
        {% block view_detail %}

        {% endblock view_detail %}
    </div>

<!-- footer -->
{% include 'partials/footer.html' %}
</body>

...- dashboard.html
{% extends 'partials/base.html' %}
{% block title %}
대시보드 페이지
{% endblock title %}
{% load %}
{% block content %}
<h1>차트</h1>
<div>
<canvas id="myChart"></canvas>
<!-- <h1>차트</h1> -->
<div class="row mt-3 pt-3">
<div class="col-md-4">
<div class="border p-3 shadow">
<h4>Add Data</h4>
<hr>
<form method="POST">
{{ form }}{% csrf_token %}
<input type="submit" class="btn btn-success btn-block" value="입력">
</form>
</div>
</div>
<div class = 'col'>
<canvas id="myChart"></canvas>
</div>
</div>
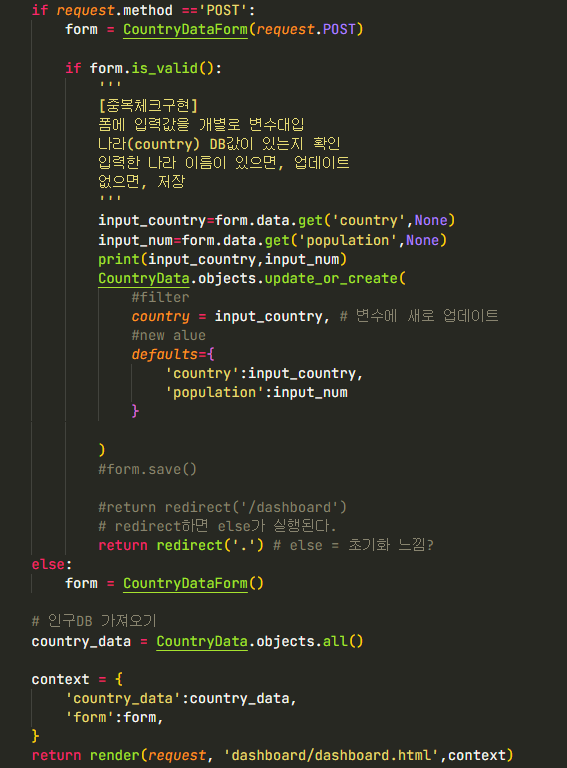
{% endblock content %}대시보드에서 입력 DB 저장
- views.py
- dashboard.html
{% block script %}
<script src="https://cdn.jsdelivr.net/npm/chart.js"></script>
<script>
const ctx = document.getElementById('myChart');
new Chart(ctx, {
type: 'bar',
data: {
//labels: ['January', 'February', 'March', 'April', 'May', 'June', 'July'],
labels: [
<!-- for문 사용! -->
{% for data in country_data %}
'{{ data.country }}',
{% endfor %}
],
datasets: [{
label: '# of Votes',
//data: [65, 59, 80, 81, 56, 55, 40],
data: [
<!-- for문 사용! -->
{% for data in country_data %}
'{{ data.population }}',
{% endfor %}
],
backgroundColor: [
'rgba(255, 99, 132, 0.2)',
'rgba(255, 159, 64, 0.2)',
'rgba(255, 205, 86, 0.2)',
'rgba(75, 192, 192, 0.2)',
'rgba(54, 162, 235, 0.2)',
'rgba(153, 102, 255, 0.2)',
'rgba(201, 203, 207, 0.2)'
],
borderColor: [
'rgb(255, 99, 132)',
'rgb(255, 159, 64)',
'rgb(255, 205, 86)',
'rgb(75, 192, 192)',
'rgb(54, 162, 235)',
'rgb(153, 102, 255)',
'rgb(201, 203, 207)'
],
borderWidth: 1
}]
},
options: {
scales: {
y: {
beginAtZero: true
}
}
}
});
</script>
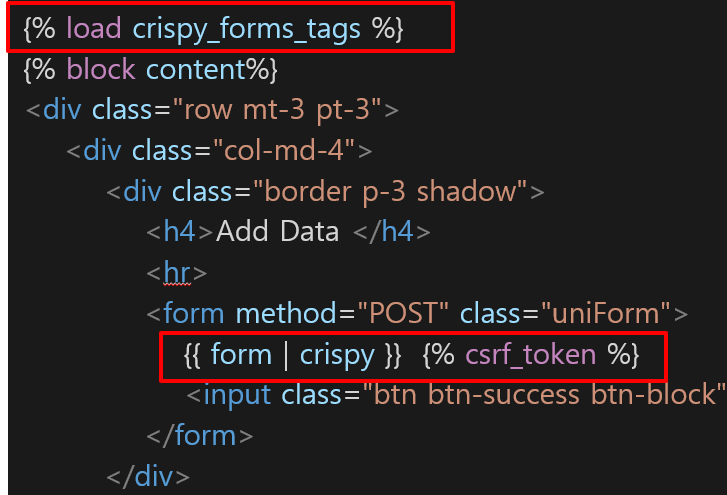
{% endblock script %}crispy boostrap
- https://django-crispy-forms.readthedocs.io/en/latest/ 활용
- dashboard.html
redirect & render
간단하게 redirect와 render에 대해 알아보자.
처음에 배웠을때는 render는 template를 띄워준다. context가 있을때는 context 내용과 함께 template을 띄워준다고 이해했다. redirect와 명확한 차이를 알고싶었다.
render
def render(request, template_name, context=None, content_type=None, status=None, using=None):
- render는 request, template_name 변수를 무조건 정의해줘야한다.
- request는 그냥 고대로 적어주고 template_name에는 불러주고 싶은 html을 적으면 된다.
- 템플릿만 띄워주던가 아님 템플릿과 거기서 사용하고 싶은 변수를 함께 넘겨줄 수 있는 것이 render다.
redirect
def redirect(to, *args, permanent=False, **kwargs):
- redirect는 to에 이동하고싶은 url을 적어준다.
- 보통 urls.py에서 name을 지정하고 이를 많이 사용한다.
- 단지 url로 이동하는 것이기 때문에 render처럼 템플릿에 값을 전달하지는 못한다.
그니까 render는 전달할 인자와 함께(없을수도 있)html페이지를 띄워주는거지만, redirect는 url로 이동시켜준다. 그래서 그 url에 해당하는 views함수가 또 실행되는 것이다.