기초작업을 해주고.
Empty프로젝트를 만들고 GameManager 만들어준 다음 위치값 초기화한다.
그리고 스크립트도 동일한 이름으로 만들고 컴포넌트를 넣어준다.

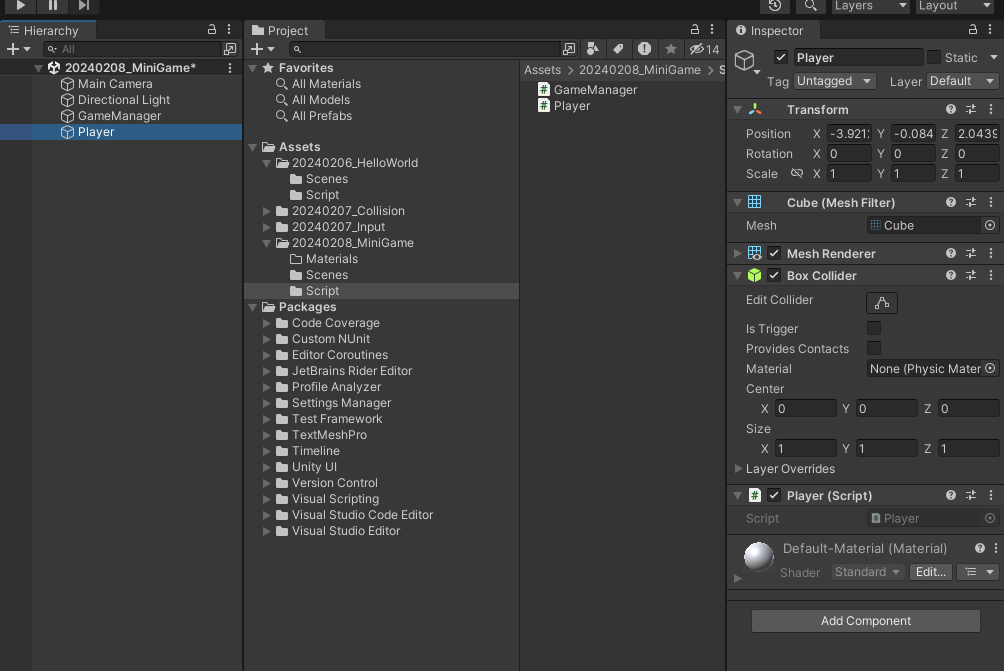
Cube 오브젝트를 만들어주고 Player 라고 이름을 지정한다.
그리고 카메라의 Z축을 -4까지 땡깁니다.

플레이어 컨트롤을 위해서 큰트롤러 스크립트를 만들어주고
public class PlayerController : MonoBehaviour
{
    [SerializeField] private GameObject player = null;
}
를 넣어주고 컴포넌트를 게임 매니저에 넣어주면
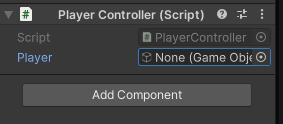
이런식으로 오브젝트를 변경할수있게 된다.
PlayerController.cs

public class PlayerController : MonoBehaviour
{
    [SerializeField] private GameObject playerGo = null;
    private void Update()
    {
        float axisH = Input.GetAxis("Horizontal");
        Player playerComp = playerGo.GetComponent<Player>();
        //함수 템플릿
        playerComp.MoveHorizontal(axisH);
    }
}
하지만 이렇게 만들면 좋은코드가 아니기 때문에 이렇게 하지는 말자
PlayerController.cs

public class PlayerController : MonoBehaviour
{
    [SerializeField] private Player player = null;
    private void Update()
    {
        float axisH = Input.GetAxis("Horizontal");
    }
}
컴포넌트의 이름을 넣으면 player만 들어가기 때문에 관리에 더욱 용이하다. 이렇게 만들어야 기획자가 실수하지않고 게임을 만들고있다.
그리고 Player.cs로 돌아가 일정거리 이상을 초과하면 화면에서 벗어나지못하게 만들어야한다.
    public void MoveHorizontal(float _axisH)
    {
        if(transform.position.x < -3.5f)
        {
            Vector3 newPos = transform.position;
            newPos.x = -3.5f;
            transform.position = newPos;
        }
                else if (transform.position.x > 3.5f)
        {
            Vector3 newPos = transform.position;
            newPos.x = 3.5f;
            transform.position = newPos;
        }
    }
    }
이 렇게 넣어주면 가능하다.
자유롭게 움직이게 하돼 -3.5 넘어가면 강제로 -3.5로 만들어주는 코드이다.
else if 는 양수로 똑같이 된다고 생각하면 된다.
이것보다 더 좋은게 함수형 프로그래밍인데.
using JetBrains.Annotations;
using System.Collections;
using System.Collections.Generic;
using UnityEditor.Rendering;
using UnityEngine;

public class Player : MonoBehaviour
{
    [SerializeField] private float limitLeft = -1f;
    [SerializeField] private float limitRight = 1f;
    private float moveSpeed = 10f;


    public void MoveHorizontal(float _axisH)
    {
        transform.Translate(Vector3.right * _axisH * moveSpeed * Time.deltaTime);
        #region Faild Limit Check
        /*if (transform.position.x < limitLeft)
          {
              //transform.position.x = -3.5f;
              Vector3 newPos = transform.position;
              newPos.x = limitLeft;
              transform.position = newPos;
          }
          else if (transform.position.x > limitRight)
          {
              Vector3 newPos = transform.position;
              newPos.x = limitRight;
              transform.position = newPos;
          }*/
        #endregion

        if (CheckLimitLeft())
        {
            FixedLimitHorizontal(limitLeft);
        }
        else if (CheckLimitRight())
        {
            FixedLimitHorizontal(limitRight);
        }
    }
    private bool CheckLimitLeft()
    {
        return transform.position.x < limitLeft;
    }
    private bool CheckLimitRight()
    {
        return transform.position.x > limitRight;
    }

    private void FixedLimitHorizontal(float _limitH)
    {
        Vector3 newPos = transform.position;
        newPos.x = _limitH;
        transform.position = newPos;
    }
}
이게 완성형이다. 이렇게 만들면
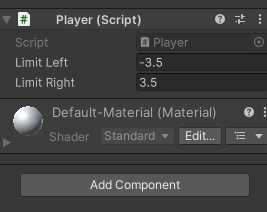
이렇게 유니티에서 조정이 가능하다
그리고 장애물을 만들어보자
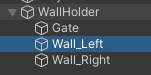
빈 오브젝트로 상속을 받는 문과 벽을 만들어줍니다 .
그리고 왼쪽벽과 오른쪽 벽을 만들고
스케일을 5,2,1 로 만듭니다.
그리고 포지션은 Left를 -3.3 Right를 3.3으로 만들어주면
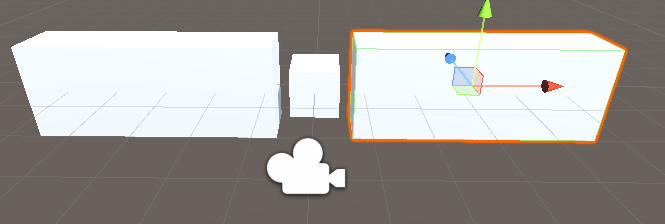
이렇게 된다
이제 머테리얼을 만들어준다
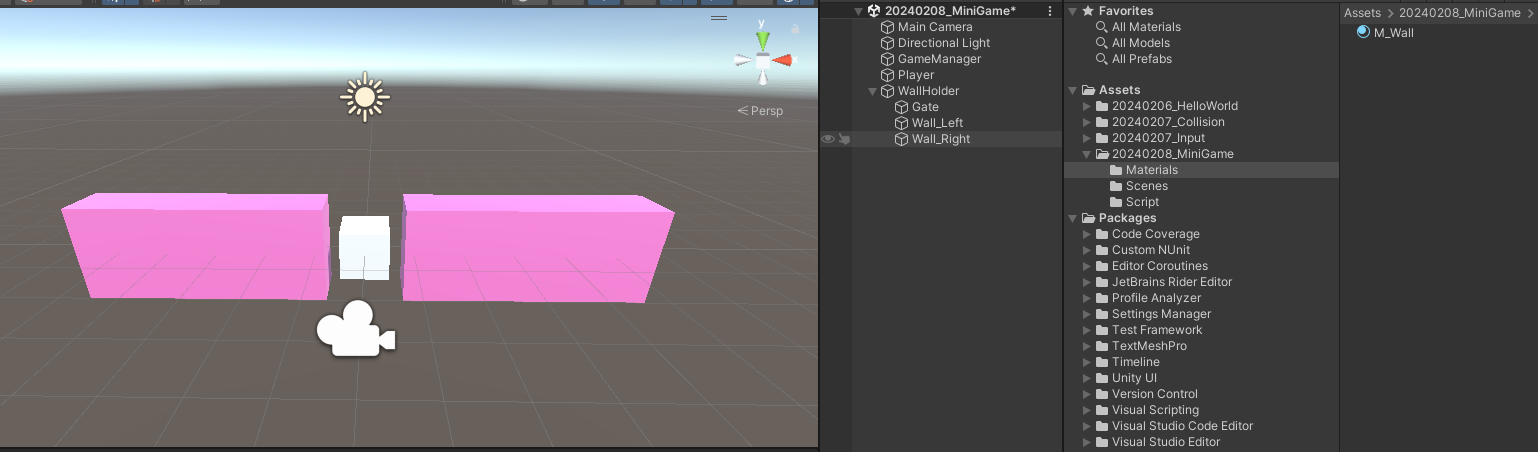
짜잔 이렇게 넣어주면 예뻐진다.
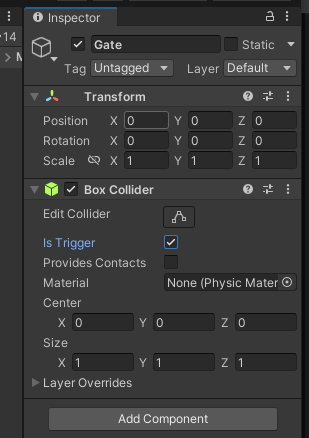
그리고 Gate 에 BoxCollider을 만들어주고 is Trigger을 true로 만들어줍니다 .
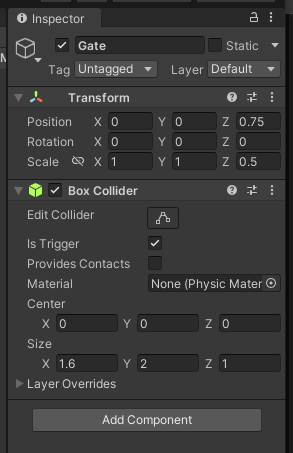
사이즈를 이정도로 만들어주면
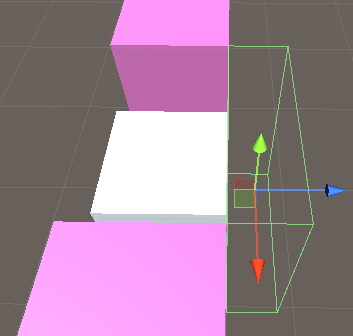
이렇게 된다.
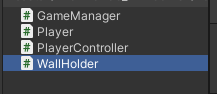
그리고 스크립트 WallHolder를 만들어주고 WallHolder.object에 넣어줍니다.
using System.Collections;
using System.Collections.Generic;
using UnityEngine;

public class WallHolder : MonoBehaviour
{
    private const float respawnPosZ = 10f;
    private const float endPosZ = -4f;
    private const float moveSpeed = 7f;

    private void Update()
    {
        MovingProcess();


        if (CheckEndPosition())
        {
            Respawn();
        }
    }
    private void Respawn()
    {
        Vector3 newPos = transform.position;
        newPos.x = UnityEngine.Random.Range(-3f, 3f);
        newPos.z = respawnPosZ;
        transform.position = newPos;

    }

    private bool CheckEndPosition()
    {
        return transform.position.z < endPosZ;
    }

    private void MovingProcess()
    {
        transform.Translate(Vector3.back * moveSpeed * Time.deltaTime);
    }
}
이렇게 해놓으면
벽이 랜덤으로 리스폰 되는 것은 만들어진다.
조금 더 재밌게 하기위해서 새로운 함수를 만들어보자
using System.Collections;
using System.Collections.Generic;
using UnityEngine;

public class WallHolder : MonoBehaviour
{
    private const float respawnPosZ = 10f;
    private const float endPosZ = -4f;
    private const float moveSpeed = 4f;
    private  float waveSpeed = 7f;
    private void Start()
    {
        Respawn();
    }

    private void Update()
    {
        // MovingProcess();
        MovingWaveProcess();

        if (CheckEndPosition())
        {
            Respawn();
        }
    }
    private void Respawn()
    {
        Vector3 newPos = transform.position;
        newPos.x = UnityEngine.Random.Range(-3f, 3f);
        newPos.z = respawnPosZ;
        transform.position = newPos;
        waveSpeed = Random.Range(1f, 3f) ;

    }

    private bool CheckEndPosition()
    {
        return transform.position.z < endPosZ;
    }

    private void MovingProcess()
    {
        transform.Translate(Vector3.back * moveSpeed * Time.deltaTime);
    }

    private void MovingWaveProcess()
    {
        Vector3 newPos = new Vector3();
        newPos.x = Mathf.Sin(Time.time * waveSpeed) * 3f;
        newPos.z = transform.position.z + (-1f * moveSpeed * Time.deltaTime);
        transform.position = newPos;
    }
}
좌우로 움직이면서 다가오는 벽을 만든다음 해보니 난이도가 너무 어려워서 벽 두께를 조정하고 속도도 줄여보면서 밸런스를 맞춰봐야한다 .

수치도 바꾸고 난이도 조정을 위해서 게이트의 크기를 조절한다.
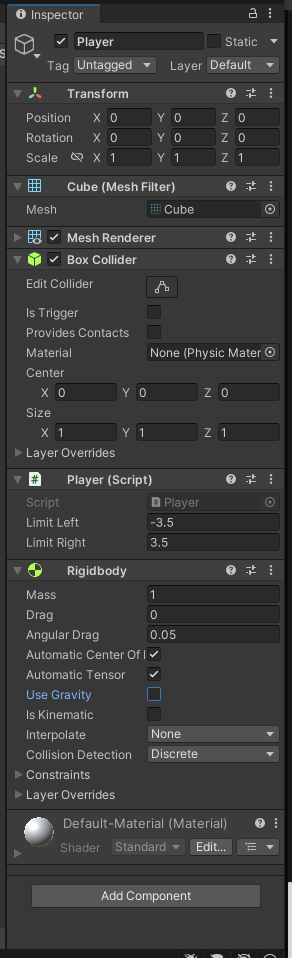
그리고 충돌 처리를 위해 Player.object에 Rigidbody 에 넣고 중력을 없앤다.
그리고

Constraints 탭에서 Rotation 의 축을 고정시키고 Position 의 Y축도 고정 시켜줍니다.
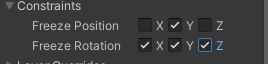
하면 고정된다!
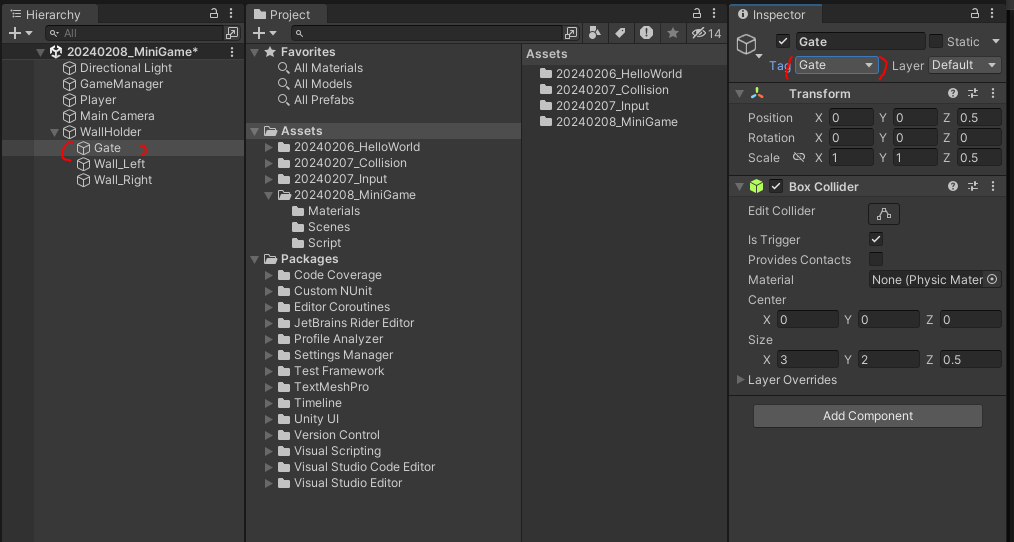
그리고 Gate에서 Gate 라는 태그를 생성하고 태그를 Gate로 지정해줍니다.
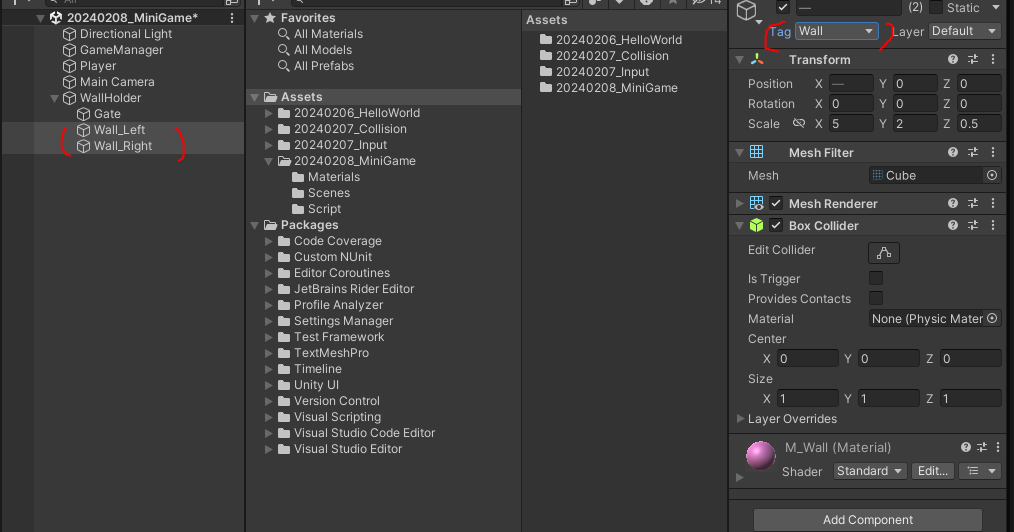
와 마찬가지로 Wall도 만들어줍니다.
이제 Player.cs로 돌아가서
using JetBrains.Annotations;
using System.Collections;
using System.Collections.Generic;
using UnityEditor.Rendering;
using UnityEngine;

public class Player : MonoBehaviour
{
    public delegate void CollisionDelegate();
    private CollisionDelegate collisionCallback = null;
    public CollisionDelegate CollisionCallback{set{collisionCallback = value;}}

    public delegate void TriggerDelegate();
    private TriggerDelegate triggerCallback = null;
    public TriggerDelegate TriggerCallback { set { triggerCallback = value; } }


    [SerializeField] private float limitLeft = -1f;
    [SerializeField] private float limitRight = 1f;
    private float moveSpeed = 10f;


    public void MoveHorizontal(float _axisH)
    {
        transform.Translate(Vector3.right * _axisH * moveSpeed * Time.deltaTime);
        #region Faild Limit Check
        /*if (transform.position.x < limitLeft)
          {
              //transform.position.x = -3.5f;
              Vector3 newPos = transform.position;
              newPos.x = limitLeft;
              transform.position = newPos;
          }
          else if (transform.position.x > limitRight)
          {
              Vector3 newPos = transform.position;
              newPos.x = limitRight;
              transform.position = newPos;
          }*/
        #endregion

        if (CheckLimitLeft())
        {
            FixedLimitHorizontal(limitLeft);
        }
        else if (CheckLimitRight())
        {
            FixedLimitHorizontal(limitRight);
        }
    }
    private bool CheckLimitLeft()
    {
        return transform.position.x < limitLeft;
    }
    private bool CheckLimitRight()
    {
        return transform.position.x > limitRight;
    }

    private void FixedLimitHorizontal(float _limitH)
    {
        Vector3 newPos = transform.position;
        newPos.x = _limitH;
        transform.position = newPos;
    }

    private void OncollisonEnter(Collision _collision)
    {
        //Debug.Log("On Collision : " + _collision.gameObject.name);
        //충돌되는 오브젝트가 누군지 출력하는것
        // CompareTag가 == 보다 연산속도가 더 빨라서 이걸 사용하는것이 좋다.
        if (_collision.gameObject.CompareTag("Wall"))
        {
            if(collisionCallback != null)
            {
                collisionCallback();
            }

        }
    }

    private void OnTriggerEnter(Collider _collider)
    {
        //Debug.Log("On Collider : " + _collider.name);
        //충돌 되는애가 누군지 바로 들어오는것.
        if(_collider.tag == "Gate")
        {
            triggerCallback?.Invoke();
            //변수명? : null로 초기화 하는 애들 null인지 검사하는 방법
            //Invoke(): 널이 아니면 Invoke()를 호출하는데
        }
    }
}
를 넣습니다.
그리고 게임 매니저로 돌아와서
using System.Collections;
using System.Collections.Generic;
using UnityEngine;
public class GameManager : MonoBehaviour
{
[SerializeField] private Player player = null;
private int score = 0;
private void Start()
{
player.CollisionCallback = OnCollisionAtWall;
player.TriggerCallback = OnTriggerAtGate;
}
private void OnCollisionAtWall()
{
Debug.Break();
}
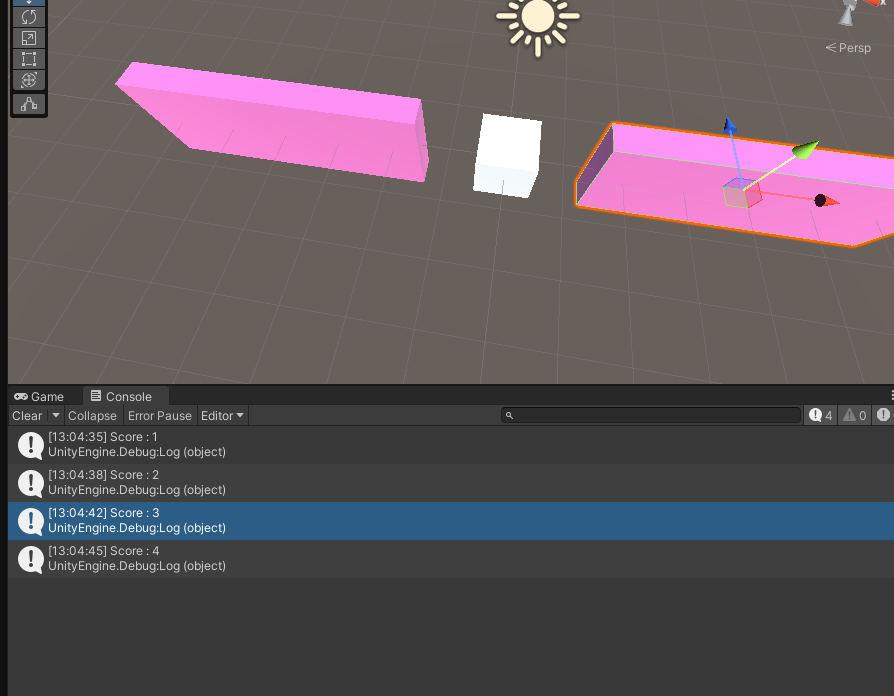
private void OnTriggerAtGate()
{
++score;
Debug.Log("Score : " + score);
}
}
를 넣어주면 완성이다