파티클 그리기
💡이번에는 사각형이 아닌 arc를 이용해서 원을 그려볼까 합니다.
canvas에서의 arc란 중심을 기준으로 반지름만큼 떨어져 원하는 각도만큼 홀을 그리는 그리는 메서드인데 원을 그릴때는 사각형과는 다르게 이 방식을 사용합니다.
const ctx = canvas.getContext('2d');

ctx.beginPath()
// 나 패스를 그리기 시작할게~ 라고 알려주기
ctx.arc(100, 100, 50, 0, 360);
arc
- 시작하는 X 위치
- 시작하는 Y 위치
- 반지름의 길이
- 시작하는 각도
- 끝나는 각도
- 시계 방향? or 반시계 방향?
ctx.beginPath();
ctx.arc(100, 100, 50, 0, (Math.PI / 180) * 360);
ctx.fillStyle = 'red';
ctx.fill();
// ctx.stroke();
ctx.closePath();
이제 각각 다른 위치에서 나타내주기 위해 이 5줄을 이동시킬건데
y,x,radius값을 각각 다르게 주기 위함입니다,
// index.js 전체 코드
const canvas = document.querySelector('canvas');

const ctx = canvas.getContext('2d');
console.log(ctx);
const dpr = window.devicePixelRatio;

const canvaseWidth = 300;
const canvaseHeight = 300;

canvas.style.width = canvaseWidth + 'px';
canvas.style.height = canvaseHeight + 'px';

canvas.width = canvaseWidth * dpr;
canvas.height = canvaseHeight * dpr;
ctx.scale(dpr, dpr);

// ctx.fillRect(10, 10, 50, 50);

class Particle {
  constructor(x, y, radius) {
    this.x = x;
    this.y = y;
    this.radius = radius;
  }
  draw() {
    ctx.beginPath();
    ctx.arc(this.x, this.y, this.radius, 0, (Math.PI / 180) * 360);
    ctx.fillStyle = 'red';
    ctx.fill();
    ctx.closePath();
  }
}

const x = 100;
const y = 100;
const radius = 50;
const particle = new Particle(x, y, radius);

particle.draw();
그럼 이제 에니메이션을 나타내주기위한 animate 함수를 만들어보겠습니다.
window.requestAnimationFrame은 1초에 몇 프레임이나 찍힐까요?
현재 모니터 디스플레이의 주사율을 기반으로 모니터마다 다르게 횟수가 찍혀서 나오게 됩니다. ex)요즘 게이밍 노트북, 모니터는 보통 144hz 주사율을 가지고 있는데 requestAnimationFrame가 1초에 144번 함수가 실행이 됩니다.
보통 회사 모니터들은 60hz의 주사율을 가지고 있다고 합니다.
게임을 만들경우 주사율이 달라 1초에 1px씩 이동시킨다고 했을때 누구는 144px 누구는 60px 이동시키게 되면 안되겠죠~ 그래서 통일을 시켜주어야 하는데,
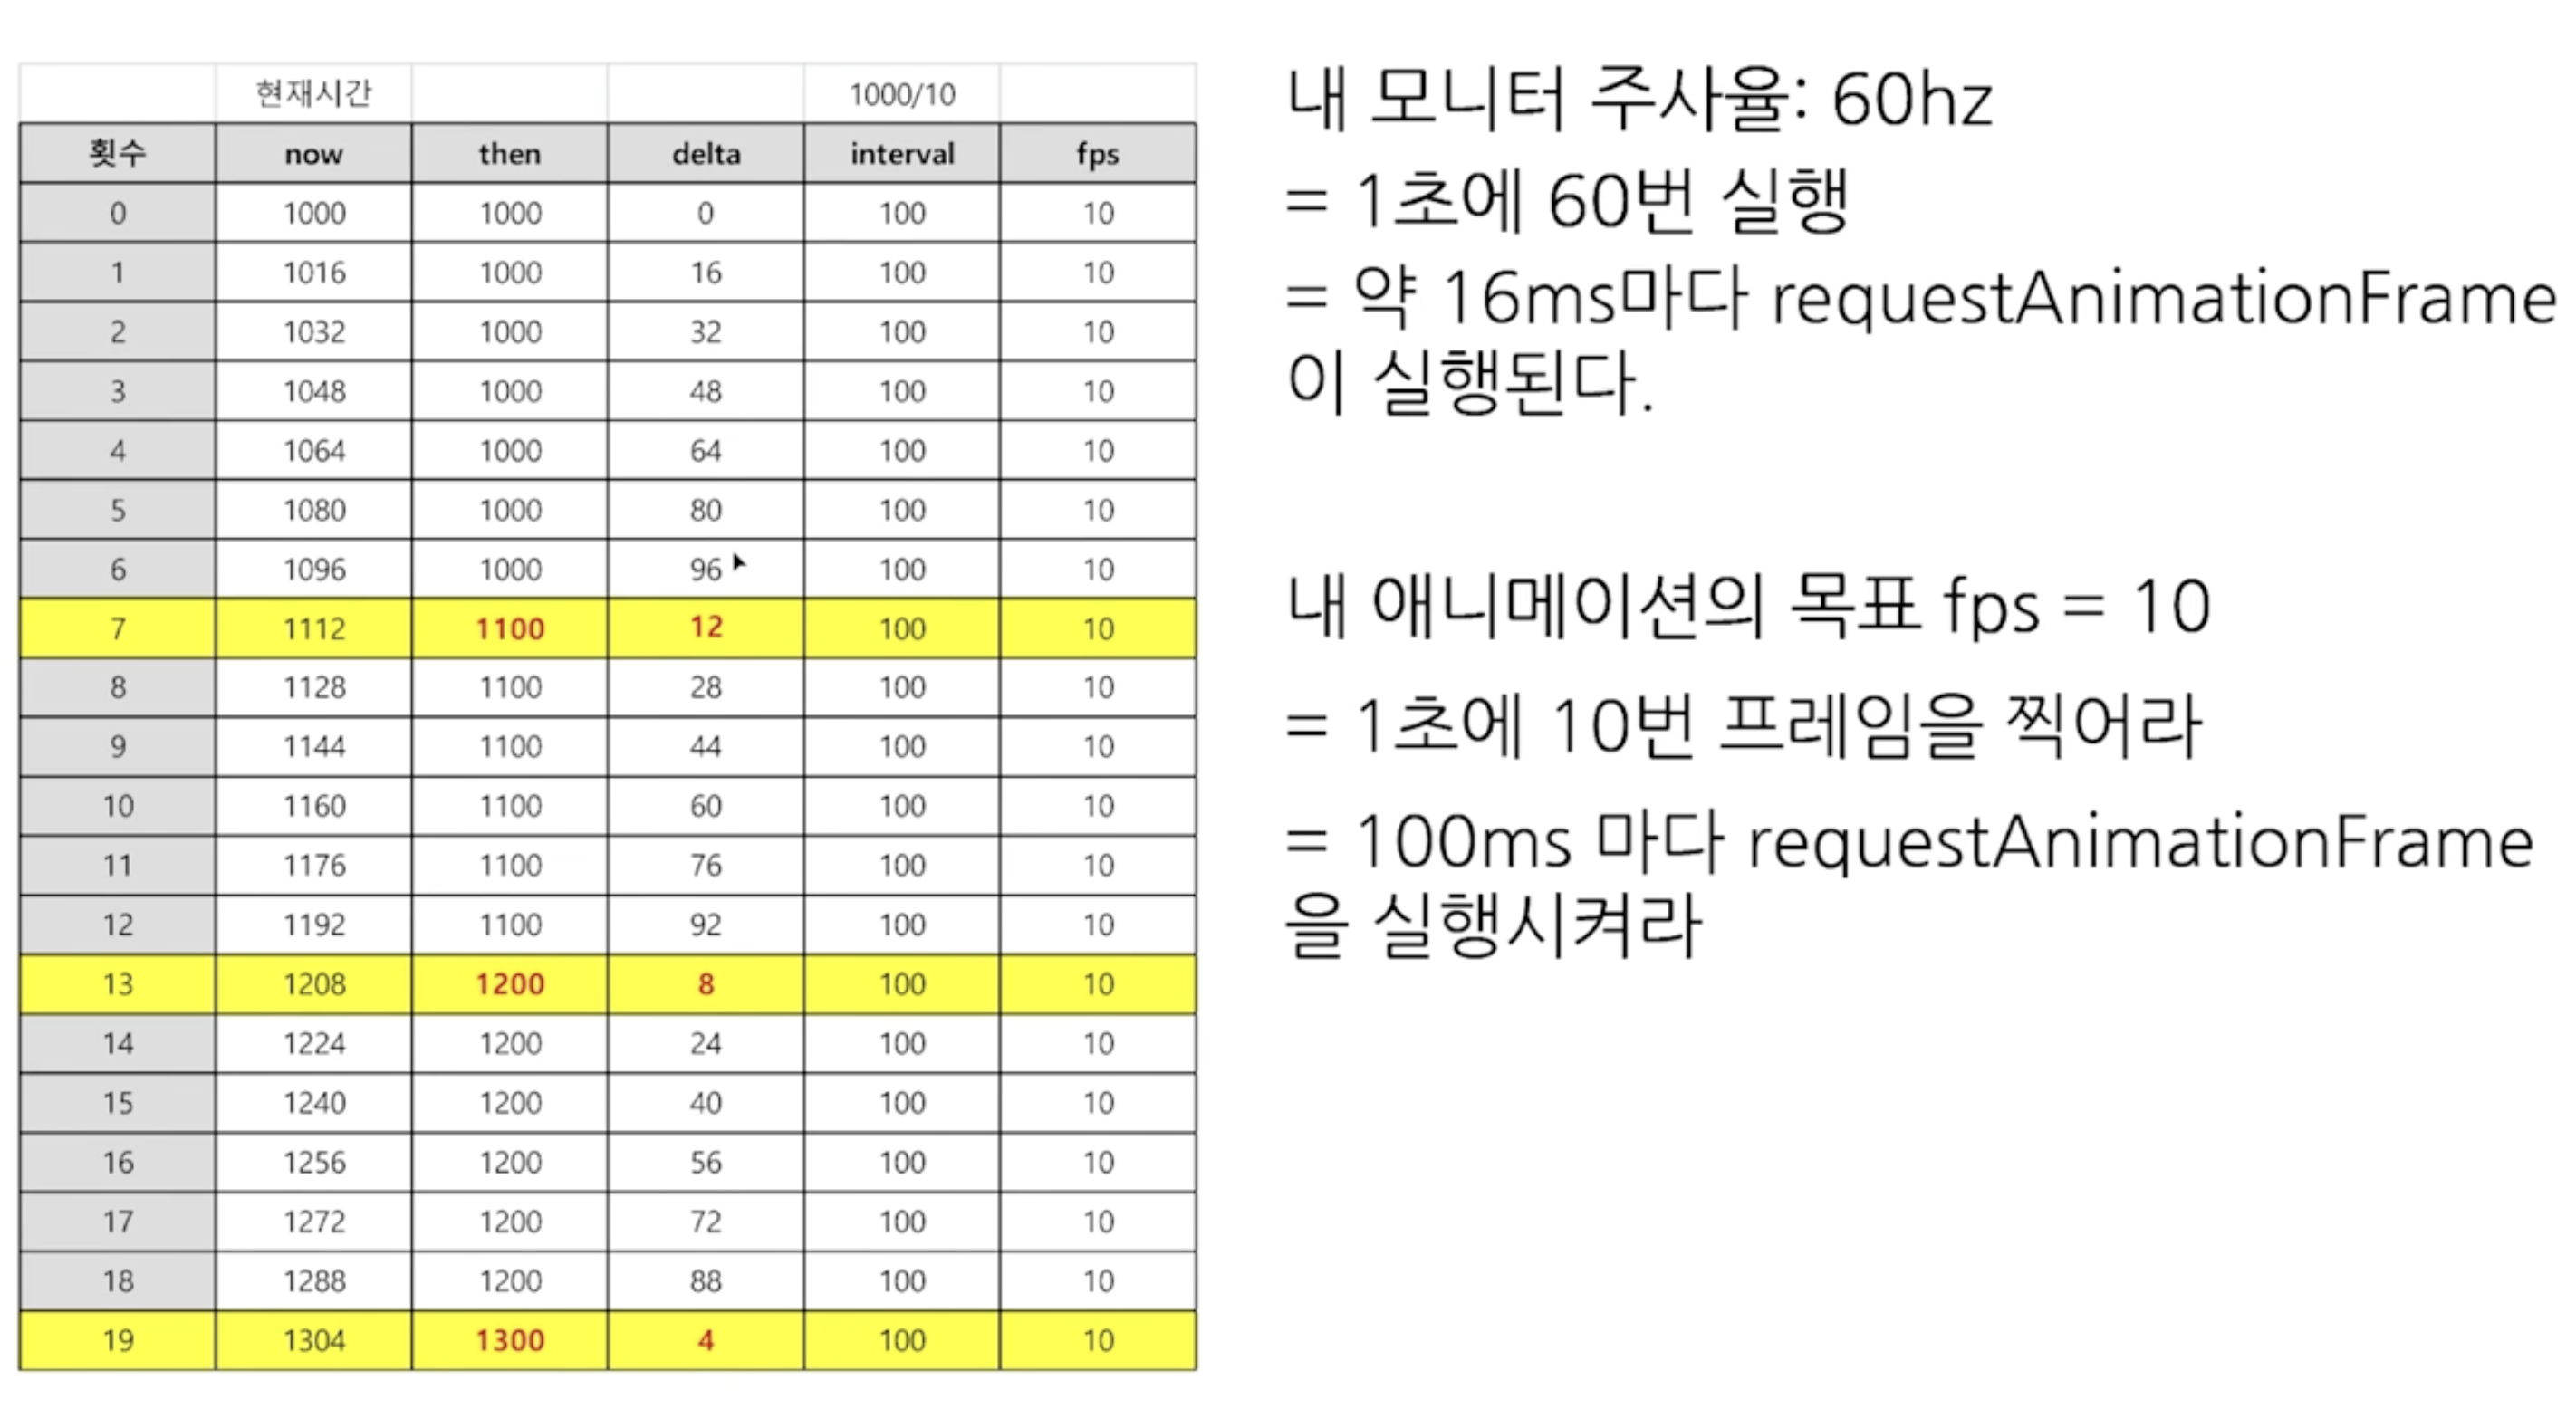
// 60 FPS
let interval = 1000 / 60;
let now, delta;
let then = Date.now();

function animate() {
  // window.requestAnimationFrame(animate);
  now = Date.now();
  delta = now - then;

  if (delta < interval) return;

  ctx.clearRect(0, 0, canvaseWidth, canvaseHeight);
  // particle.y += 1;
  // particle.draw();

  then = now - (delta % interval);
}

animate();
이번강의에서는 이렇게 추가해주면 된다고 하네요!
강의를 한 챕터씩 2~3번정도 보고 벨로그 글을 수정하도록 하겠습니다 ㅎ