
[ 📄 문 제 ]
두 개의 버튼을 화면에 추가하고 버튼 모양을 각각 다르게 보이도록 만들어 보세요.
[ 📚 설 명 ]
- 화면에 두 개의 버튼을 배치합니다.
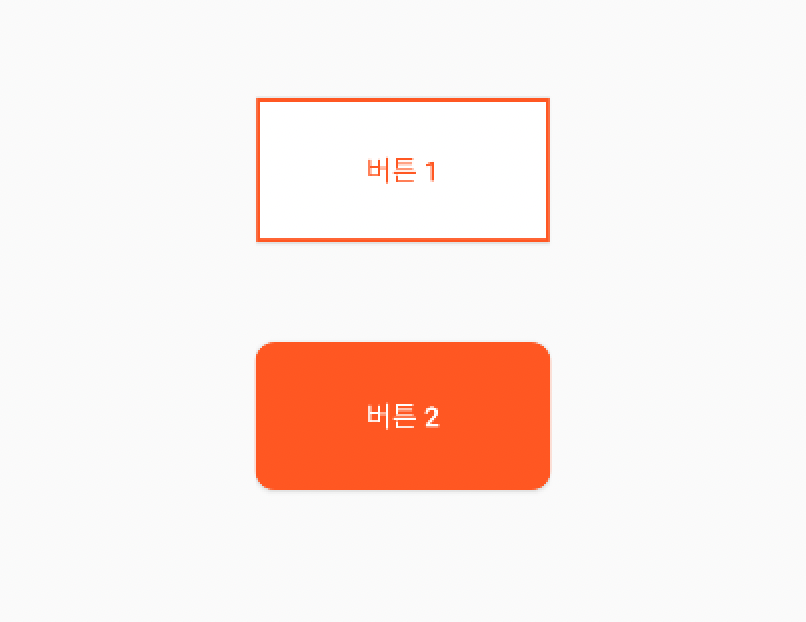
- 첫 번째 버튼의 모양은 가장자리에 경계선만 보이도록 하고 경계선과 글자색이 동일하도록 만듭니다.
- 두 번째 버튼의 모양은 배경색이 있고 모서리는 약간 둥글며 글자가 하얀색이 되도록 만듭니다.
[ 💻 코 드 ]
[ acticity_main.xml ]
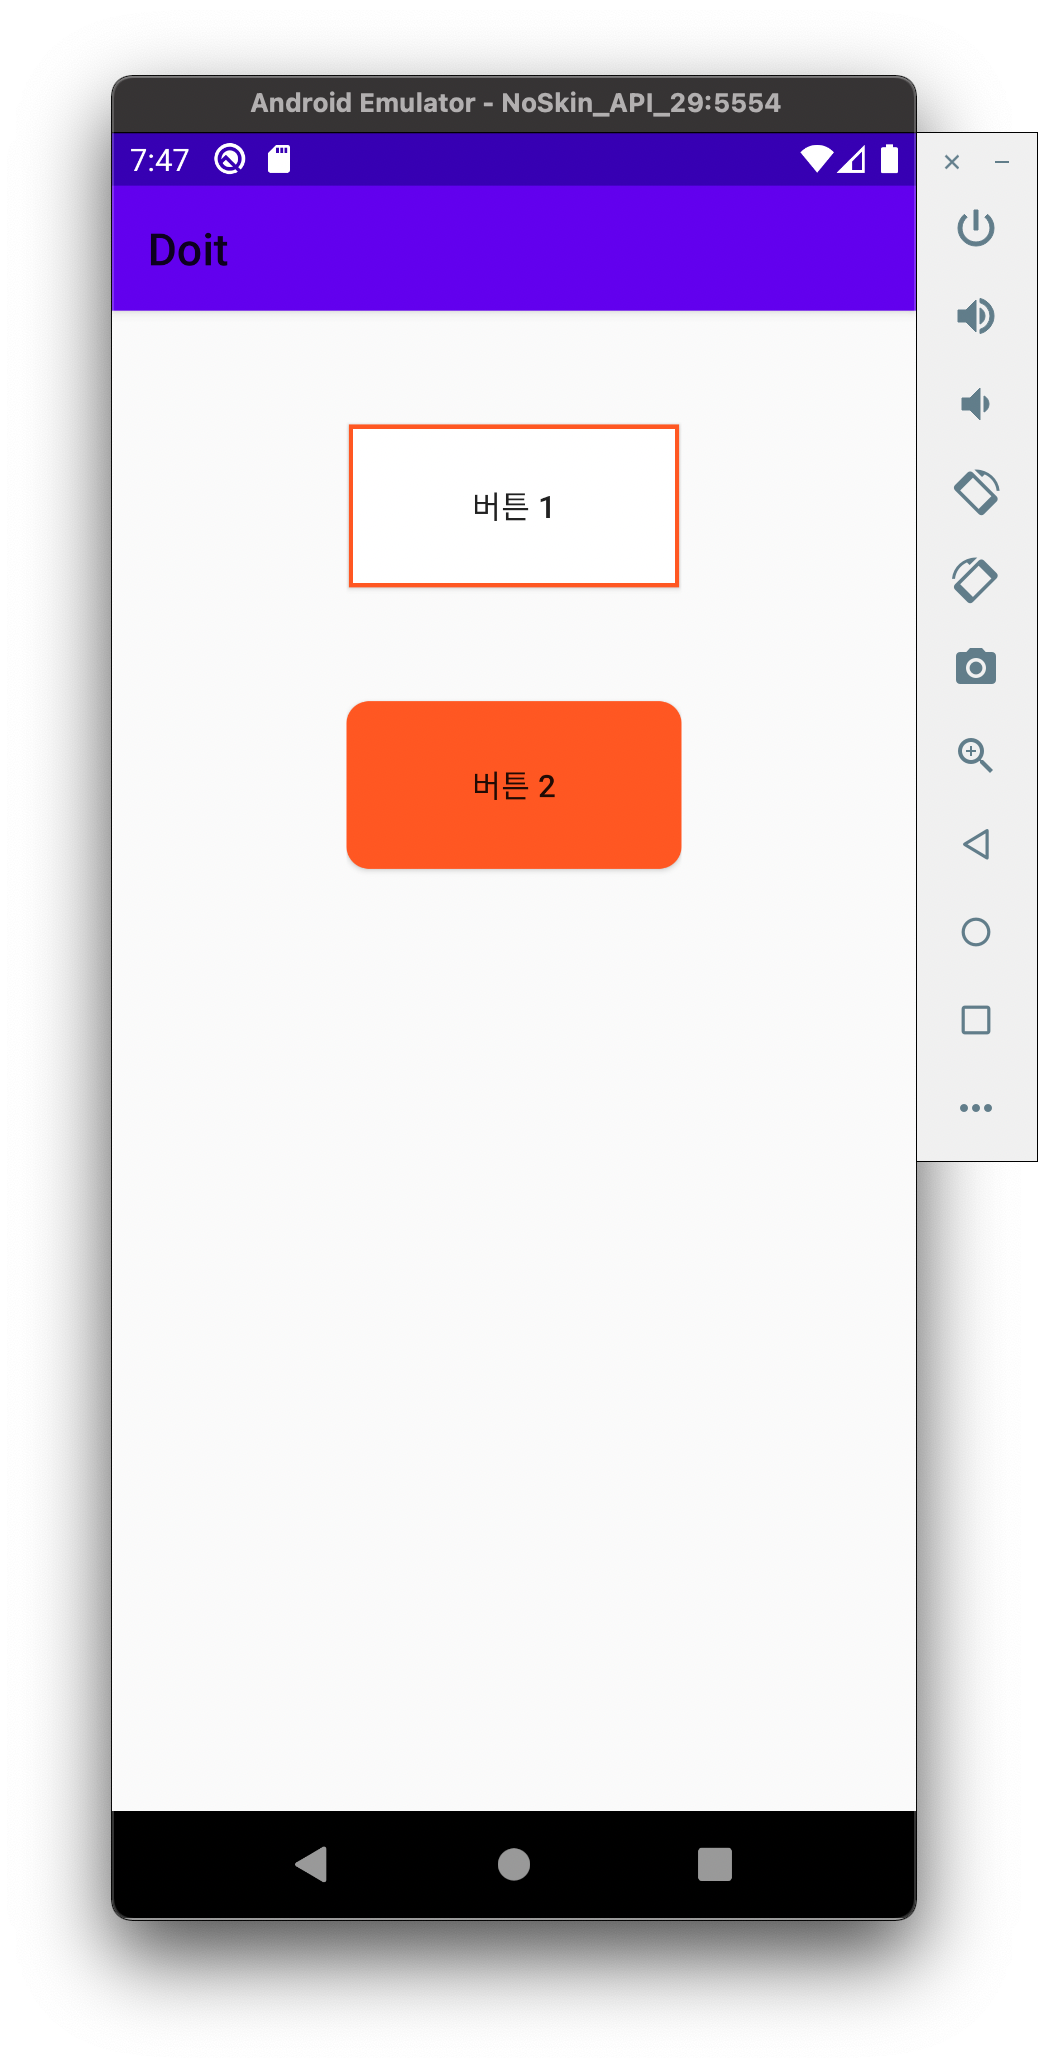
<?xml version="1.0" encoding="utf-8"?>
<LinearLayout xmlns:android="http://schemas.android.com/apk/res/android"
    xmlns:app="http://schemas.android.com/apk/res-auto"
    xmlns:tools="http://schemas.android.com/tools"
    android:layout_width="match_parent"
    android:layout_height="match_parent"
    android:orientation="vertical"
    android:gravity="center"
    tools:context=".MainActivity">

    <LinearLayout
        android:layout_width="wrap_content"
        android:layout_height="wrap_content"
        android:orientation="vertical"
        android:gravity="center_horizontal"
        android:layout_weight="0.3"
        android:layout_margin="50dp">

        <Button
            android:id="@+id/btn1"
            android:layout_width="150sp"
            android:layout_height="75sp"
            android:textColor="#ff5722"
            android:background="@drawable/button_draw1"
            android:text="버튼 1"/>

        <Button
            android:id="@+id/btn2"
            android:layout_width="150sp"
            android:layout_height="75sp"
            android:textColor="#ffffff"
            android:layout_marginTop="50sp"
            android:background="@drawable/button_draw2"
            android:text="버튼 2"/>

    </LinearLayout>

</LinearLayout>
app/res/drawable에 xml파일을 두 개 만들어줍니다.
아래 두 xml 파일들은 버튼을 꾸며줄 코드입니다.
[ button_draw1.xml ]
// 버튼1
<?xml version="1.0" encoding="utf-8"?>
<layer-list xmlns:android="http://schemas.android.com/apk/res/android" >

    <item
        android:bottom="1dp"
        android:left="1dp"
        android:right="1dp"
        android:top="1dp">
        <shape android:shape="rectangle">
            <solid android:color="#ffffff" />
            <stroke
                android:width="2dp"
                android:color="#ff5722" />
        </shape>
    </item>

</layer-list>
[ button_draw2.xml ]
// 버튼2
<shape xmlns:android="http://schemas.android.com/apk/res/android">
    <solid android:color="#FF5722" />
    <corners android:radius="10dp" />
</shape>
[ 🖋 디자인 ]
[ 💡 학습한 내용 ]
안드로이드 스튜디오가 업데이트 되면서 외부 파일로 뷰의 색을 바꾸려해도 안 바뀌는 경우가 생깁니다.
이때, app/res/values/theme.xml에 들어가서 코드를 변경해주어야 합니다.
아래 사진의 3번째 줄 코드를 보면 parent="~"
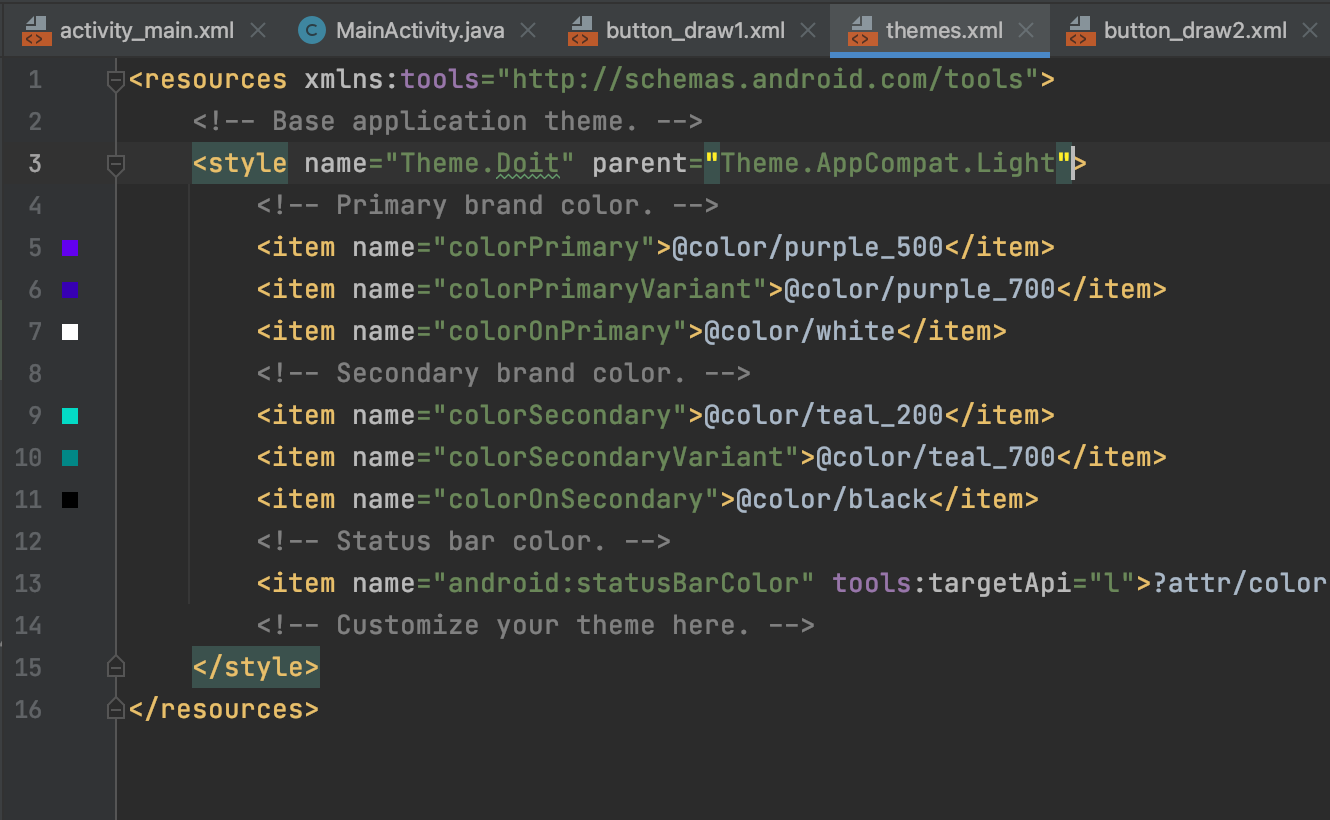
<style name="Theme.Doit" parent="Theme.MaterialComponents.DayNight.DarkActionBar">로 설정되어 있는데 이는 안드로이드의 테마를 기본 테마를 사용하겠다는 내용입니다.
따라서, parent값을 Theme.AppCompat.Light로 변경해주어야합니다.
style name="Theme.Doit" parent="Theme.AppCompat.Light"solid 값은 칸 영역을, stroke값은 테두리 영역을 나타낸다.

다른 사람이 만든 것을 소비하는 활동보다, 내가 생산적인 활동을 하는 시간이 더 많도록 생활화 하자.