구글 지도앱 만들기
1. 지도 사용 설정하기
- 빌드 그래들의 dependencies 항목
implementation 'com.google.android.gms:play-services-maps:18.1.0'
implementation 'com.google.android.gms:play-services-location:21.0.1'- 퍼미션을 등록
<uses-permission android:name="android.permission.ACCESS_FINE_LOCATION"/>
<uses-permission android:name="android.permission.ACCESS_COARSE_LOCATION"/>
<uses-permission android:name="android.permission.INTERNET"/>- 구글 지도 API를 이용하는 키를 등록
<uses-library android:name="org.apache.http.legacy" android:required="true"/>
<meta-data android:name="com.google.android.maps.v2.API_KEY"
      android:value="*### 구글 지도 API 키 등록 ###*"/>
<meta-data android:name="com.google.android.gms.version"
      android:value="@integer/google_play_services_version"/>
2. 구글 개발자 콘솔에서 지도 API 키 얻기
- 구글 개발자 콘솔(console.cloud.google.com)에 접속해 프로젝트를 생성하고 사용자 인증 정보를 만들면 지도 API 키 를 발급
- 구글 개발자 콘솔에서 얻은 지도 API키를 매니페스트 파일에 등록
- 레이아웃 XML
<fragment xmlns:android="http://schemas.android.com/apk/res/android"
    android:id="@+id/mapView"
    android:layout_width="match_parent"
    android:layout_height="match_parent"
    android:name="com.google.android.gms.maps.SupportMapFragment"/>
3. 지도 제어하기
- 지도의 중심 이동하기
-
지도를 출력하는 뷰 객체를 얻어야 합니다.
class MainActivity : AppCompatActivity(), OnMapReadyCallback { var googleMap: GoogleMap? = null override fun onCreate(savedInstanceState: Bundle?) { super.onCreate(savedInstanceState) setContentView(R.layout.activity_main) (supportFragmentManager.findFragmentById(R.id.mapView) as SupportMapFragment)!!.getMapAsync(this) // 지도 객체를 이용할 수 있는 상황이 될 때 override fun onMapReady(p0: GoogleMap?) { googleMap = p0 } } -
지도의 중심을 이동
val latLng = LatLng(37.566610, 126.978403) val position = CameraPosition.Builder() .target(latLng) .zoom(18f) .build() googleMap?.moveCamera(CameraUpdateFactory.newCameraPosition(position)) -
마커 표시하기
val markerOptions = MarkerOptions() markerOptions.icon(BitmapDescriptorFactory.fromResource(R.drawable.ic_marker)) markerOptions.position(latLng) markerOptions.title("서울시청") markerOptions.snippet("Tel:01-120") googleMap?.addMarker(markerOptions) -
위치 요청
val locationRequest = LocationRequest.create().apply {
            interval = 1000
            fastestInterval = 500
            priority = LocationRequest.PRIORITY_HIGH_ACCURACY
        }

        locationCallback = object : LocationCallback(){
            //1초에 한번씩 변경된 위치 정보가 onLocationResult 으로 전달된다.
            override fun onLocationResult(locationResult: LocationResult) {
                locationResult?.let{
                    for (location in it.locations){
                        Log.d("위치정보",  "위도: ${location.latitude} 경도: ${location.longitude}")

                    }
                }
            }
        }
-
- 지도에서 사용자 이벤트 처리
-
GoogleMap.OnMapClickListener: 지도 클릭 이벤트
-
GoogleMap.OnMapLongClickListener: 지도 롱 클릭 이벤트
-
GoogleMap.OnMarkerClickListener: 마커 클릭 이벤트
-
GoogleMap.OnMarkerDragListener: 마커 드래그 이벤트
-
GoogleMap.OnInfoWindowClickListener: 정보 창 클릭 이벤트
-
GoogleMap.OnCameraIdleListener: 지도 화면 변경 이벤트
googleMap?.setOnMapClickListener { latLng ->
            Log.d("map_test", "click : ${latLng.latitude} , ${latLng.longitude}")
        }

googleMap?.setOnMapLongClickListener { latLng ->
            Log.d("map_test", "long click : ${latLng.latitude} , ${latLng.longitude}")
        }

googleMap?.setOnCameraIdleListener {
            val position = googleMap!!.cameraPosition
            val zoom = position.zoom
            val latitude = position.target.latitude
            val longitude = position.target.longitude
            Log.d("map_test", "User change : $zoom $latitude , $longitude")
        }

googleMap?.setOnMarkerClickListener { marker ->
            true
        }

googleMap?.setOnInfoWindowClickListener { marker ->
        }
-
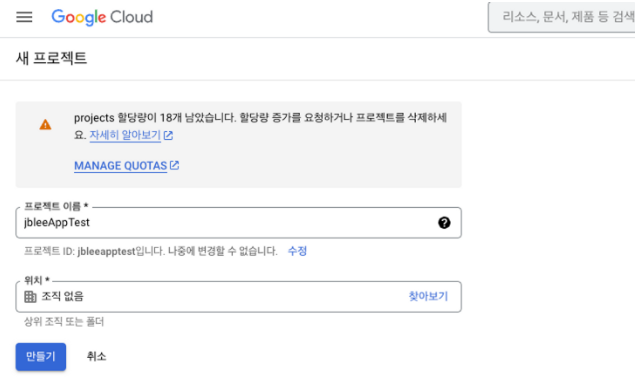
4. GoogleCloud에서 사용자 인증키 만들기
- GoogleCloud에 접속하여 구글 계정으로 로그인한다.
https://console.cloud.google.com/welcome/new?project=helical-rhythm-398810
- 새 프로젝트 생성
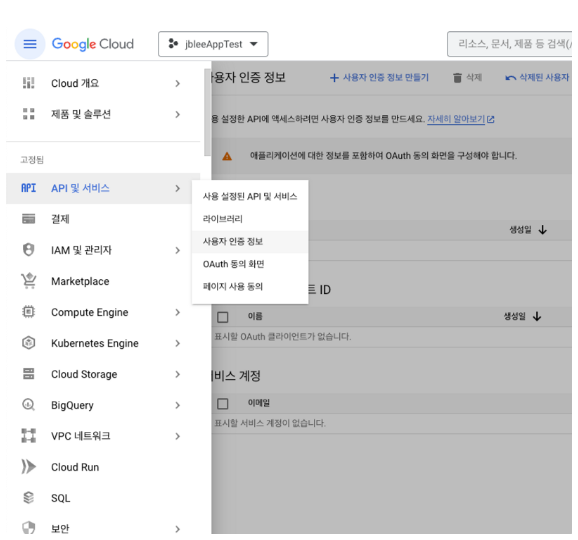
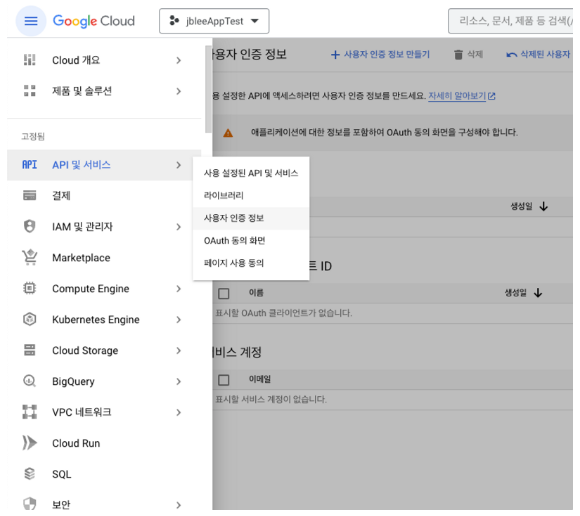
- 사용자 인증정보
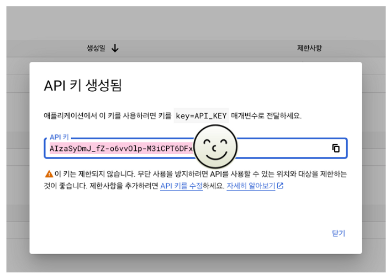
- 사용자 인증정보 만들기 > API키
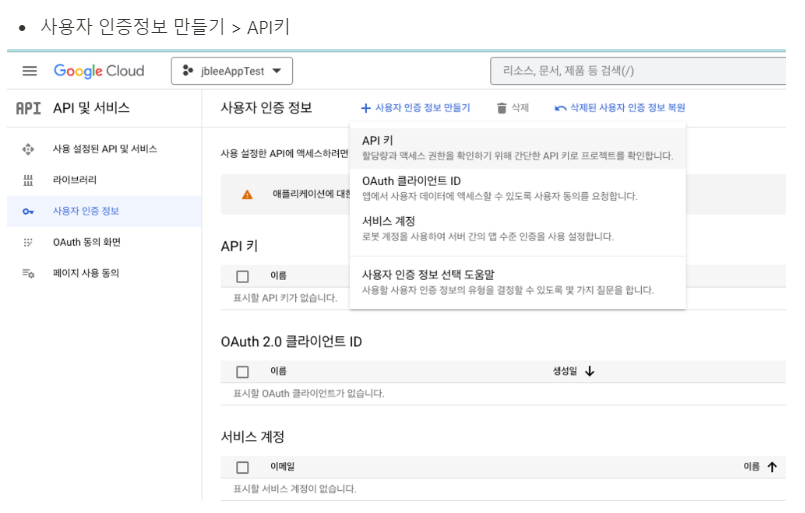
- API 키 생성
5. Android APP 만들기
- maptest 프로젝트 생성
- build.gradle파일에 Googlemap library 추가
dependencies {

    implementation 'androidx.core:core-ktx:1.10.1'
    implementation 'androidx.appcompat:appcompat:1.6.1'
    implementation 'com.google.android.material:material:1.9.0'
    implementation 'androidx.constraintlayout:constraintlayout:2.1.4'
    testImplementation 'junit:junit:4.13.2'
    androidTestImplementation 'androidx.test.ext:junit:1.1.5'
    androidTestImplementation 'androidx.test.espresso:espresso-core:3.5.1'

    implementation 'com.google.android.gms:play-services-maps:18.1.0'
    implementation 'com.google.android.gms:play-services-location:21.0.1'
}-
AndriodManifest.xml 에 permission과 google-map api 추가
googlecloud에서 생성한 API키 입력
<?xml version="1.0" encoding="utf-8"?>
<manifest xmlns:android="http://schemas.android.com/apk/res/android"
    xmlns:tools="http://schemas.android.com/tools">

    **<uses-permission android:name="android.permission.ACCESS_FINE_LOCATION"/>
    <uses-permission android:name="android.permission.ACCESS_COARSE_LOCATION"/>
    <uses-permission android:name="android.permission.INTERNET"/>**

    <application
        android:allowBackup="true"
        android:dataExtractionRules="@xml/data_extraction_rules"
        android:fullBackupContent="@xml/backup_rules"
        android:icon="@mipmap/ic_launcher"
        android:label="@string/app_name"
        android:supportsRtl="true"
        android:theme="@style/Theme.MapTest"
        tools:targetApi="31">

        **<uses-library android:name="org.apache.http.legacy" android:required="true"/>
        <meta-data android:name="com.google.android.maps.v2.API_KEY"
            android:value="== Google Cloud에서 생성한 API키 입력!! ==="/>
        <meta-data android:name="com.google.android.gms.version"
            android:value="@integer/google_play_services_version"/>**

        <activity
            android:name=".MainActivity"
            android:exported="true">
            <intent-filter>
                <action android:name="android.intent.action.MAIN" />

                <category android:name="android.intent.category.LAUNCHER" />
            </intent-filter>
        </activity>
    </application>

</manifest>- activity_main.xml
<?xml version="1.0" encoding="utf-8"?>
<fragment xmlns:android="http://schemas.android.com/apk/res/android"
    android:id="@+id/mapView"
    android:layout_width="match_parent"
    android:layout_height="match_parent"
android:name="com.google.android.gms.maps.SupportMapFragment"/>- MainActivity.kt
package com.android.ex11_googlemap
import android.Manifest
import android.annotation.SuppressLint
import android.content.pm.PackageManager
import android.location.Location
import android.os.Bundle
import android.os.Looper
import android.util.Log
import android.widget.Toast
import androidx.activity.result.ActivityResultLauncher
import androidx.activity.result.contract.ActivityResultContracts
import androidx.appcompat.app.AppCompatActivity
import androidx.core.app.ActivityCompat
import androidx.core.content.ContextCompat
import com.google.android.gms.common.ConnectionResult
import com.google.android.gms.location.FusedLocationProviderClient
import com.google.android.gms.location.LocationCallback
import com.google.android.gms.location.LocationListener
import com.google.android.gms.location.LocationRequest
import com.google.android.gms.location.LocationResult
import com.google.android.gms.location.LocationServices
import com.google.android.gms.maps.CameraUpdateFactory
import com.google.android.gms.maps.GoogleMap
import com.google.android.gms.maps.OnMapReadyCallback
import com.google.android.gms.maps.SupportMapFragment
import com.google.android.gms.maps.model.BitmapDescriptorFactory
import com.google.android.gms.maps.model.CameraPosition
import com.google.android.gms.maps.model.LatLng
import com.google.android.gms.maps.model.MarkerOptions
import com.google.android.gms.tasks.OnSuccessListener
class MainActivity : AppCompatActivity(), OnMapReadyCallback {
private lateinit var mGoogleMap: GoogleMap
//위치 서비스가 gps를 사용해서 위치를 확인
lateinit var fusedLocationClient: FusedLocationProviderClient
//위치 값 요청에 대한 갱신 정보를 받는 변수
lateinit var locationCallback: LocationCallback
lateinit var locationPermission: ActivityResultLauncher<Array<String>>
override fun onCreate(savedInstanceState: Bundle?) {
super.onCreate(savedInstanceState)
setContentView(R.layout.activity_main)
locationPermission = registerForActivityResult(
ActivityResultContracts.RequestMultiplePermissions()){ results ->
if(results.all{it.value}){
(supportFragmentManager.findFragmentById(R.id.mapView) as SupportMapFragment)!!.getMapAsync(this)
}else{ //문제가 발생했을 때
Toast.makeText(this,"권한 승인이 필요합니다.",Toast.LENGTH_LONG).show()
}
}
//권한 요청
locationPermission.launch(
arrayOf(
Manifest.permission.ACCESS_COARSE_LOCATION,
Manifest.permission.ACCESS_FINE_LOCATION
)
)
}
// 지도 객체를 이용할 수 있는 상황이 될 때
override fun onMapReady(p0: GoogleMap) {
val seoul = LatLng(37.566610, 126.978403)
mGoogleMap = p0
mGoogleMap.mapType = GoogleMap.MAP_TYPE_NORMAL // default 노말 생략 가능
mGoogleMap.apply {
val markerOptions = MarkerOptions()
markerOptions.icon(BitmapDescriptorFactory.defaultMarker(BitmapDescriptorFactory.HUE_AZURE))
markerOptions.position(seoul)
markerOptions.title("서울시청")
markerOptions.snippet("Tel:01-120")
addMarker(markerOptions)
}
fusedLocationClient = LocationServices.getFusedLocationProviderClient(this)
updateLocation()
}
fun updateLocation(){
val locationRequest = LocationRequest.create().apply {
interval = 1000
fastestInterval = 500
priority = LocationRequest.PRIORITY_HIGH_ACCURACY
}
locationCallback = object : LocationCallback(){
//1초에 한번씩 변경된 위치 정보가 onLocationResult 으로 전달된다.
override fun onLocationResult(locationResult: LocationResult) {
locationResult?.let{
for (location in it.locations){
Log.d("위치정보", "위도: ${location.latitude} 경도: ${location.longitude}")
setLastLocation(location) //계속 실시간으로 위치를 받아오고 있기 때문에 맵을 확대해도 다시 줄어든다.
}
}
}
}
//권한 처리
if (ActivityCompat.checkSelfPermission(
this,
Manifest.permission.ACCESS_FINE_LOCATION
) != PackageManager.PERMISSION_GRANTED && ActivityCompat.checkSelfPermission(
this,
Manifest.permission.ACCESS_COARSE_LOCATION
) != PackageManager.PERMISSION_GRANTED
) {
return
}
fusedLocationClient.requestLocationUpdates(locationRequest, locationCallback,
Looper.myLooper()!!
)
}
fun setLastLocation(lastLocation: Location){
val LATLNG = LatLng(lastLocation.latitude,lastLocation.longitude)
val makerOptions = MarkerOptions().position(LATLNG).title("나 여기 있어용~")
val cameraPosition = CameraPosition.Builder().target(LATLNG).zoom(15.0f).build()
mGoogleMap.addMarker(makerOptions)
mGoogleMap.moveCamera(CameraUpdateFactory.newCameraPosition(cameraPosition))
}
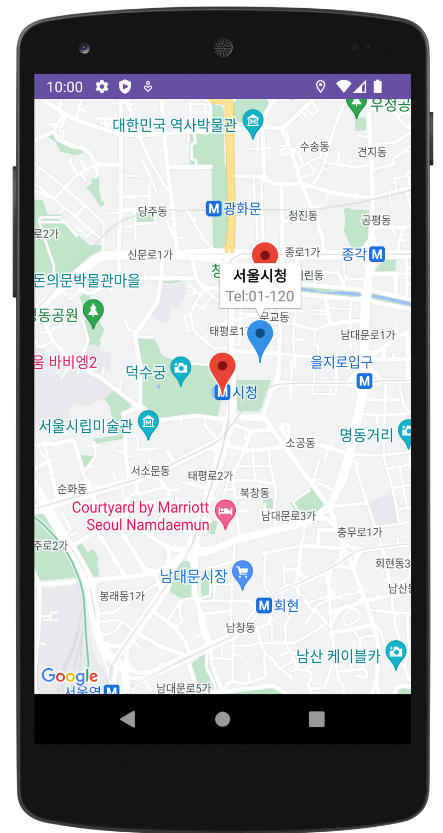
}6. 실행 결과

안드로이드 주니어 개발자