
storage로 이미지 업로드하기 후에 여러장 업로드하기이다.
1. RecyclerView를 추가한다.
xml파일
   <LinearLayout
            android:id="@+id/linearLayout3"
            android:layout_width="match_parent"
            android:layout_height="99dp"
            android:orientation="horizontal"
            app:layout_constraintEnd_toEndOf="parent"
            app:layout_constraintStart_toStartOf="parent"
            app:layout_constraintTop_toBottomOf="@+id/view">

            <androidx.constraintlayout.widget.ConstraintLayout
                android:id="@+id/camera"
                android:layout_width="60dp"
                android:layout_height="60dp"
                android:layout_margin="20dp"
                android:background="@drawable/btn_camera"
                tools:layout_editor_absoluteX="20dp"
                tools:layout_editor_absoluteY="88dp">

                <ImageView
                    android:id="@+id/imageView9"
                    android:layout_width="wrap_content"
                    android:layout_height="wrap_content"
                    android:layout_marginTop="10dp"
                    android:src="@drawable/camera"
                    app:layout_constraintEnd_toEndOf="parent"
                    app:layout_constraintStart_toStartOf="parent"
                    app:layout_constraintTop_toTopOf="parent" />

                <TextView
                    android:id="@+id/image_count"
                    android:layout_width="wrap_content"
                    android:layout_height="wrap_content"
                    android:text="0/0"
                    app:layout_constraintBottom_toBottomOf="parent"
                    app:layout_constraintEnd_toEndOf="parent"
                    app:layout_constraintStart_toStartOf="parent"
                    app:layout_constraintTop_toBottomOf="@+id/imageView9" />

            </androidx.constraintlayout.widget.ConstraintLayout>

            <androidx.recyclerview.widget.RecyclerView
                android:id="@+id/recyclerView"
                android:layout_width="match_parent"
                android:layout_height="match_parent" />
        </LinearLayout>
2. recyclerView 아이템 xml을 추가한다.
<?xml version="1.0" encoding="utf-8"?>
<androidx.constraintlayout.widget.ConstraintLayout xmlns:android="http://schemas.android.com/apk/res/android"
    xmlns:app="http://schemas.android.com/apk/res-auto"
    android:layout_width="wrap_content"
    android:layout_height="wrap_content">

    <ImageView
        android:id="@+id/edit_image"
        android:layout_width="100dp"
        android:layout_height="100dp"
        android:layout_marginStart="3dp"
        android:layout_marginEnd="3dp"
        android:scaleType="center"
        app:layout_constraintBottom_toBottomOf="parent"
        app:layout_constraintEnd_toEndOf="parent"
        app:layout_constraintStart_toStartOf="parent"
        app:layout_constraintTop_toTopOf="parent" />

</androidx.constraintlayout.widget.ConstraintLayout>
3. RecyclerView에 넣기위해 Adapter를 생성한다.
그 전에 gradle.kts파일에 의존성을 추가한다.
implementation ("com.github.bumptech.glide:glide:4.16.0")Adapter
class EditImageAdapter(val context: EditActivity, val items: ArrayList<Uri>) :
RecyclerView.Adapter<EditImageAdapter.ViewHolder>() {
override fun onCreateViewHolder(parent: ViewGroup, viewType: Int): ViewHolder {
val inflater = LayoutInflater.from(parent.context)
val binding = EditImageItemBinding.inflate(inflater, parent, false)
return ViewHolder(binding)
}
override fun getItemCount(): Int {
return items.count()
}
override fun onBindViewHolder(holder: ViewHolder, position: Int) {
val item = items[position]
holder.bindItem(item)
}
inner class ViewHolder(private val binding: EditImageItemBinding) :
RecyclerView.ViewHolder(binding.root) {
fun bindItem(item: Uri) {
val imageArea = binding.editImage
Glide.with(context)
.load(item)
.into(imageArea)
}
}
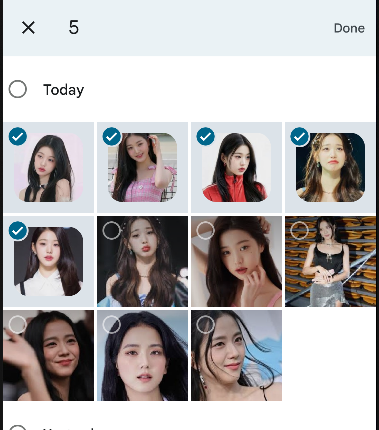
}4. 업로드할 Activity에 코드를 작성한다.
여기서 중요한 점
인텐트에 Intent.EXTRA_ALLOW_MULTIPLE 값을 true로 넣어줘야 멀티 선택이 가능하다.
val intent = Intent(Intent.ACTION_PICK)
intent.type = "image/*"
intent.putExtra(Intent.EXTRA_ALLOW_MULTIPLE, true)
registerForActivityResult.launch(intent)
그 외 자세한 점은 주석으로 달아놨다.
class EditActivity : AppCompatActivity() {
    private val binding by lazy { ActivityEditBinding.inflate(layoutInflater) }
    private lateinit var uri: Uri
    private var uriList = ArrayList<Uri>()
    private val maxNumber = 10
    lateinit var adapter: EditImageAdapter


    override fun onCreate(savedInstanceState: Bundle?) {
        super.onCreate(savedInstanceState)
        setContentView(binding.root)

        adapter = EditImageAdapter(this, uriList)
        binding.recyclerView.adapter = adapter

        binding.recyclerView.layoutManager =
            LinearLayoutManager(this, LinearLayoutManager.HORIZONTAL, false)


        // ImageView를 클릭할 경우
        binding.imageView9.setOnClickListener {
            if (uriList.count() == maxNumber) {
                //maxNumber가 되면 Toast를 띄우고
                Toast.makeText(this, "이미지는 최대 ${maxNumber}징 까지 첨부할 수 있습니다.", Toast.LENGTH_SHORT)
                    .show()
                //return한ㄷ.
                return@setOnClickListener
            }

            //ACTION_PICK을 통해 앨범으로 이동한다
            val intent = Intent(Intent.ACTION_PICK)
            //type을 image/*로 지정
            intent.type = "image/*"
            intent.putExtra(Intent.EXTRA_ALLOW_MULTIPLE, true)
            registerForActivityResult.launch(intent)
        }

        binding.btnComplete.setOnClickListener {
            for (i in 0 until uriList.count()) {
                //uriList에 i만큼 imageUplod
                imageUpload(uriList.get(i), i)
                try {
                    //5초동안 대기
                    Thread.sleep(500)
                } catch (e: InterruptedException) {
                    e.printStackTrace()
                }
            }
        }
    }

    // 이미지 선택 화면을 호출하고 선택한 이미지를 처리ㅁㄴ
    @SuppressLint("NotifyDataSetChanged")
    private val registerForActivityResult =
        registerForActivityResult(ActivityResultContracts.StartActivityForResult()) { result ->
            when (result.resultCode) {
                RESULT_OK -> {
                    val clipData = result.data?.clipData
                    if (clipData != null) { // 이미지를 여러 개 선택할 경우
                        val clipDataSize = clipData.itemCount
                        val selectableCount = maxNumber - uriList.count()
                        if (clipDataSize > selectableCount) { // 최대 선택 가능한 개수를 초과해서 선택한 경우
                            Toast.makeText(
                                this,
                                "이미지는 최대 ${selectableCount}장까지 첨부할 수 있습니다.",
                                Toast.LENGTH_SHORT
                            ).show()
                        } else {
                            // 선택 가능한 경우 ArrayList에 가져온 uri를 넣어준다.
                            for (i in 0 until clipDataSize) {
                                uriList.add(clipData.getItemAt(i).uri)
                            }
                        }
                    } else {
                        // 이미지를 한 개만 선택할 경우 null이 올 수 있다.
                        val uri = result?.data?.data
                        if (uri != null) {
                            uriList.add(uri)

                        }
                    }
                    adapter.notifyDataSetChanged()
                    printCount()
                }
            }
        }

    //textView를 카운팅해주기
    private fun printCount() {
        val text = "${uriList.count()}/${maxNumber}"
        binding.imageCount.text = text
    }

    // 파일 업로드
    // 파일을 가리키는 참조를 생성한 후 putFile에 이미지 파일 uri를 넣어 파일을 업로드한다.
    @SuppressLint("SimpleDateFormat")
    private fun imageUpload(uri: Uri?, count: Int) {

        if (uri == null) {
            Log.e(TAG, "URI is null. Image upload failed.")
            Toast.makeText(this, "이미지를 선택해주세요.", Toast.LENGTH_SHORT).show()
            return
        }
        val storage = Firebase.storage
        // storage 참조
        val storageRef = storage.getReference("image")
        // filename이 같으면 안되므로 기존 패턴 뒤에 count까지 붙여준다
        val fileName = SimpleDateFormat("yyyyMMddHHmmss_${count}").format(java.util.Date())
        val mountainsRef = storageRef.child("${fileName}.png")
        val uploadTask = mountainsRef.putFile(uri)

        uploadTask.addOnSuccessListener { task ->
            Toast.makeText(this, "사진 업로드 성공", Toast.LENGTH_SHORT).show()
        }.addOnFailureListener {
            Toast.makeText(this, "사진 업로드 실패", Toast.LENGTH_SHORT).show();
        }
    }
}

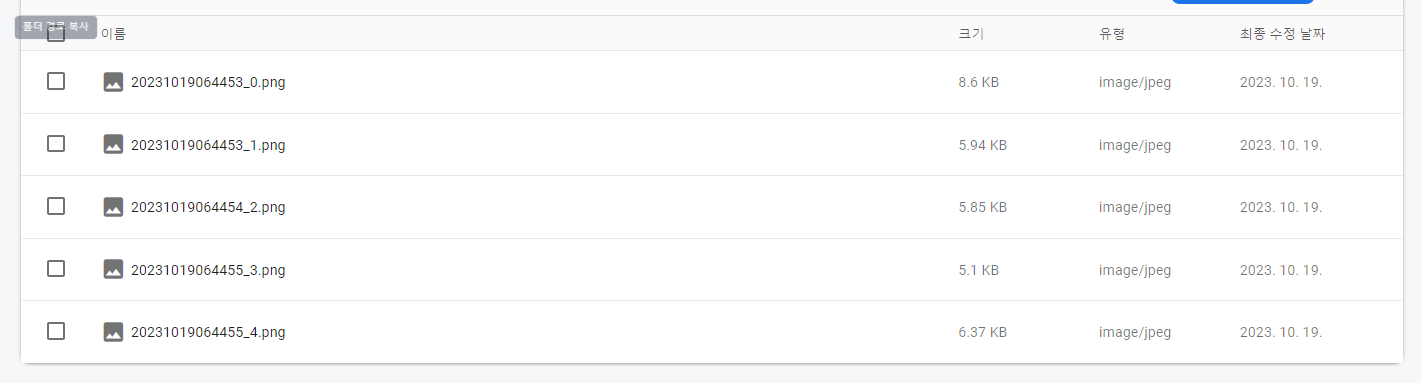
잘 들어왔다!😁

안드로이드 주니어 개발자
잘 봤습니다! 참고해서 학습해 봐야겠어요