ansible을 이용한 nginx & wordpress & Mysql 구축하기
이때까지는 httpd 아파치를 이용하여 wordpress와 mysql을 연동하는 작업을 했는데 이제는 nginx를 이용하여 wordprss를 구축하였다
nginx와 wordpress를 구축하기 위해서 새로운 php-fpm을 다운받아 연동을 하였다
CentOS7을 사용하였고 새로운 가상머신을 한대 더 구축을 하여 새롭게 구축을 하였다
---
- name: nginx & wordpress & php74 & mysql
  hosts: nginx
  tasks:
  - name: nginx install
    yum:
      name: "{{ item }}"
      state: latest
    loop:
      - wget
      - yum-utils
      - epel-release
      - nginx
      - http://rpms.remirepo.net/enterprise/remi-release-7.rpm

  - name: wordpress install
    get_url:
      url: https://ko.wordpress.org/wordpress-5.8.6-ko_KR.tar.gz
      dest: ./

  - name: unarchive wordpress
    unarchive:
      src: wordpress-5.8.6-ko_KR.tar.gz
      dest: ./
      remote_src: yes

  - name: wordpress directory all file copy to /usr/share/nginx/html
    copy:
      src: "{{ item.src }}"
      dest: "{{ item.dest }}"
      remote_src: yes
    loop:
      - {src: './wordpress/', dest: '/usr/share/nginx/html/' }
      - {src: '/usr/share/nginx/html/wp-config-sample.php', dest:'/usr/share/nginx/html/wp-config.php' }

   - name: yum-config-manager config
    shell:
      yum-config-manager --enable remi-php74

   - name: php7.4 install
     yum:
       name: "{{ packages }}"
     vars:
        packages:
          - php
          - php-common
          - php-opcache
          - php-mcrypt
          - php-cli
          - php-gd
          - php-curl
          - php-mysqlnd
          - php-fpm

  - name: wp-config.php file change
    replace:
      path: /usr/share/nginx/html/wp-config.php
      regexp: "{{ item.src }}"
      replace: "{{ item.dest }}"
    loop:
      - {src: "database_name_here", dest: "wordpress" }
      - {src: "username_here", dest: "root" }
      - {src: "password_here", dest: "It12345@" }
      - {src: "localhost", dest: "10.0.0.4" }

  - name: replace /etc/php-fpm.d/www.conf
    replace:
       path: /etc/php-fpm.d/www.conf
       regexp: "{{ item.src }}"
       replace: "{{ item.dest }}"
    loop:
      - {src: 'apache', dest: 'nginx'}
      - {src: 'nobody', dest: 'nginx'}
      - {src: 'listen = 127.0.0.1:9000', dest: ';listen = 127.0.0.1:9000' }
      - {src: ';listen.owner = nginx', dest: 'listen.owner = nginx' }
      - {src: ';listen.group = nginx', dest: 'listen.group = nginx' }

  - name: blockinfile /etc/php-fpm.d/www.conf
    blockinfile:
      path: /etc/php-fpm.d/www.conf
      marker: "; {mark} ANSIBLE MANAGED BLOCK "
      insertafter: ";listen = 127.0.0.1:9000"
      block: |
        listen = /run/php-fpm/www.sock

- name: blockinfile /etc/nginx/nginx.conf
    blockinfile:
      path: /etc/nginx/nginx.conf
      marker: "# {mark} ANSIBLE MANAGED BLOCK "
      insertbefore: '^(\s+error_page+\s)404 /404.html;'
      block: |
        #aa
               index       index.php;
               location ~\.php$ {
                   try_files $uri =404;
                   fastcgi_pass unix:/run/php-fpm/www.sock;
                   fastcgi_index   index.php;
                   fastcgi_param SCRIPT_FILENAME $document_root$fastcgi_script_name;
                   include fastcgi_params;
        }

  - name: systemd start nginx & php-fpm
    systemd:
      name: "{{ item }}"
      state: started
    loop:
      - php-fpm
      - nginx

  - name: firewall open 80/tcp
    firewalld:
      port: 80/tcp
      permanent: yes
      immediate: yes
      state: enabled
구축에 앞서 nginx에서 설정을 해줘야 하는 작업들을 먼저 알고가야한다 원래 httpd를 사용을 하면 /etc/httpd/conf/httpd.conf에서 설정을 하면 되었지만 nginx는 /etc/nginx/nginx.conf에서 설정 작업을 해주면되는 동시에 php-fpm 설정또한 해줘야 하기때문에 코드가 이전보다 많아진 것을 확인 할 수 있다
php-fpm 설정을 하기 위해선 /etc/php-fpm.d/www.conf 에서 설정 작업을 해줘야 하며 vi편집기를 이용해서 들어가보면 user = apache 그리고 group = apache로 되어있던 것을 nginx로 수정을 해주면 된다
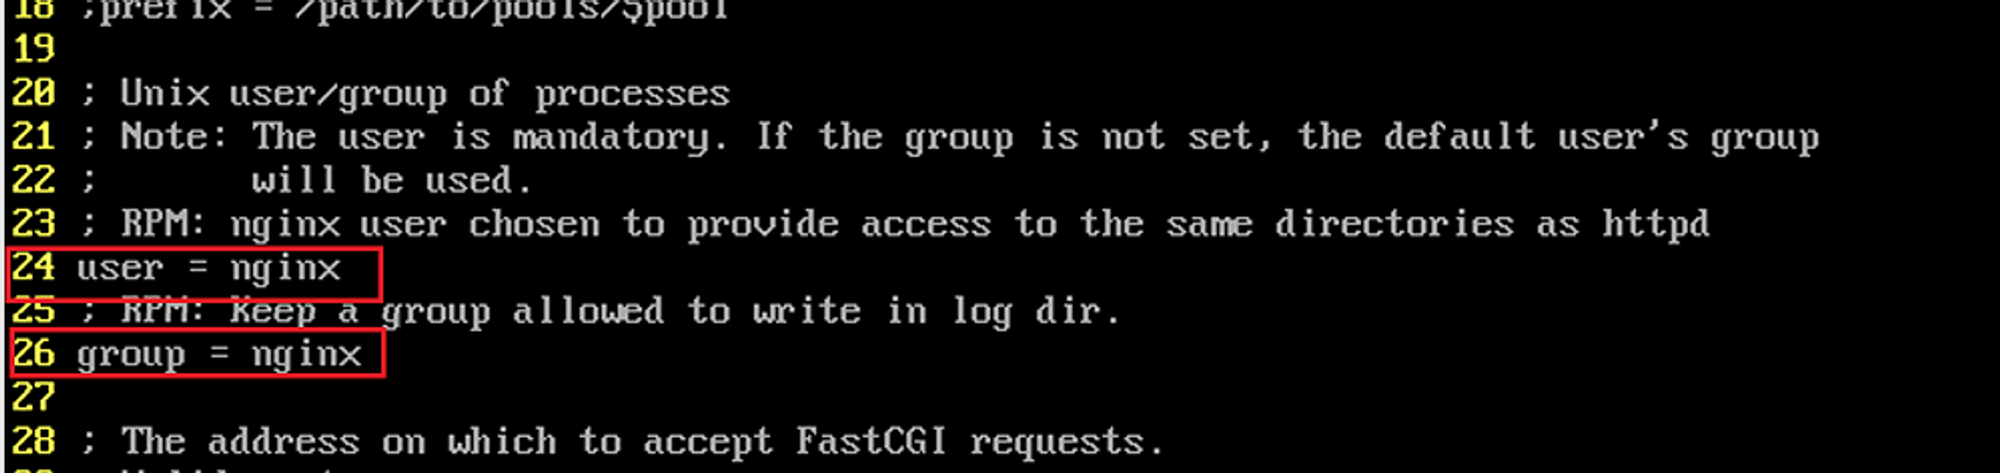
수정을 하고나서는 이렇게 변경이 되어야 한다
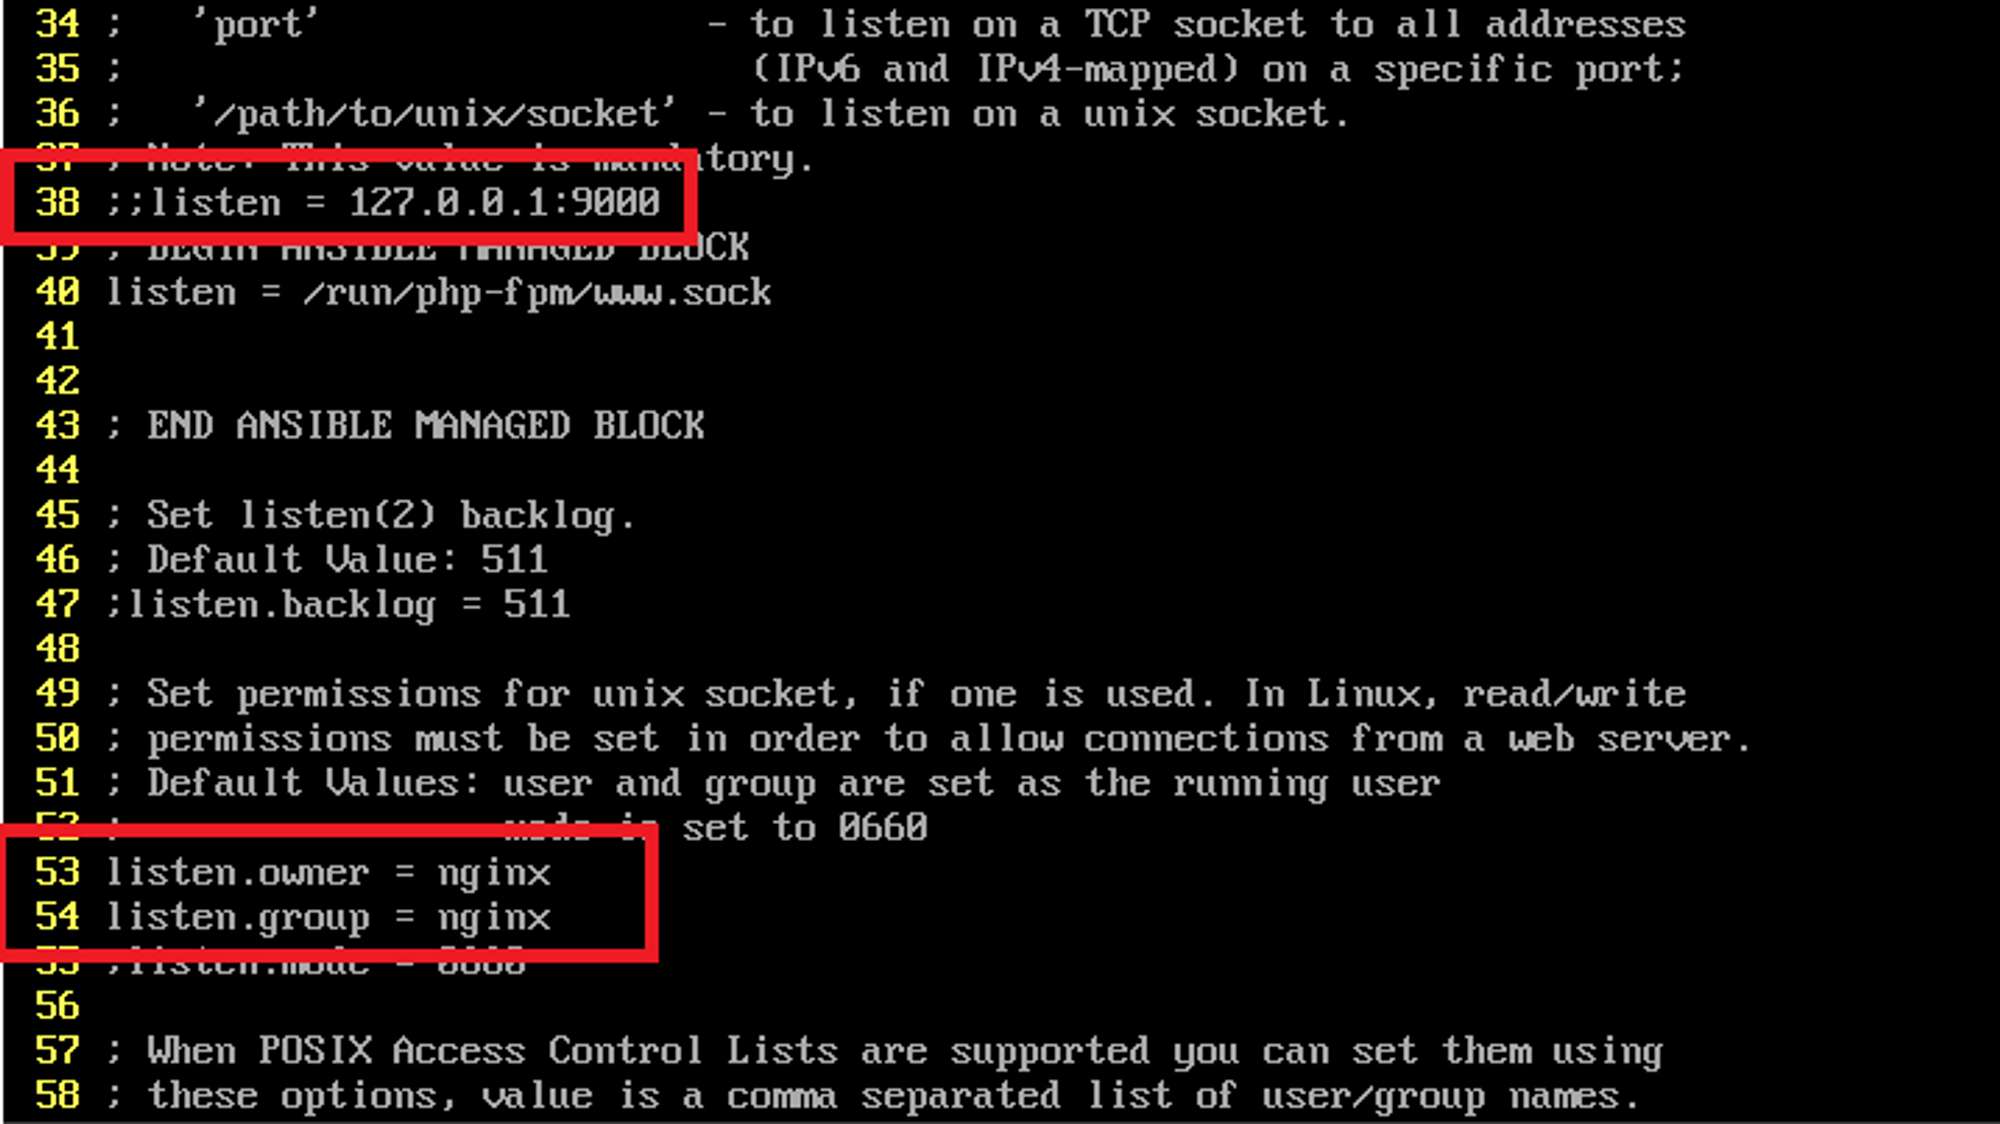
위 사진을 보면 listen = 127.0.0.1:9000 부분을 ;를 이용하여 주석처리를 해주어야 하고 53,54 라인에 보면 listen.owner , listen.group부분이 있는데 처음 초기에는 nobody라고 설정이 되어있어 이부분을 nginx라고 replace 모듈을 사용하여 변경을 해 주었다
ansible코드를 작성하면서 blockinfile 의 insertafter 및 insertbefore부분에서 설정되어있는 부분의 표현식을 인식을 못해 다른 쪽으로 들어가는 현상이 많아서 삽질을 많이 했었다 같은 코드가 있다면 왠만하면 그 부분의 삽입보단 한가지만 있는 표현식 부분을 잘 찾아서 넣어야 할거 같다
이제까지 배운 모든 것을 총 합한 것이 Nginx & Wordpress(PHp7.4) & MySQL 까지 총 연동을 ansible로서 구축을 해 본것이다