ansible을 이용한 nginx 설치 및 구성
---
- name: nginx install & web root directory change
  hosts: db1
  tasks:
  - name: install epel-release & nginx
    yum:
      name: "{{ item }}"
      state: latest
    loop:
      - epel-release
      - nginx

  - name: web root directory change-1
    lineinfile:
      path: /etc/nginx/nginx.conf
      insertafter: '^(\s+sroot\s+)/html;'
      line: index       hoho.html;

  - name: web root directory change-2
    replace:
       path: /etc/nginx/nginx.conf
       regexp: '/usr/share/nginx/html;'
       replace: '/html;'

  - name: Create a directory /html
    file:
      path: /html
      state: directory

 - name: Create a file /html/hoho.html
    file:
      path: /html/hoho.html
      state: touch

  - name: bobo.html insert
    blockinfile:
      path: /html/hoho.html
      marker: "<!-- {mark} ANSIBLE MANAGED BLOCK -->"
      block: |
        <html>
        <body>
        <h1>kws-nginx-webserver</h1>
        </body>
        </html>

  - name: firewalld open 80/tcp
    firewalld:
      port: 80/tcp
      state: enabled

  - name: service start nginx
    service:
      name: nginx
      state: started
Web 서버를 구성하는 애플리케이션은 Apache Tomcat 등등 여러 가지가 있지만 그중에서도 nginx는 Apache가 가지고 있지 않는 proxy기능까지 포함을 하고있다
일단 Apache는 설정파일이 /etc/httpd/conf/httpd.conf에 있지만
nginx 는 /etc/nginx/nginx.conf에 있다는 점이다. 또한 설정파일을 수정하지 않는한 index.html을 불러오는 파일의 경로는 Apache의 경우에는 /var/www/html에 default 값이지만 nginx는 기본적으로 불러오는 경로는 /usr/share/nginx/html이라는 차이점이 있다
기본 설정을 변경하는 것을 제외하곤 나머지는 비슷하게 작동이 되며 방화벽 포트 또한 80/tcp로 설정이 되어있다
저번 Apache 웹서버를 구성 할때는 미리 파일을 만들어 놓고 copy 모듈을 사용하여 파일을 이동했지만 이번에는 file 모듈을 사용하여 디렉터리와 파일을 새로 만들어서 진행을 하였다
lineinfile 은 라인 자체를 바꿔주는 모듈이지만 inserafter를 사용하면 인식된 라인의 둘 다음에 line에 적어 놓은 것이 추가가 된다
replace는 regexp에 지정해놓은 파일의 이름을 replace으로 설정한다
blockinfile 이라는 모듈을 사용하엿는데 이 모듈은 파일을 만들고 그 안에다가 내용을 새로 넣기 위해서 사용한다 block 뒤에는 |파이프 라인이 꼭 들어가 줘야한다 그리고 marker를 추가하지 않으면 #block ~이라고 하는 줄이 생기면서 html 코드에 자동으로 글이 작성된다 그래서 그것을 방지 하기 위해선 marker를 필수적으로 넣어줘야 한다

10.0.0.4 를 접속 하였을때는 정상적으로 웹사이트에 접속이 된 모습이다
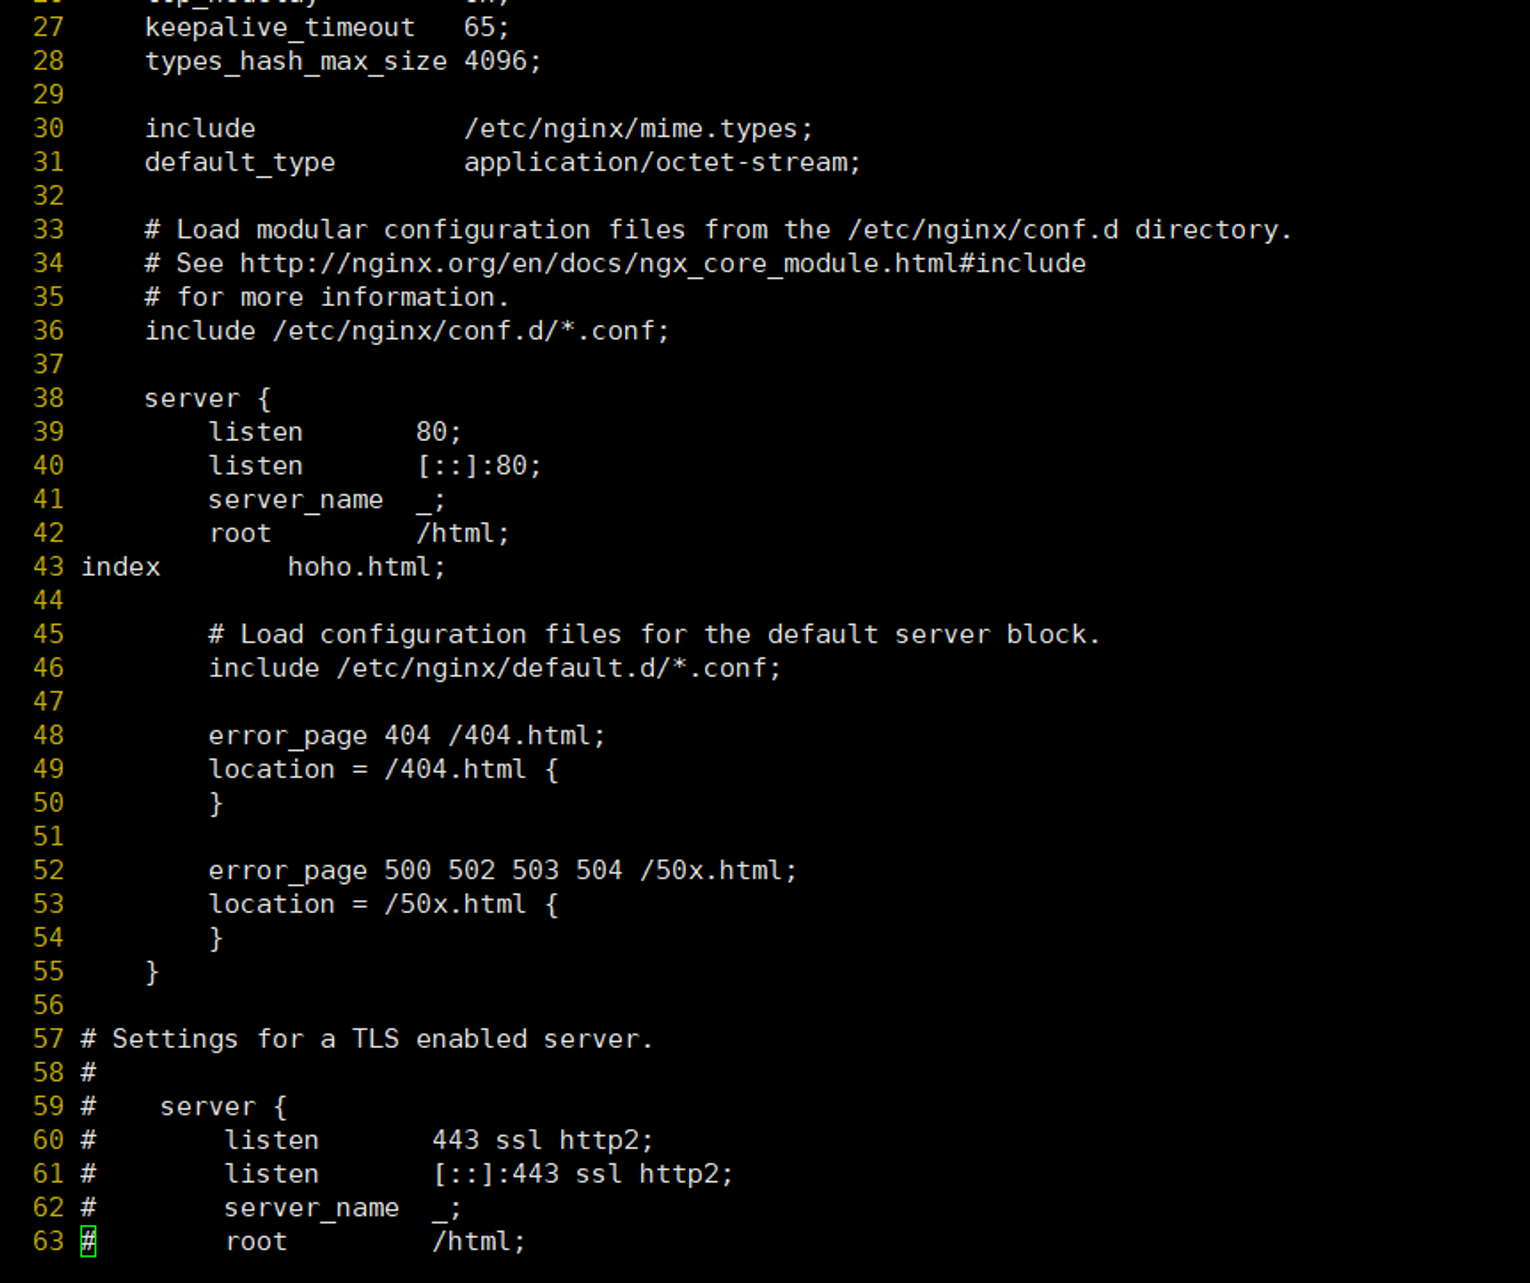
이 사진은 /etc/nginx/nginx.conf nginx의 설정파일을 스크린샷 찍어서 올려 놓았다 ansible 코드 처럼 기본 default파일은 /html로 변경이 되었고 lineinfile 처럼"^(\s+root\s+)/html"을 인식하고 다음줄에 index hoho.html이 생긴 모습이다