Ansible을 이용하여 haproxy 및 wordpress 서버 구축
---
- name: wordpress download & install, php7.4 install
  hosts: was1
  tasks:
  - name: wget, httpd, php repository, php7.4 repo install
    yum:
      name: "{{ item }}"
      state: present
    loop:
      - wget
      - httpd
      - yum-utils
      - epel-release
      - http://rpms.remirepo.net/enterprise/remi-release-7.rpm
      - haproxy

  - name: yum-config-manager config
    shell:
      yum-config-manager --enable remi-php74

  - name: php7.4 install
    yum:
      name: "{{ packages }}"
    vars:
      packages:
        - php
        - php-common
        - php-opcache
        - php-mcrypt
        - php-cli
        - php-gd
        - php-curl
        - php-mysqlnd

  - name: url use file download
    get_url:
      url: https://ko.wordpress.org/wordpress-5.8.6-ko_KR.tar.gz
      dest: ./
  - name: unarchive
    unarchive:
      src: wordpress-5.8.6-ko_KR.tar.gz
      dest: ./
      remote_src: yes

  - name: index.html change index.php
    lineinfile:
      path: /etc/httpd/conf/httpd.conf
      regexp: "{{ item.src }}"
      line: "{{ item.dest }}"
    loop:
      - { src: 'DirectoryIndex health.html', dest: 'DirectoryIndex index.php'}
      - { src: 'Listen 80', dest: 'Listen 8080'}

  - name: wordpress directory all file copy to /var/www/html
    copy:
      src: "{{ item.src }}"
      dest: "{{ item.dest }}"
      remote_src: yes
    loop:
      - {src: './wordpress/', dest: '/var/www/html/' }
      - {src: '/var/www/html/wp-config-sample.php', dest: '/var/www/html/wp-config.php' }

  - name: wp-config.php file change
    replace:
      path: /var/www/html/wp-config.php
      regexp: "{{ item.src }}"
      replace: "{{ item.dest }}"
    loop:
      - {src: "database_name_here", dest: "wordpress" }
      - {src: "username_here", dest: "root" }
      - {src: "password_here", dest: "It12345@" }
      - {src: "localhost", dest: "10.0.0.4" }

  - name: change setting haproxy
    replace:
      path: /etc/haproxy/haproxy.cfg
      regexp: "{{ item.src }}"
      replace: "{{ item.dest }}"
    loop:
      - {src: ':5000', dest: ':80'}
      - {src: '127.0.0.1:5001', dest: '10.0.0.2:80'}
      - {src: '127.0.0.1:5002', dest: '10.0.0.3:8080'}

  - name: haproxy.cfg line delete
    lineinfile:
      path: /etc/haproxy/haproxy.cfg
      regexp: "{{ item.bobo }}"
      line: "{{ item.coco }}"
    loop:
      - {bobo: '127.0.0.1:5003', coco: ''}
      - {bobo: '127.0.0.1:5004', coco: ''}

  - name: httpd & haproxy  service started
    service:
      name: "{{ item }}"
      state: started
    loop:
     - httpd
     - haproxy

  - name: httpd firewall open
    firewalld:
      port: "{{ item }}"
      state: enabled
    loop:
     - 80/tcp
     - 8080/tcp
현재 CentOS Server는 4개를 가지고있는데 10.0.0.1 - 4 까지 static IP를 사용하여 서버를 구축하고 있다 10.0.0.2 IP를 가진 서버는 wordpress를 구축 하였고 10.0.0.3 서버에서는 wordpress & haproxy를 구축 할 예정이다
haproxy 란 LoadBalancer 역할을 하는 즉, 부하분산을 하는 기능을 가지고 있다.
웹서버를 접속하는 클라이언트 들은 똑같은 웹사이트라도 다른 IP에 접속을 한다
예를 들어 설명하자면 2대의 웹서버가 있는데 (웹사이트 코드는 동일) 1대의 서버에만 접속이 되면 나머지 1대는 구축을 했지만 아무일도 하지 않고 놀고있는 현상과, 1대에 서버에 부하가 너무 많이 가버리면 다운되는 현상을 막기위해서 부하분산, 즉 로드밸런서의 기능을 이용하는 것이다
그래서 Centos7에서 구축을 할것이며 먼저 설치한 wordpress server는 80번 포트를 사용하고 있고 haproxy 서버는 80번 포트를 연결하면 wordpress server와 충돌이 나기 때문에 8080포트를 열어 연결을 해줄것이다
yml 파일의 구성을 보면 wordpress와 동일하지만 딱 한가지 추가가되것이 있다
바로 haproxy 를 설치하는것 그리고 configuration 하는것이다
/etc/httpd/conf/httpd.conf http 웹 사이트에서의 port 번호는 아까 얘기했듯이 8080 포트로 설정을 하여 같은 웹사이트 이지만 충돌을 방지하기 위해서 8080로 설정을 해주었다
/etc/haproxy/haproxy.cfg haproxy의 설정 파일에 들어가면 default 설정파일은 5000번 port를 가리키고 있는데 이것을 80으로 설정을 해주고 밑에 IP와 포트번호를 수정하는 부분에서 80 및 8080으로 지정을 해줘야한다
설정을 다하고 나서는 httpd & haproxy service started를 해주면 되고 방화벽 포트 또한 80 & 8080을 열어주었다
사실 8080 port 는 내부 백엔드 부분이기때문에 방화벽을 열어줄 필요는 없다 외부로 통신되는 80 port만 열어줘도 무방하다
그냥 웹사이트에만 접속을 하면 이것이 10.0.0.2 인지 10.0.0.0.3인지 모르는데 이것은 log 파일을 확인해보면 알 수 있다
로그파일은 /var/log/httpd/access_log 파일에서 확인을 할 수 있으며 응답코드는 이렇게 구성이 된다.
- 응답 코드
- 200 ⇒ 성공
- 300 ⇒ 리디렉션
- 400 ⇒ 클라이언트측 오류
- 500 ⇒ 서버 측 오류
tail -F /var/log/httpd/access_log로그파일을 업로드 될때마다 새로 업로드 되게 하는 명령어 이다.tail은 로그파일의 꼬리부분 10개를 본다는 것이다.
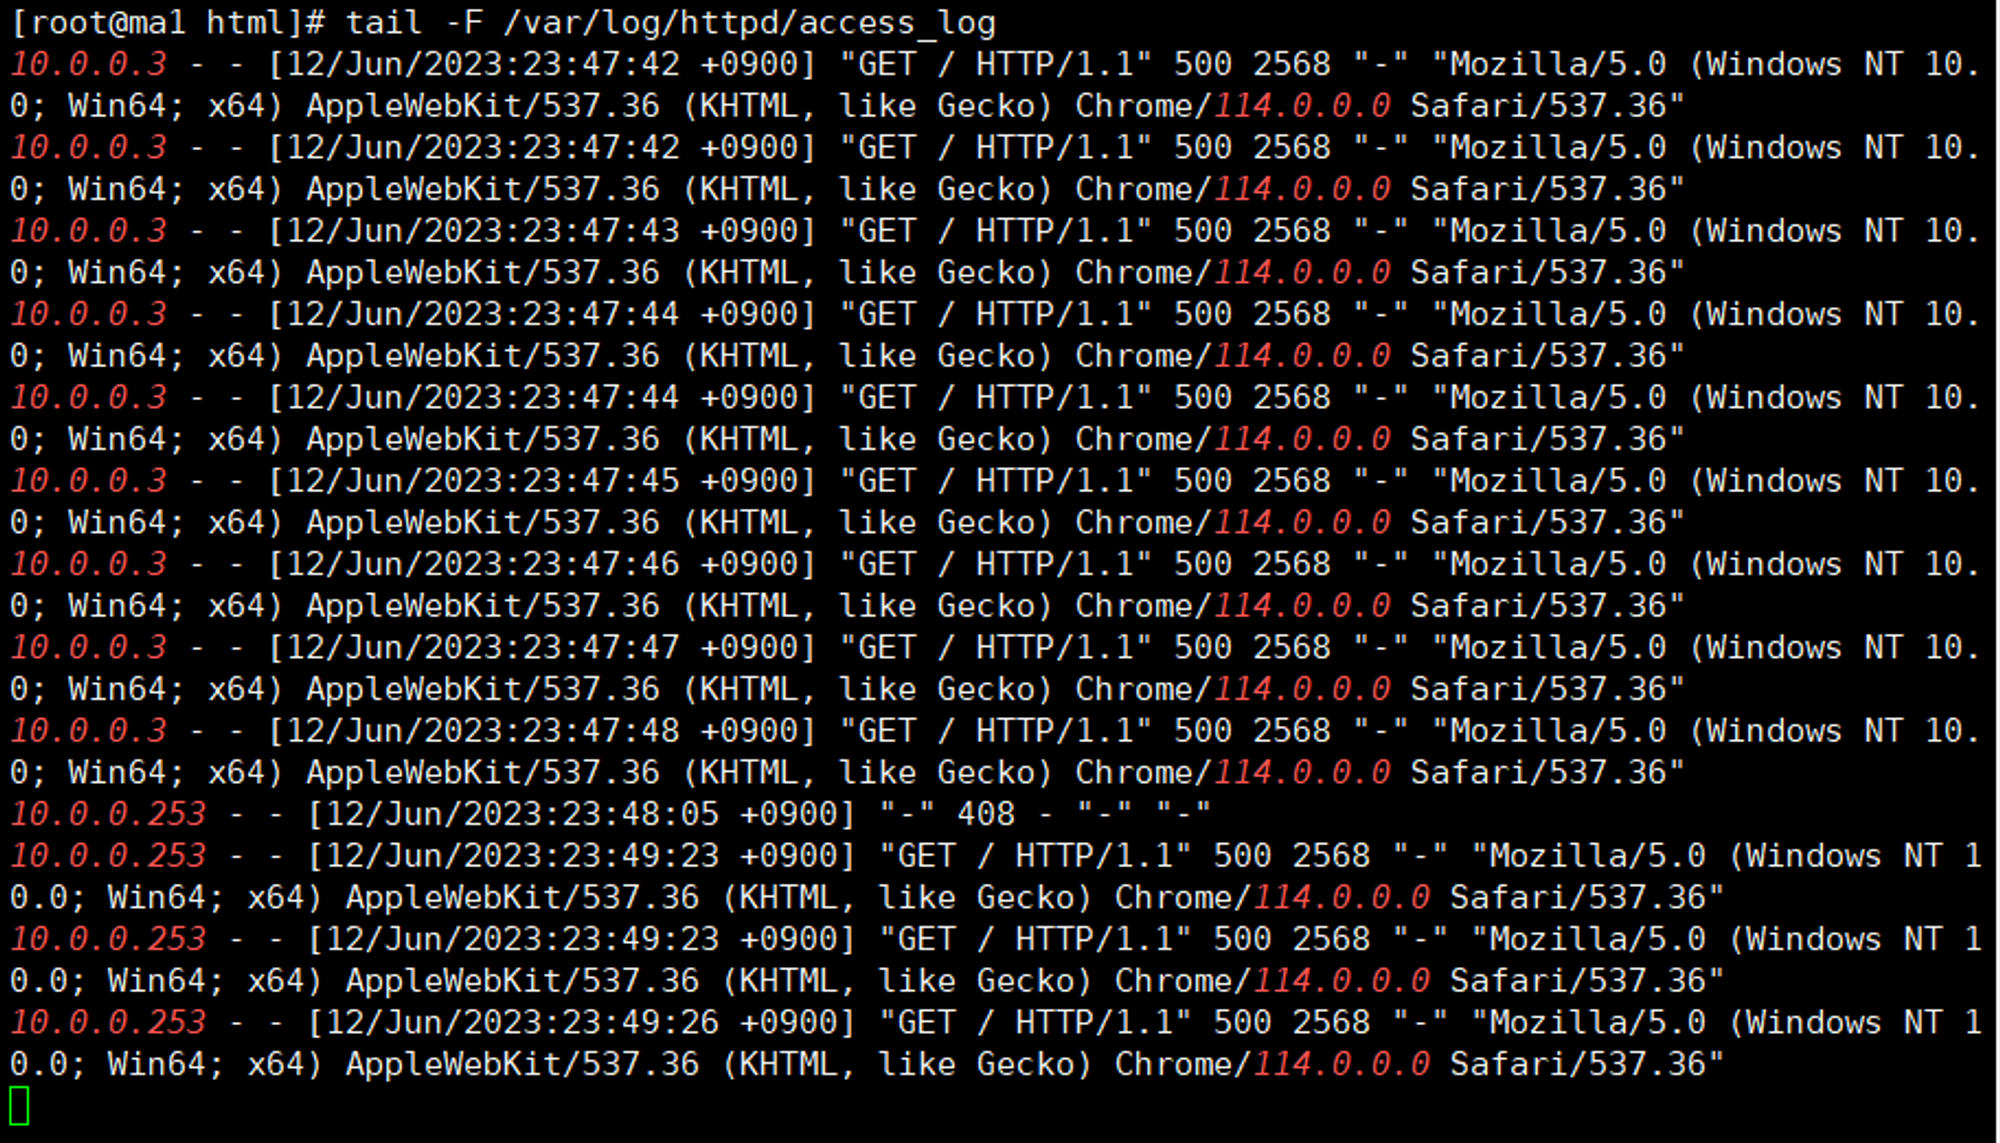
이 사진은 10.0.0.2에서 로그파일을 확인한 것이고 500번 에러가 발생한것을 볼 수 있다
현재는 database 연동을 아직 하지 않았기 때문에 500번, 서버측 오류가 뜨는것이 정상이다.
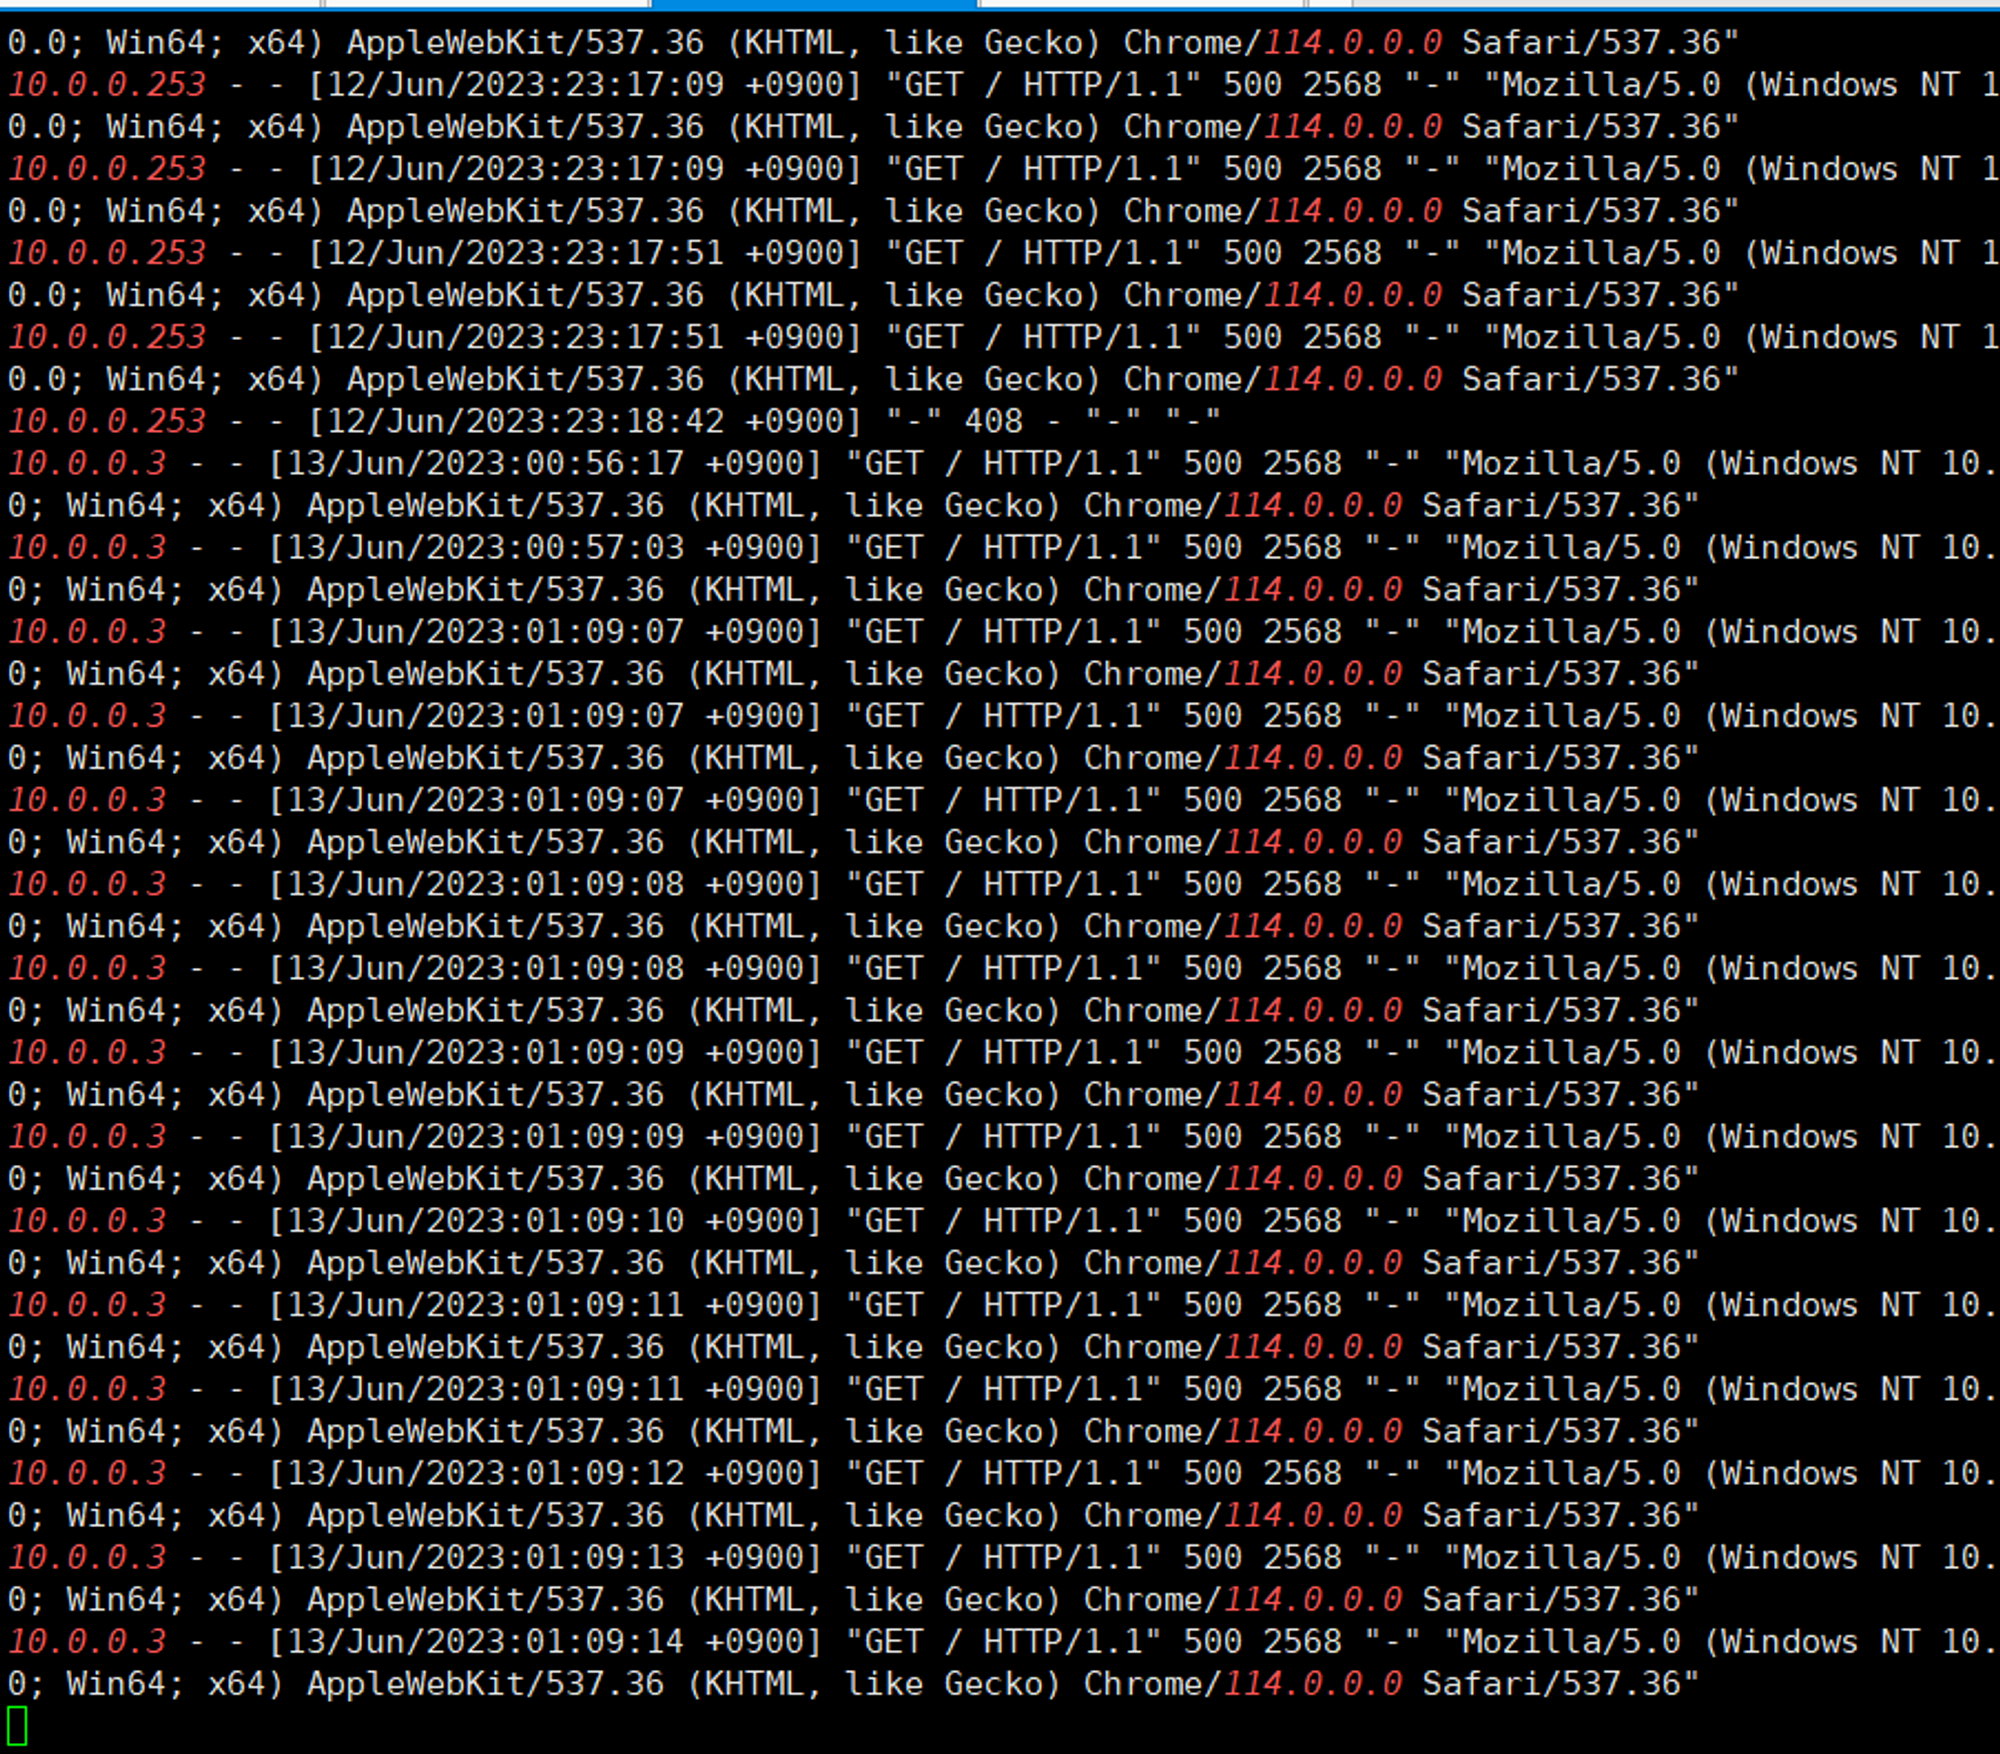
10.0.0.3 에서 로그파일을 확인한 결과 똑같이 500번 에러가 뜨는 모습이고 아까 말했듯이 아직 wordpress에 DB 연동을 하지 않아 뜨는 에러이다