이번에는 동일한 화면에 대해 Redux를 사용하고 사용 안하고의 소스차이점을 보도록 하겠습니다.
만들 예제는 아래 내용입니다.
버튼을 누를때 전체 색이 변하는 예제입니다.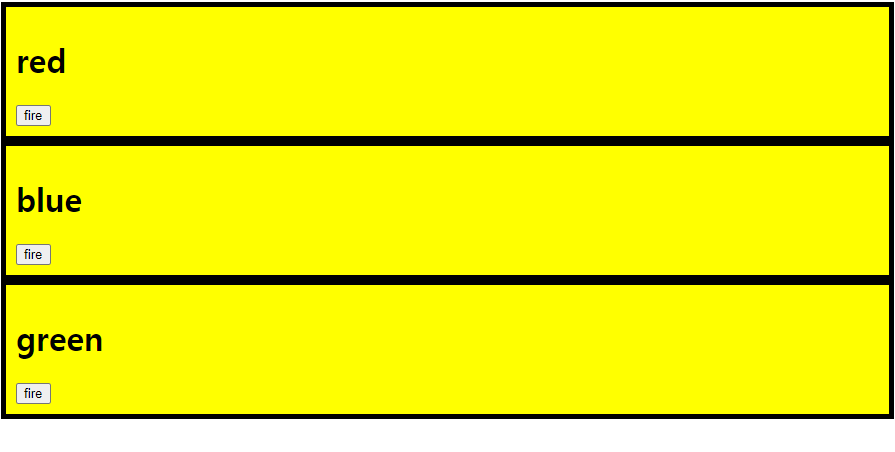
 whithout-redux.html
whithout-redux.html 소스는 html만 사용하여 만들었습니다.
아래 코드를 보시면 버튼을 클릭할 때 red, green, blue 3개의 div의 배경색을 해당 색깔에 맞게 변경해주는 코드입니다.
<html>
    <body>
        <style>
            .container{
                border:5px solid black;
                padding:10px;
            }
        </style>
        <div id="red"></div>
        <div id="green"></div>
      <div id="blue"></div>
        <script>
function red(){
    document.querySelector('#red').innerHTML = `
        <div class="container" id="component_red">
            <h1>red</h1>
            <input type="button" value="fire">
        </div>
    `;
}
red();
function green(){
    document.querySelector('#green').innerHTML = `
        <div class="container" id="component_green">
            <h1>green</h1>
            <input type="button" value="fire">
        </div>
    `;
}
green();
function blue(){
    document.querySelector('#blue').innerHTML = `
        <div class="container" id="component_blue">
            <h1>blue</h1>
            <input type="button" value="fire">
        </div>
    `;
}
blue();
        </script>
    </body>
</html>
코드를 자세히 보시면 3개의 div태그안에 해당 div들을 다 가지고 있는 것이 보일껍니다.
div태그가 예제처럼 몇개 안되면 저렇게 해도 상관이 없겠지만, 100개가 되었을 때면 100개 div에 100개의 div 배경색을 바꿔줘야합니다. 그렇다면 10000번정도 작업을 하게 될 껍니다.
with-redux.html
다음 코드는 Redux를 사용하여 변경한 코드입니다.
<!DOCTYPE html>
<html>
<head>
    <script src="https://cdnjs.cloudflare.com/ajax/libs/redux/4.0.1/redux.js"></script><!--Redux를 추가해주어 아래에서 사용가능함-->
</head>
<body>
    <style>
        .container{
            border:5px solid black;
            padding:10px;
        }
    </style>
    <div id="red"></div>
    <div id="blue"></div>
    <div id="green"></div>
    <script>
        function reducer(state, action){ // state값을 만들어주는 reducer (state : 현재 state값, action : dispatch에서 보낸 객체 값)
            console.log(state, action);
            //state 초기값 설정
            if(state === undefined){ // state 초기값 설정
                return {color : 'yellow'} // return 값은 state다.
            }
            var newState;
            switch(action.type){
                case 'CHANGE_COLOR':{
                    newState = Object.assign({},state, {color : action.color});
                    //state.color = action.color;
                    break;
                }
                default :
                break;
            }
            console.log(action.type, action, state, newState);
            return newState; // state값
        }
        var store = Redux.createStore(reducer,
        window.__REDUX_DEVTOOLS_EXTENSION__ && window.__REDUX_DEVTOOLS_EXTENSION__()
        ); // createStore 인자값은 reducer를 받는다.
        //console.log(store.getState());
function red(){
    var state = store.getState();
    //store.dispatch({type:'CHANGE_COLOR', color : 'red'});
    // dispatch는 reducer를 호출한다.
    //{}객체 값 가져가는데 해당 객체값은 reducer의 action 값에 들어감
    //type은 필수 반드시 있어야함, 변경할 state값
document.querySelector('#red').innerHTML = `
    <div class="container" id="component_red" style = "background-color : ${state.color}">
        <h1>red</h1>
        <input type="button" value="fire">
    </div>
`;
}
store.subscribe(red); // 렌더링해준다. getState() -> render
red();
function blue(){
var state = store.getState();
document.querySelector('#blue').innerHTML = `
    <div class="container" id="component_blue" style = "background-color : ${state.color}">
        <h1>blue</h1>
        <input type="button" value="fire">
    </div>
`;
}
store.subscribe(blue);
blue();
function green(){
var state = store.getState();
document.querySelector('#green').innerHTML = `
    <div class="container" id="component_green" style = "background-color : ${state.color}">
        <h1>green</h1>
        <input type="button" value="fire">
    </div>
`;
}
store.subscribe(green);
green();
    </script>
</body></html>
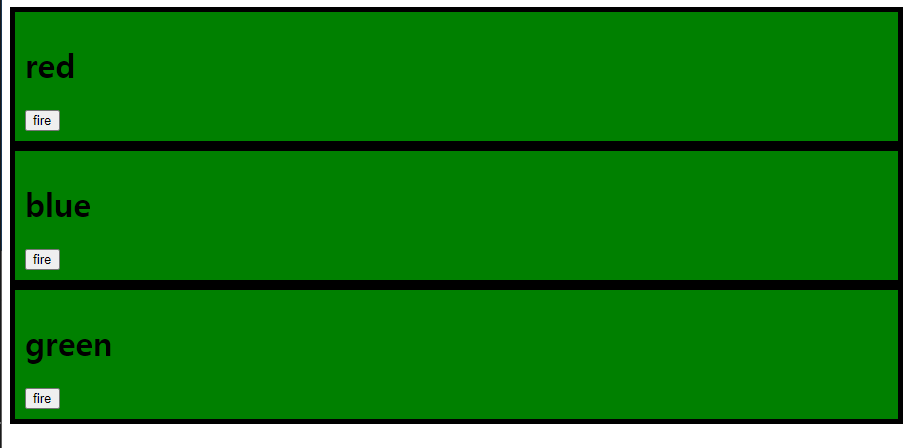
redux를 사용할 때는 store에 값을 저장해두고, 버튼을 누를 때마다 해당 컬러는 store에 저장해 리랜더링을 해서 값을 변경되어 보여주고 있는겁니다.
요약
var store = Redux.createStore(reducer)로 store을 생성해주고,
버튼 클릭 시
onclick="store.dispatch({type:'CHANGE_COLOR', color : 'red'});"
dispatch()함수를 호출하여 action이 일어나게 하여,
function reducer(state, action) 리듀서를 실행합니다.
reducer를 실행하면서 state값이 변경되게됩니다.
이때 subscribe(구독)을 이용하여 리랜더링되게 만들어줍니다.
store.subscribe(red);
redux를 사용하면 div가 몇개가 늘어나든 해당 div만 만들어주면 되어 유지보수도 편하고 수정하는 범위가 적어집니다.
