이제 여러 .v 파일의 여러 module 을 합성해볼 차례이다.
이 다음부터는 Verilator 공식문서 정독포함 약 3시간의 삽질이 들었고, 그 결과 Verilator 에 대한 대략적인 감이 잡히게 되었다.
그 삽질의 결과를 여기에 기록하고자 한다.
여러 Verilog 파일을 합성하고자 하면 어떻게 해야 하는가?
이 경우엔 단도직입적으로 결과를 설명함과 함께 코드의 의미를 설명하는게 맞다는 생각이 들었다.
우선,
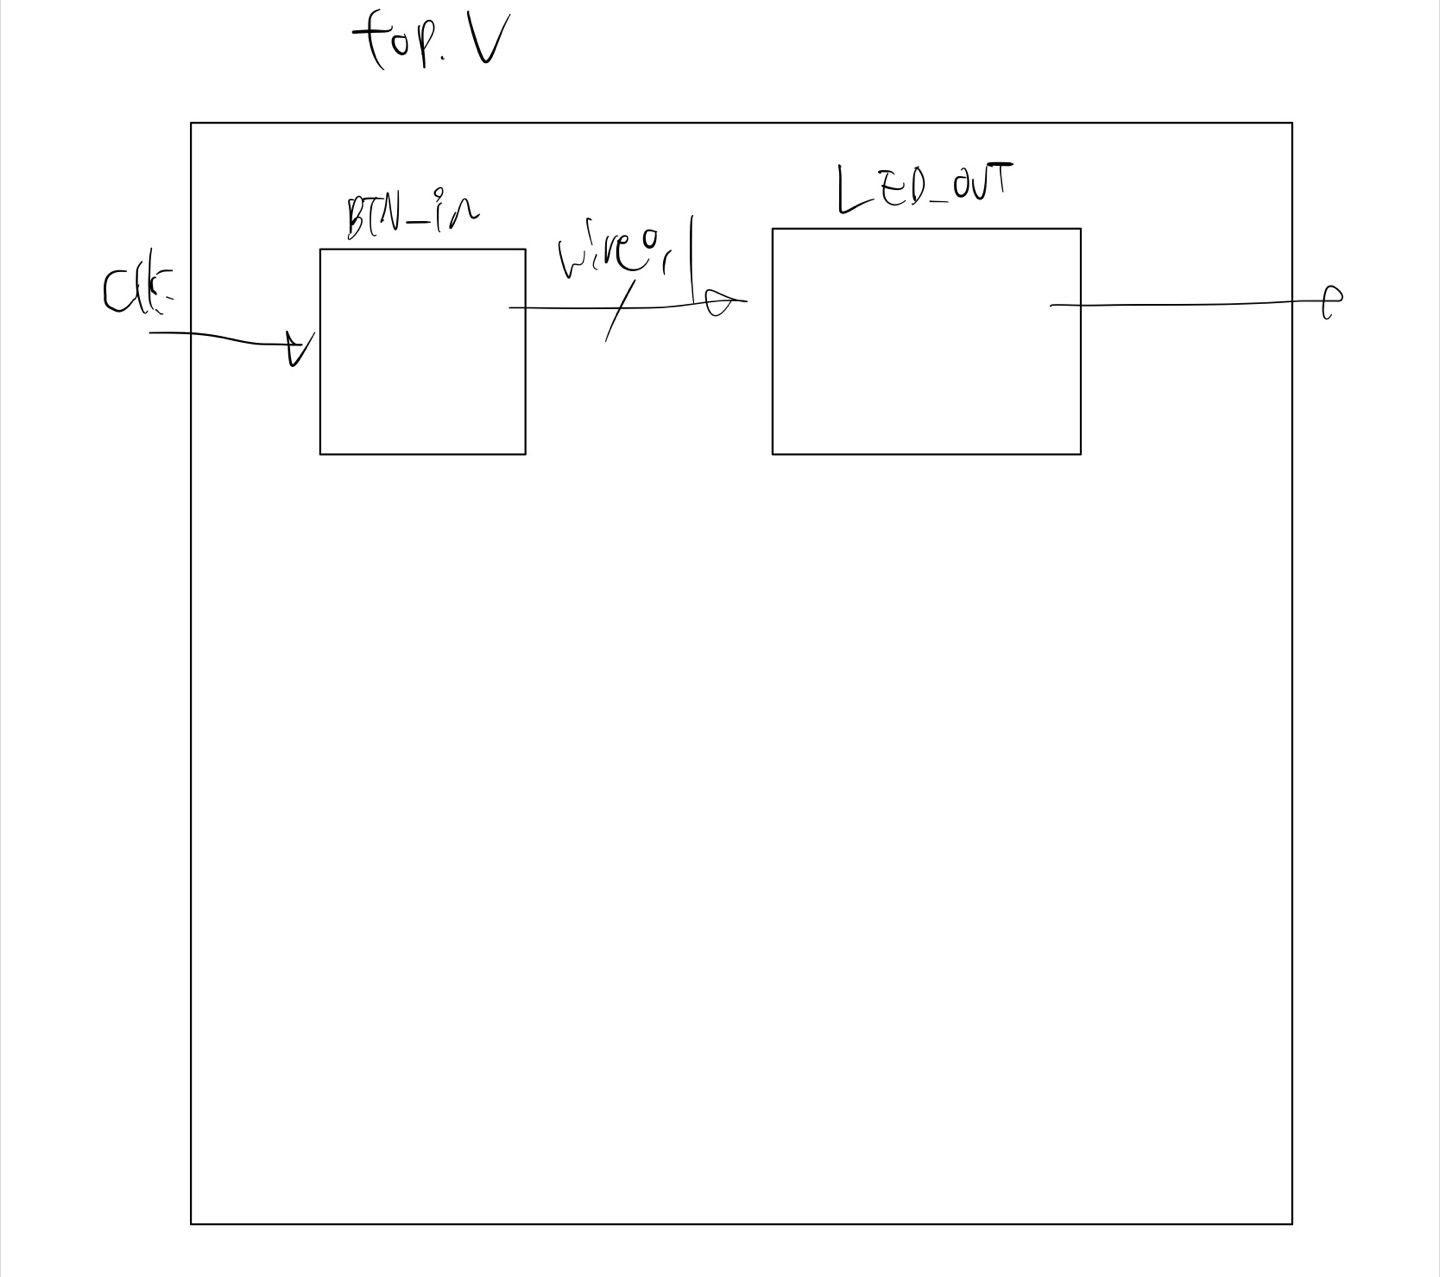
매우매우매우매우 간단한 "여러 모듈로 설계된 HW 조립체" 를 top.v 로 구성한다.
top.v 로부터 받은 입력을 BTN_in과 LED_out 모듈이 받아서 다시 top.v 의 출력에 연결해주는 것이다.
그 코드는 아래와 같다.
top.v
/*
Make LED_BLINKER
*/
// `include "led_out.v"
// `include "btn_in.v"
module top
        (
            input clk,
            input rstn,
            input btn0,
            input btn1,
            output reg led0,
            output reg led1
        );
    wire wire0;
    wire wire1;

    BTN_in blk(
        .clk(clk),
        .rstn(rstn),
        .in0(btn0),
        .in1(btn1),
        .out0(wire0),
        .out1(wire1)
    );

    LED_out led(
        .clk(clk),
        .rstn(rstn),
        .in0(wire0),
        .in1(wire1),
        .out0(led0),
        .out1(led1)
    );

endmodule
btn_in.v
module BTN_in
        (
            input clk,
            input rstn,
            input in0,
            input in1,
            output reg out0,
            output reg out1
        );
    always @(posedge clk or negedge rstn) begin
        if(!rstn) begin
            out0 <= 0;
            out1 <= 0;
        end
        else begin
            out0 <= in0;
            out1 <= in1;
        end
    end
endmodule
led_out.v
module LED_out
        (
            input clk,
            input rstn,
            input in0,
            input in1,
            output reg out0,
            output reg out1
        );
    always @(posedge clk or negedge rstn) begin
        if(!rstn) begin
            out0 <= 0;
            out1 <= 0;
        end
        else begin
            out0 <= in0;
            out1 <= in1;
        end
    end
endmodule
보다시피 `include도,
`timescale 1ns/100fs도 없다.
단도직입적으로 말하면, Makefile에 아래와 같이 적어주면 된다.
######################################################################
#
# DESCRIPTION: Verilator Example: Small Makefile
#
# This calls the object directory makefile.  That allows the objects to
# be placed in the "current directory" which simplifies the Makefile.
#
# This file ONLY is placed under the Creative Commons Public Domain, for
# any use, without warranty, 2020 by Wilson Snyder.
# SPDX-License-Identifier: CC0-1.0
#
######################################################################
# Check for sanity to avoid later confusion

ifneq ($(words $(CURDIR)),1)
 $(error Unsupported: GNU Make cannot build in directories containing spaces, build elsewhere: '$(CURDIR)')
endif

######################################################################

# This is intended to be a minimal example.  Before copying this to start a
# real project, it is better to start with a more complete example,
# e.g. examples/make_tracing_c.

# If $VERILATOR_ROOT isn't in the environment, we assume it is part of a
# package install, and verilator is in your path. Otherwise find the
# binary relative to $VERILATOR_ROOT (such as when inside the git sources).
ifeq ($(VERILATOR_ROOT),)
VERILATOR = verilator
else
export VERILATOR_ROOT
VERILATOR = $(VERILATOR_ROOT)/bin/verilator
endif

default:
	@echo "-- Verilator hello-world simple example"
	@echo "-- VERILATE & BUILD --------"
	$(VERILATOR) -cc --exe --trace --build -j top.v btn_in.v led_out.v sim_main.cpp
	@echo "-- RUN ---------------------"
	obj_dir/Vtop
	@echo "-- DONE --------------------"
	@echo "Note: Once this example is understood, see examples/make_tracing_c."
	@echo "Note: See also https://verilator.org/guide/latest/examples.html"

######################################################################

maintainer-copy::
clean mostlyclean distclean maintainer-clean::
	-rm -rf obj_dir *.log *.dmp *.vpd core
즉,
$(VERILATOR) -cc --exe --trace --build -j top.v btn_in.v led_out.v sim_main.cpp로써 포함될 .v 파일을 전부 명기해주기만 하면 된다.
그 실행결과는 아래와 같다.
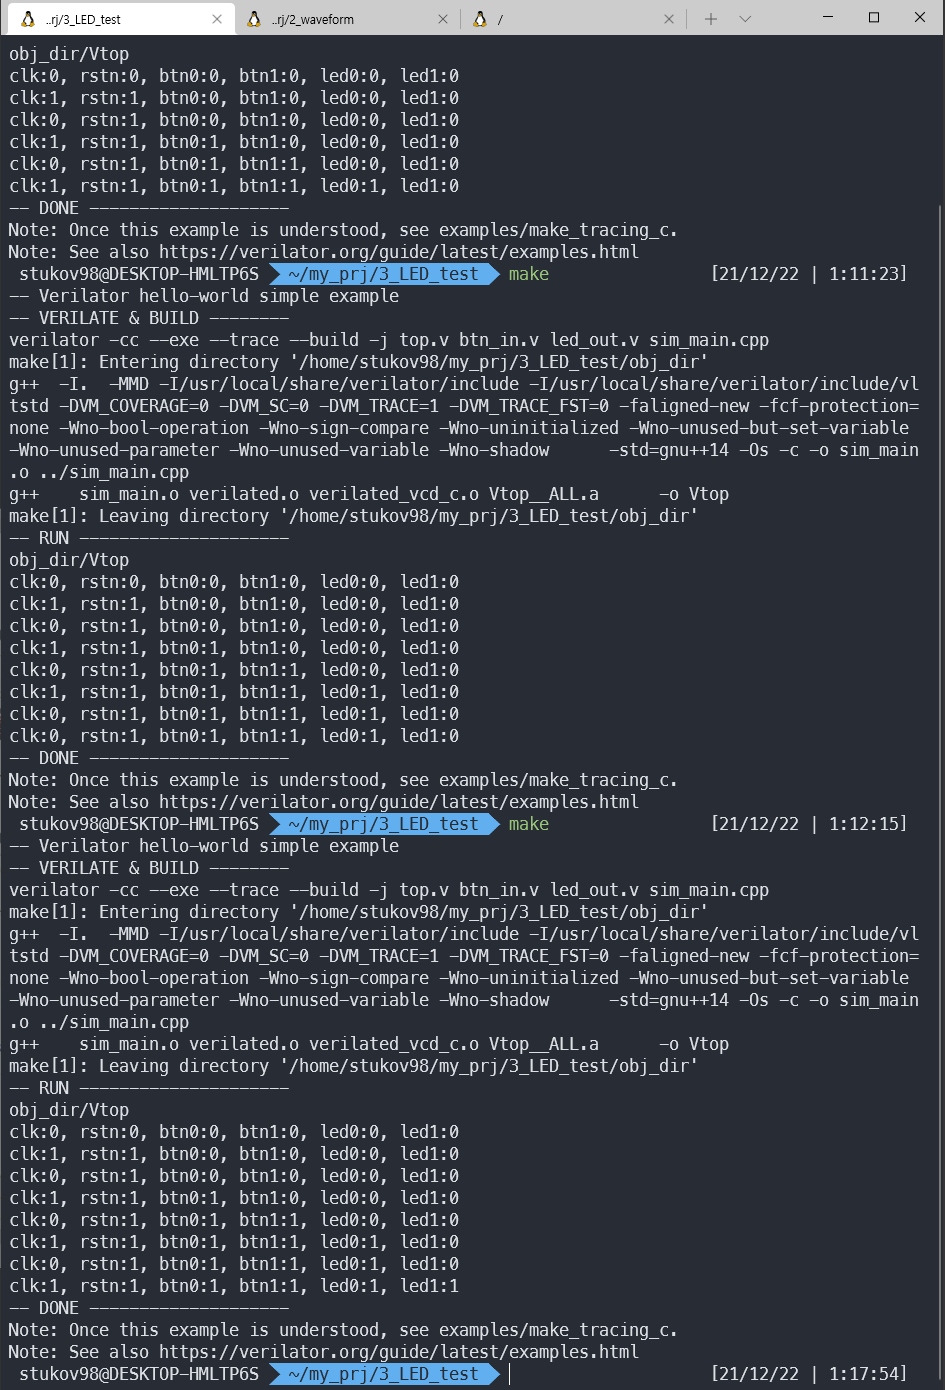
튀기는 것에 따라 led1, 0 이 상승하강하는 것을 볼 수 있으며
top->eval() 이전에 발생한 top->???? 의 변수변화는 셋업타임이 만족되지 않으므로 당연히 동시에 처리되며 따라서 다다음 eval() 부터 반영됨을 확인할 수 있다.
이러한 구현이 어느 파일에 되어있는가를 확인하고자 한다면, obj_dir 에 있는 파일을 뜯어봐야 하는데
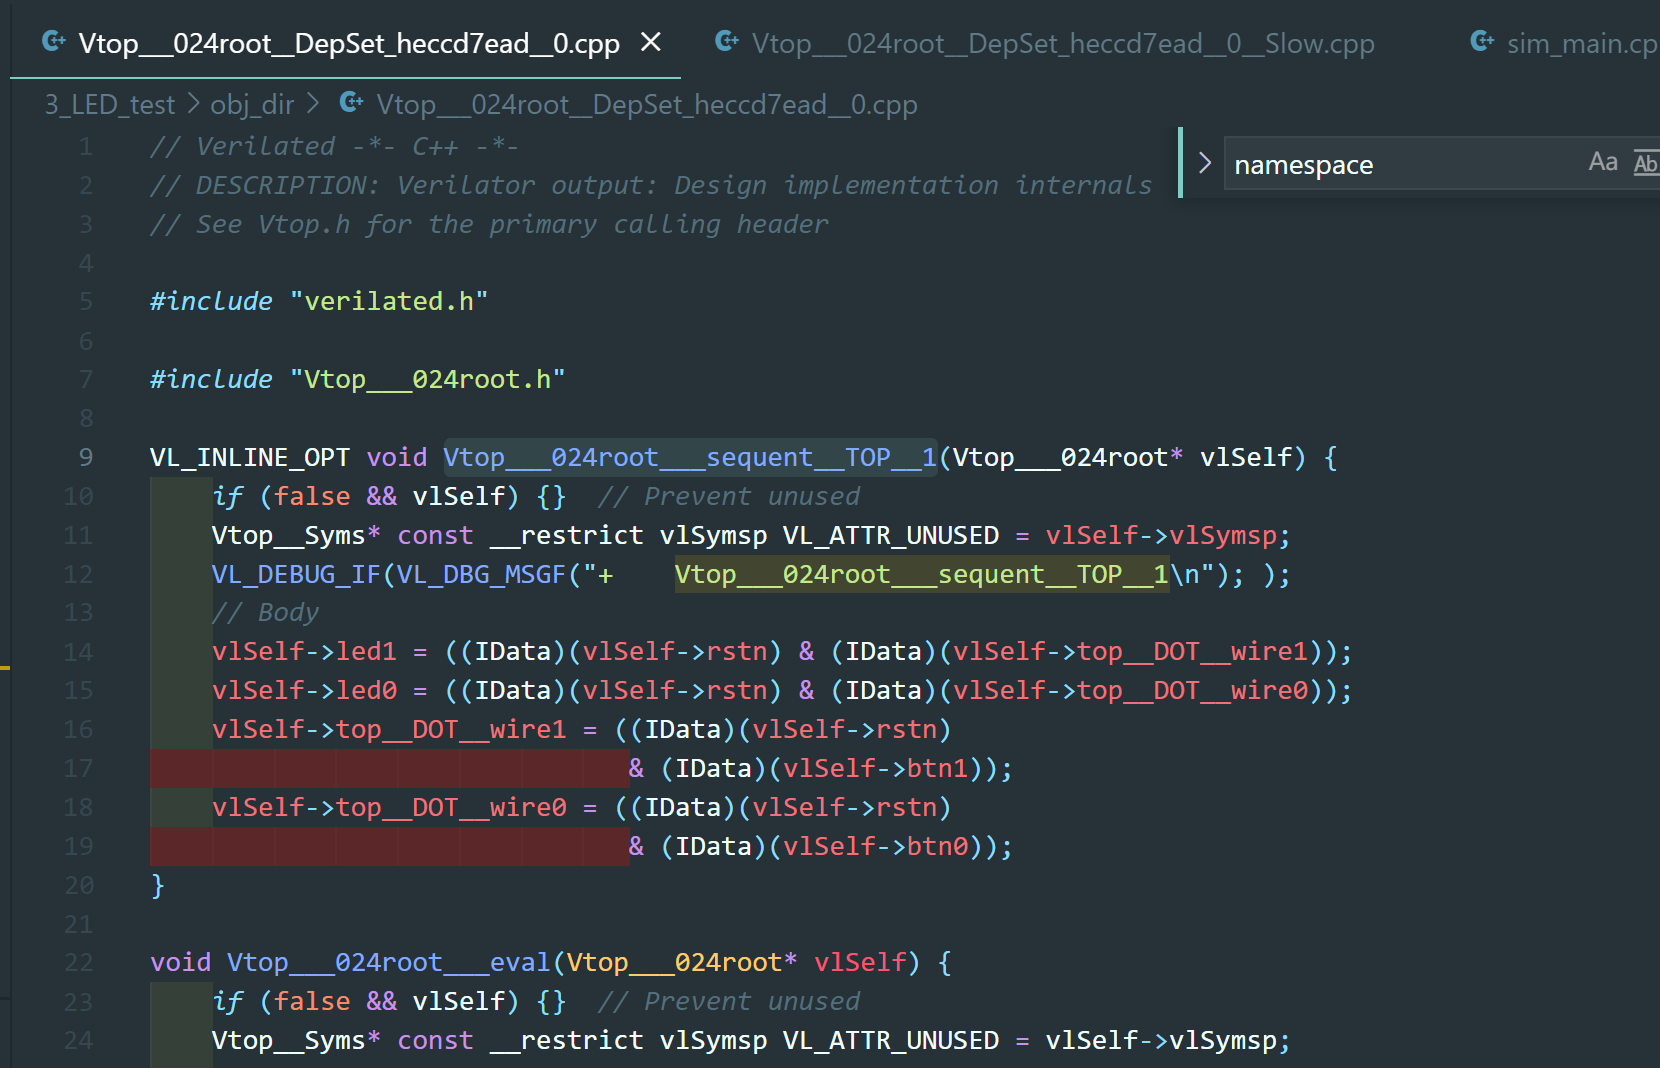
의 형태로 내부에서 알아서 BTN_out, LED_out 까지 최적화하여 구현되어있음을 확인할 수 있다.