앞서
코드의 의미를 분석해보고자 한다.
참고했던 네이버 블로그와 내용이 다를텐데,
이는 verilator 버전이 1년이 넘어 대대적으로 바뀌었기 때문으로 추정한다.
우선 make_hello_c를 ~/my_prj 로 복사한다.
cp -rf ./make_hello_c ~/my_prj-f없으면 mkdir 따로 해야해서 귀찮을거다.
아무튼,
우리의 top.v 는 아래와 같은데
module top;
  initial begin
    $display("Hello World!");
    $finish;
  end
endmodule
테스트벤치 역할을 하는 sim_main.cpp 는 아래와 같다.
#include <verilated.h>
#include "Vtop.h"

int main(int argc, char** argv, char** env) {
    if (false && argc && argv && env) {}
    Vtop* top = new Vtop;

    // Simulate until $finish
    while (!Verilated::gotFinish()) {
        top->eval();
    }

    // Final model cleanup
    top->final();

    // Destroy model
    delete top;

    // Return good completion status
    return 0;
}
분석하려면 뭐부터 봐야할까? 당연히 코드 훑기->헤더->각각의 변수 및 class들의 원형 추적 순이다.
코드를 훑어보자.
Vtop* 가 선언되고, while 문을 finish 가 감지될 때까지 돌면서 eval 을 시전하고, 종료전에 final 호출 뒤 delete, return 한다.
근데 Vtop.h 가 같은 폴더에 없다?
Vtop.h 는 우리가 앞서 make 를 했을 때 obj_dir 에 생성된다.
즉, Vtop.h 는 make 를 통해 생성되며 make 는 .v 파일을 verilator 가 어찌어찌하는 그런 구조로 되어있다.
Vtop.h 는 아래와 같다.
#ifndef VERILATED_VTOP_H_
#define VERILATED_VTOP_H_  // guard

#include "verilated.h"

class Vtop__Syms;
class Vtop___024root;

// This class is the main interface to the Verilated model
class Vtop VL_NOT_FINAL {
  private:
    // Symbol table holding complete model state (owned by this class)
    Vtop__Syms* const vlSymsp;

  public:

    Vtop___024root* const rootp;

    explicit Vtop(VerilatedContext* contextp, const char* name = "TOP");
    explicit Vtop(const char* name = "TOP");
    virtual ~Vtop();
  private:
    VL_UNCOPYABLE(Vtop);  ///< Copying not allowed

  public:
    // API METHODS
    /// Evaluate the model.  Application must call when inputs change.
    void eval() { eval_step(); }
    /// Evaluate when calling multiple units/models per time step.
    void eval_step();
    /// Evaluate at end of a timestep for tracing, when using eval_step().
    /// Application must call after all eval() and before time changes.
    void eval_end_step() {}
    /// Simulation complete, run final blocks.  Application must call on completion.
    void final();
    /// Return current simulation context for this model.
    /// Used to get to e.g. simulation time via contextp()->time()
    VerilatedContext* contextp() const;
    /// Retrieve name of this model instance (as passed to constructor).
    const char* name() const;
} VL_ATTR_ALIGNED(VL_CACHE_LINE_BYTES);

#endif  // guard
메소드들이 선언되어있고,
이것이 포함된 VL_NOT_FINAL 매크로가 있다.
일반적으로, class a b {...} 는 invalid syntax이나,
이 경우 b가 사실 매크로로써, uniform initialization 의 기능을 한다고 한다. 이것은 좀 더 읽어봐야겠다.(C++은 파고들수록 언어자체가 난해하다.)
<의문>
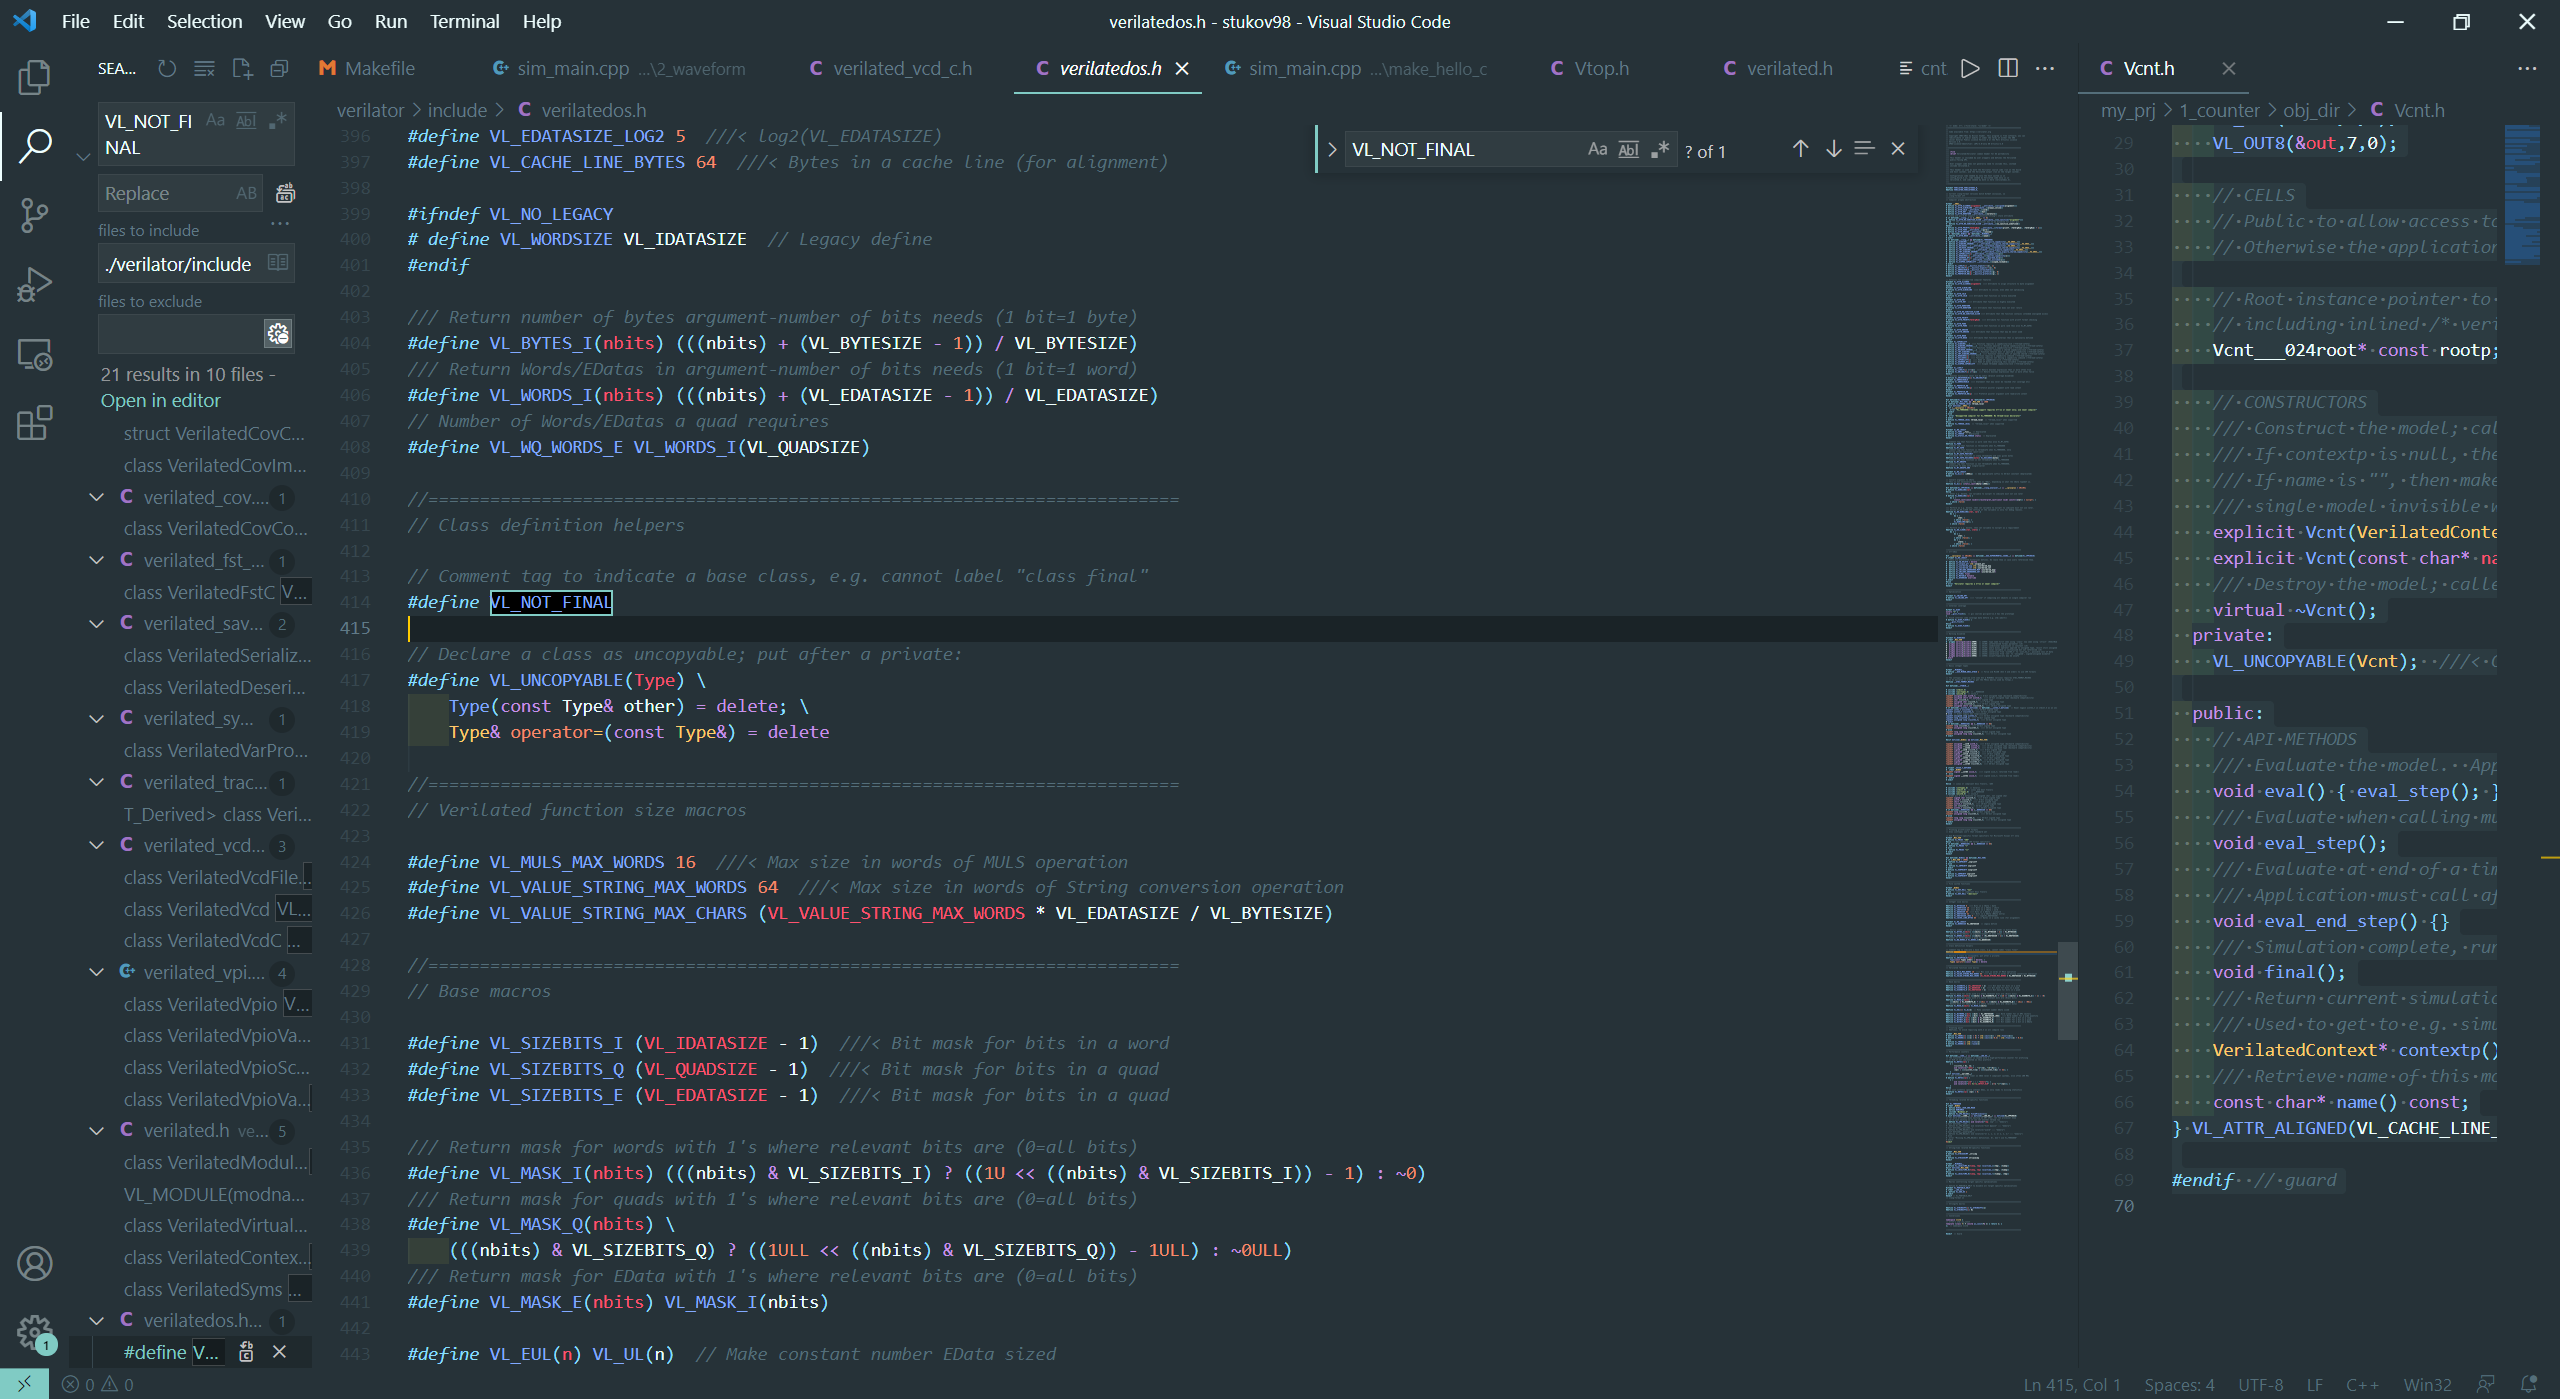
class a b {...} 는 invalid syntax 아닌가 싶었는데
스택오버 검색해보니 위의 경우도 b가 사실은 매크로로써, valid 한 문법이라고 한다.
그래서 b의 매크로가 뭔지 추적해서 까보니 그냥 아무것도 선언되어있지 않다.
도대체 왜 이렇게 짠거지?

어쨌든, 부차적인 문제니 의문으로 일단 남겨두고 전진한다.
<의문 해결>
final 키워드를 못쓰던 시절 공백 define 문으로 저렇게 표시하고자 남겨뒀다는 의견을 들었다.
확실히 그 말이 맞는 것 같다.
덕분에 C++에서 final 키워드의 존재도 알게 되었다.
내가 모르는게 참 많다..
이제는 counter 를 구현해보도록 한다.
여태 우리는 input도 output도 없는 정말 허수아비 모듈만 구현했는데, input 과 output의 선언이 이루어진 cnt.v 파일이 어떻게 Vcnt.h 형태로 영향이 나타날지
그리고 Makefile 은 어떤 식으로 수정을 해야 할지,
그리고 sim_main.cpp 는 어떤 식으로 수정을 해야할지를 조사할 것이다.
cp -rf make_hello_c/ 1_counter 로 새 폴더에 전부 붙여넣고,
vi cnt.v 로 아래와 같이 선언한다.
module cnt
    (
        input clk,
        input rstn,
        output reg[7:0] out
    );

    always @(posedge clk, negedge rstn) begin
        if(!rstn) begin
            out<=0;
        end
        else begin
            if(out<250)
                out<=out+1;
            else
                out<=0;
        end
    end

endmodule
터무니없이 간단한 코드다.
Makefile 에서
top.v -> cnt.v
obj_dir/Vtop -> obj_dir/Vcnt 로 바꿔준다.
sim_main.cpp 에서
#include "Vtop.h" -> #include "Vcnt.h" 로 바꿔준다.
Vtop top = new Vtop; -> Vcnt top = new Vcnt; 로 바꿔준다.
make clean 해서 기존 obj_dir 있으면 날려주고
이제 make 를 갈겨준다.
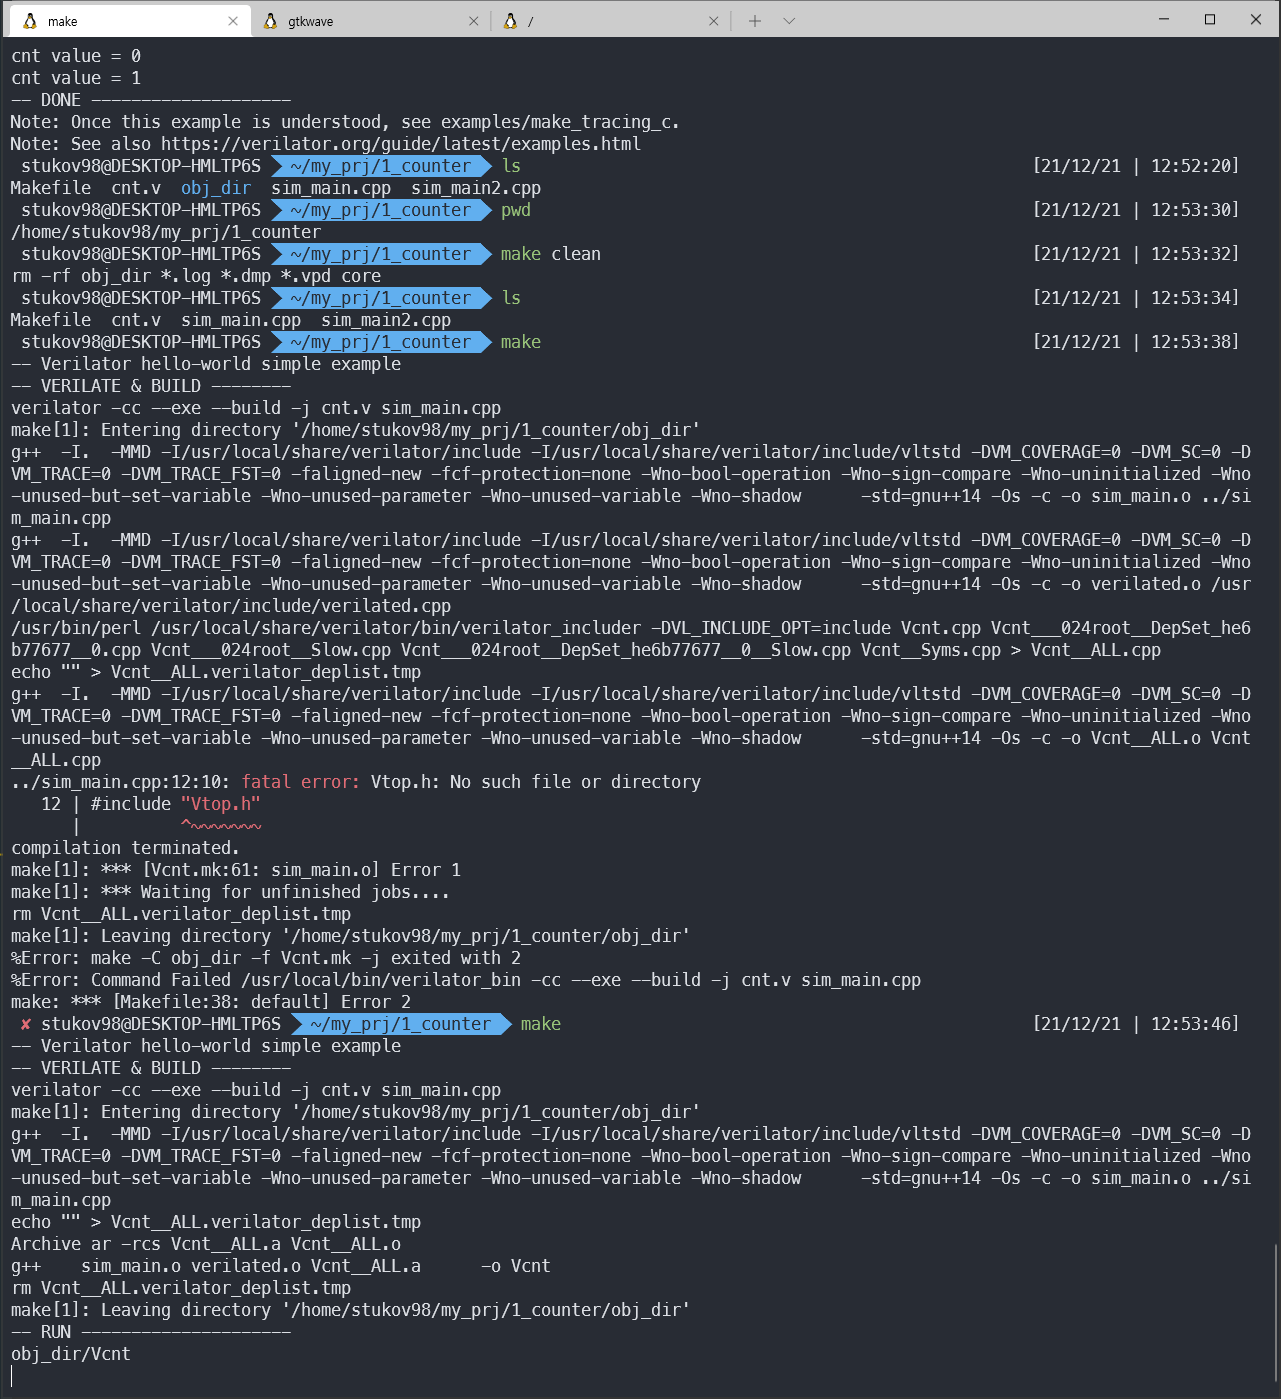
무한루프를 도는 것을 확인할 수 있는데,
이는 우리가 cnt.v 에 top.v때와 달리 인위적인 $finish 를 넣지 않아줘서 그런 것에 불과하다.
터트리고 나오자.
obj_dir 가 생성되었는데, 까보자.
// Verilated -*- C++ -*-
// DESCRIPTION: Verilator output: Primary model header
//
// This header should be included by all source files instantiating the design.
// The class here is then constructed to instantiate the design.
// See the Verilator manual for examples.

#ifndef VERILATED_VCNT_H_
#define VERILATED_VCNT_H_  // guard

#include "verilated.h"

class Vcnt__Syms;
class Vcnt___024root;

// This class is the main interface to the Verilated model
class Vcnt VL_NOT_FINAL {
  private:
    // Symbol table holding complete model state (owned by this class)
    Vcnt__Syms* const vlSymsp;

  public:

    // PORTS
    // The application code writes and reads these signals to
    // propagate new values into/out from the Verilated model.
    VL_IN8(&clk,0,0);
    VL_IN8(&rstn,0,0);
    VL_OUT8(&out,7,0);

    // CELLS
    // Public to allow access to /* verilator public */ items.
    // Otherwise the application code can consider these internals.

    // Root instance pointer to allow access to model internals,
    // including inlined /* verilator public_flat_* */ items.
    Vcnt___024root* const rootp;

    // CONSTRUCTORS
    /// Construct the model; called by application code
    /// If contextp is null, then the model will use the default global context
    /// If name is "", then makes a wrapper with a
    /// single model invisible with respect to DPI scope names.
    explicit Vcnt(VerilatedContext* contextp, const char* name = "TOP");
    explicit Vcnt(const char* name = "TOP");
    /// Destroy the model; called (often implicitly) by application code
    virtual ~Vcnt();
  private:
    VL_UNCOPYABLE(Vcnt);  ///< Copying not allowed

  public:
    // API METHODS
    /// Evaluate the model.  Application must call when inputs change.
    void eval() { eval_step(); }
    /// Evaluate when calling multiple units/models per time step.
    void eval_step();
    /// Evaluate at end of a timestep for tracing, when using eval_step().
    /// Application must call after all eval() and before time changes.
    void eval_end_step() {}
    /// Simulation complete, run final blocks.  Application must call on completion.
    void final();
    /// Return current simulation context for this model.
    /// Used to get to e.g. simulation time via contextp()->time()
    VerilatedContext* contextp() const;
    /// Retrieve name of this model instance (as passed to constructor).
    const char* name() const;
} VL_ATTR_ALIGNED(VL_CACHE_LINE_BYTES);

#endif  // guard
달라진 점이 보일텐데,
    VL_IN8(&clk,0,0);
    VL_IN8(&rstn,0,0);
    VL_OUT8(&out,7,0);
즉
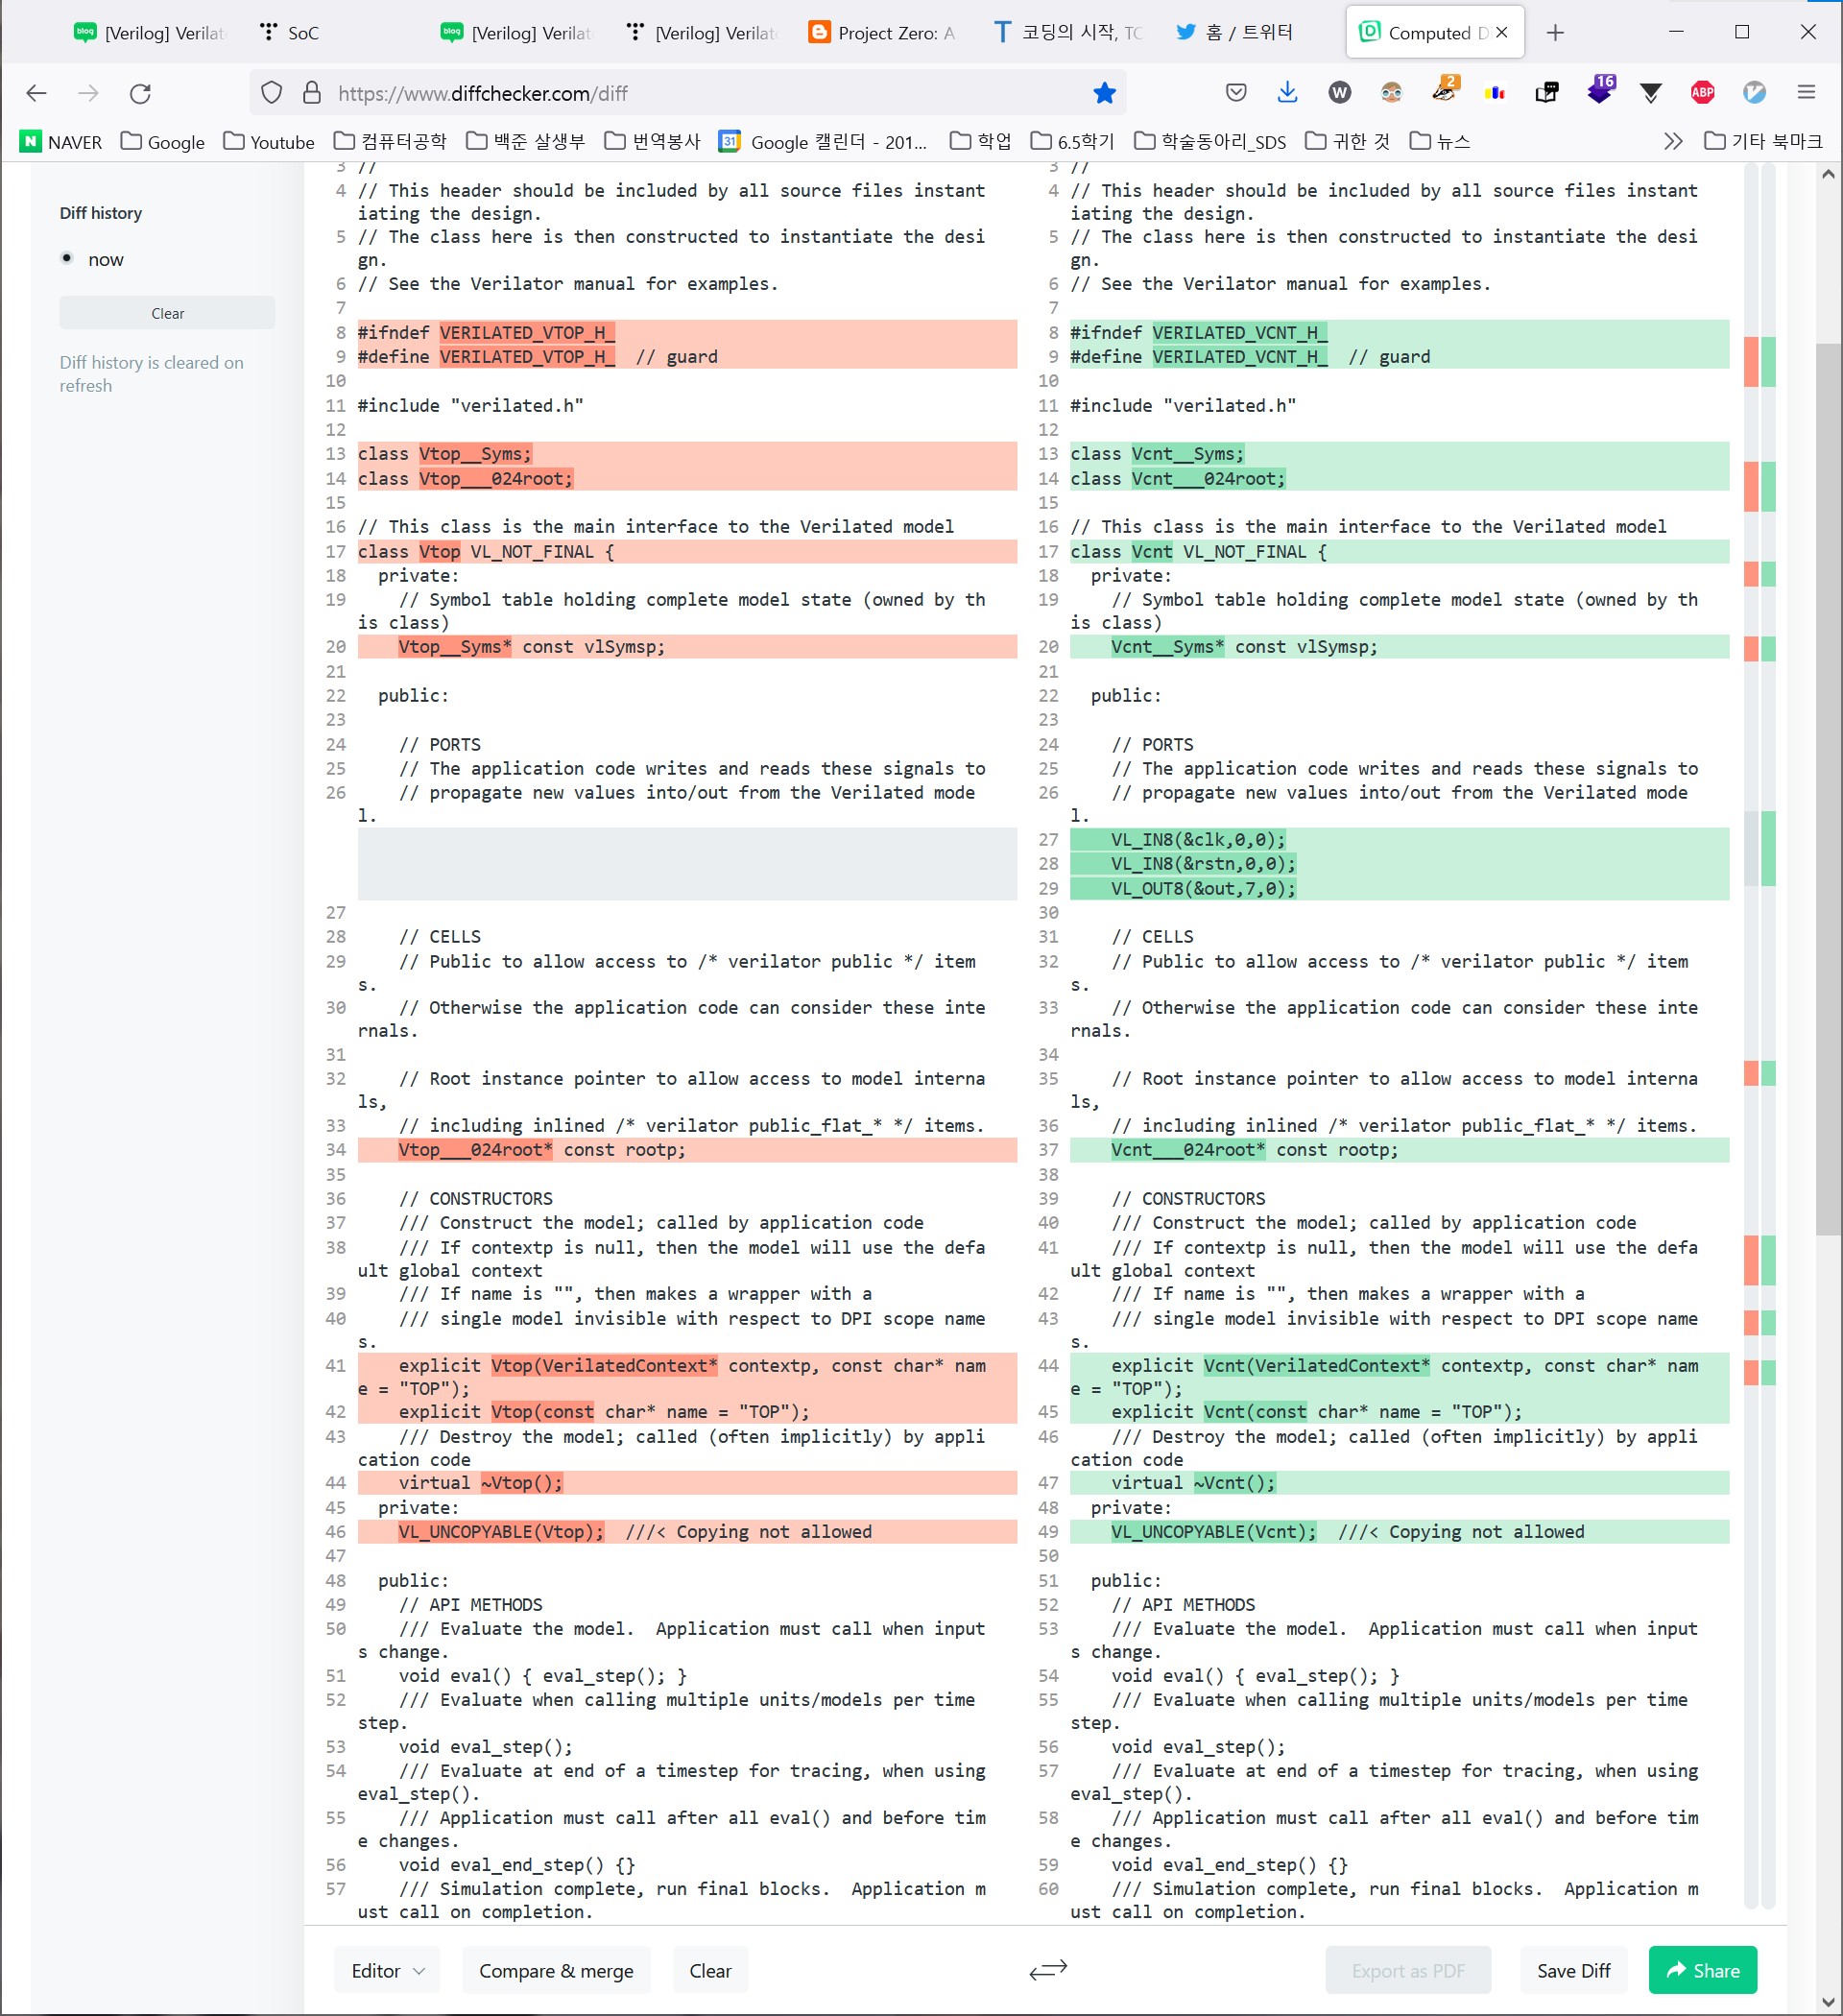
만큼 달라졌다. Vcnt로 변수명 싸그리 바뀐 것 제외하고는 위가 유일하다.
그럼 VL_IN8 은 딱봐도 8비트짜리 input line 일텐데 이것의 C++ 원형은 무엇인가?
아래에 기술한다.
verilator/include/verilated.h 를 까보면 자료형의 원형을 알 수 있다.
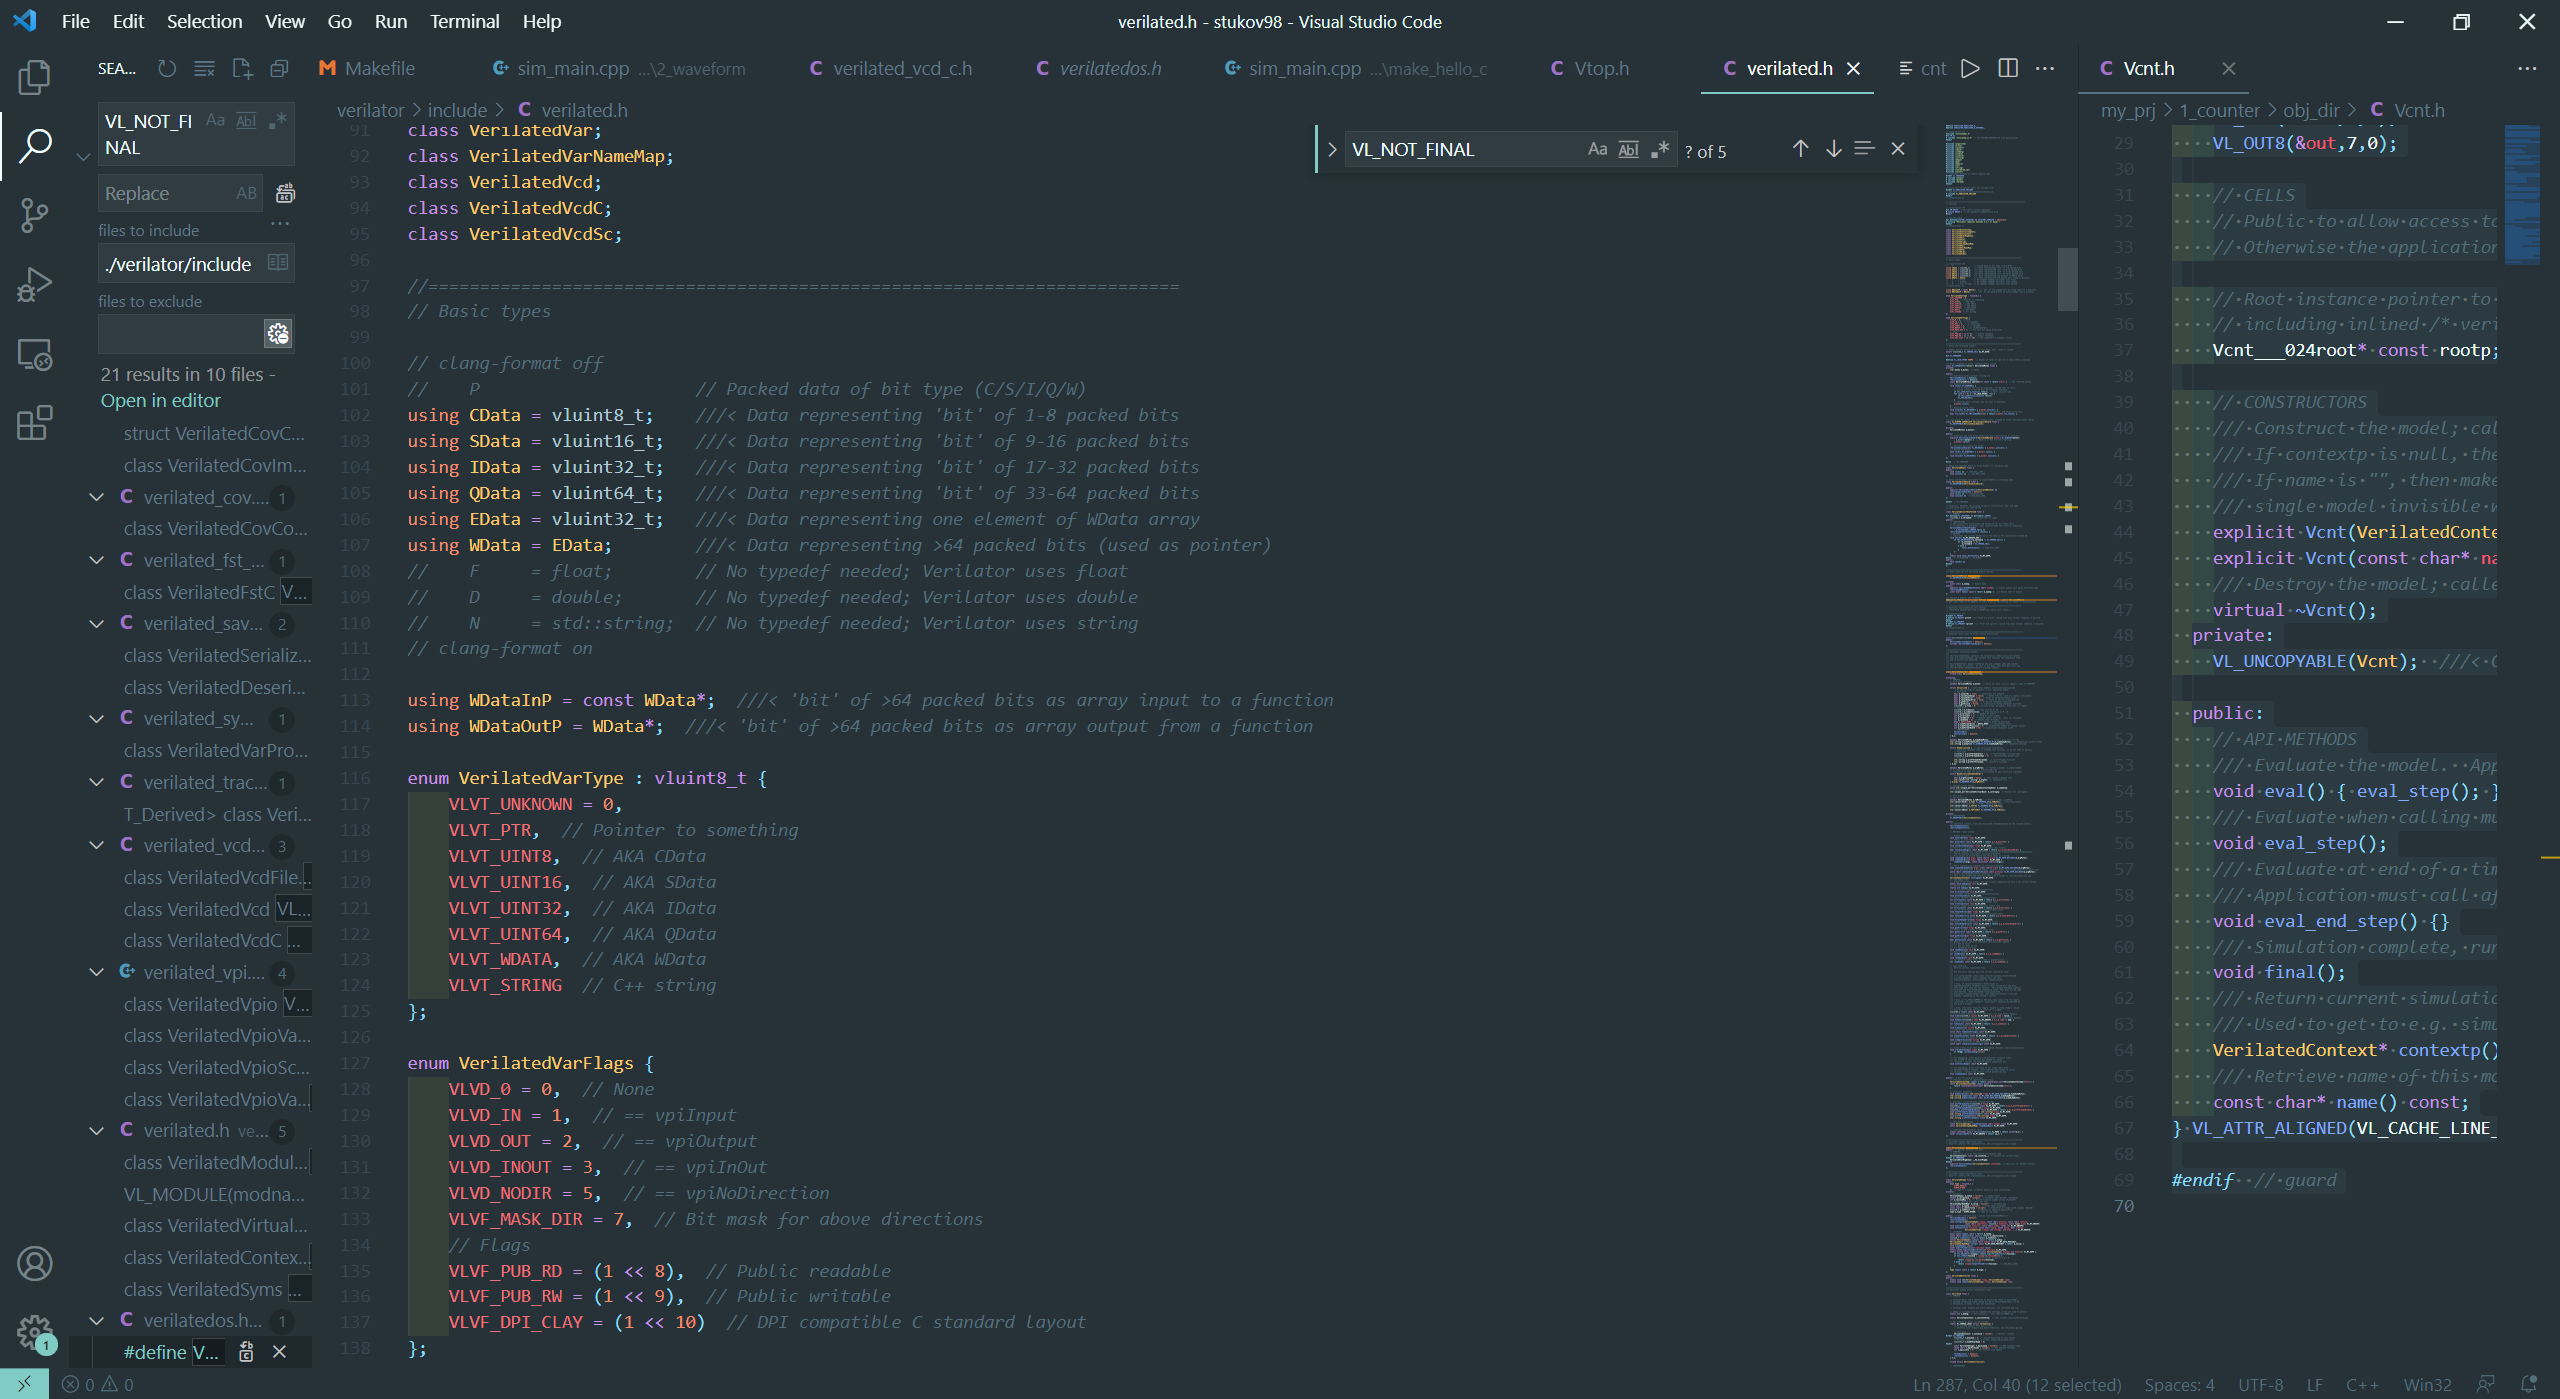
1~8비트면 CData
9~16비트면 S
I, Q, E, 그 이상이면 포인터형태로써 넘겨지며 W
이런식으로 Prefix 가 붙은 자료형으로 vluint8_t 와 같은 꼴로 내부적으로 유지가 되는 것을 확인할 수 있고, 이는 이따 체크해볼 수 있다.

vluint8_t 같은 자료형의 원형은 verilator/include/verilatedos.h 에서 확인할 수 있으며
아키텍쳐에 따라 다른 모양이지만

처럼 결국 char, short int, long long 등등으로 그 크기에 맞춰 선언되어있음을 확인할 수 있다.
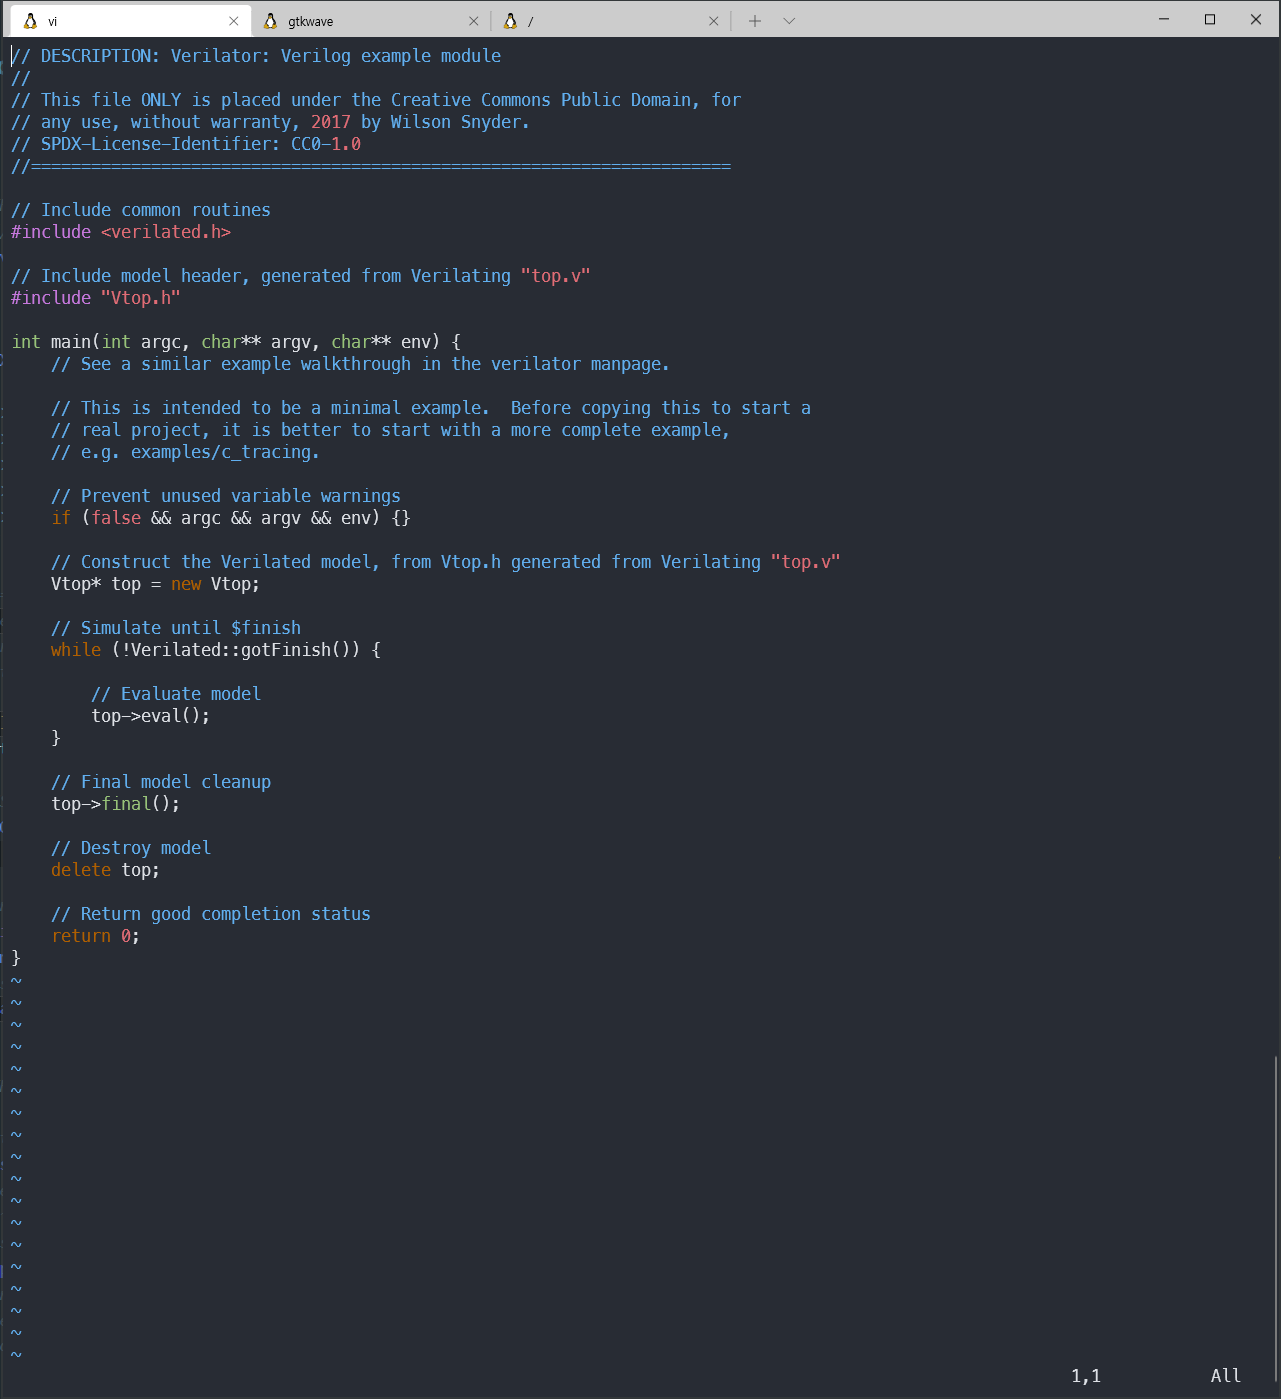
eval의 역할이 무엇인지 알고싶다면, 위와 같이 sim_main.cpp를 변형해보자.
// DESCRIPTION: Verilator: Verilog example module
//
// This file ONLY is placed under the Creative Commons Public Domain, for
// any use, without warranty, 2017 by Wilson Snyder.
// SPDX-License-Identifier: CC0-1.0
//======================================================================

// Include common routines
#include <verilated.h>

// Include model header, generated from Verilating "top.v"
#include "Vcnt.h"

int main(int argc, char** argv, char** env) {
    // See a similar example walkthrough in the verilator manpage.

    // This is intended to be a minimal example.  Before copying this to start a
    // real project, it is better to start with a more complete example,
    // e.g. examples/c_tracing.

    // Prevent unused variable warnings
    if (false && argc && argv && env) {}

    // Construct the Verilated model, from Vtop.h generated from Verilating "top.v"
    Vcnt* top = new Vcnt;

    printf("cnt value = %d\n", top->out);
    top->rstn=1;
    top->eval();
    top->rstn=0;
    top->eval();
    top->rstn=1;
    top->eval();
    printf("cnt value = %d\n", top->out);

    // Final model cleanup
    top->final();

    // Destroy model
    delete top;

    // Return good completion status
    return 0;
}
위를 보면 정말 modelsim보다 편리한 점을 바로 확인할 수 있다.
    printf("cnt value = %d\n", top->out);
    top->rstn=1;
    top->eval();
    top->rstn=0;
    top->eval();
    top->rstn=1;
    top->eval();
    printf("cnt value = %d\n", top->out);
로 변수의 로그를 바로 찍을 수 있고, 변수를 바로 튕겨줄 수 있고, eval 때리는 시점을 내가 직접 정할 수 있다.
리셋을 1로 해주고 0으로 해주고 다시 1로 해주는 것에 불과하다.
카운터니까 클럭이 튕길때마다 1씩 올라간다.
이를 확인하기 위해 아예 for문을 적어보자.
// DESCRIPTION: Verilator: Verilog example module
//
// This file ONLY is placed under the Creative Commons Public Domain, for
// any use, without warranty, 2017 by Wilson Snyder.
// SPDX-License-Identifier: CC0-1.0
//======================================================================

// Include common routines
#include <verilated.h>

// Include model header, generated from Verilating "top.v"
#include "Vcnt.h"

int main(int argc, char** argv, char** env) {
    // See a similar example walkthrough in the verilator manpage.

    // This is intended to be a minimal example.  Before copying this to start a
    // real project, it is better to start with a more complete example,
    // e.g. examples/c_tracing.

    // Prevent unused variable warnings
    if (false && argc && argv && env) {}

    // Construct the Verilated model, from Vtop.h generated from Verilating "top.v"
    Vcnt* top = new Vcnt;

    printf("cnt value = %d\n", top->out);
    top->rstn=1;
    top->eval();
    top->rstn=0;
    top->eval();
    top->rstn=1;
    top->eval();
    printf("cnt value = %d\n", top->out);

    for(int i=0;i<252;i++){
        top->clk = 0;
        top->eval();
        top->clk = 1;
        top->eval();
        printf("cnt value = %d\n", top->out);
    }

    // Final model cleanup
    top->final();

    // Destroy model
    delete top;

    // Return good completion status
    return 0;
}
252번 조낸 clk을 튕긴다.
make로 확인해보자.
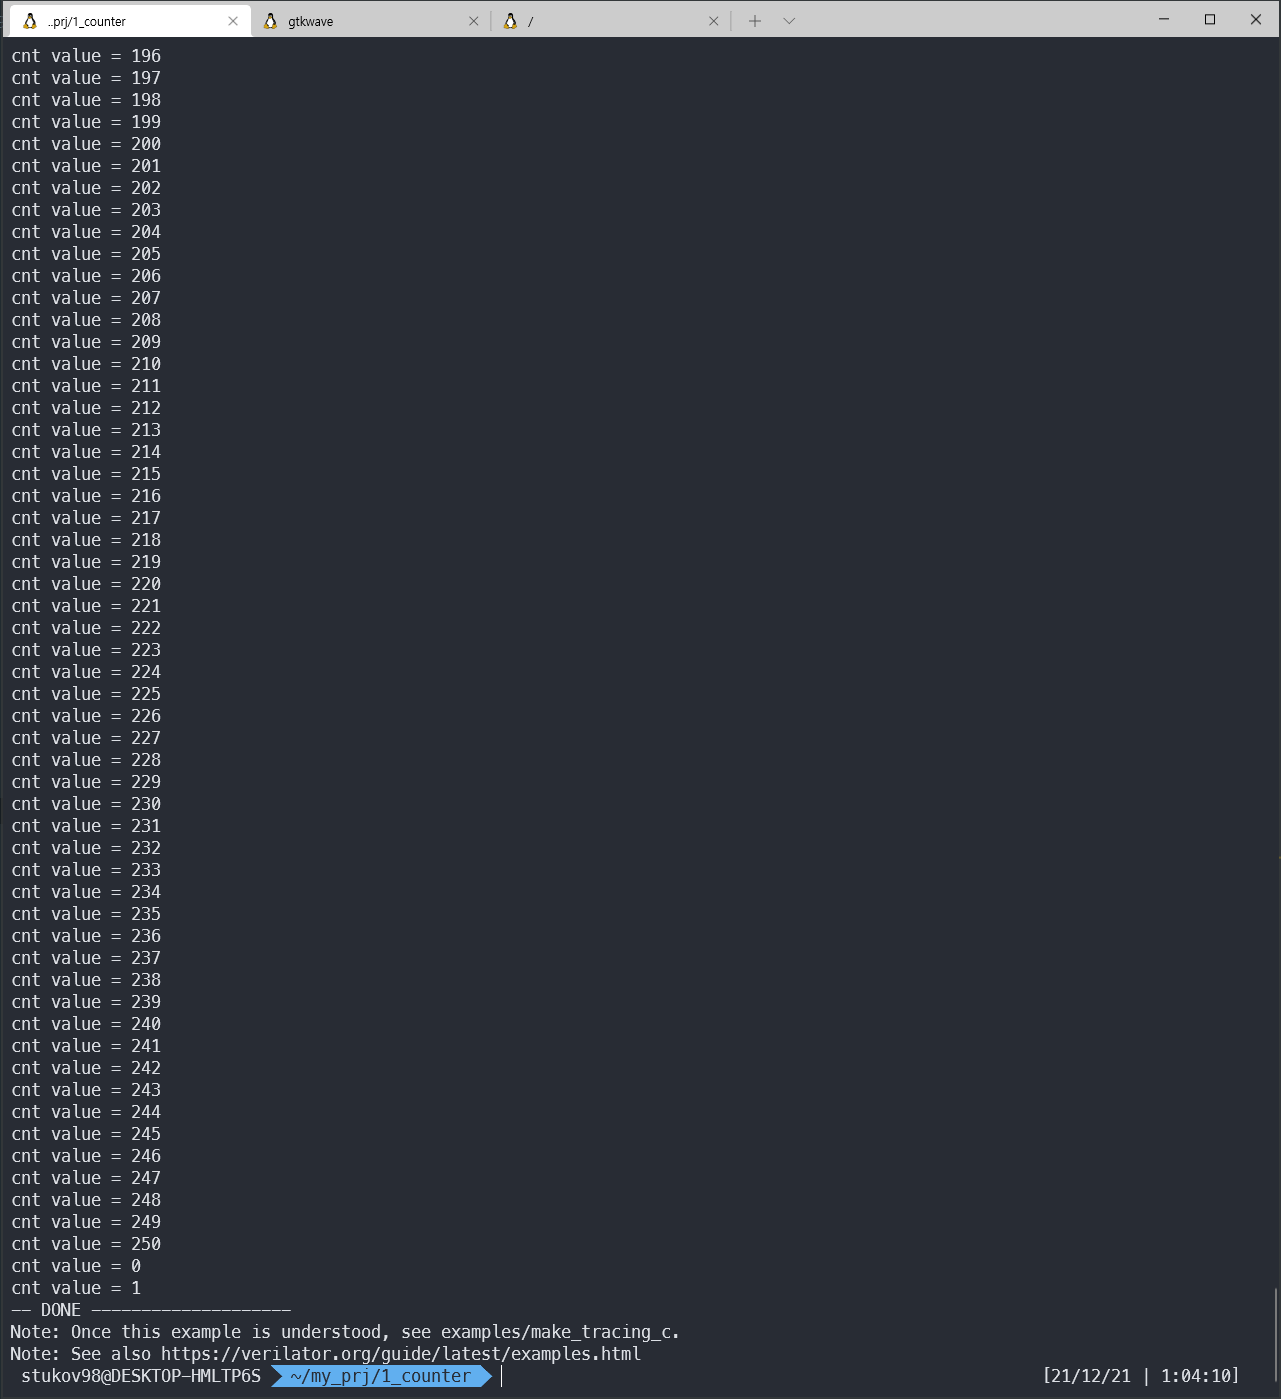
의도한 바와 같이 잘 작동함을 확인할 수 있다.
이로써 eval() 메소드에 대한 감을 잡을 수 있다.
다음에는 verilator의 makefile 에 --trace 옵션을 줘서 .vcd 파일을 만든 뒤, gtkwave를 통한 wave 분석을 확인할 것이다.