앞서 top->eval() 의 의미 및 verilator 내부 변수구현구조에 대해 간단하게나마 알아보았다.
이제는 gtkwave 를 통해 파형을 확인할 것이다.
참고로, WLS2 에서 윈도우로 GUI 를 띄워야 하기 때문에,
X11 윈도우 설치 및 세팅이 완료되어있어야 한다.
우선 cp -rf 1_counter/ 2_waveform 이라는 명령어로 폴더를 새로 복사한다.
waveform 보기 위해서는 makefile 수정 및 sim_main.cpp 수정이 필요하다.
- Makefile 수정
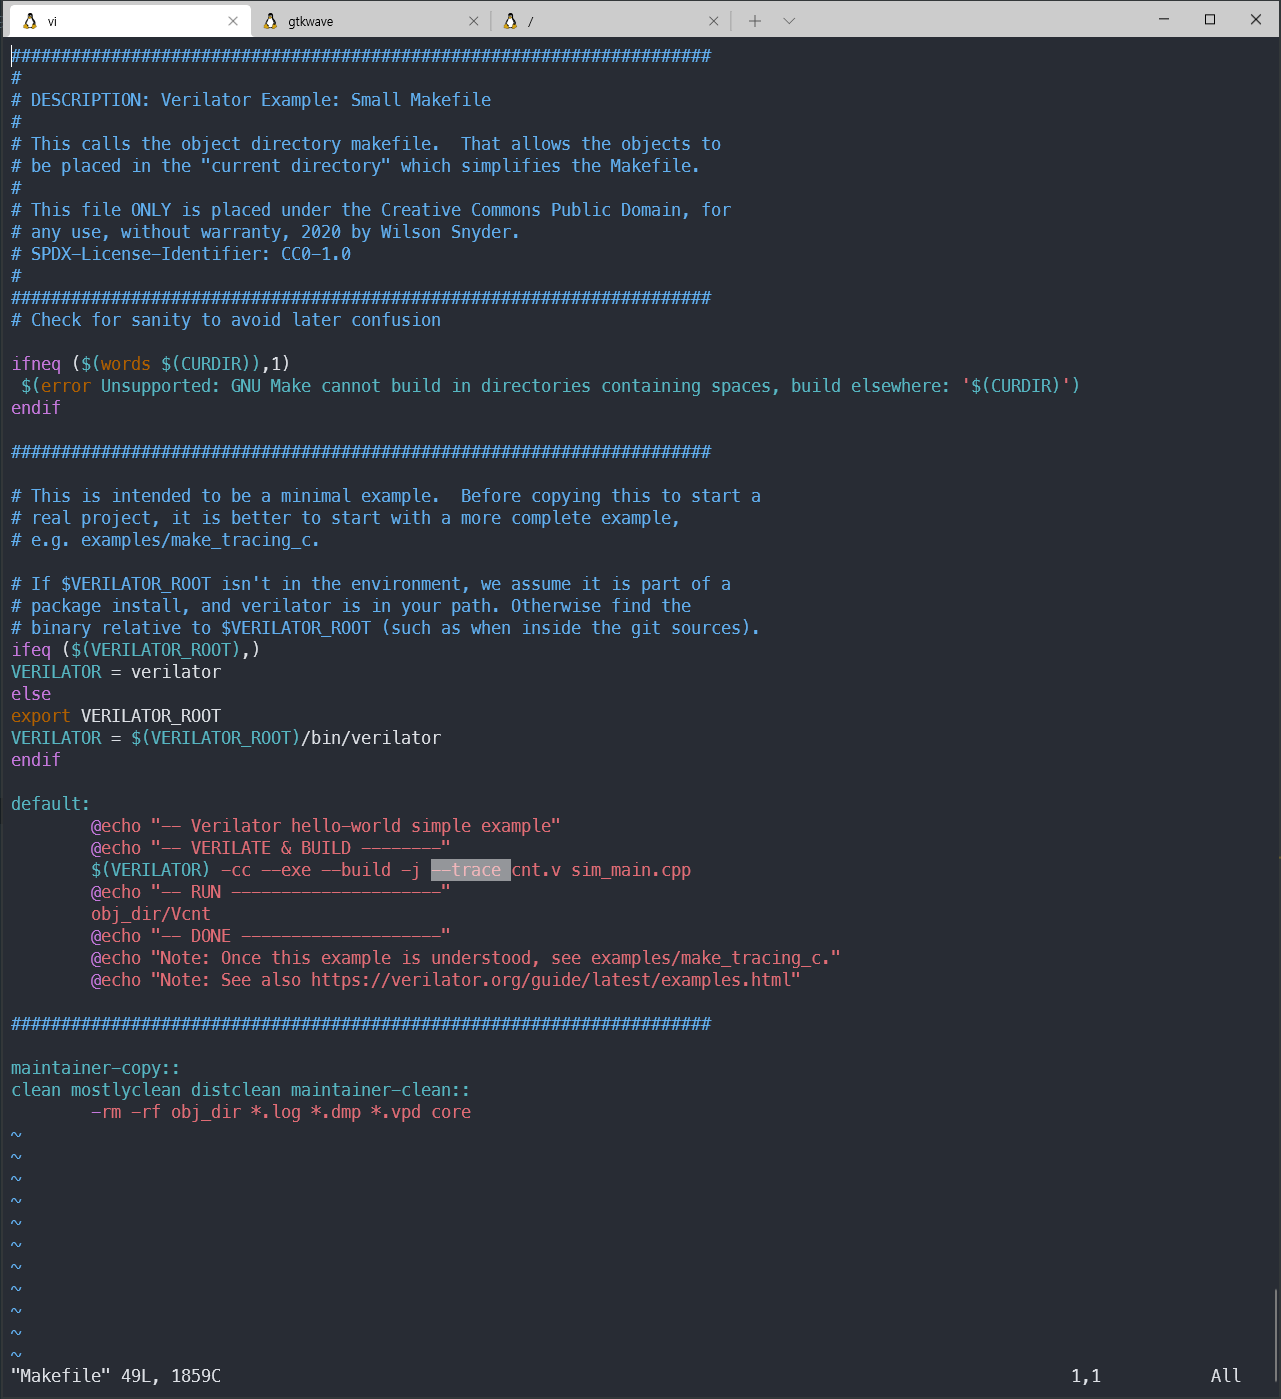
그저 --trace 를 추가한다.
- make 갈기기, Vcnt.h 생성
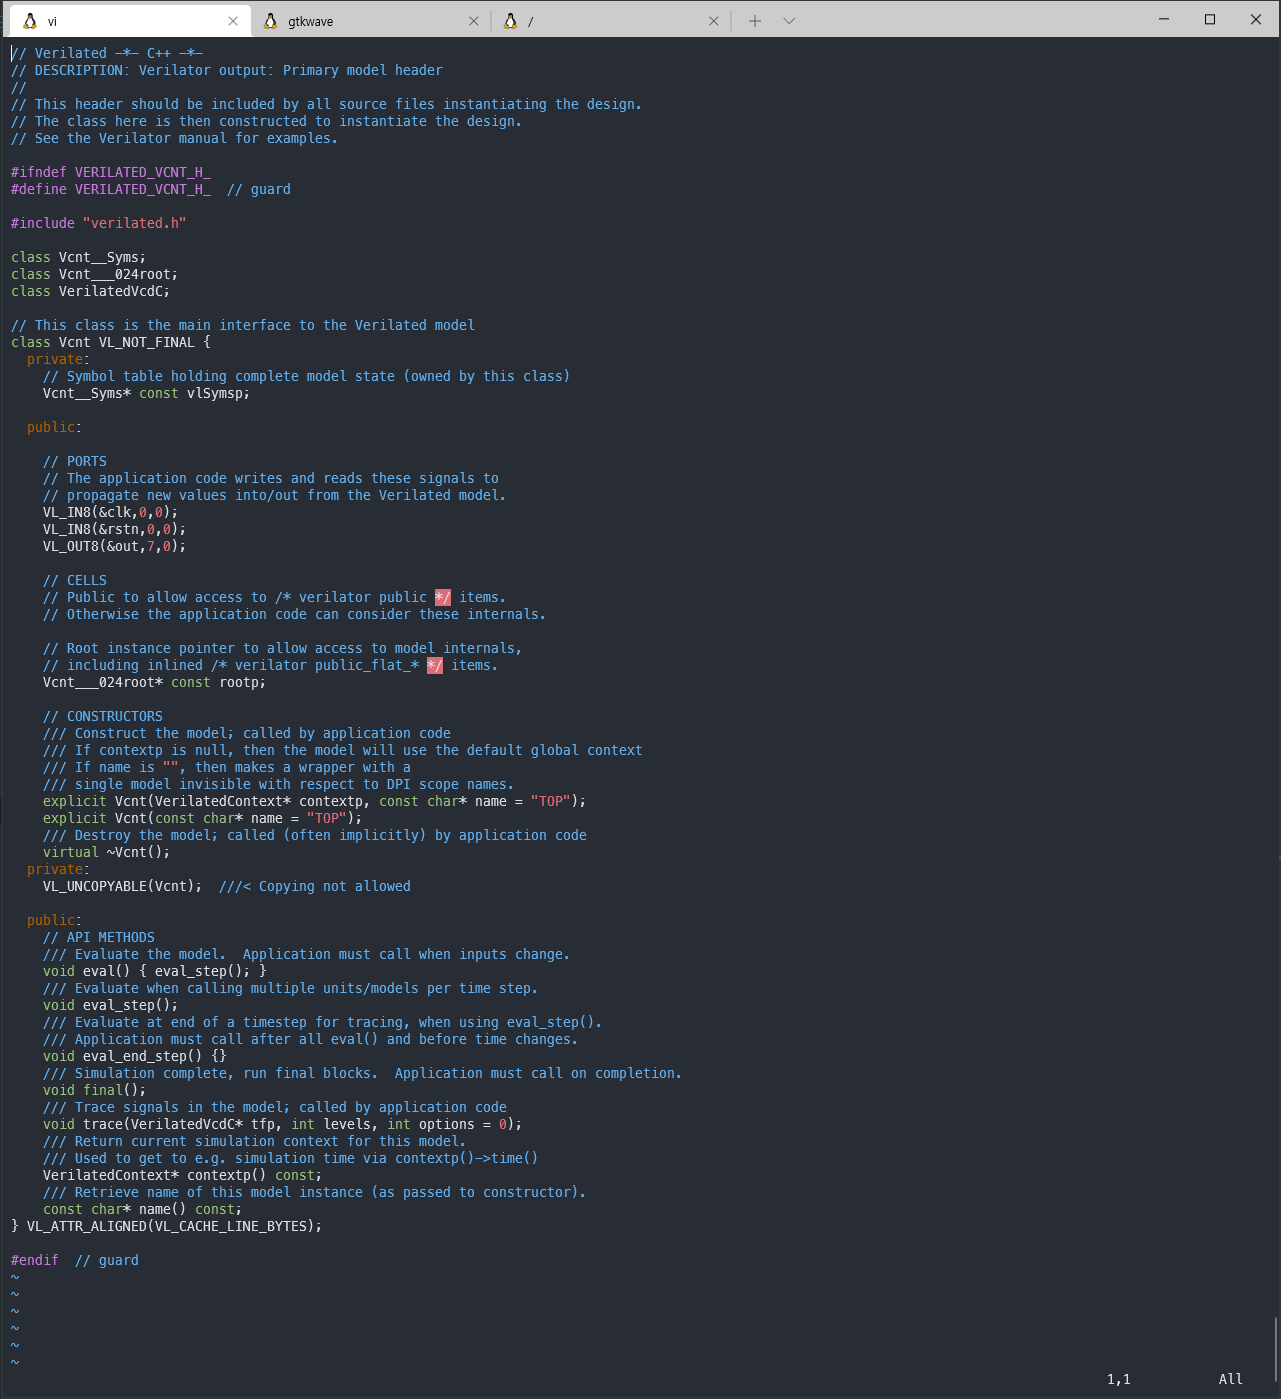
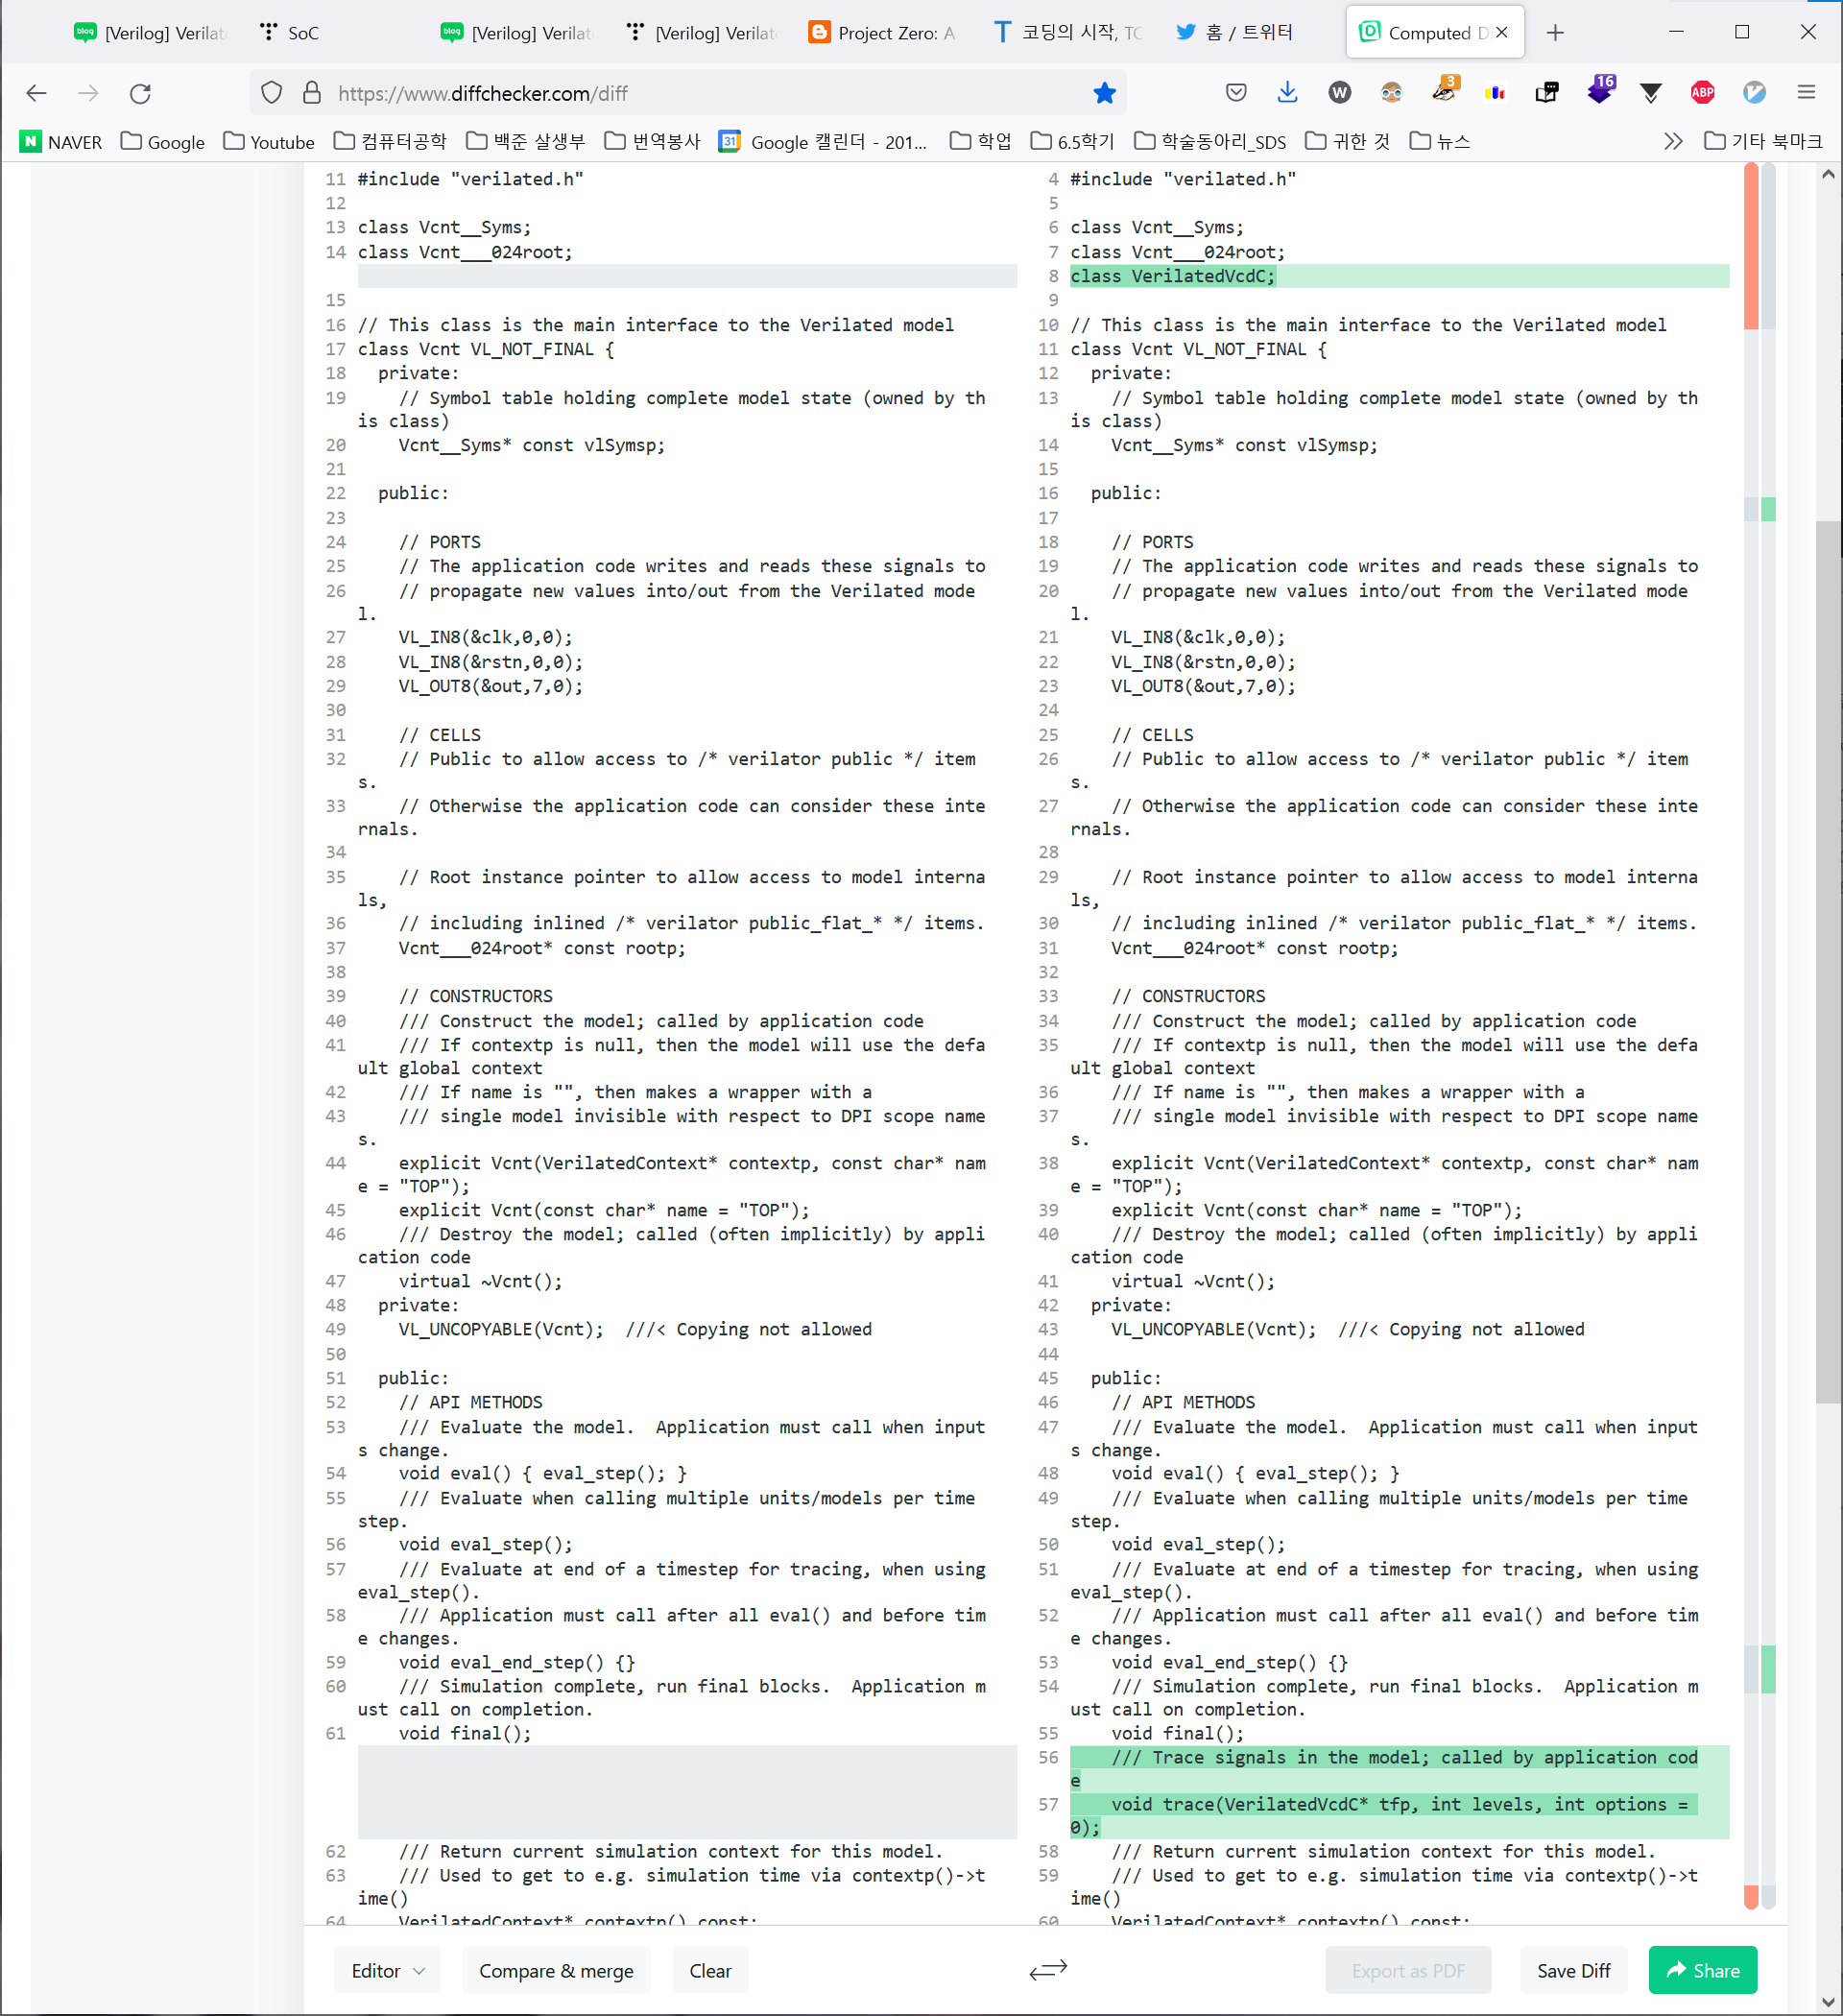
기존과 딱 두 부분 다른것을 확인할 수 있다.
class VerilatedVcdC; 선언이 추가되었고
void trace(VerilatedVcdC* tfp, int levels, int options = 0); 가 추가되었다.
우리는 top->eval() 을 매번 호출하여 테스트를 진행해나갔듯이
마찬가지로 wave_fp->dump(time); time++; 을 매번 호출함으로써 파형을 그려나갈 것이다.
// DESCRIPTION: Verilator: Verilog example module
//
// This file ONLY is placed under the Creative Commons Public Domain, for
// any use, without warranty, 2017 by Wilson Snyder.
// SPDX-License-Identifier: CC0-1.0
//======================================================================

// Include common routines
#include <verilated.h>

// Include model header, generated from Verilating "top.v"
#include "Vcnt.h"
#include "verilated_vcd_c.h"

int main(int argc, char** argv, char** env) {
    // See a similar example walkthrough in the verilator manpage.

    // This is intended to be a minimal example.  Before copying this to start a
    // real project, it is better to start with a more complete example,
    // e.g. examples/c_tracing.

    // Prevent unused variable warnings
    if (false && argc && argv && env) {}

    // Construct the Verilated model, from Vtop.h generated from Verilating "top.v"
    Vcnt* top = new Vcnt;

    // FOR WAVEFORM
    Verilated::traceEverOn(true);
    VerilatedVcdC* wave_fp = new VerilatedVcdC;
    int time = 0;
    top->trace(wave_fp, 999);
    printf("waveform file name is top.vcd\n");
    wave_fp->open("./top.vcd");

    printf("cnt value = %d\n", top->out);
    top->rstn=1;
    top->eval();
    wave_fp->dump(time); time++;

    top->rstn=0;
    top->eval();
    wave_fp->dump(time); time++;

    top->rstn=1;
    top->eval();
    wave_fp->dump(time); time++;
    printf("cnt value = %d\n", top->out);

    for(int i=0;i<252;i++){
        top->clk = 0;
        top->eval();
        wave_fp->dump(time); time++;

        top->clk = 1;
        top->eval();
        wave_fp->dump(time); time++;

        printf("cnt value = %d\n", top->out);
    }

    // Final model cleanup
    top->final();
    wave_fp->close();

    // Destroy model
    delete top;

    delete wave_fp;
    // Return good completion status
    return 0;
}
즉,
#include "verilated_vcd_c.h"추가해주고
    Verilated::traceEverOn(true);
    VerilatedVcdC* wave_fp = new VerilatedVcdC;
    int time = 0;
    top->trace(wave_fp, 999);
    printf("waveform file name is top.vcd\n");
    wave_fp->open("./top.vcd");
로 wave_fp 초기화해주고
위와같이, top->eval() 할 때마다 마찬가지로
wave_fp->dump(time); time++ 을 해주고
마지막에는
    wave_fp->close();
    delete wave_fp;
로 닫아준다.
이로써 코드 수정은 끝이 난다.
이제 .vcd 파일을 만들어보자.
make 를 갈기면
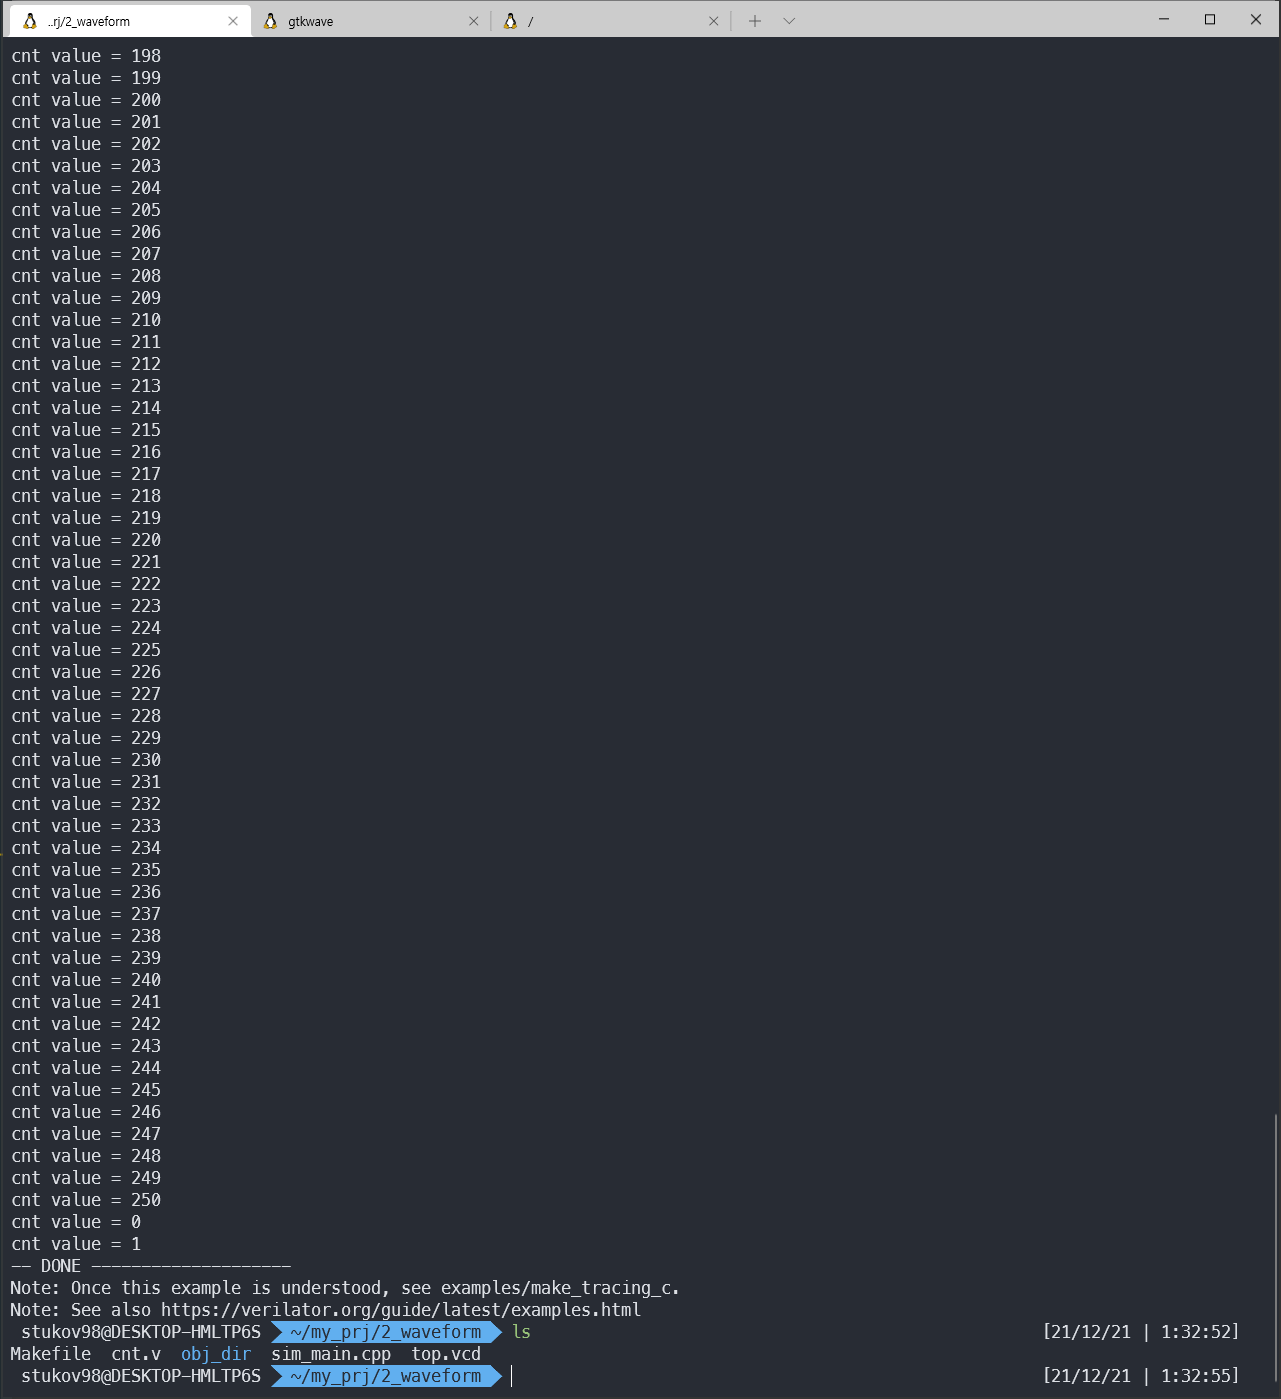
이처럼 .vcd 파일이 생성됨을 확인할 수 있다.
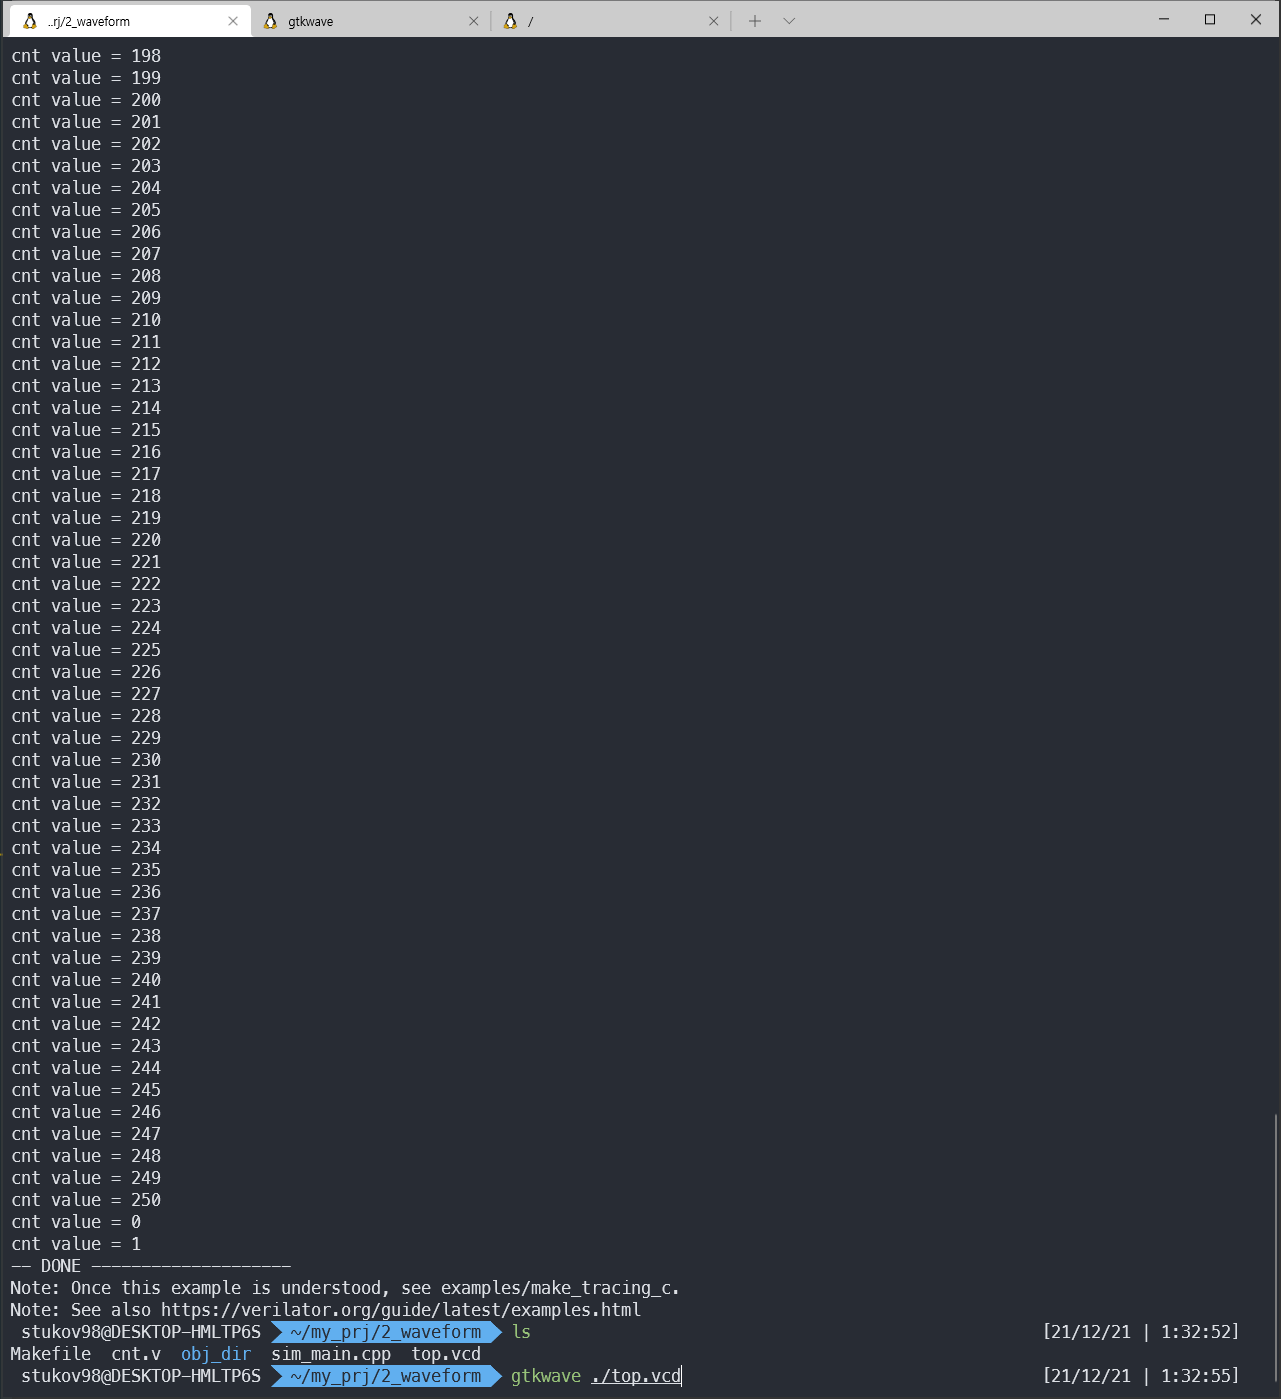
gtkwave 및 X11 윈도우 설정이 끝났다는 가정하에,
gtkwave ./top.vcd 를 실행하면
(만약 안될 경우, vi ~/.zshrc 에서 export DISPLAY=:0 이 되어있는지의 여부를 확인한 뒤,

source ~/.zshrc 로 쉘을 다시 시작해주자)
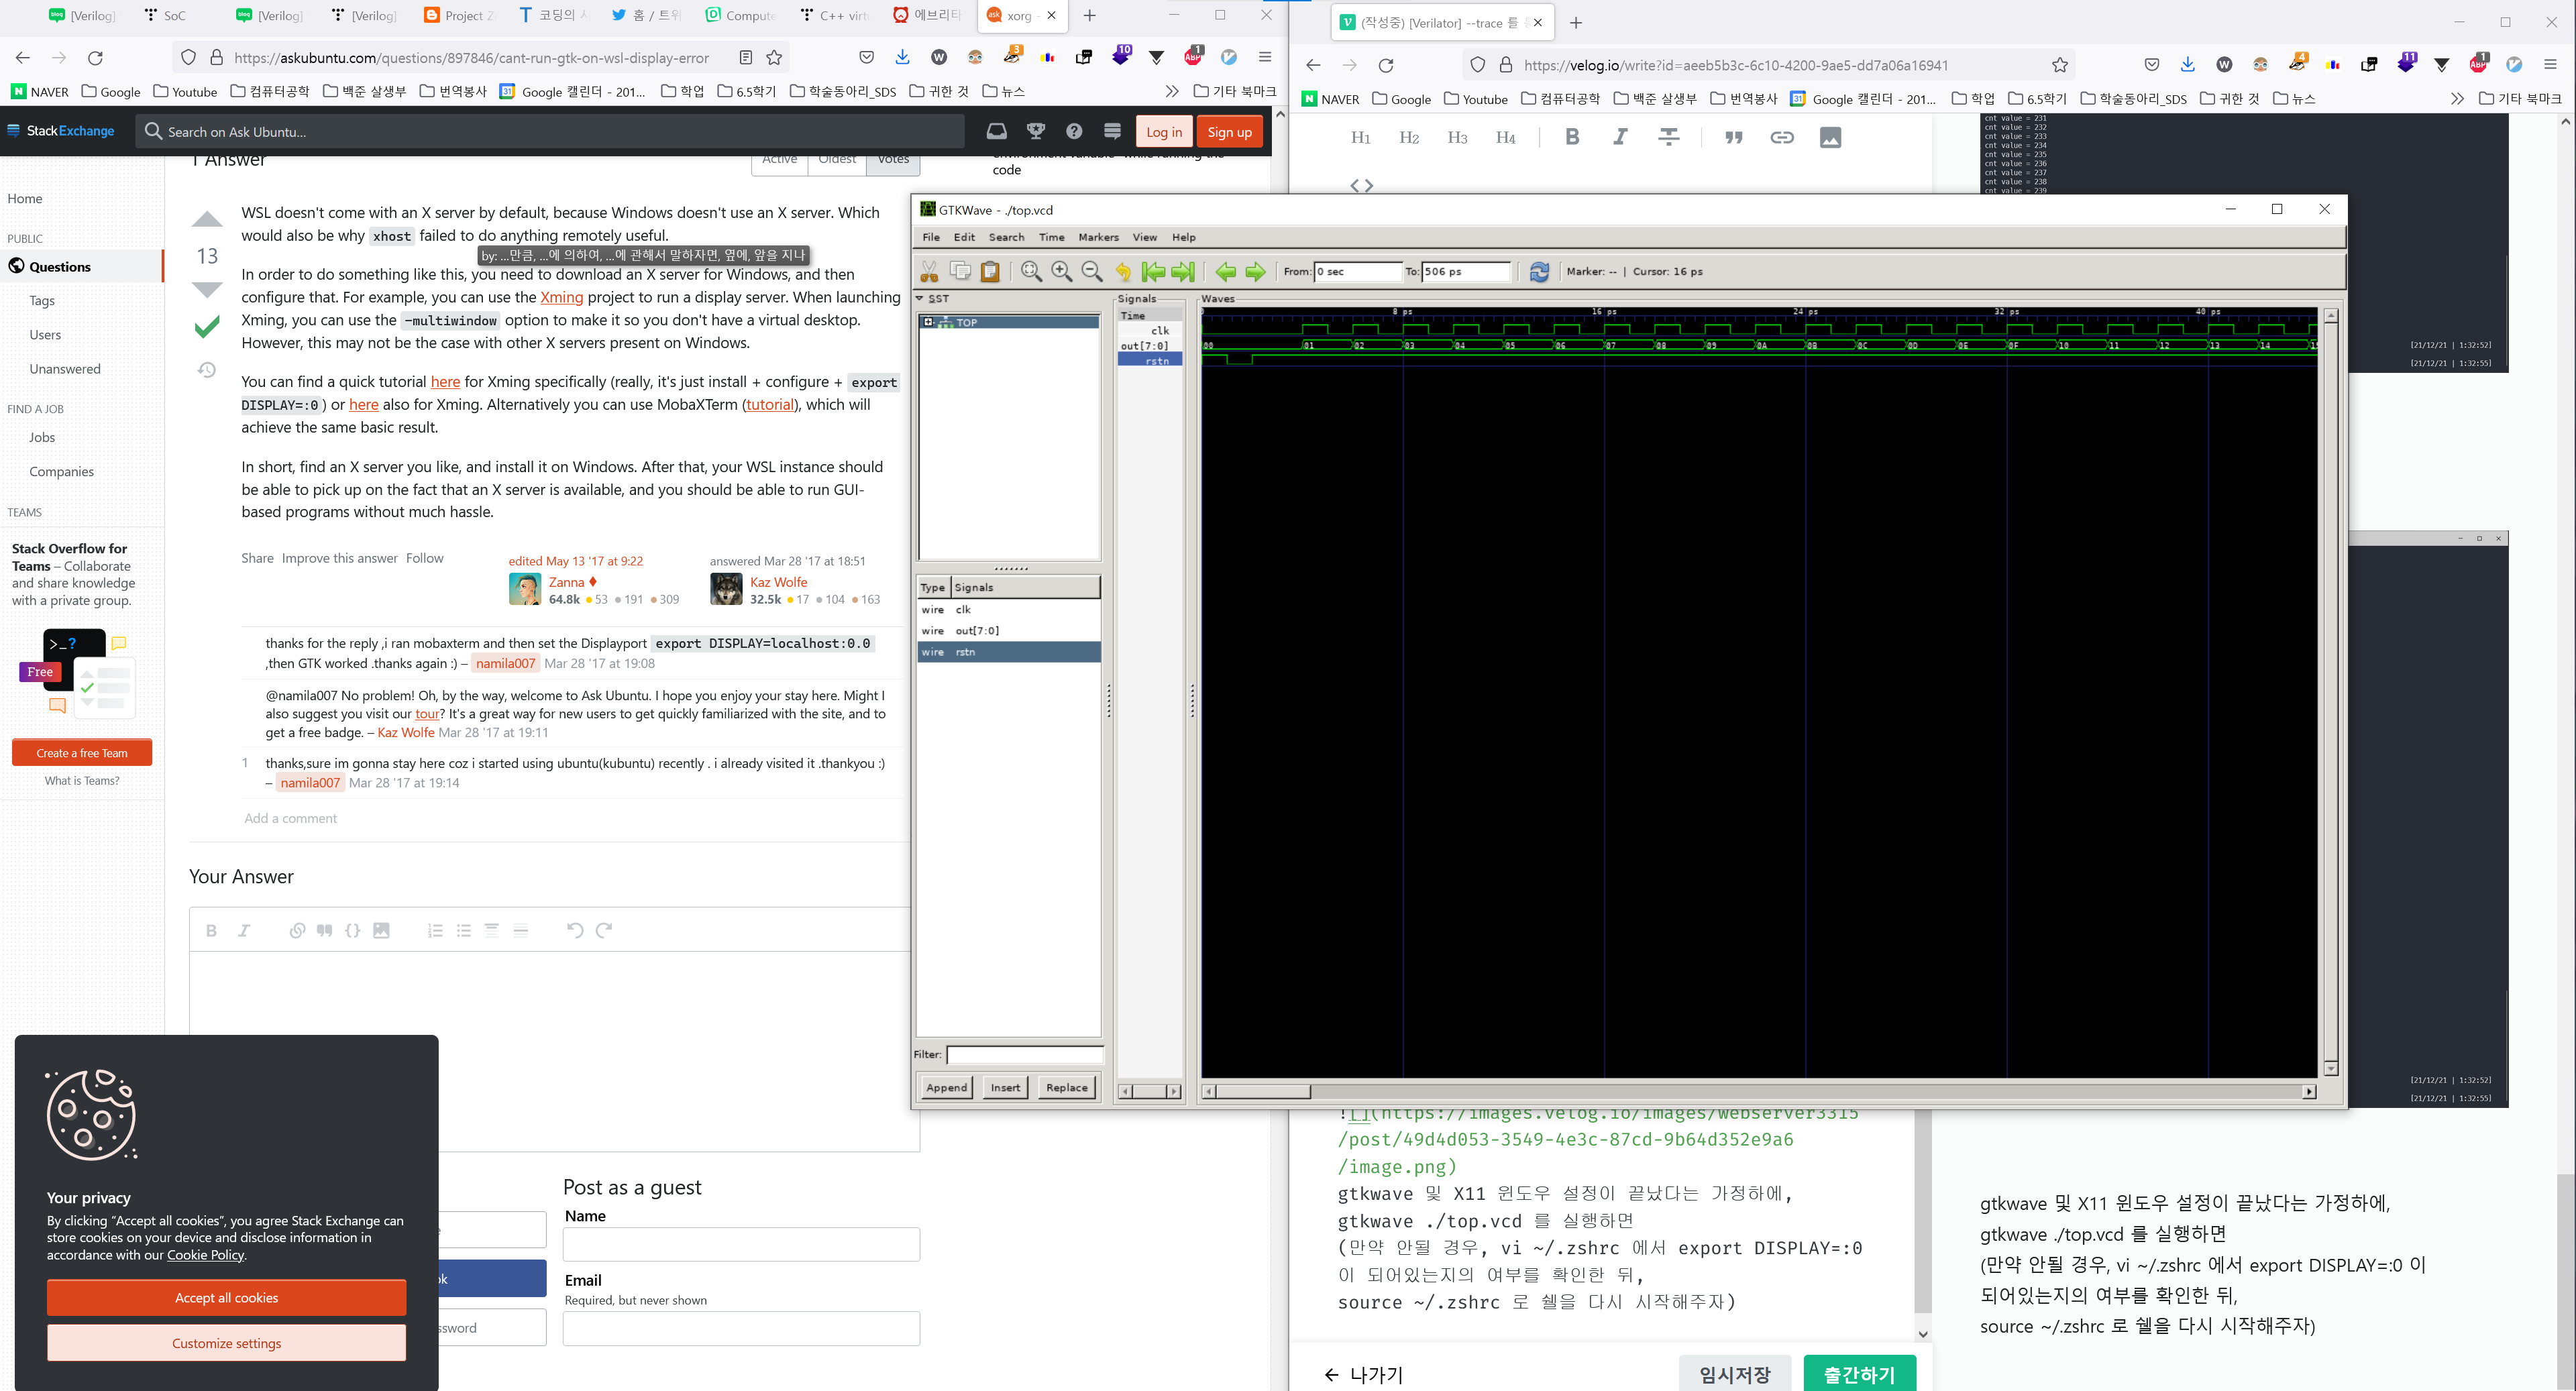
WA! 파형이 나옴을 확인할 수 있다.
이로써 Verilator 기초가 끝났으며,
이제 공식문서를 읽어보거나 여러 .v 파일에 대한 컴파일 및 테스트를 진행하여 컴퓨터 구현 프로젝트의 초석을 마련하고자 한다.
