requests
requests 라이브러리를 사용하면 HTTP/1.1 요청을 쉽게 보낼 수 있다.
URL에 쿼리 스트링을 수동으로 추가하거나 POST 데이터를 인코딩해줄 필요가 없다.
연결 유지와 HTTP 연결 풀링은 urllib3 라이브러리로 100% 자동이다.
다음과 같은 기능을 제공한다.
- 연결 유지 및 연결 풀링
- 국제 도메인 및 URL
- 쿠키 지속성 있는 세션
- 브라우저 스타일 SSL 확인
- 자동 콘텐츠 디코딩
- 기본/다이제스트 인증
- 키/값 쿠키
- 자동 복원
- 유니코드 응답
- HTTP(S) 프록시 지원
- 멀티파트 파일 업로드
- 스트리밍 다운로드
등을 지원한다.
설치
다음 명령을 실행하여 설치하자.
$ python -m pip install requests요청 메소드
requests.request(method, url, **kwargs)- method - 메소드 종류
GET,OPTIONS,HEAD,POST,PUT,PATCH,DELETE를 입력 - url - 요청할 URL
- kwargs - 선택사항
- params - 쿼리 스트링
- data -
Request의 바디에 객체를 보냄 - json -
Request의 바디에 직렬화된 파이썬 객체 - headers - HTTP 헤더를
Request에 보냄 - cookies -
Request에 쿠키 객체를 보냄 - files - multipart 인코딩 업로드를 위해
'name': file-like-objects또는{'name': file-tuple}과 같이 전달 - auth - 사용자 지정 HTTP 인증을 활성화
- timeout - 서버가 데이터를 보낼 때까지 기다리는 시간
- allow_redirects - GET/POST 등의 메소드의 리다이렉트를 활성화/비활성화함. 기본값은 True
- proxies - 프록시 URL 에 프로토콜 매핑
- verify - 부울이면, 서버의 TLS 인증서 확인 여부를 제어. 문자열이면 CA 번들에 대한 경로여아함
- stream -
False라면, 컨텐츠 등답을 즉시 다운로드함 - cert - 문자열이라면, SSL 인증서 파일 경로. 튜플이면
('cert', 'key') 쌍 값
request.head, request.get, ...
위와 같이 메소드 형식을 생략하고 바로 요청을 할 수 있다.
인수는 url 과 request 의 **kwargs 와 동일하다.
이렇게 얻은 요청을 통해 얻을 수 있는 것을 알아보자.
close() - 풀에 대한 연결을 해제
content - 응답 내용 (바이트)
cookies - 서버가 다시 보낸 쿠키의 CookieJar
elapsed - 요청 전송과 응답 도착 사이의 경과 시간
encoding - r.text 에 액세스 시 디코딩할 인코딩
headers - 대소문자를 구분하지 않는 응답 딕셔너리
history - Response 요청 기록의 객체 목록
json - json 으로 인코딩된 콘텐츠 반환
links - 응답 구문 분석된 헤더 링크가 있으면 이를 반환
text - 유니코드로된 응답의 내용
status_code - 성공 또는 실패 여부
요청 내용 얻기
import requests

rq = requests.request('GET', 'https://www.google.com/', timeout=5000)
if rq.status_code == 200:
    print(rq.text)
다음과 같은 html 내용의 결과를 얻을 수 있다.

쿼리 스트링
import requests

url = "https://www.google.com?a=aaa&b=bbb"
response = requests.get(url) # 이와 같이 직접 파라미터를 넣거나

url = "https://www.google.com"
paramDict = {
  "a": "aaa",
  "b": "bbb"
}
response = requests.get(url, params=paramDict) # 이와 같이 가능
POST로 데이터 넘기기
import requests

datas = {
  "a": "aaa",
  "b": "bbb"
}
url = "https://www.google.com"

response = requests.post(url, data=datas)
이외에도 많은 기능이 있으니 도큐먼트에서 확인해보자.
BeautifulSoup
beautifulsoup 은 HTML과 XML 파일로부터 데이터를 뽑아내기 위한 파이썬 라이브러리
설치
pip install beautifulsoup4파싱 및 데이터 서치
| 파싱 | 사용법 | 장점 | 단점 |
|---|---|---|---|
| html | BeautifulSoup(markup, "html.parser") | 각종 기능 적절한 속도 관대함(파이썬 버전 2.7.3, 3.2) | 관대하지 않음(파이썬 버전 ~2.7.3, ~3.2) |
| lxml 의 HTML | BeautifulSoup(markup, "lxml") | 아주 빠름 관대 | 외부 C 라이브러리 의존 |
| lxml 의 XML | BeautifulSoup(markup, ["lxml", "xml"]) BeautifulSoup(markup, "xml") | 아주 빠름 유일하게 XML 해석 | 외부 C 라이브러리 의존 |
| html5lib | BeautifulSoup(markup, html5lib) | 아주 관대 웹 브라우저 방식으로 페이지 해석 유효한 HTML5를 생성 | 아주 느림 외부 파이썬 라이브러리 의존 파이썬 2 전용 |
태그
soup = BeautifulSoup('<b class="boldest">Extremely bold</b>')
tag = soup.b
type(tag)
# <class 'bs4.element.Tag'>
tag 객체는 원래 문서의 XML 태그 또는 HTML 태그에 상응하여 위와 같이 soup.b 를 통해 b 를 찾아 가져올 수 있다.
태그마다 이름이 있으며 .name 과 같이 접근할 수 있다.
tag.name
# u'b'
태그의 이름을 바꾸면 그 변화가 beautifulsoup 이 생성한 HTML 에 반영된다.
tag.name = "blockquote"
tag
# <blockquote class="boldest">Extremely bold</blockquote>
속성
태그의 속성으로 접근할 수도 있다.
tag['class']
# u'boldest

tag.attrs # attrs 로도 접근 가능
# {u'class': u'boldest'}
태그의 속성을 추가, 제거, 변경도 할 수 있다.
tag['class'] = 'verybold'
tag['id'] = 1
tag
# <blockquote class="verybold" id="1">Extremely bold</blockquote>

del tag['class']
del tag['id']
tag
# <blockquote>Extremely bold</blockquote>

tag['class']
# KeyError: 'class'
print(tag.get('class'))
# None
이 외에도 .parent 로 부모 태그에 접근하거나 .html 로 최상위 태그를, .head 로 헤더를 얻는 등의 접근도 가능하다.
물론 해당 태그의 앞뒤로 .next_element, .previous_element 등도 가능하다.
필터링
find_all() 메소드를 통해 해당 속성, 문자열 텍스트 등을 조합하여 필터링할 수 있다.
다음은 가장 단순한 필터링으로 해당하는 태그를 모두 찾는다.
soup.find_all('b')
# [<b>The Dormouse's story</b>]
정규 표현식으로도 가능하며 beautifulsoup는 match() 메소드를 사용하여 해당 표현식에 맞는 필터링을 하여 모두 찾아낸다.
다음은 b 로 시작하는 태그를 모두 찾는다.
import re
for tag in soup.find_all(re.compile("^b")):
    print(tag.name)
# body
# b
리스트 형태로 건낸다면 그 리스트에 담긴 항목마다 문자열 태그들을 모두 찾는다.
soup.find_all(["a", "b"])
# [<b>The Dormouse's story</b>,
#  <a class="sister" href="http://example.com/elsie" id="link1">Elsie</a>,
#  <a class="sister" href="http://example.com/lacie" id="link2">Lacie</a>,
#  <a class="sister" href="http://example.com/tillie" id="link3">Tillie</a>]
이 뿐만 아니라 id 속성, class 속성 등으로도 탐색이 가능하다.
soup.find_all(id='link2')
# [<a class="sister" href="http://example.com/lacie" id="link2">Lacie</a>]

soup.find_all("a", class_="sister")
# [<a class="sister" href="http://example.com/elsie" id="link1">Elsie</a>,
#  <a class="sister" href="http://example.com/lacie" id="link2">Lacie</a>,
#  <a class="sister" href="http://example.com/tillie" id="link3">Tillie</a>]

soup.find_all(class_=re.compile("itl")) # 물론 정규식도 가능
# [<p class="title"><b>The Dormouse's story</b></p>]
두 번째 인자가 attrs 로서 문자열을 건내면 그 문자열을 CSS 클래스처럼 탐색하기도 한다.
soup.find_all("a", "sister")
# [<a class="sister" href="http://example.com/elsie" id="link1">Elsie</a>,
#  <a class="sister" href="http://example.com/lacie" id="link2">Lacie</a>,
#  <a class="sister" href="http://example.com/tillie" id="link3">Tillie</a>]
text 인자로 태그 대신에 문자열을 탐색할 수도 있다. 물론 문자열, 정규 표현식, 리스트, 함수, True 값 모두 건낼 수 있다.
soup.find_all(text="Elsie")
# [u'Elsie']

soup.find_all(text=["Tillie", "Elsie", "Lacie"])
# [u'Elsie', u'Lacie', u'Tillie']

soup.find_all(text=re.compile("Dormouse"))
[u"The Dormouse's story", u"The Dormouse's story"]

def is_the_only_string_within_a_tag(s):
    """Return True if this string is the only child of its parent tag."""
    return (s == s.parent.string)

soup.find_all(text=is_the_only_string_within_a_tag)
# [u"The Dormouse's story", u"The Dormouse's story", u'Elsie', u'Lacie', u'Tillie', u'...']
limit 인자를 건내주면 방대한 문서에서 필요한 횟수만을 넘겨 받을 수 있다.
soup.find_all("a", limit=2)
# [<a class="sister" href="http://example.com/elsie" id="link1">Elsie</a>,
#  <a class="sister" href="http://example.com/lacie" id="link2">Lacie</a>]
find_all() 메소드는 문서의 전체를 훑어 결과를 찾지만 어떤 경우에는 하나만을 원할 수 있다.
limit=1 을 건낼 수도 있지만 find() 메소드를 사용할 수도 있다.
두 코드는 거의 동등하지만 find() 를 추천한다.
soup.find_all('title', limit=1)
# [<title>The Dormouse's story</title>]

soup.find('title')
# <title>The Dormouse's story</title>
지금까지 find_all 과 find 메소드를 통해 트리를 내려 오면서 탐색했지만 find_parents(), find_parent() 는 트리를 올라가며 탐색한다.
a_string = soup.find(text="Lacie")
a_string
# u'Lacie'

a_string.find_parents("a")
# [<a class="sister" href="http://example.com/lacie" id="link2">Lacie</a>]

a_string.find_parent("p")
# <p class="story">Once upon a time there were three little sisters; and their names were
#  <a class="sister" href="http://example.com/elsie" id="link1">Elsie</a>,
#  <a class="sister" href="http://example.com/lacie" id="link2">Lacie</a> and
#  <a class="sister" href="http://example.com/tillie" id="link3">Tillie</a>;
#  and they lived at the bottom of a well.</p>

a_string.find_parents("p", class="title")
# []
이 외에도 형제 노드를 반복하여 찾거나 한 태그 뒤에 오는 태그를 찾는 등의 메소드도 존재한다.
find_(next, previous)_sibling[s](), find_[all_](next, previous)()
CSS 선택자
beautifulsoup 는 CSS 선택자 표준의 부분집합을 지원한다.
.select() 메소드를 건내 탐색할 수 있다.
soup.select("title")
# [<title>The Dormouse's story</title>]

soup.select("body a")
# [<a class="sister" href="http://example.com/elsie" id="link1">Elsie</a>,
#  <a class="sister" href="http://example.com/lacie"  id="link2">Lacie</a>,
#  <a class="sister" href="http://example.com/tillie" id="link3">Tillie</a>]

soup.select("head > title")
# [<title>The Dormouse's story</title>]

soup.select(".sister")
# [<a class="sister" href="http://example.com/elsie" id="link1">Elsie</a>,
#  <a class="sister" href="http://example.com/lacie" id="link2">Lacie</a>,
#  <a class="sister" href="http://example.com/tillie" id="link3">Tillie</a>]

soup.select("#link1")
# [<a class="sister" href="http://example.com/elsie" id="link1">Elsie</a>]

soup.select('a[href$="tillie"]')
# [<a class="sister" href="http://example.com/tillie" id="link3">Tillie</a>]
위와 태그, class, id, CSS 선택자, 속성값 모두 사용 가능하다.
트리 변형
append(), insert(), new_tag(), clear(), extract() 등등 추가, 삭제, 삽입, 생성 모두 가능하다.
출력
prettify() 메소드로 beautiful 트리를 예쁘게 변환하여 보여줄 수 있다.
markup = '<a href="http://example.com/">I linked to <i>example.com</i></a>'
soup = BeautifulSoup(markup)
soup.prettify()
# '<html>\n <head>\n </head>\n <body>\n  <a href="http://example.com/">\n...'

print(soup.prettify())
# <html>
#  <head>
#  </head>
#  <body>
#   <a href="http://example.com/">
#    I linked to
#    <i>
#     example.com
#    </i>
#   </a>
#  </body>
# </html>
unicode() 나 str() 에 beautifulsoup 객체를 건내주면 있는 그대로를 인쇄할 수 있다.
문서나 태그의 텍스트 부분만 추출하고 싶다면 get_text() 메소드를 사용하여 얻을 수 있다.
markup = '<a href="http://example.com/">\nI linked to <i>example.com</i>\n</a>'
soup = BeautifulSoup(markup)

soup.get_text()
u'\nI linked to example.com\n'
soup.i.get_text()
u'example.com'
자세한 내용은 직접 BeautifulSoup 도큐먼트을 살펴보자.
날씨 웹크롤링
지금까지 알아본 requests 와 beautifulsoup 라이브러리를 사용하여 사용자가 입력한 지역에 따라 지역, 날씨 등의 정보를 크롤링하여 출력해주는 프로그램을 만들어보자.
import requests
from bs4 import BeautifulSoup

area = input()
webpage = requests.get('https://www.google.com/search?q=날씨+' + area)
soup = BeautifulSoup(webpage.text, "html.parser")

tt = soup.find_all(attrs={'class': 'tAd8D'})
temp = soup.find(attrs={'class': 'iBp4i'})
others = soup.find_all(attrs={'class': 's3v9rd'})

print('날씨 정보 \n')
print(tt[0].get_text())
print(tt[1].get_text())
print(temp.get_text())
결과

실제 구글 사이트의 날씨 정보 태그의 id 나 class 가 일치하지 않아 대충 requests 요청으로 text 출력하여 날씨 정보들을 찾으며 해당 태그를 beautifulsoup 로 필터링하여 걸러내서 출력했다. 구글 측에서 아마 라이브러리로 날씨를 가져와서 속성값들을 변경해서 그런듯?
앞으로 위 코드를 시간날 때 틈틈이 업그레이드 하며 더 좋은 날씨 정보 얻기 프로그램을 만들어보자.
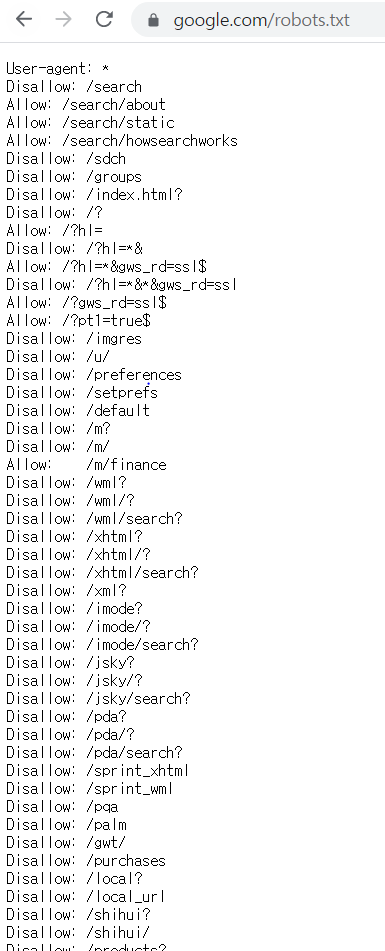
robots.txt
이와 같이 웹크롤링은 다양한 정보들을 수집하는 장점이 있어 빅데이터 분석이나 챗봇 구현 등 다양한 분야의 연구에 활용 중이다.
하지만 이와 같은 기술은 정보를 무단으로 복제하여 지식재산권을 침해하는 사례도 존재한다.
이는 웹 사이트주소/robots.txt 와 같이 접속하여 크롤링 제한 범위를 확인할 수 있다.