
Flask 란?
Flask는 Jinja 템플릿 엔진과 Werkzeug WSGI 툴킷의 템플릿 엔진을 기반으로 한 웹 프레임워크이다.
작고 단순하여 특별한 도구나 라이브러리가 필요없다.
데이터베이스 추상화 계층, 양식 유효성 검사 등 이를 처리할 수 있는 기능을 포함하지 않으며 이미 존재하는 라이브러리가 많기 때문 대신 Flask 자체에서 구현된 것처럼 데이터베이스 통합, 객체 관계 매퍼, 양식 유효성 검사, 업로드 처리, 다양한 개방형 인증 기술 등의 공통 기능들을 제공해준다.
설치
pip install Flask빠른 시작
가장 간단한 예제
from flask import Flask

app = Flask(__name__)

@app.route("/")
def hello_world():
    return "<p>Hello, World!</p>"

if __name__ == "__main__":
    app.run()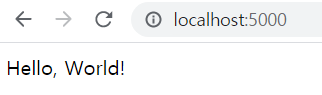
가장 간단한 예제이다.
route() 데코레이터를 사용하여 지정한 URL을 Flask 에게 알린다.
이 함수는 사용자의 브라우저에 표시하려는 메시지를 반환한다.
app = Flask(__name__) 으로 Flask 클래스를 가져와 app.run() 으로 실행하였다.
해당 서버를 다른 컴퓨터도 접속할 수 있도록 공개하는 방법은
$ flask run --host=0.0.0.0으로 운영 체제가 모든 공용 IP에서 수신 대기하도록 지시한다.
HTML 이스케이프
HTML 반환할 때 출력에서 렌더링된 사용자가 제공한 값은 주입 공격으로부터 보호하기 위해 이스케이프되어야 한다. Jinja 로 렌더링된 HTML 템플릿은 이 작업을 자동으로 수행한다.
escape() 메소드로 넘겨받은 인자를 수동으로 사용할 수 있다.
간단한 예제를 위해 생략되었지만 신뢰할 수 없는 데이터를 사용하는 방법을 알고 있어야 한다.
from flask import Flask
from markupsafe import escape
app = Flask(__name__)
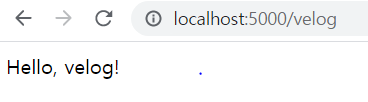
@app.route("/<name>")
def hello(name):
return f"Hello, {escape(name)}!"
if __name__ == "__main__":
app.run()사용자가 이름에 <script>alert("bad")</script> 로 제출할 경우 이스케이프하여 스크립트 실행 대신 텍스트로 렌더링된다.
<name> 경로에 URL 에서 값을 캡처하여 전달해준다.
라우팅
위에서 했던 바와 같이 route() 데코레이터를 사용하여 함수를 URL에 바인딩한다.
@app.route('/')
def index():
  return 'Index Page'

@app.route('/hello')
def hello():
  return 'Hello, World'
변수
앞서 봤듯이, URL에 가변 섹션을 추가할 수 있다.
<variable_name> 을 추가하며 인수 유형도 <converter:variable_name> 와 같이 지정할 수 있다.
from markupsafe import escape

@app.route('/user/<username>')
def show_user_profile(username):
    # 유저의 이름을 출력
    return f'User {escape(username)}'

@app.route('/post/<int:post_id>')
def show_post(post_id):
    # 주어진 id 를 정수로 변환함
    return f'Post {post_id}'

@app.route('/path/<path:subpath>')
def show_subpath(subpath):
    # /path/ 이후의 경로를 출력
    return f'Subpath {escape(subpath)}'
| 컨버터 유형 | 설명 |
|---|---|
string | 슬래시 없는 모든 텍스트 허용 |
int | 양의 정수 허용 |
float | 양수 부동 소수점 값 허용 |
path | string 과 비슷하지만 슬래시도 허용 |
uuid | UUID 문자열 허용 |
고유 URL/리다이렉션 동작
@app.route('/projects/')
def projects():
    return 'The project page'

@app.route('/about')
    return 'The about page'
projects 끝에 후행 슬래시가 있다.
파일 시스템의 폴더와 비슷하게 후행 슬래시없이(/projects) URL 액세스하면 Flask는 후행 슬래시가 있는 표준 URL로 리다이렉션 한다.
about 끝에는 후행 슬래시가 없는데 후행 슬래시(/about/)가 있는 URL에 액세스하면 페이지를 찾을 수 없다는 오류가 발생한다.
이렇게 URL을 고유하게 유지하며 검색 엔진이 동일한 페이지를 두 번 인덱싱하는 것을 방지할 수 있다.
URL 구축
특정 함수에 대한 URL 작성 시 url_for() 함수를 사용하자.
함수 이름을 첫 번째 인수로 허용하고 각 URL 규칙의 가변 부분에 해당하는 임의의 키워드 인수를 허용한다. 알 수 없는 변수 부분은 쿼리 매개변수로 URL에 추가된다.
템플릿에 하드 코딩하는 대신 URL 을 역으로 계산하는 기능으로 url_for() 을 구축 하는 이유
- 리버싱은 종종 URL을 하드 코딩하는 것보다 더 설명이 쉬움
- 하드 코딩된 URL을 수동으로 변경하는 것을 기억할 필요 없음
- URL 작성은 특수 문자의 이스케이프를 투명하게 처리
- 생성된 경로는 항상 절대적이며 상대 경로의 동작을 방지
- 응용 프로그램이 URL 루트 외부에 있을 경우 적절하게 처리
여기선 .test_request_context() 로 Flask 가 요청을 처리하는 것처럼 테스트로 시도할 수 있다.
from flask import url_for

@app.route('/')
def index():
    return 'index'

@app.route('/login')
def login():
    return 'login'

@app.route('/user/<username>')
def profile(username):
    return f'{username}\'s profile'

with app.test_request_context():
    print(url_for('index'))
    print(url_for('login'))
    print(url_for('login', next='/'))
    print(url_for('profile', username='John Doe'))

결과

/
/login
/login?next=/
/user/John%20Doe
HTTP 메소드
기본적으로 경로의 요청은 GET 이다.
데코레이터에 methods 인수로 다양한 HTTP 메소드를 처리할 수 있다.
from flask import request

@app.route('/login', methods=['GET', 'POST'])
def login():
    if request.method == 'POST':
        return do_the_login()
    else:
        return show_the_login_form()
정적 파일
동적 웹 응용 프로그램에는 정적 파일도 필요하다.
Flask 는 static 패키지 도는 모듈 옆에 /static 폴더를 통해 사용할 수 있다.
정적 파일에 대한 URL 을 생성하려면 특수 'static' 엔드 포인트 이름을 사용하자.
url_for('static', filename='style.css')렌터딩 템플릿
render_template() 메소드를 통해 템플릿을 렌더링할 수 있다.
from flask import render_template

@app.route('/hello/')
@app.route('/hello/<name>')
def hello(name=None):
    return render_template('hello.html', name=name)
template 폴더에서 템플릿을 찾는다.
사례1 : 모듈
/application.py
/templates
    /hello.html
사례2 : 패키지
/application
    /__init__.py
    /templates
        /hello.html
템플릿에도 Jinja2 템플릿 기능을 모두 사용할 수 있다.
자세한 내용은 공식 Jinja2 템플릿 문서를 참조하자.
아래는 예제 템플릿이다.
<!doctype html>
<title>Hello from Flask</title>
{% if name %}
  <h1>Hello {{ name }}!</h1>
{% else %}
  <h1>Hello, World!</h1>
{% endif %}
요청 데이터 액세스
웹 애플리케이션에서 클라이언트가 서버에 보내는 데이터에 대해 반응하는 것이 중요한데 Flask는 request 객체를 제공한다.
from flask import request

with app.test_request_context('/hello', method='POST'):
    assert request.path == '/hello'
    assert request.method == 'POST'
이와 같이 요청 객체에 접근할 수 있다.
request 객체
form 속성의 요청에 대해 다루어 보자.
@app.route('/login', methods=['POST', 'GET'])
def login():
    error = None
    if request.method == 'POST':
        if valid_login(request.form['username'],
                       request.form['password']):
            return log_the_user_in(request.form['username'])
        else:
            error = 'Invalid username/password'
    return render_template('login.html', error=error)
form 속성에 키가 없으면 Keyerror 가 발생한다. 이 에러를 캐치할 수 있지만 그렇게 하지 않으면 HTTP 400 오류 페이지를 대신 표시한다.
URL(?key=value)에 제출된 매개변수에 액세스 하려면 args 속성을 사용할 수 있다.
searchword = request.args.get('key', '')파일 업로드
Flask 로 업로드된 파일을 쉽게 처리할 수 있다.
enctype="multipart/form-data 양식으로 전송받아 처리한다.
업로드된 파일은 임시 위치에 저장되며 이러한 파일에 액세스할 수 있다.
해당 파일 객체는 표준 파이썬의 file 객체처럼 작동하지만 save() 를 통해 파일을 저장할 수 있는 메도드도 있다.
from flask import request

@app.route('/upload', methods=['GET', 'POST'])
def upload_file():
    if request.method == 'POST':
        f = request.files['the_file']
        f.save('/var/www/uploads/uploaded_file.txt')
    ...
파일의 정보를 알고 싶다면 file.filename 과 같은 속성에 액세스 할 수도 있다. 하지만 이 값은 위조될 수 있으니 절대로 신뢰하지는 말자.
클라이언트의 파일 이름을 사용하여 서버에 저장하려면 secure_filename() 로 전달하면 된다.
from werkzeug.utils import secure_filename

@app.route('/upload', methods=['GET', 'POST'])
def upload_file():
    if request.method == 'POST':
        file = request.files['the_file']
        file.save(f"/var/www/uploads/{secure_filename(f.filename)}")
쿠키
쿠키에 액세스하려면 cookies 속성을 사용할 수 있다.
쿠키를 설정하려면 set_cookie 메소드를 사용할 수 있다.
from flask import request

@app.route('/')
def index():
    username = request.cookies.get('username')
    # 쿠키가 없다면 KeyError
다음은 쿠키 저장이다.
from flask import make_response

@app.route('/')
def index():
    resp = make_response(render_template(...))
    resp.set_cookie('username', 'the username')
    return resp
리다이렉션 및 오류
사용자를 다른 페이지로 리다이렉션 하려면 redirect() 함수를 사용하면 된다.
오류 코드로 요청을 조기에 중단하려면 다음 abort() 기능을 사용하자.
from flask import abort, redirect, url_for

@app.route('/')
def index():
    return redirect(url_for('login'))

@app.route('/login')
def login():
    abort(401)
    this_is_never_executed()
오류 페이지를 사용자가 직접 지정하려면 errorhandler() 데코레이터를 사용할 수 있다.
from flask import render_template

@app.errorhandler(404)
def page_not_found(error):
    return render_template('page_not_found.html'), 404
JSON을 포함된 API
API를 작성할 때 일반적으로는 JSON 이 응답 형식이다.
Flask로 이런 API 작성이 쉬우며 딕셔너리로 반환하면 JSON 응답으로 변환된다.
@app.route("/me")
def me_api():
    user = get_current_user()
    return {
        "username": user.username,
        "theme": user.theme,
        "image": url_for("user_image", filename=user.image),
    }
세션
요청 객체 외에도 session 에도 정보를 저장할 수 있다.
from flask import session

# Set the secret key to some random bytes. Keep this really secret!
app.secret_key = b'_5#y2L"F4Q8z\n\xec]/'

@app.route('/')
def index():
    if 'username' in session:
        return f'Logged in as {session["username"]}'
    return 'You are not logged in'

@app.route('/login', methods=['GET', 'POST'])
def login():
    if request.method == 'POST':
        session['username'] = request.form['username']
        return redirect(url_for('index'))
    return '''
        <form method="post">
            <p><input type=text name=username>
            <p><input type=submit value=Login>
        </form>
    '''

@app.route('/logout')
def logout():
    # remove the username from the session if it's there
    session.pop('username', None)
    return redirect(url_for('index'))