지난글
- RingGeometry
- ShapeGeometry
- SphereGeometry
- TetrahedronGeometry
- TextGeometry
- TorusGeometry
이어서
지난 포스트에서 기본 도형들을 마무리 지었습니다. 이번 포스트는 그 도형들에 적용할 수 있는 재질(Materials)을 알아보겠습니다. 저는 빛을 반사하는게 신기하더라구요. 이번에는 많이 쓰이는 재질 6가지만 하고 빠르게 카메라 파트로 넘어갈게요. 꽈베기 모양의 TorusKnotGeometry라는 도형으로 알아보겠습니다. 기본 도형 시리즈에서 그냥 넘어갔던 것 같아 여기서 써보려고 합니다.
index.html
<!DOCTYPE html>
<html lang="en">
  <head>
    <meta charset="UTF-8" />
    <meta name="viewport" content="width=device-width, initial-scale=1.0" />
    <title>Document</title>
  </head>
  <body>
    <canvas id="c"></canvas>
    <script type="module" src="./index.js"></script>
  </body>
</html>
index.js
import * as THREE from './node_modules/three/build/three.module.js';
const canvas = document.querySelector('#c');
const renderer = new THREE.WebGLRenderer({ antialias: true, canvas });
renderer.setSize(window.innerWidth, window.innerHeight);
const fov = 70;
const aspect = window.innerWidth / window.innerHeight;
const near = 0.1;
const far = 100;
const camera = new THREE.PerspectiveCamera(fov, aspect, near, far);
camera.position.z = 20;
const scene = new THREE.Scene();
const radius = 5;
const tube = 1.5;
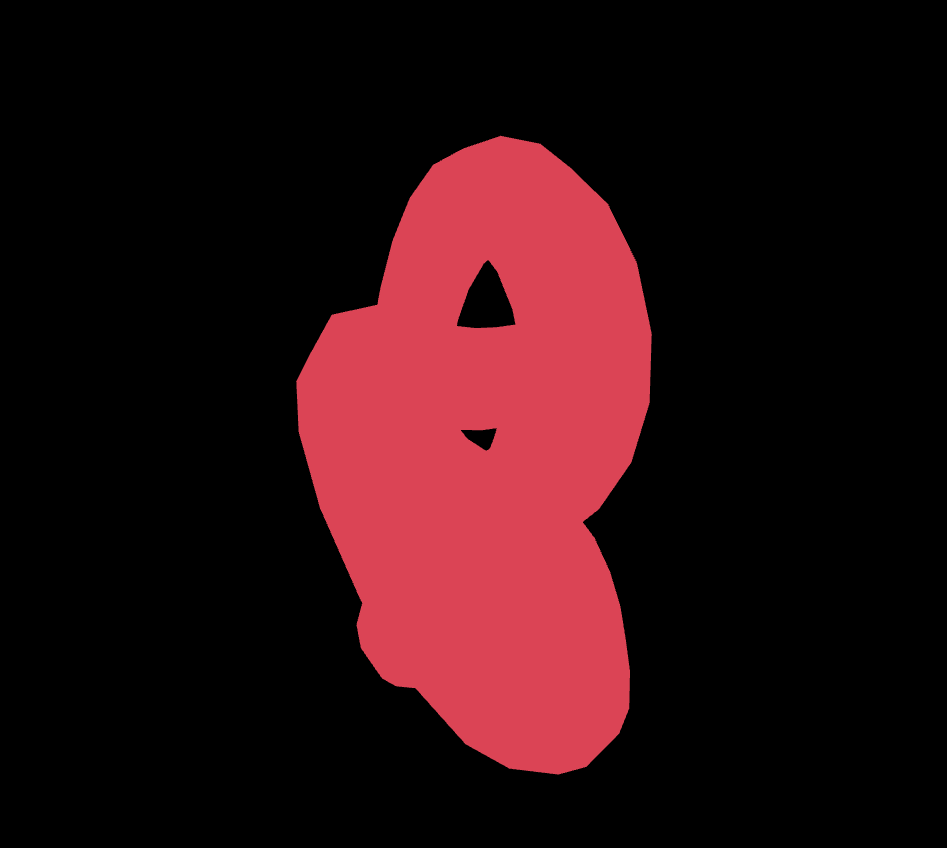
const geometry = new THREE.TorusKnotGeometry(radius, tube);
const material = new THREE.MeshBasicMaterial({
color: '#DB4455',
});
const mesh = new THREE.Mesh(geometry, material);
scene.add(mesh);
function animate() {
// 애니메이션
mesh.rotation.x += 0.01;
mesh.rotation.y += 0.01;
renderer.render(scene, camera);
requestAnimationFrame(animate);
}
animate();
이번에는 index.js 18번째줄 material만 바꿔주시면 됩니다.
0. Material?
재질의 속성(property)를 정하는 방법은 크게 두 가지로 나뉩니다. 하나는 이전처럼 생성자를 호출할 때 값을 넘겨주는 것이고,
const material = new THREE.MeshPhongMaterial({
  color: 0xFF0000,
  // 빨강 (CSS처럼 문자열로 넘겨줄 수도 있음. "#ff0000")
});
다른 하나는 생성한 뒤에 바꾸는 것이죠.
const material = new THREE.MeshPhongMaterial();
material.color.setHSL(0, 1, .5);  // 빨강
물론 HSL 색상 모델 외에 rgb, hex 등 다양한 방법으로 색을 지정할 수 있습니다.
1. MeshBasicMaterial
빛의 영향을 받지않는 기본 재질입니다. 메모리를 적게 써서 부담없이 쓸 수 있는 것 같습니다. 참고로 flatShading: true 는 도형을 좀 더 각지게 만들어줍니다.
const material = new THREE.MeshBasicMaterial({
  color: '#DB4455',
  flatShading: true,
});
2. MeshLambertMaterial
MeshLambertMaterial은 정점에서만 광원을 계산합니다. 빛의 영향을 받기 때문에 아래의 코드만 붙여서 실행해보면 아무것도 보이지 않을 겁니다. 그래서 조명도 넣어줘야합니다.
const material = new THREE.MeshLambertMaterial({
  color: 'blue',
  flatShading: true,
});
아래의 코드는 태양광을 표현할때 넣는 조명(직사광)을 넣어주겠습니다.
const color = 0xffffff;
const intensity = 5;
const light = new THREE.DirectionalLight(color, intensity);
light.position.set(10, 10, 0);
scene.add(light);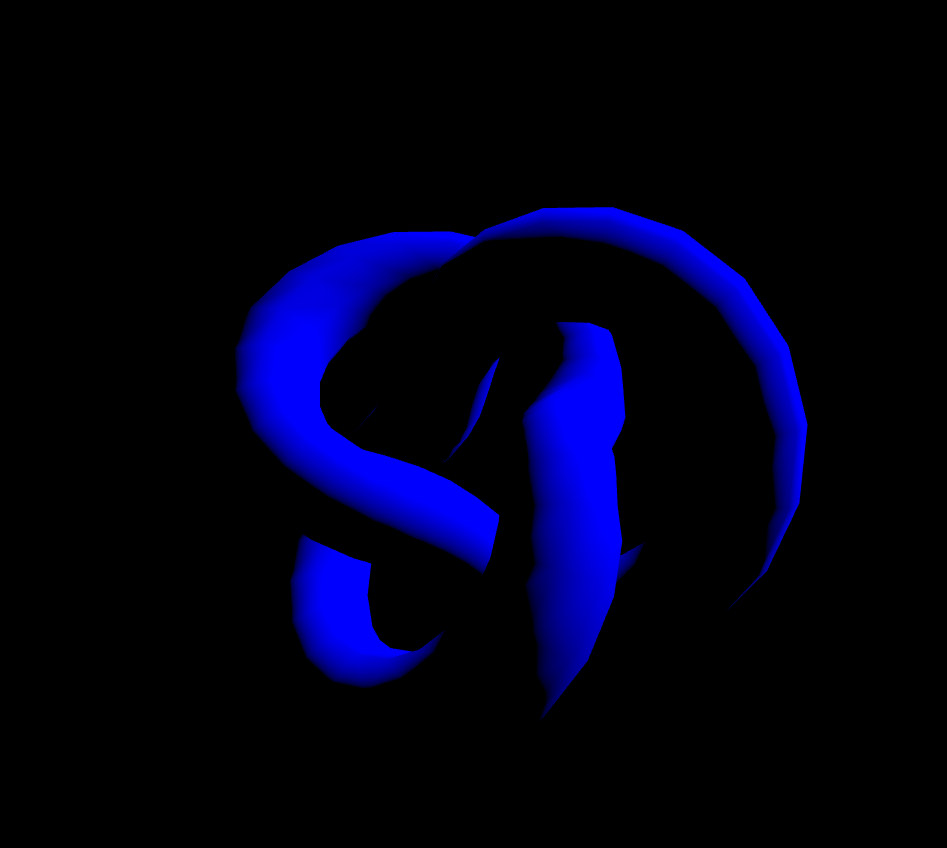
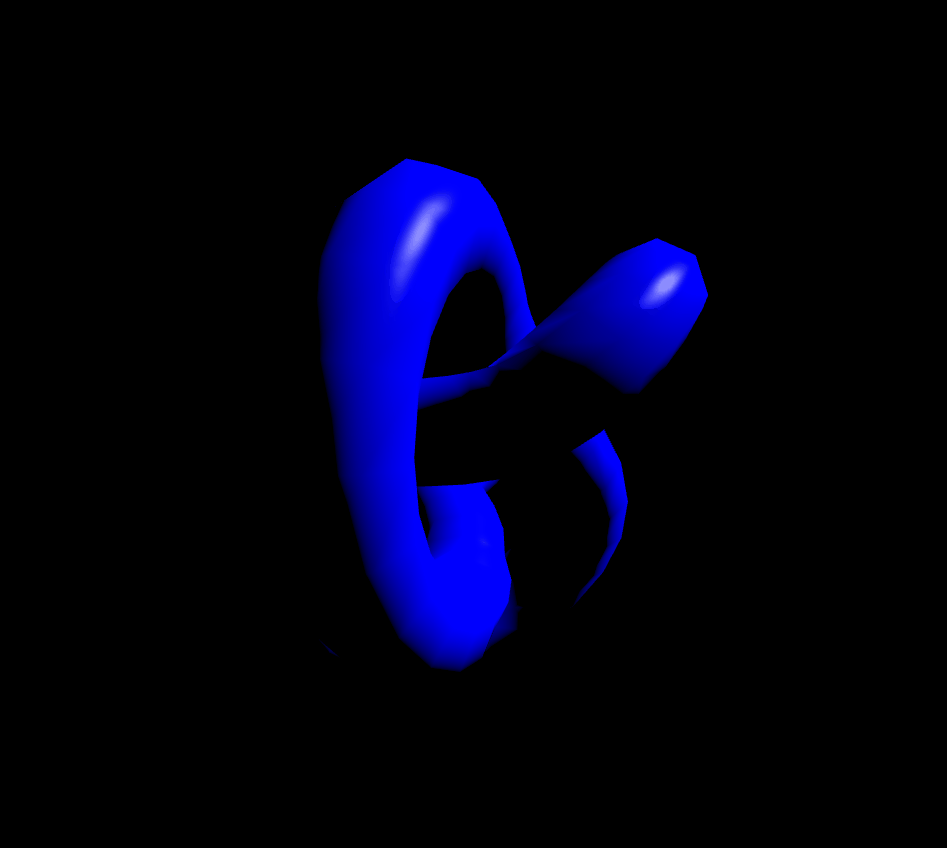
3. MeshPhongMaterial
MeshPhongMaterial은 반사점(specular highlights, 물체가 조명을 받을 때 물체에 나타나는 밝은 점. 역주)도 지원합니다. 재질이 정교할수록 GPU의 부담이 커지기 때문에 잘 조절해서 사용하셔야 할 것 같습니다. shininess값으로 반사값을 정할수 있습니다.(기본값 30)
const material = new THREE.MeshPhongMaterial({
  color: 'blue',
  shininess: 150, // 매끈매끈
});
4. MeshToonMaterial
const color = 0xffffff;
const intensity = 2;
const light = new THREE.DirectionalLight(color, intensity);
light.position.set(0, 10, 0);
scene.add(light);

const radius = 5;
const tube = 1.5;
const geometry = new THREE.TorusKnotGeometry(radius, tube);
const material = new THREE.MeshToonMaterial({
  color: '#049ef4',
});
const mesh = new THREE.Mesh(geometry, material);
scene.add(mesh);
5. MeshStandardMaterial
MeshStandardMaterial는 MeshPhongMaterial과 유사합니다. 하지만 사용하는 속성이 다릅니다. roughness와 metalness 두 가지 속성을 사용합니다.roughness는 당구공처럼 번들번들하게 만들어줍니다. 주는 방법은 숫자값0~1인데 0은 번들번들하게 되고 1은 빛반사가 없습니다.metalness는 금속성입니다. 이것도 주는 방법은 숫자값 0~1인데 0은 금속이 아닌것 처럼 보이고 1은 금속처럼 보이게 됩니다.
const radius = 5;
const tube = 1.5;
const geometry = new THREE.TorusKnotGeometry(radius, tube);
const material = new THREE.MeshStandardMaterial({
  color: '#049ef4',
  roughness: 0, // 빤딱빤딱
});
const mesh = new THREE.Mesh(geometry, material);
scene.add(mesh);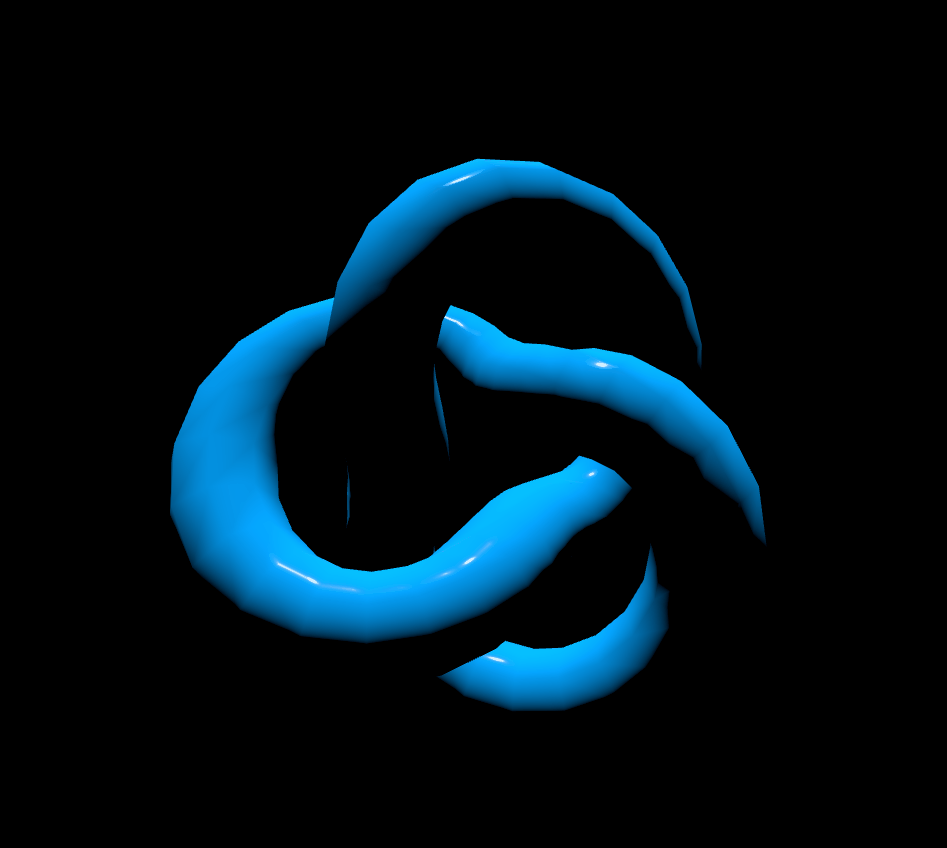
6. MeshPhysicalMaterial
MeshPhysicalMaterial은 MeshStandardMaterial과 기본적으로 같지만, 0부터 1까지의 clearcoat 속성으로 표면에 코팅 세기를 설정하고, clearcoatRoughness 속성으로 코팅의 거침 정도를 설정한다는 점이 다릅니다.
const radius = 5;
const tube = 1.5;
const geometry = new THREE.TorusKnotGeometry(radius, tube);
const material = new THREE.MeshPhysicalMaterial({
  color: '#049ef4',
  clearcoat: 1, // 빤딱빤딱
  clearcoatRoughness: 0.5,
});
const mesh = new THREE.Mesh(geometry, material);
scene.add(mesh);
정리
여태까지 살펴본 Three.js의 기본 재질을 성능이 빠른 것부터 나열하면,
MeshBasicMaterial ➡ MeshLambertMaterial ➡ MeshPhongMaterial ➡ MeshStandardMaterial ➡ MeshPhysicalMaterial
성능 부담이 클수록 더 현실적인 결과물을 얻을 수 있지만, 저사양 지원을 위해서는 코드 최적화에 그만큼 신경을 써야 합니다.
오늘은 6가지의 기본 재질들에 대해서 알아보았습니다. 다음에는 카메라에 대해 알아보고 예제도 준비해오겠습니다. 고생하셨습니다.