글에 사용된 모든 그림과 내용은 직접 작성한 것입니다.
[유튜브 영상]
[깃허브 보러가기]
https://github.com/Chang-Jin-Lee/D3D11-AliceTutorial/tree/main/25_ToonShading_Outline
[풀리퀘 보러가기]
https://github.com/Chang-Jin-Lee/D3D11-AliceTutorial/pull/50
글의 목적
D3D11에서 아웃라인을 그리는 방법을 정리하기 위함
| All Shader Collection |
|---|
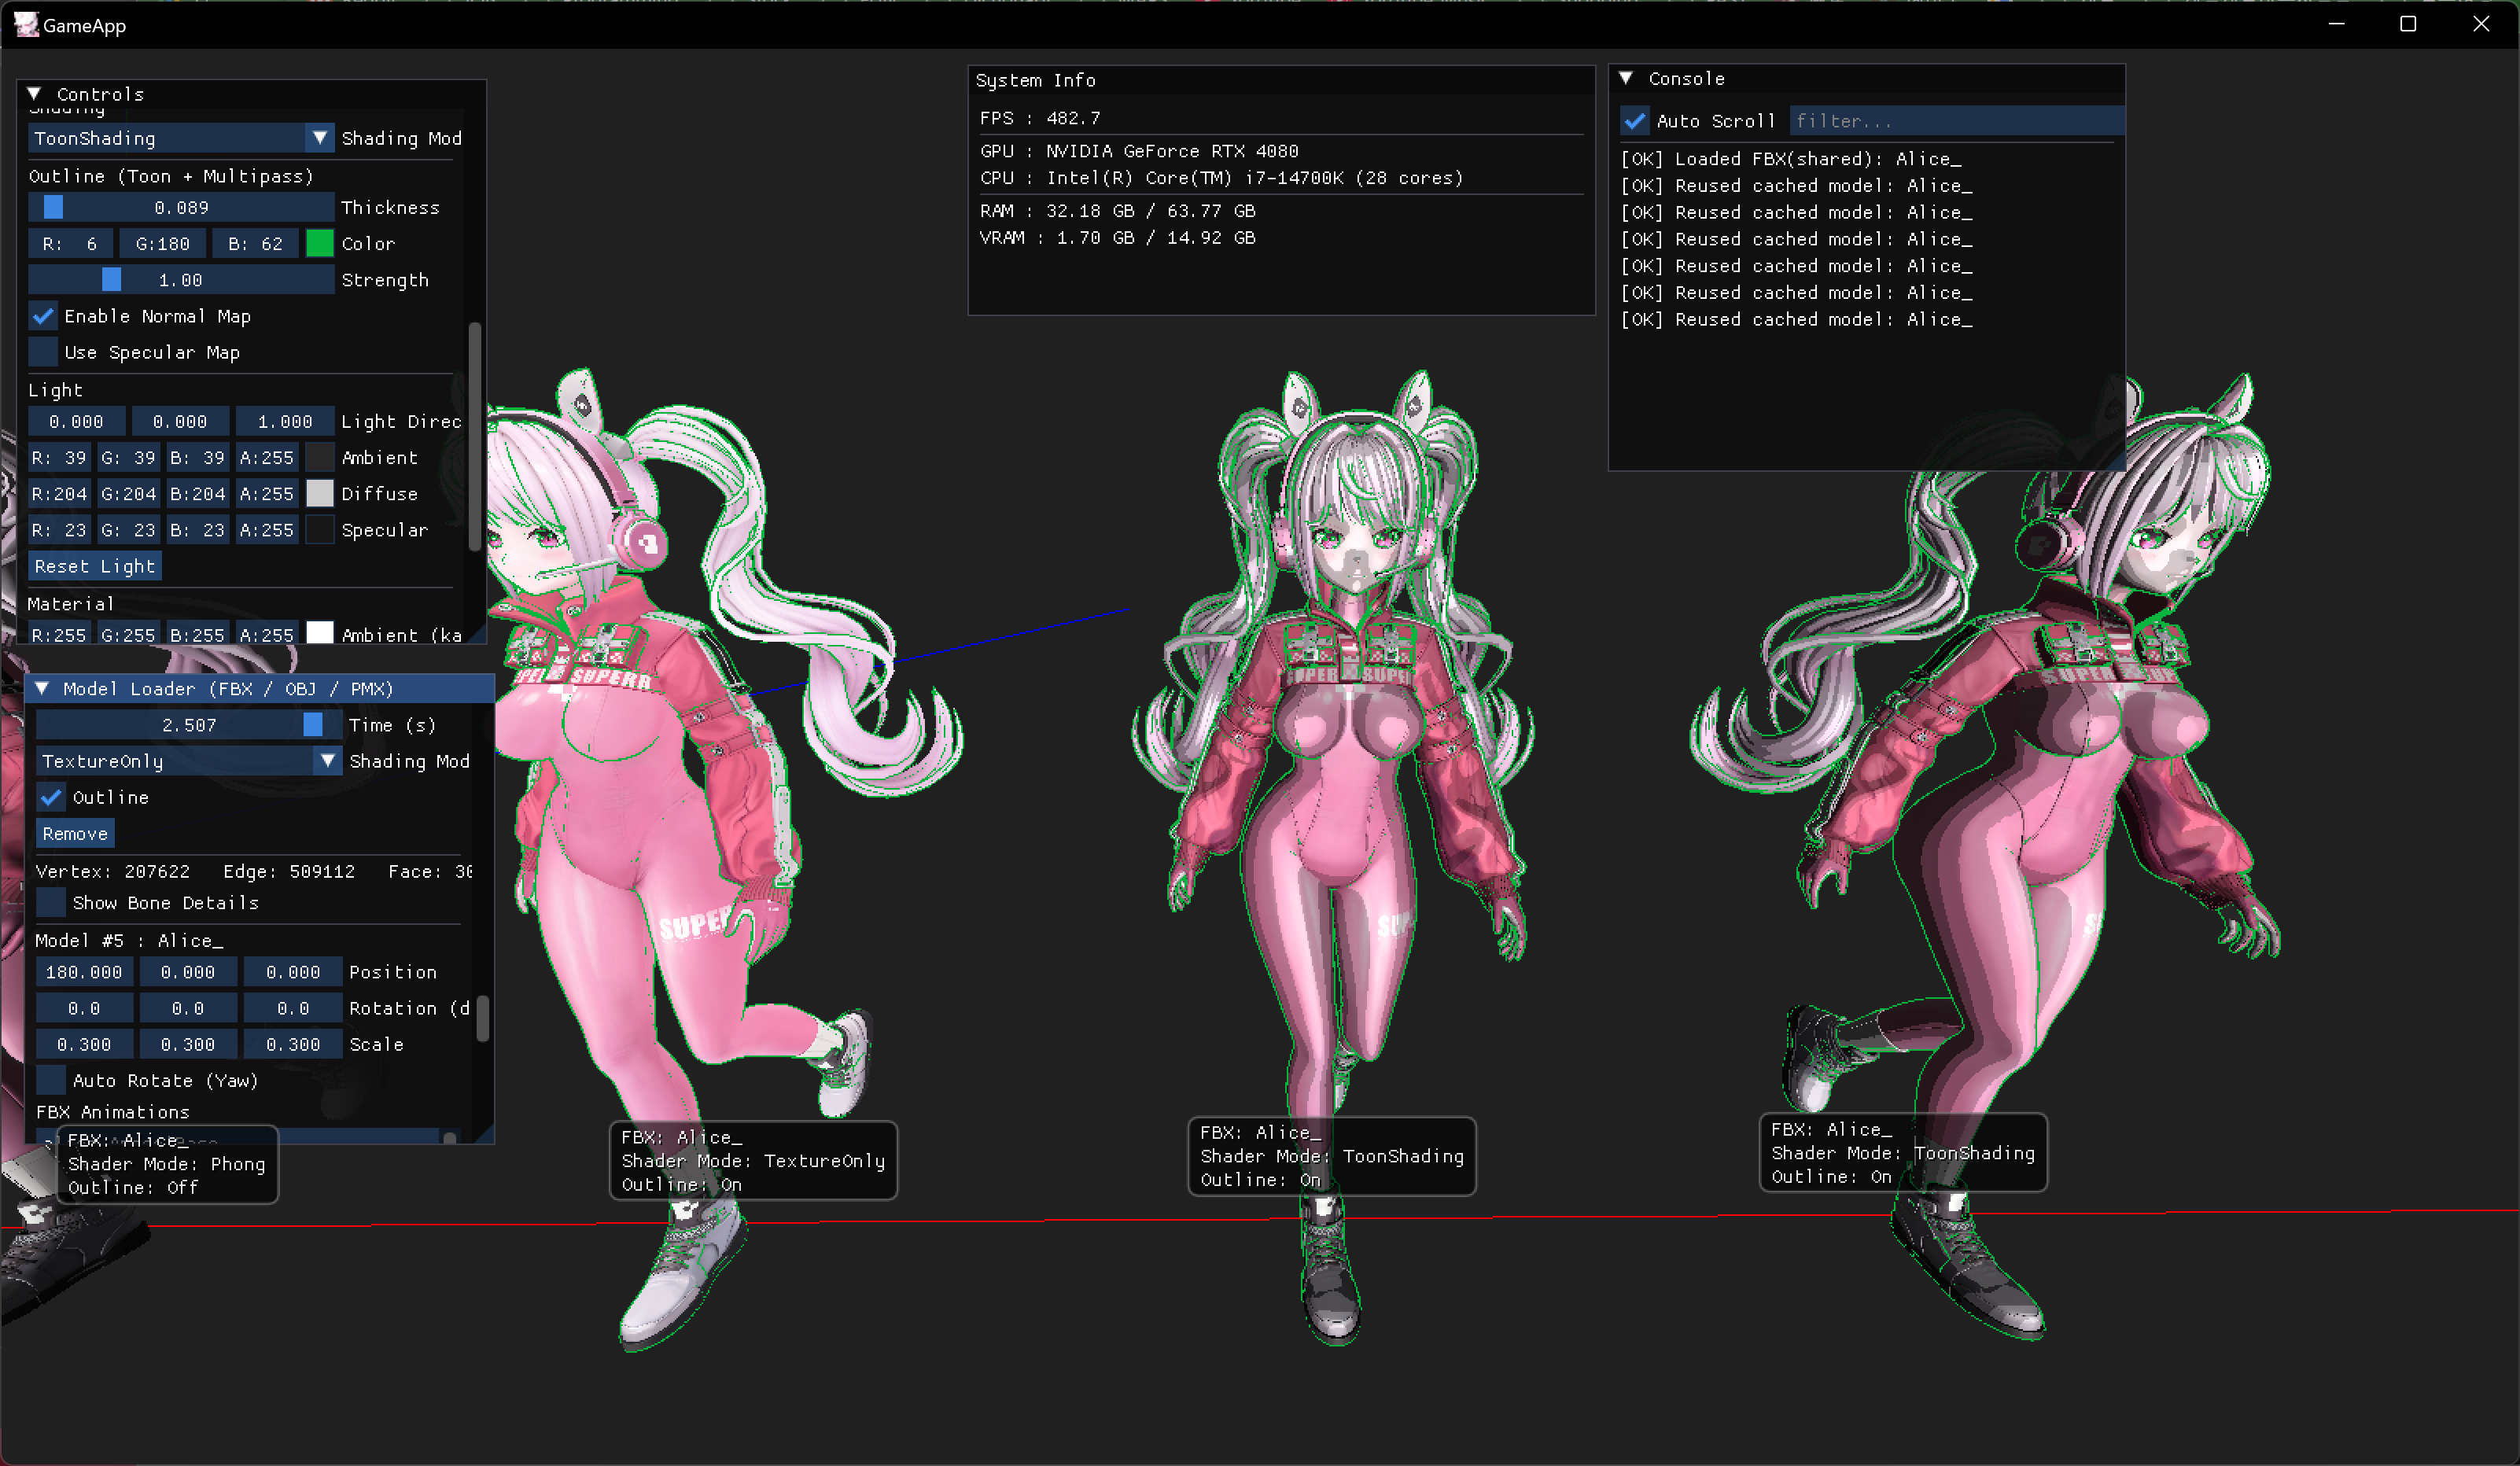
툰 쉐이딩
- 경계면을 나누어 그림자를 생기게해서 만화적인 표현을 하기 위한 방법입니다
- 이 툰 쉐이딩이랑 함께 자주 사용되는게 outline 입니다. 물체의 외곽선입니다.
Outline
- 본 패스를 렌더한 뒤, 멀티 패스에서 정점을 뷰-공간 XY 바깥으로 키웁니다.
- 그 다음 “백페이스”만 렌더합니다. 깊이는 읽기만 해서 실루엣만 남기고 앞면 색은 보이지 않게 합니다.
Vertex Shader : 일반 메시, skinned 메시
- 일반 메시는 이 패스를 진행합니다
VSOutOutline VSOutline(VSInOutline vIn)
{
    VSOutOutline o;
    // View-space XY 팽창: 깊이는 유지하여 실루엣만 보이도록
    float4 posW = mul(float4(vIn.posL, 1.0f), g_World);
    float4 posV = mul(posW, g_View);
    float3 nW = normalize(mul(vIn.normalL, (float3x3) g_WorldInvTranspose));
    float3 nV = normalize(mul(nW, (float3x3) g_View));
    float2 dir = nV.xy;
    float len = max(length(dir), 1e-5);
    dir /= len;
    posV.xy += dir * g_OutlineThickness;
    o.posH = mul(posV, g_Proj);
    return o;
}- skinned 메시는 이 패스를 진행합니다
VertexOut VSSkinnedOutline(VertexInSkinned vIn)
{
    VertexOut vOut;
    uint4 bi = vIn.boneIdx; float4 bw = vIn.boneW;
    matrix M = bw.x * g_BonePalette[bi.x]
             + bw.y * g_BonePalette[bi.y]
             + bw.z * g_BonePalette[bi.z]
             + bw.w * g_BonePalette[bi.w];
    float4 skinnedPos = mul(float4(vIn.posL,1.0f), M);
    float3x3 M3 = (float3x3)M;
    float3 skinnedN = normalize(mul(vIn.normalL, M3));
    // 월드→뷰 변환
    float4 posW = mul(skinnedPos, g_World);
    float4 posV = mul(posW, g_View);
    float3 nW = normalize(mul(skinnedN, (float3x3)g_WorldInvTranspose));
    float3 nV = normalize(mul(nW, (float3x3)g_View));
    // 화면 두께가 보이도록 z 성분 제거 후 XY 평면으로만 팽창
    float2 nVP = normalize(max(abs(nV.x) + abs(nV.y), 1e-5) * (nV.xy / max(length(nV.xy), 1e-5)));
    posV.xy += nVP * g_OutlineThickness;
    // 프로젝션
    vOut.posH = mul(posV, g_Proj);
    vOut.posW = posW.xyz;
    vOut.normalW = nW;
    vOut.tangentW = float3(1,0,0);
    vOut.bitanW   = float3(0,1,0);
    vOut.tex = vIn.tex;
    vOut.color = float4(0,0,0,1);
    return vOut;
}
Pixel Shader
- outline에 대한 픽셀쉐이더 입니다
struct PSInOutline
{
    float4 posH : SV_POSITION;
};

float4 PSOutline(PSInOutline i) : SV_Target
{
    float s = saturate(g_OutlineStrength);
    return float4(g_OutlineColor.rgb * s, 1.0f);
}
cpp
- 다음처럼 컬 모드를 바꿔주고
CD3D11_RASTERIZER_DESC rasterizerDesc(CD3D11_DEFAULT{});
rasterizerDesc.FillMode = D3D11_FILL_SOLID;
rasterizerDesc.CullMode = D3D11_CULL_BACK;
rasterizerDesc.FrontCounterClockwise = true;
HR_T(m_->m_pDevice->CreateRasterizerState(&rasterizerDesc, &m_->RSCullClockWise));- InputLayout을 실행하기전에 컬링 모드를 설정해줍니다
 m_->m_pDeviceContext->VSSetConstantBuffers(0, 1, &m_->m_pConstantBuffer);
 m_->m_pDeviceContext->PSSetConstantBuffers(0, 1, &m_->m_pConstantBuffer);
 if (m_->m_pDepthStencilStateReadOnly)
     m_->m_pDeviceContext->OMSetDepthStencilState(m_->m_pDepthStencilStateReadOnly, 0);
 m_->m_pDeviceContext->RSSetState(m_->RSCullClockWise);

 if (useSkinned)
 {
     m_->m_pDeviceContext->IASetInputLayout(m_->m_pInputLayoutSkinned);
     m_->m_pDeviceContext->VSSetShader(m_->m_pVertexShaderSkinnedOutline, nullptr, 0);
     if (cbBones) m_->m_pDeviceContext->VSSetConstantBuffers(1, 1, &cbBones);
 }
 else
 {
     m_->m_pDeviceContext->IASetInputLayout(m_->m_pOutlineInputLayout ? m_->m_pOutlineInputLayout : m_->m_pInputLayout);
     m_->m_pDeviceContext->VSSetShader(m_->m_pVertexShaderOutline, nullptr, 0);
     ID3D11Buffer* nullCB = nullptr; m_->m_pDeviceContext->VSSetConstantBuffers(1, 1, &nullCB);
}| Unlit | Lambert | BlinnPhong |
|---|---|---|
| Phong | TextureOnly | ToonShading | ToonShading + outline |
|---|---|---|---|

게임 프로그래머