Spring Boot 3 & Spring Framework 6 - Section 16 : 풀스택 Application 실습 #2 - Backend API랑 연결
Udemy학습-Spring & React
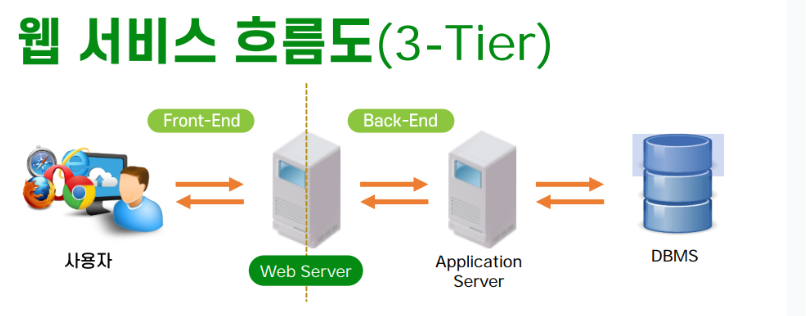
。Front-End : React,Back-End : Spring,DBMS : PostgreSQL
React를 통해Front-end로서 생성한 Project를Spring을 통해Back-end로서REST API와 연결
。React에서Axios를 통해Back-end로 요청 시 해당API를 관리하는Spring에서Http Request를 처리 후Http Response를 전달.
Axios
。JavaScript에서HttpRequest를 쉽게 전송할 수 있는HTTP Client Library
▶React에서API요청을 전송하여REST API호출 시 가장 많이 사용.
。REST API와 통신을 수행 시 유용하며Fetch API보다 유용한 기능을 제공하여 React Project에서 더 많이 사용됨.
( 자동JSON Conversion,Request / Response Interceptor)
。async/await을 지원하여 비동기Promise기반으로 작동. Javascript-Promise
▶ 비동기로서 여러개의 Request를 동시에 처리 가능.
。Fetch API와 다르게404,500의Http Error도Promise객체.catch(콜백함수)를 통해 감지 가능. Fetch API
。Interceptor를 통해HTTP Request / HTTP Response를 가로채서 수정이 가능.
axios.create({ Property }):
。axios의 instance를 생성하는 함수.
。axios의 기본설정 (기본 URL,Header,timeout등 )을 사전에 지정이 가능.
▶ 매번Axios를 활용한 API 호출 시 동일한 설정을 반복구현할 필요 없이 재사용 가능한axios의 instance 생성 가능.
axios.create()Property 종류import axios from 'axios' // 기본설정이 구현된 axios instance 생성 const apiClient = axios.create({ baseURL: "http://localhost:3000", // 기본 URL timeout: 5000, // 요청 제한 시간 (5초) headers: { // 기본 Header 설정 "Content-Type": "application/json", Authorization: "Bearer YOUR_ACCESS_TOKEN", }, });
baseURL:
。API호출 시의 기본 URL ( ex.Origin:http://localhost:3000)을 지정
▶baseURL을 정의하는 경우 해당axios instance를 사용하여Axios HTTP Method사용 시URL Parameter만 정의하여API를 호출할 수 있다.
timeout:
。제한요청시간을 설정하여 설정된 시간 이후HTTP Request실패 처리.
headers
。기본HTTP Request Header지정.
▶Header를 미리 지정할 경우 모든HTTP Request에서 자동으로 포함되어 로그인 API를 사용 시JWT Token을 자동 추가하여 유용.
。headers에 정의된{ }배열의Authorization은 인코딩된 형태의Spring Security에서 등록된 ID와 PW를 기입.
Axios Http Method
。JSX에import axios from 'axios'를 선언하여 사용하거나axios.create()로axios instance를 생성하여 활용.
。Server에Http Request전달 시REST API호출 성공여부에 따른HTTP Response또는Error를 포함한Promise객체를 return
▶Axios HTTP Method에 추가적으로Callback Method(Promise객체.then(콜백함수),Promise객체.catch(콜백함수),Promise객체.finally(콜백함수))를 선언하여 콜백함수의 매개변수로 전달되는HTTP Response또는Error에 따라서 비동기로 처리하는 logic 구현. Promise-Callback Method
。Axios HTTP Method를 사용하는경우Promise를 return하며, 이때Callback Method를 구현 시Promise는 비동기 특성을 지니므로,Callback Method를 다 완료하기 전에 다음 구문을 실행하게된다.
▶async / await을 사용하여Callback Method가 완료된 후 다음구문을 실행하도록 설정.
Promise에 async/await 활용사례
axios객체.get("URL" , { property }):
。GET HTTP Request를 Server( =Application)로 전달하여 데이터를 가져온다.
。REST API호출 성공 시 (200)Callback method에서Promise.then(콜백함수)의 콜백함수의 매개변수로HTTP Response이 전달된다.
▶Exception발생 시Promise.catch(콜백함수)의 콜백함수의 매개변수로Error객체가 전달.
。{ property }는기본 URL,Header,timeout등을 지정가능하며, 이는 사전에axios.create({ property })를 통해axios instance를 생성 활용 가능.
axios객체.post("URL", Object객체 , { property })
。데이터를 포함한POST HTTP Request를 Server로 전달하여 생성 등의 작용 수행.
▶Object객체는API호출 시HTTP Request Body로 전달되며Spring의Controller Method매개변수의@RequestBody를 통해 Mapping되어 데이터를 전달받는다.
axios객체.put("URL", Object객체 , { property })
。PUT HTTP Request를 Server로 전달하여 전체 데이터 UPDATE.
axios객체.patch("URL" , Object객체 , { property })
。PATCH HTTP Request를 Server로 전달하여 일부 데이터 UPDATE.
axios객체.delete("URL" , { property })
。DELETE HTTP Request를 Server로 전달하여 데이터 DELETE.
Axios Http Method의 Property에headers를 포함하여 API 호출
。Axios Http Method의 매개변수에headers가 정의된Object객체를 설정.
。Front-End Application에서Spring Application의Spring Security로 보호된REST API를 호출하기위해API호출 시 전송하는HTTP Request에Spring에 접근할 수 있는Authorization Header를 포함하도록 설정.import axios from 'axios' export const retrieveBean = (pathvariable) => axios.get(`/pg/hello-world-bean/${pathvariable}`,{ headers : { // 인코딩된 형태의 사용자 ID와 PW Authorization : "Basic dXNlcjEyMzpwdzQ1Ng==" }});。
headers에 정의된{ }배열의Authorization은 인코딩된 형태의Spring Security에서 등록된 ID와 PW를 기입.
▶ 이때,Axios API마다 일일이 설정하기보다 사전에axios.create( { Property } )를 통해header등의 property를 구현한axiosinstance를 생성하여Axios HTTP Method활용 시 매HTTP Request전달시마다 해당header을 포함하여 전달하도록 설정import axios from 'axios' const apiClient = axios.create({ baseURL : "http://localhost:8080", // axios instance에 기본 Header 설정 // axios instance를 이용해 API 호출시 해당 Header가 항상 포함. headers: { Authorization: "Basic dXNlcjEyMzpwdzQ1Ng==", } }) export const retrieveBean = (pathvariable) => apiClient.get(`/pg/hello-world-bean/${pathvariable}`);
Axios Interceptors
。Axios의API호출로 인한HTTP RequestorHTTP Response가 처리되기전에 Intercepting하여 Customize할 수 있는 기능.
▶axios instance를 이용하여 Interceptor를 구현할 수 있다.
。해당 기능을 사용하는 경우header에Token추가,Error Handling,HTTP Response변환 등의 작업을 수행할 수 있다.
Request Interceptor:axios객체.interceptors.request
。특정Axios instance를 통해API 호출시HTTP Request가Server로 전송되기전에 Intercepting하여 Customize.
。axios객체.interceptors.request.use( callback )선언 시 callback의 매개변수로서 특정Axios HTTP Request를 Intercepting하여 전달되는Configuration 객체( =config)가 전달됨.
▶ 해당Configuration 객체를 수정 시 Intercepting한HTTP Request를 전송하기 전에Configuration을 변경할 수 있다.
Axios HTTP Request Configuration 객체구조
。Javascript에서config.headers.Authorization = token처럼HTTP Request를 Intercepting하여config을 통해 수정이 가능.{ "url": "/users", "method": "get", "headers": { "Accept": "application/json, text/plain, */*" }, "baseURL": "https://api.example.com", "timeout": 5000 }
url:HTTP Request를 수행할 API의URL Parameter
method:HTTP Request의HTTP Method
headers:HTTP Request의header객체.
。Accept,Authorization,Content-Type,Origin등의HTTP Header를 포함
。Authorization:JWT Token,HTTP Basic Auth를 추가 시 사용.
baseURL: 기본 URL
timeout:HTTP Request의 요청제한시간
params:GET HTTP Request의Query Parameter
data:POST,PUT에서 전달할 데이터.
Response Interceptor:axios객체.interceptors.response
。특정Axios instance를 통해API 호출후HTTP Response를 전달받을 경우Callback Method가 실행되기전에 Intercepting하여 Customize.
AxiosDependency 설치
npm install axios
。PowerShell에서npm을 통해React Project에 dependency로 설치
。Node.js서버 구동 시ctrl + c로 취소 후 dependency 설치 후npm start로 서버 재구동.
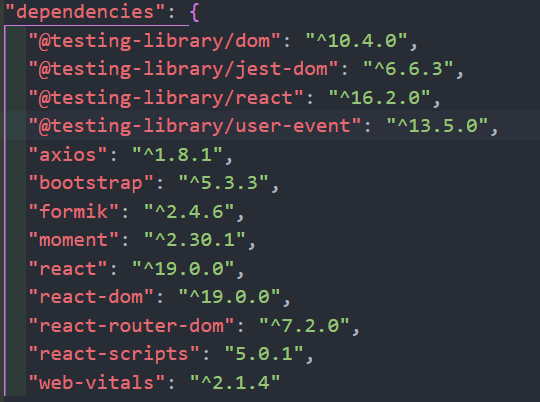
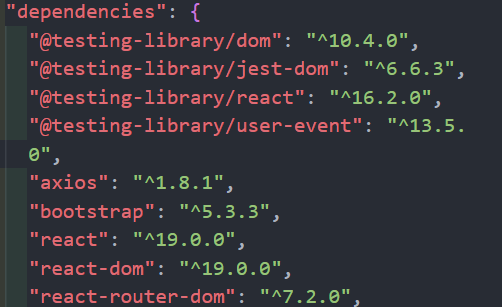
。React Project의package.json에서 설치된 dependency를 확인 가능.
▶ 이후jsx파일에서import axios from 'axios'로 import하여 사용.

React Project에서 Spring에서 구축한REST API를 호출
Spring에서 구축한 REST API
。React Project에서Axiosdependency를 추가 후 사용할jsx파일에import axios from 'axios'로Axios를 import.
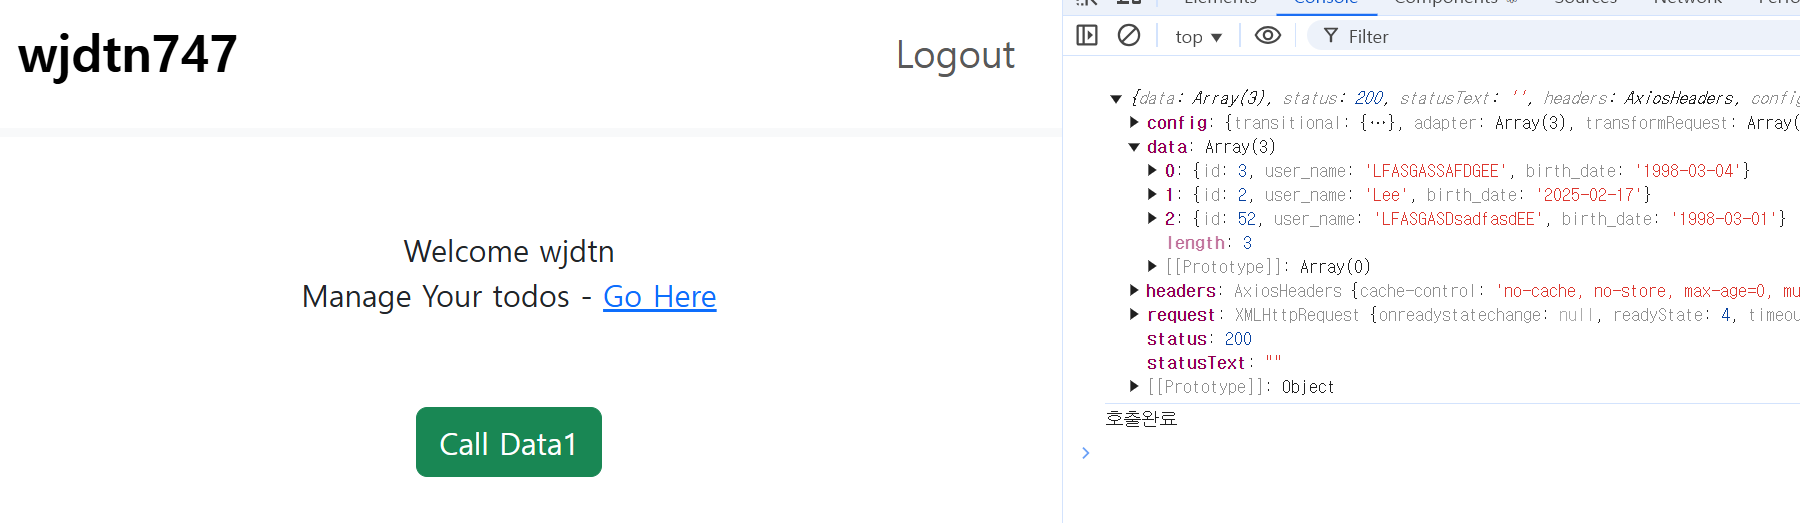
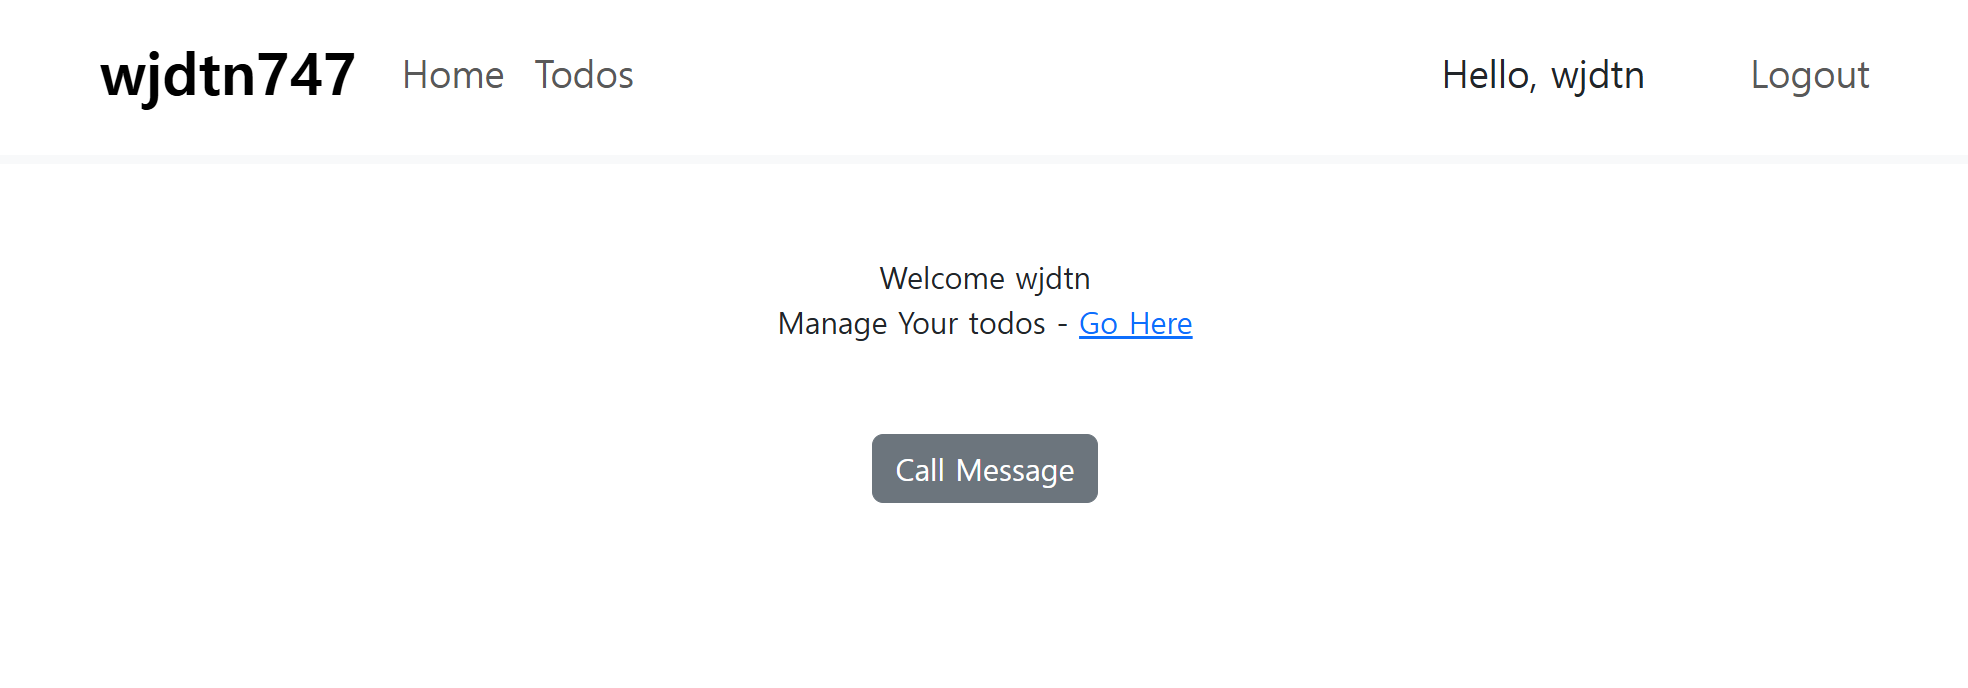
▶Axios를 활용해HTTP Method에 해당하는HTTP Request를 Spring이 Mapping한REST API URL로 전달.import {useParams,Link} from 'react-router-dom' import axios from 'axios' export default function WelcomeComponent(){ const {username} = useParams() function callRestAPI(){ // Spring에서 Mapping한 URL로 GET HTTP Request를 수행. axios.get("http://localhost:8080/pg/jpa/users") // REST API 호출 성공 시 작동하며 콜백함수의 매개변수로서 HTTP Response를 가져온다. .then((response)=>{console.log(response)}) .catch((error)=>{console.log(error)}) // REST API 호출 중 Exception 발생 시 작동하며 매개변수로서 Error객체를 가져온다. .finally(()=>{console.log("호출완료")}) } return( <div> Welcome {username} <div> Manage Your todos - <Link to="/todos">Go Here</Link> </div> <div> {/* Click 시 REST API를 통해 Spring에서 Data를 GET하는 함수를 작동하는 버튼 */} <button className="btn btn-success m-5" onClick={callRestAPI}>Call Data1</button> </div> </div> ) }
GET: 간단한 추가실습 :
- Spring Application에서 Mapping한 URL에
Http Request를 전달하면 Resource를 Response하는Controller Method생성
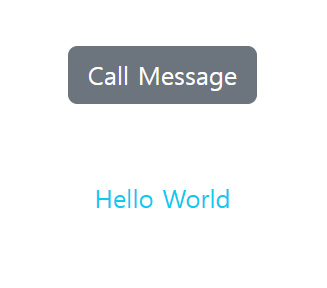
。@RestController를 선언한 Class에서@GetMapping(path="Mapping할 url")을 선언한Controller Method생성.@GetMapping(path="/pg/hello-world-bean") public String helloWorldBean(){ return "Hello World"; }
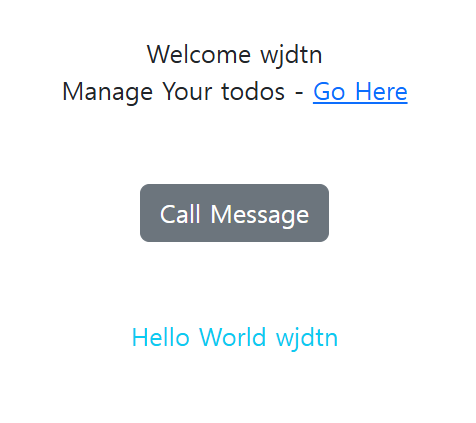
React Component에서Axios를 통해HTTP Request를 전송하는 함수와 버튼 구현
。axios를 통해Spirng이 Mapping한 URL에HTTP Request를 전송하여 API호출하는 함수 구현.
▶HTTP Response를State에 설정.
。<button>의onClick={함수명}으로 해당 함수를 설정하여 버튼을 누르면 trigger되도록 설정.import axios from 'axios' import {useState} from 'react' export default function WelcomeComponent(){ const [httpresponse, setHttpResponse] = useState("") function CallRestAPIMessage(){ // `Spirng`이 Mapping한 URL에 `HTTP Request`를 전송하여 API호출 axios.get("http://localhost:8080/pg/hello-world-bean") // HTTP Response를 State값으로 설정 .then((response)=>{ setHttpResponse(response.data)}) // HttpResponse의 JSON에서 data JSON 배열로 설정. .catch((error)=>{console.log(error)}) .finally(()=>{console.log("호출완료")}) } return( <div> <div> {/* Click 시 REST API를 통해 Spring에서 Data를 GET하는 함수를 작동하는 버튼 */} <button className="btn btn-secondary m-5" onClick={CallRestAPIMessage}>Call Message</button> </div> <div className="text-info">{httpresponse}</div> </div> ) }
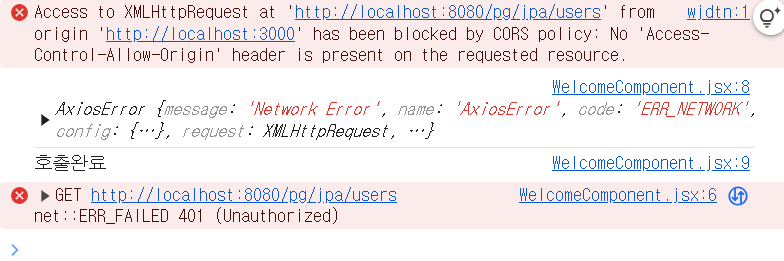
- 이때,
http://localhost:3000/( React )에서http://localhost:8080/( Spring )으로 다른Origin을 통해HTTP Request를 통해REST API를 호출하는것이므로,HTTP Request가Application Server에서CORS로 인한Spring Security에 의해 차단.
▶Spring Boot의Spring Security에서는 기본적으로 모든 다른Origin로부터의HTTP Request로 인한API호출(Cross-Origin Request)은 차단하도록 설정. Spring Security-CORS
。401: Resource에 유효한 자격증명이 없기 때문에HTTP Request가 적용되지 않았음
Spring Boot REST API에서CORS HTTP Request활성화
。특정Origin(http://localhost:3000/)에서 전송하는 모든HTTP Request를CORS를 통해 허용하도록 설정.
。Spring Application의WebMvcConfigurer Interface를 활용하여CORS Configuration정의
CORS Configuration된WebMvcConfigurer의 instance를 Spring Bean으로 반환하는@Bean Method구현.
。Spring Application의@SpringBootApplication이 정의된 Spring Boot Application의 진입점 Class에서 해당@Bean Method생성.
。WebMvcConfigurer의 instance의 구현MethodaddCorsMappings()를 Override하여 구현.
▶ Override를 수행할addCorsMappings(CorsRegistry registry)에서CorsRegistry객체를 활용하여CORS Configuration을 수행 후WebMvcConfigurer instance를Spring Bean으로 반환.import org.springframework.boot.SpringApplication; import org.springframework.boot.autoconfigure.SpringBootApplication; import org.springframework.context.annotation.Bean; import org.springframework.web.servlet.config.annotation.CorsRegistry; import org.springframework.web.servlet.config.annotation.WebMvcConfigurer; // @SpringBootApplication을 통해 Spring Boot의 // Auto-Configuration, Spring Bean의 생성 등이 자동으로 설정. @SpringBootApplication public class Practice5Application { public static void main(String[] args) { SpringApplication.run(Practice5Application.class, args); } // CORS Configuration을 수행한 WebMvcConfigurer instance를 생성하여 // Spring Bean으로 반환하는 @Bean Method. @Bean public WebMvcConfigurer corsConfigurer() { return new WebMvcConfigurer() { // addCorsMappings()를 Override하여 작성하며 // 매개변수로 전달된 CorsRegistry instance를 통해 Cross-Origin Request의 CORS Configuration 수행. public void addCorsMappings(CorsRegistry registry) { registry.addMapping("/**") // 모든 URL Pattern에 대하여 CORS 허용. .allowedMethods("*") // 모든 HTTP Method에 대하여 CORS 허용 .allowedOrigins("http://localhost:3000"); // React의 Origin에 대해서만 CORS 허용. } }; } }
。CORS Configuration에 의해React의Origin(http://localhost:3000)에 한해서만 모든 HTTP Method와 URL Pattern에 대해서Spring Application의Origin으로Cross-Origin Request로API호출을 수행해도CORS에 의해 차단되지 않는다.
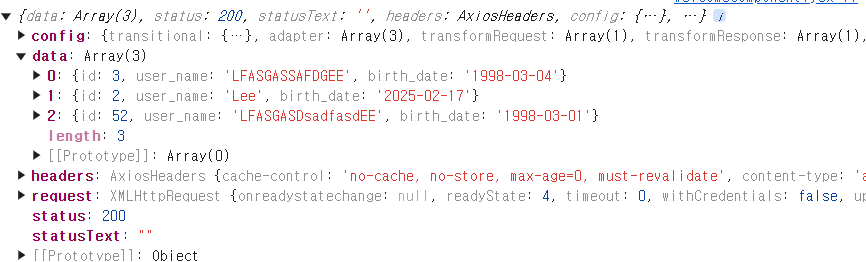
。axios.get("ResourceURL")에서 가져온HTTP Response는 다음처럼data와status등을 포함한JSON Object.
Cross-Origin Request:
。특정Origin에서 다른Origin으로HTTP Request를 전송하는것을 의미.
Origin:
。웹브라우저에서Origin은프로토콜 + 도메인 + 포트번호를 조합한 값.
▶https:// + example.com + :8080
CORS( Cross-Origin Resource Sharing ) :
。 브라우저가Cross-Origin Request의 허용여부를 결정하는 웹 보안정책.
▶CORS가 존재하지 않으면, 브라우저가Cross-Origin Request를 무조건 차단.
。Spring Boot의Spring Security에서는 기본적으로 모든 다른Origin로부터의HTTP Request로 인한API호출(Cross-Origin Request)은 차단하도록 설정되어있음.
▶ 백엔드 API 서버 ( =Spring Application)에서CORS Configuration을 통해Access-Control-Allow-Origin Header를 정의하여 모든 도메인 또는 특정 도메인에만HTTP Request를 허용하도록 설정.
ex )http://localhost:3000/( React )에서http://localhost:8080/( Spring )으로 다른Origin으로부터HTTP Request를 통해REST API를 호출하는것이므로,CORS로 인한Spring Security에 의해 차단.
WebMvcConfigurer
。Spring MVC의 세부적인 JAVA 기반 Configuration을 사용자 정의하는 구현 Method를 제공하는 Interface.
▶Spring Boot은 기본적으로Auto Configuration을 제공하지만, 세부설정이 필요할 경우WebMvcConfigurer을 통해 정의.
。 해당 Interface의CORS Configuration,Interceptor 추가,Static Resource Mapping,View Controller Configuration수행하는 구현 Method를Override하여 구현.
WebMvcConfigurer구현 메소드
- addCorsMappings(CorsRegistry registry)
。Spring에서CORS정책을 설정하는WebMvcConfigurer interface구현 Method.
▶ 해당 Method를 구현 및WebMvcConfigurer에Override하여 설정 시, Back-end Application에서 특정Origin의Cross-Origin Request를 전역적으로 허용가능.
。CorsRegistry의 instance를 매개변수로 가져오므로, 해당CorsRegistry객체를 이용해CorsRegistry의 Method를 활용하여CORS정책을 설정.@Bean public WebMvcConfigurer corsConfigurer() { return new WebMvcConfigurer() { // addCorsMappings()를 Override하여 작성하며 // 매개변수로 전달된 CorsRegistry instance를 통해 Cross-Origin Request의 CORS Configuration 수행. public void addCorsMappings(CorsRegistry registry) { registry.addMapping("/**") // 모든 URL Pattern에 대하여 CORS 허용. .allowedMethods("*") // 모든 HTTP Method에 대하여 CORS 허용 .allowedOrigins("http://localhost:3000"); // React의 Origin에 대해서만 CORS 허용. } }; }
CorsRegistry:
。Spring MVC에서CORS정책을 설정 시 사용하는 Class.
▶WebMvcConfigurer Interface의addCorsMappings(CorsRegistry registry)구현 Method를 통해 활용됨.
CorsRegistryMethod
CorsRegistry객체.addMapping("/URLpattern")
。Spring Boot에서Cross-Origin Request의CORS를 허용할 URL 패턴을 지정.
CorsRegistry객체.addMapping("/api/**"):
。/api/로 시작하는 모든Cross-Origin Request에 대하여CORS허용.
CorsRegistry객체.addMapping("/**"):
。모든 Cross-Origin Request에 대하여 CORS 허용.
CorsRegistry객체.allowedOrigins("Origin1", "Origin2" , ...)
。Spring Boot에서CORS를 허용할Origin을 지정하는 Method.
CorsRegistry객체.allowedOrigins("http://localhost:3000")
。특정Origin에 대해서만CORS허용.
CorsRegistry객체.allowedOrigins("*")
。모든Origin에 대해서CORS허용.
CorsRegistry객체.allowedMethods("GET", "POST" , ...)
。Cross-Origin Request에서CORS를 허용할HTTP Method지정.
▶"GET","POST","PUT","DELETE","PATCH"
CorsRegistry객체.allowedHeaders("Content-Type" , "Authorization" , ...)
。Spring Boot에서CORS를 허용할Header를 지정하는 Method.
CorsRegistry객체.allowedHeaders("*"): 모든header에 대해서CORS허용.
CorsRegistry객체.allowCredentials(Boolean)
。Cookie,Authorization Header등의 인증정보를 포함한Cross-Origin Request에 대하여CORS허용여부 설정.
。CorsRegistry객체.allowCredentials(true)설정 시CorsRegistry객체.allowedOrigins("*")를 사용할 수 없으며, 반드시특정 Origin만 지정하여 설정해야한다.
API호출을 전담하는 별도의JS파일생성하여 Refactoring 수행
。기존WelcomeComponent의Axios를 통한 직접적으로 Application Server에API 호출하는 기능을 해당JS파일로 이전하고API호출의 성공여부에 따른 상호작용만을 구현.
▶WelcomeComponent에서axios를 사용하지 않고,ApiService.js에서만axios를 사용.
。axios.create()를 통해axios instance를 생성하여 기본설정 (기본 URL,Header,timeout등 )을 사전에 지정.
。Axios를 활용할 경우,Path Variable을 용이하게 활용이 가능.// Spring @GetMapping(path="/pg/hello-world-bean/{id}") public String helloWorldBean(@PathVariable String id){ return String.format("Hello World %s",id); }。
Spring에서URL Parameter를 포함한MappingURL로HTTP Request하여API호출 시@PathVariable를 통해 Java 변수로 가져와서HTTP Response로 return.// ApiService.js import axios from 'axios' // baseURL이 구현된 Axios instance 생성 const apiClient = axios.create({ baseURL : "http://localhost:8080" }) // Axios instance를 통한 API호출을 수행하여 HttpResponse를 Return하는 함수 활용 export const retrieveBeanApi = (pathvariable) => apiClient.get(`/pg/hello-world-bean/${pathvariable}`);。
baseURL이 설정된axios instance를 생성하여 API 호출.
▶axios instance에 설정을 추가하여 해당 instance를 통해 매번HTTP Request를 전송할때마다JWT Token등 을 포함한Header를 기본적으로 포함하여 전송이 가능.
。default가 아닌 경우, 화살표함수로 export 가능.// WelcomeComponent import {retrieveBeanApi} from './api/ApiService.js' const [httpresponse, setHttpResponse] = useState("") function CallRestAPIMessage(){ // ApiService.js의 Axios를 통한 API호출을 담당하는 함수를 import하여 활용 retrieveBeanApi("wjdtn") .then((response)=>{ setHttpResponse(response)}) .catch((error)=>{console.log(error)}) .finally(()=>{console.log("호출완료")}) }
ListTodosComponent에서 하드코딩으로 구현된 Static 배열 데이터를Axios의API호출을 통해 DB에서 가져온 데이터로 대체해서 표현
。useEffect() Hook사용.
SpringController Method// GET Method 구현 // GET /users : 모든 사용자 조회 @GetMapping(path="/pg/jpa/users") public List<PostgresUser> ListAllUsers(){ // JpaRepository를 구현한 Service Class의 JpaRepository객체.findAll() Method 활용. List<PostgresUser> users = pgservice.GetAllPGUsers(); return users; }。API 호출 시
Spring JPA에서Mapping이 된DB Table과DB Entity를 통해SpringBean을JpaRepository객체를 통해 가져와서HTTP Response하여 전송.
- 특정 (
Todo) DB Table의 API호출을 전담하는Axios가 구현된JS파일을 생성// TodoApiService.js import axios from 'axios' // baseURL이 구현된 Axios instance 생성 const apiClient = axios.create({ baseURL : "http://localhost:8080" }) // Application Server의 Resource URL에 GET HTTP Request를 전송하여 API호출하는 함수 export const retrieveDataApi = () => apiClient.get(`/pg/jpa/users`);
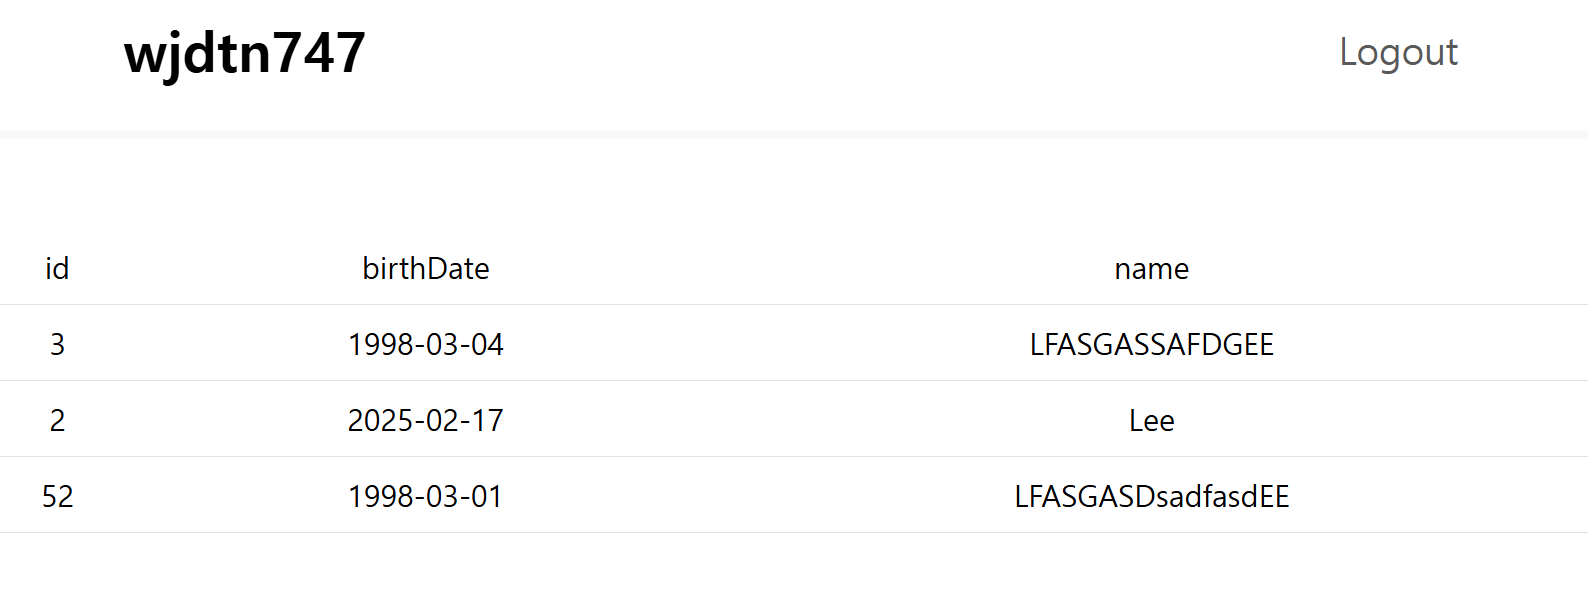
ListTodosComponent에서API 호출후 받은 데이터를 JSX코드로 표현
。useEffect(콜백함수) Hook활용.
▶useEffect(콜백함수) Hook를 활용하여 Component가 Rendering된 후 내부에 구현된콜백함수를 실행하도록 설정.// ListTodosComponent.jsx import { retrieveDataApi } from './api/TodoApiService.js' import { useState , useEffect } from 'react' export default function ListTodosComponent(){ const [todos,setTodos] = useState([]); // useEffect(콜백함수)를 구현하여 해당 콜백함수가 // Component가 Rendering된 후 실행되도록 설정. // 의존성배열이 빈배열이므로, 처음 렌더링 시 한번만 실행 useEffect( () => refreshState() , []) // Axios -> Spring -> DB에서 데이터를 가져와서 HTTP Response로 전달. function refreshState(){ retrieveDataApi() .then((response)=>{ console.log(response.data) setTodos(response.data) }) .catch((error)=>{console.log(error)}) .finally(()=>{console.log("실행완료")}) } return( <div className="container-fluid"> <table className="table"> <thead> <tr> <td>id</td> <td>birthDate</td> <td>name</td> </tr> </thead> <tbody> { todos && todos.map( (todo)=> (<tr key={todo.id}> <td>{todo.id}</td> <td>{todo.birth_date}</td> <td>{todo.user_name}</td> </tr> ) ) } </tbody> </table> </div> ) }
useEffect(콜백함수, [ Dependency List ]):
import { useEffect } from 'react'
。Functional Component에서Side effect를 처리하는데 사용하는React Hook
▶ Component의 Rendering 후 실행되는 코드를 정의 시 사용.
。API 호출,Event Listener추가,Timer설정 ,State변화 감지 등 작업에 활용.의존성배열 :
Dependency List:
。useEffect의 2번째 인자에 선언.
。정의안하는경우 : 모든 Rendering 시 마다 콜백함수 실행.
▶ 해당 API 호출 등의 작업을 Rendering할때마다 반복하므로 무한으로 사용.
。빈 배열[]:React Component가 처음 렌더링 시 한번만 콜백함수 실행.
。[ 특정 변수 ]: 특정 변수가 변경시마다 콜백함수 실행.
- React에서
axios를 통해HTTP Request의Response로 배열객체를 가져와서State변경함수를 통해State값으로 설정 후State배열.map()JSX코드로 표현 시TypeError: State배열.map is not a function으로 에러가 발생하는 경우
。원인 : 초기State를 설정한React Component를 렌더링 시State값의 초기값이null로 설정되어있으므로,JSX코드내부에 구현된State배열.map()이 해당값을 인식하지 못한다.
▶JSX코드에서{ State배열 && State배열.map() }을 정의하여State배열에 값이 들어왔을때map함수가 작동되도록 설정.
React Application에서Application Server에DELETE HTTP Request를 전송하는API호출을 통해 DB의 데이터를 삭제하는 기능 구현하기
。React Application에서DELETE /pg/jpa/users/{id}전송 시Spring에서 수신하여Spring JPA를 통해PostgreSQL DB의 특정 데이터를 삭제
- Spring Controller Method
@DeleteMapping(path="/pg/jpa/users/{id}")
    public ResponseEntity<Void> DeleteUserById(@PathVariable int id){
        // JpaRepository를 구현한 Service Class의 JpaRepository객체.deleteById() Method 활용.
        pgservice.DeletePGUser(id);
        return ResponseEntity.noContent().build();
    }
。
React에서DELETE를 수행하기위한URL Parameter를 포함한 API호출 시Spring JPA에서Mapping이 된DB Table과DB Entity를 통하여JpaRepository instance를 이용해DB Table의 data 삭제를 수행.
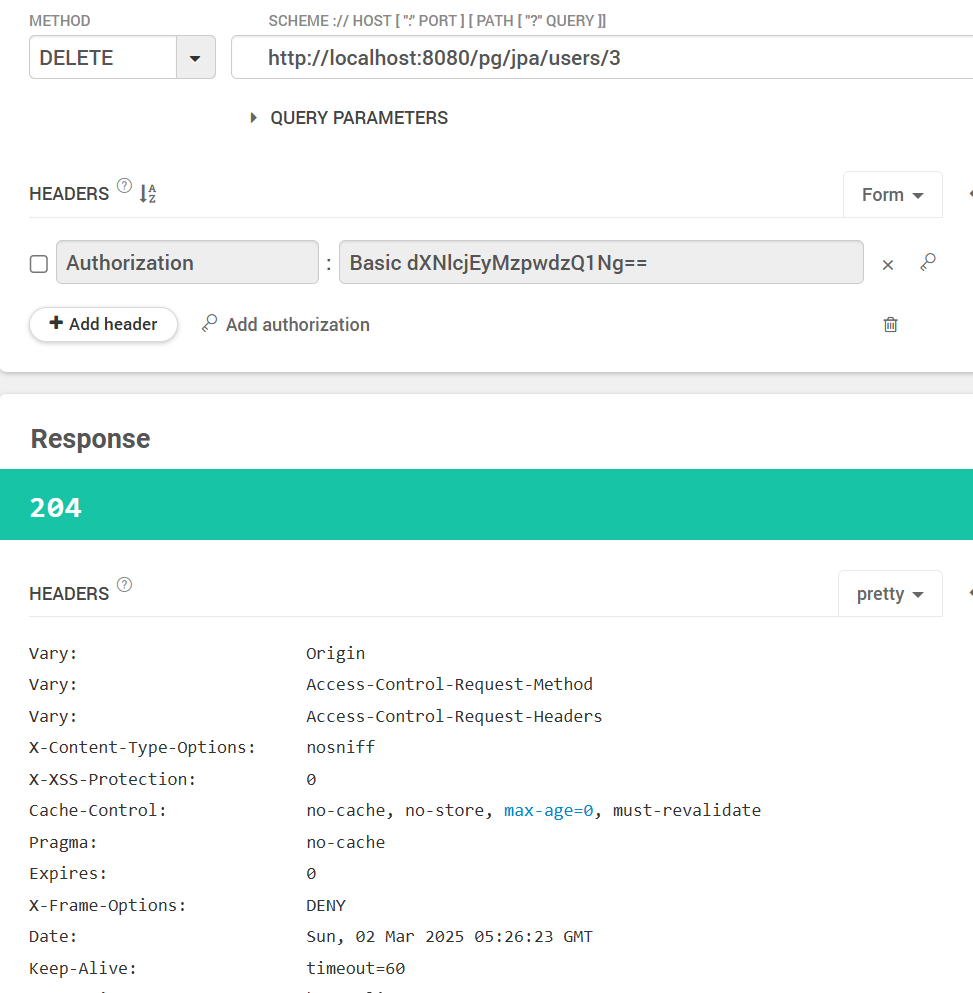
。이때Spirng에서PostgreSQL DB에 대해Spring JPA를 통해DELETE작업을 수행한 이후ResponseEntity instance를 생성 및HTTP 204Status Code를 설정 후Controller Method의 반환값으로 설정하여HTTP Response를React로 반환.
▶Talend API Tester로 Test할 경우@DeleteMapping으로 Mapping된 URL로 API호출 시HTTP 204이 설정된HTTP Response를 반환.
- 특정 DB Table의 API호출을 수행하는
Axios를 포함하는JS파일에DELETE HTTP Request를 전송하는 API 호출을 수행하는Axios함수 구현하기.// TodoApiService.js import axios from 'axios' // baseURL이 구현된 Axios instance 생성 const apiClient = axios.create({ baseURL : "http://localhost:8080" }) // Application에 참조할 데이터를 HTTP Request를 전송하여 API호출하는 함수 export const retrieveDataApi = () => apiClient.get(`/pg/jpa/users`); export const deleteDataByIdApi = (id) => apiClient.delete(`/pg/jpa/users/${id}`);。
TodoApiService.js의base URL이 설정되어 생성된Axiosinstance를 이용하여Spring Application의@DeleteMapping으로 Mapping된 URL로id를 포함하여 API호출을 수행하는 화살표함수 생성.
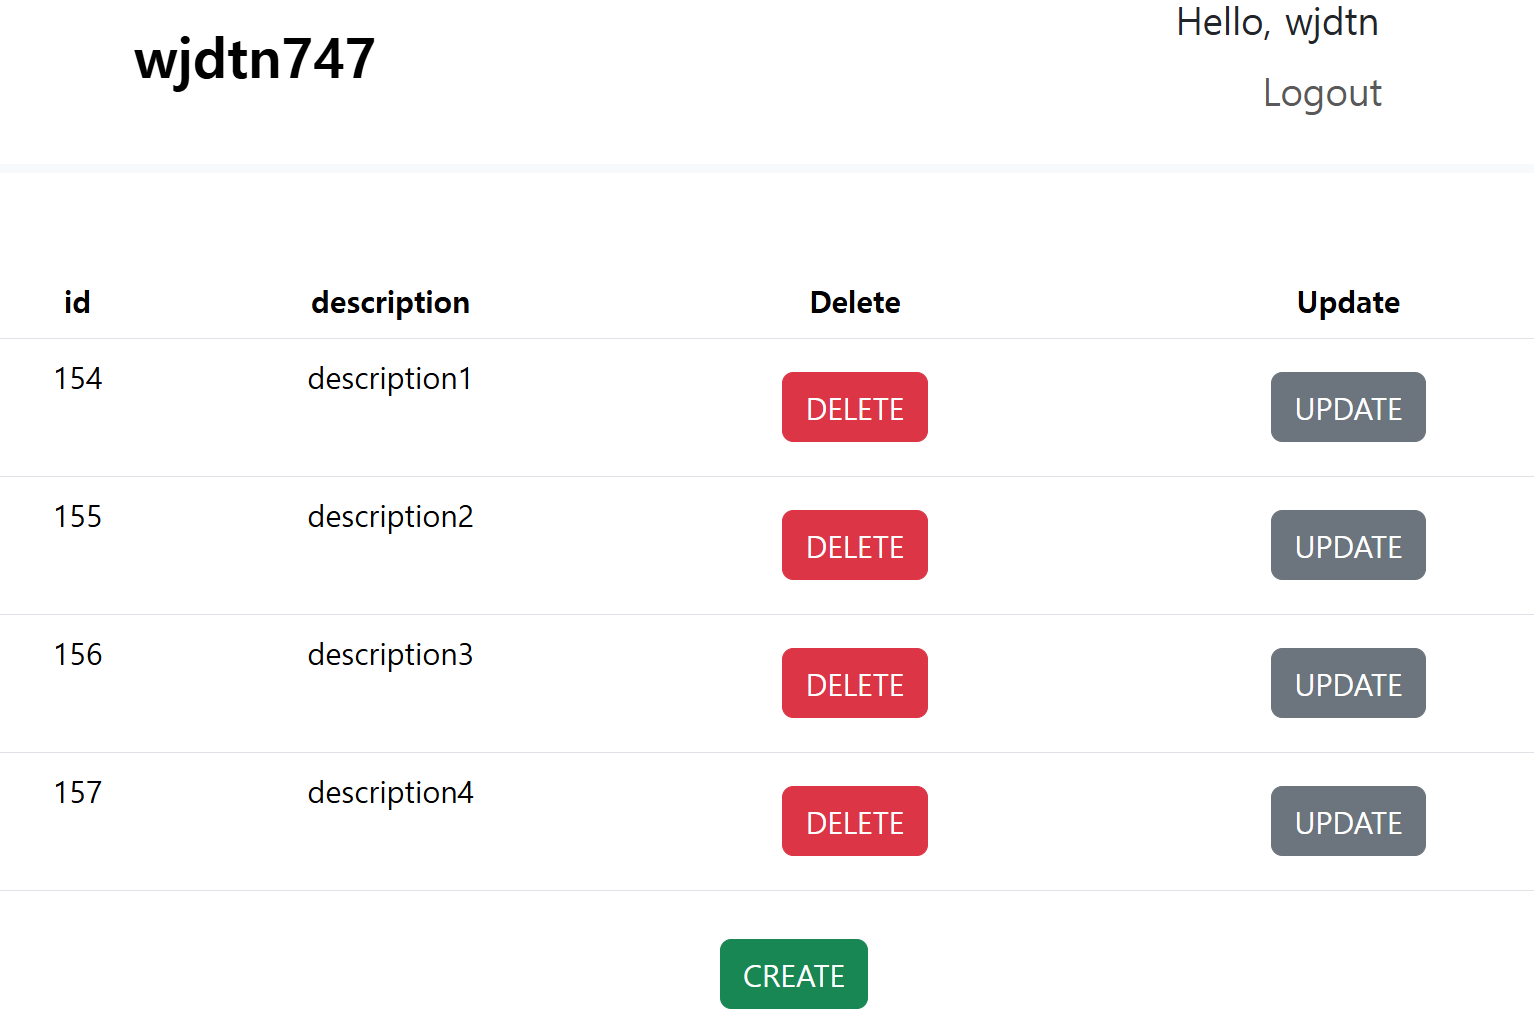
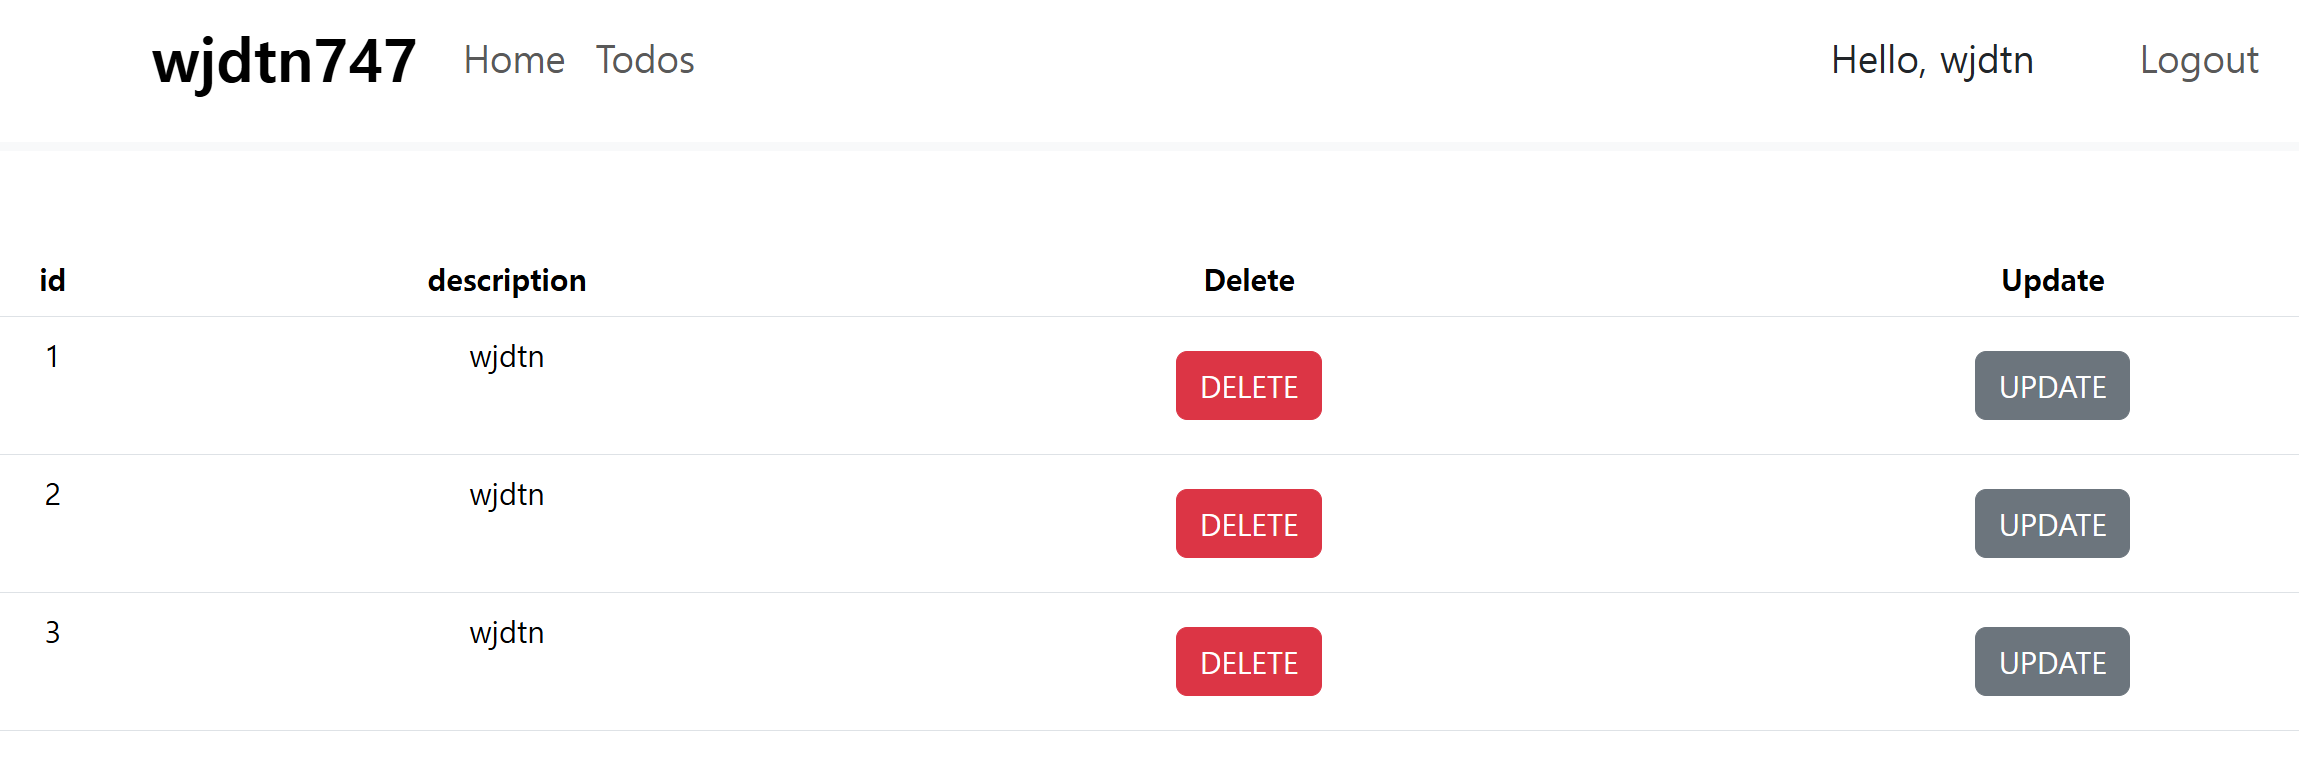
ListTodosComponent에서JSX코드로 표현된 DELETE버튼을 누르면 API호출을 통해 삭제를 수행 후 다시 렌더링하여 표현
。JSX코드에서배열.map(콜백함수)로<table>구현 시 해당 배열요소의 변수값을 활용하여onClick등의 이벤트에 사용하는 방법 :화살표함수{ todos && todos.map( (todo)=> (<tr key={todo.id}> <td>{todo.id}</td> <td>{todo.birth_date}</td> <td>{todo.user_name}</td> <td><button className="btn btn-danger" onClick={ ()=>{deleteState(todo.id)} }>DELETE</button></td> </tr> ) ) }。
배열.map()함수가 각 배열요소마다 return하는JSX요소의onClick에 정의된 함수의 매개변수로 해당 배열요소의 변수값을 참조하여 전달.
▶ 버튼을 누를 경우 전달된 변수값(id)를DELETE API호출 기능이 정의된 함수로 전달하여 삭제를 수행.
。<table>의<tr>요소의 자식으로<button>등의 요소로 직접 설정할 수 없으며,<tr><td><button/></td></tr>으로, 계보의 중간에<td>를 경유하여 설정.import { deleteDataByIdApi } from './api/TodoApiService.js' const [todos,setTodos] = useState([]); // useEffect(콜백함수)를 구현하여 해당 콜백함수가 // Component가 Rendering된 후 실행되도록 설정. useEffect( () => refreshState(),[todos] ) // id를 전달하여 Axios -> Spring -> DB로 데이터를 삭제한 후 HTTP Response로 전달. function deleteState(id){ deleteDataByIdApi(id) .then((response)=>{ console.log(response) refreshState() }) .catch((error)=>{console.log(error)}) .finally(()=>{console.log("실행완료")}) }。
TodoApiService.js에서 정의된deleteDataByIdApi(id)를 import하여JSX코드에서 전달할 매개변수를 정의 후API호출을 통해 반환될HTTP Response에 대해CallBack Method정의.
▶Promise객체.then( ()=>{ refreshState() } )를 설정하여 삭제가 완료될 경우 다시 데이터를 조회하는 기능 추가.
▶ 또는useEffect(콜백함수, 의존성배열)에서 해당state변수를 의존성배열에 추가하여 state변수 변화 발생 시 데이터를 조회하는useEffect Hook를 설정.import { retrieveDataApi , deleteDataByIdApi } from './api/TodoApiService.js' import { useState , useEffect } from 'react' export default function ListTodosComponent(){ const [todos,setTodos] = useState([]); const [message,setMessage]= useState(null); // useEffect(콜백함수)를 구현하여 해당 콜백함수가 // Component가 Rendering된 후 실행되도록 설정. useEffect( () => refreshState(),[] ) // Axios -> Spring -> DB에서 데이터를 가져와서 HTTP Response로 전달. function refreshState(){ retrieveDataApi() .then((response)=>{ console.log(response.data) setTodos(response.data) }) .catch((error)=>{console.log(error)}) .finally(()=>{console.log("실행완료")}) } // id를 전달하여 Axios -> Spring -> DB로 데이터를 삭제한 후 HTTP Response로 전달. function deleteState(id){ deleteDataByIdApi(id) .then((response)=>{ console.log(response) setMessage(id) refreshState() }) .catch((error)=>{console.log(error)}) .finally(()=>{console.log("실행완료")}) } return( <div className="container-fluid"> { message && <div className="alert alert-warning">{`Successfuly Deleted ${message}`}</div> } <table className="table"> <thead> <tr> <th>id</th> <th>birthDate</th> <th>name</th> <th>Delete</th> </tr> </thead> <tbody> { todos && todos.map( (todo)=> (<tr key={todo.id}> <td>{todo.id}</td> <td>{todo.birth_date}</td> <td>{todo.user_name}</td> {/* onClick={ 함수 }에 화살표함수 정의 시 해당 map함수의 배열요소의 변수를 참조 가능. */} <td><button className="btn btn-danger" onClick={ ()=>{deleteState(todo.id)} }>DELETE</button></td> </tr> ) ) } </tbody> </table> </div> ) }
。<td>에 비해<th>로 강조된 제목.
。DELETE버튼을 누를 경우, 화살표함수를 통해 해당 데이터의id요소를 포함하여API호출을 수행하여Axios-Spring JPA-PostgreSQL을 거쳐서 해당 행 데이터의 삭제가 수행 및ResponseEntity를 통한HTTP 204가 설정된HTTP Response가 React로 전달됨.
ResponseEntity<Type>:Type:HTTP Response Body에 포함될 Data type
。Spring Framework에서HTTP Response를 다룰 때 사용하는 객체.
▶HTTP Status Code,Header,HTTP Response Body를 포함하여 임의 설정이 가능.
。Controller Method의 반환값으로ResponseEntityInstance를 설정 시Spring이 자동으로JSON등의HTTP Response를 생성후 반환.
▶@ResponseBody를 따로 선언할 필요가 없다.
。REST API에서 에러처리,Status Code,Custom Response를 쉽게 수행.
ResponseEntity.ok(Response Body내용):
。ResponseEntity의HTTP 200 OKStatus Code와 함께Response Body내용의"문자열"을 반환.
ResponseEntity.noContent():
。HTTP 204 No Content설정.
▶204: Client의HTTP Request를 처리했으나,HTTP Response할 데이터가 존재하지 않음.
ResponseEntity.badRequest():
。HTTP 400 Bad Request설정.
ResponseEnity.notFound():
。HTTP 404 Not Found설정.
ResponseEntity.internalServerError():
。HTTP 500 Internal Server Error설정.
ResponseEntity.status(HttpStatus객체.CREATED):
。ResponseEntity의HTTP Status Code를 설정.
▶HttpStatus.CREATED:201
ResponseEntity.headers(HttpHeaders객체):
。HttpHeaders객체를 Custom한 후 추가하여 Custom Header 추가 가능.
ResponseEntity.body(Response Body내용):
。ResponseEntity의Response Body에 들어갈 내용을 정의.
ResponseEntity.build():
。ResponseEntity의 instance를 생성.
▶ResponseEntity.notFound().build():HTTP 404 Not Found설정된ResponseEntity생성.
React Context를 활용하여 로그인한 계정명을 다른React Component에도 표시하기.
。AuthContext.js에 계정명을 저장할State변수를 생성.
▶<Context객체.Provider>을 통해 해당State변수값을 다른React Component로Context객체로서 전달.import { createContext, useState , useContext} from 'react' export const AuthContext = createContext(); export const ExportContext = () => useContext(AuthContext) export default function AuthProvider({ children }){ const [ AuthState , setAuthState ] = useState(false); // 계정명을 저장할 State const [username,setUsername] = useState(null) // Login Component에서 하드코딩 Login Logic만 구현. function logIn(username, password){ if (username==="wjdtn" && password==="12345"){ setAuthState(true) // State에 계정명을 저장. setUsername(username) return true } else { setAuthState(false) return false } } // Logout Logic 구현 function Logoutfunction(){ setAuthState(false); } return( // username State를 추가로 Context객체로서 다른 Component로 전달. <AuthContext.Provider value={ {AuthState,logIn,Logoutfunction,username}}> {children} </AuthContext.Provider> ) }。이후
HeadComponent에서 기존Context객체를 전달하여 `useContext() 를 통해State를 포함하여 생성된Context객체를 import하여 해당Context객체로 전달된username state를navigation bar`에 표현.import {ExportContext} from './security/AuthContext' export function HeaderComponent(){ const AuthContext = ExportContext()<ul className="navbar-nav"> { AuthContext.AuthState && <li className="nav-item fs-5 mt-2 me-5">Hello, {AuthContext.username}</li>}。로그인 상태에서는 지시되지않고, 로그인 후에 지시됨.

PostgreSQL DB에서postgres_user와 외래키로 Mapping되어있으며Post를 저장할postgres_post를 생성 및 조회, 삭제하는 기능을 구현하여 Refactioring.
Spring과 PostgreSQL DB 연결
。postgres_postTable 생성은Spring JPA를 통해DB Entity와 Mapping하여 생성.
▶@ManyToOne,@OneToMany로postgres_user와의 외래키 설정.
DB Entity정의
。@Entity를 선언하여PostgreSQL DB와 Mapping하는DB Entity생성 Spring JPA - Entity 관련 정의
。@ManyToOne,@OneToMany을 활용하여 외래키 역할을 수행하는 field 정의. DB Entity간 양방향 설정import com.fasterxml.jackson.annotation.JsonIgnore; import jakarta.persistence.*; import java.time.LocalDate; @Entity public class PostgresPost { @Id @GeneratedValue private Integer id; private String description; private LocalDate targetDate; @ManyToOne(fetch= FetchType.LAZY) @JsonIgnore private PostgresUser user; public PostgresPost() {} public PostgresPost(Integer id, String description, PostgresUser user) { this.id = id; this.description = description; this.user = user; } public Integer getId() { return id; } public void setId(Integer id) { this.id = id; } public String getDescription() { return description; } public void setDescription(String description) { this.description = description; } public PostgresUser getUser() { return user; } public void setUser(PostgresUser user) { this.user = user; } public LocalDate getTargetDate() { return targetDate; } public void setTargetDate(LocalDate targetDate) { this.targetDate = targetDate; } }// PostgresUser.java import com.fasterxml.jackson.annotation.JsonIgnore; import com.fasterxml.jackson.annotation.JsonProperty; import jakarta.persistence.*; import jakarta.validation.constraints.Past; import jakarta.validation.constraints.Size; import java.time.LocalDate; import java.util.List; @Entity public class PostgresUser { @Id @GeneratedValue Integer id; @JsonProperty("username") @Size(min=2, message = "Name should have at least 2 characters.") String name; @JsonProperty("birth_date") @Past(message="Birth Date should be in the past.") LocalDate birthDate; public List<PostgresPost> getPosts() { return posts; } public void setPosts(List<PostgresPost> posts) { this.posts = posts; } @OneToMany(mappedBy="user") @JsonIgnore private List<PostgresPost> posts; public PostgresUser(){} public PostgresUser(Integer id, String name, LocalDate birthDate) { this.id = id; this.name = name; this.birthDate = birthDate; } public Integer getId() { return id; } public String getName() { return name; } public LocalDate getBirthDate() { return birthDate; } public void setId(Integer id) { this.id = id; } public void setName(String name) { this.name = name; } public void setBirthDate(LocalDate birthDate) { this.birthDate = birthDate; } }。
idfield의 경우Wrapper Class의Integertype으로 설정.
▶int와 달리Wrapper Class객체이므로Null값을 저장할 수 있다.
▶DB에서pk가 없거나 아직 할당되지 않은 상태를 지시하기 위해NULL을 사용할 수 있게 설정.
Integer vs int
int와Integer차이
。Java에서 둘다 정수를 다루지만, 기본 자료형(primitive type)과wrapper class라는 차이가 존재.
int
。기본자료형 (primitive type)
。null값을 가질 수 없다.
Integer
。java.lang.IntegerClass 객체
▶int를 객체로 감싼Wrapper Class객체
▶new키워드로 선언하여 객체 생성.
。null값을 저장 가능.
▶DB Entity의primary key로 활용.
- Post 조회, 삭제기능 구현
。Post의 조회는react에서 로그인한 계정이름을Context를 통해Axios에 포함하여Spring으로 API호출 시JpaRepository<Entity Class,pk type>inteface에 해당 계정이름으로Spring JPA를 통해 데이터를 찾는 Custom Method를 작성하여 해당하는PostgresUserinstance를 가져온 후 해당 instance에서 자식으로서 외래키로 연결된PostgresPostinstance를 List로서React에 반환.- 로그인한 계정명으로 DB의 데이터를 조회하는 Custom Method 생성
。JpaRepository<Entity Class,pk type>을 상속한 interface에 Custom Method 작성 시 명명규칙을 잘 지켜야한다. Spring Data JPA - Custom Method
▶ 제대로 작성안할 경우, 오류발생할 수 있음.import org.springframework.data.jpa.repository.JpaRepository; import java.util.Optional; public interface PgRepository extends JpaRepository<PostgresUser,Integer> { Optional<PostgresUser> findByname(String name); }。Custom Method를 통해 return 되는 임의의 데이터의 type을 정의 가능.
▶ 임의로Optional<PostgresUser>로 설정.
PostgresPost의 DELETE 용도의JpaRepository<Entity Class,pk type>상속 interface 구현import org.springframework.data.jpa.repository.JpaRepository; public interface pgPostRepository extends JpaRepository<PostgresPost,Integer> { }
Spring JPA의Business Logic을 구현을 위한@ServiceSpring Bean에DB와 상호작용하는 Class 생성
。JpaRepository<Entity Class,pk type>상속 interface의 instance를 생성 후Constructor based Injection을 수행하여 의존성 주입.import java.util.List; import java.util.Optional; import org.springframework.stereotype.Service; @Service public class pgService { // JpaRepository instance PgRepository pgRepository; pgPostRepository pgPostRepository; // @Autowired 생략 가능한 Constructor Based Dependency Injection public pgService(PgRepository pgRepository, pgPostRepository pgPostRepository) { this.pgRepository = pgRepository; this.pgPostRepository = pgPostRepository; } // Read Post by username public Optional<PostgresUser> GetPgUserByUsername(String username) { return pgRepository.findByname(username); } // Delete Post public void DeletePGPost(Integer id) { pgPostRepository.deleteById(id); } }。
GetPgUserByUsername(String username):PgRepository에 구현된Custom Method로 username를 매개변수로 받아PostgresUser의 조회를 수행후Optional<PostgresUser>로 반환.
。DeletePGPost(Integer id): id를 매개변수로 받아 해당 id의PostgresPost의 데이터를 삭제를 수행.
- Spring의 Controller Class에
Post를 조회 및 삭제하는 API 생성
。JPA Business Logic을 정의한 Spring Bean의 instance를 생성 후 생성자기반 의존성주입 수행하여 JPA Method 활용.import jakarta.validation.Valid; import org.springframework.http.ResponseEntity; import org.springframework.web.bind.annotation.*; import org.springframework.web.servlet.support.ServletUriComponentsBuilder; import java.net.URI; import java.util.List; import java.util.Optional; @RestController public class PgController { // JPA Business Logic을 사전에 정의한 Spring Bean pgService pgservice; // @Autowired 생략 가능한 Constructor Based Dependency Injection public PgController(pgService pgservice) { this.pgservice = pgservice; } @GetMapping(path="/pg/jpa/users/{username}/posts") public List<PostgresPost> GetPostByUser(@PathVariable String username){ // JpaRepository를 구현한 Service Class에서 JpaRepository객체.커스텀메소드 활용. // 가져온 데이터는 Optional<PostgresUser>로 return. Optional<PostgresUser> user = pgservice.GetPgUserByUsername(username); if(user.isEmpty()){ // 해당 id가 존재하지 않는 경우 발생. throw new UserNotFoundException("username :" + username); } else{ // 자식 DB Table로서 외래키로 연결된 PostgresPost의 instance를 getter를 통해 List로서 반환. return user.get().getPosts(); } } @DeleteMapping(path="/pg/jpa/posts/{id}") public ResponseEntity<Void> DeletePostByUserId(@PathVariable int id){ // JpaRepository를 구현한 Service Class의 JpaRepository객체.deleteById() Method 활용. pgservice.DeletePGPost(id); return ResponseEntity.noContent().build(); } }
React에서 해당 API를 호출하는Axios구현// TodoApiService.js import axios from 'axios' // baseURL이 구현된 Axios instance 생성 const apiClient = axios.create({ baseURL : "http://localhost:8080" }) // Application에 참조할 데이터를 HTTP Request를 전송하여 API호출하는 함수 export const retrieveDataApi = (username) => apiClient.get(`/pg/jpa/users/${username}/posts`); export const deleteDataByIdApi = (id) => apiClient.delete(`/pg/jpa/posts/${id}`);
- 해당
Axios API를 활용하는React Component구현
。PostgresPost의 데이터는username으로 조회하므로,LoginComponent에서 로그인하여State변수로 계정명을 저장하는React Context활용하여 매개변수로 전달.import { retrieveDataApi , deleteDataByIdApi } from './api/TodoApiService.js' import { useNavigate } from 'react-router-dom'; import { ExportContext } from './security/AuthContext.js' import { useState , useEffect } from 'react' export default function ListTodosComponent(){ const [todos,setTodos] = useState([]); const [message,setMessage]= useState(null); // Context를 통해 로그인한 계정명을 가져온다. const context = ExportContext(); const username = context.username; const navigate = useNavigate() useEffect( () => refreshState(),[] ) // Axios -> Spring -> DB에서 데이터를 가져와서 HTTP Response로 전달. function refreshState(){ retrieveDataApi(username) .then((response)=>{ console.log(response.data) setTodos(response.data) }) .catch((error)=>{console.log(error)}) .finally(()=>{console.log("실행완료")}) } // id를 전달하여 Axios -> Spring -> DB로 데이터를 삭제한 후 HTTP Response로 전달. function deleteState(id){ deleteDataByIdApi(id) .then((response)=>{ console.log(response) setMessage(id) refreshState() }) .catch((error)=>{console.log(error)}) .finally(()=>{console.log("실행완료")}) } return( <div className="container-fluid"> { message && <div className="alert alert-warning">{`Successfuly Deleted ${message}`}</div> } <table className="table"> <thead> <tr> <th>id</th> <th>description</th> <th>Delete</th> </tr> </thead> <tbody> { todos && todos.map( (todo)=> (<tr key={todo.id}> <td>{todo.id}</td> <td>{todo.description}</td> <td><button className="btn btn-danger" onClick={ ()=>{deleteState(todo.id)} }>DELETE</button></td> </tr> ) ) } </tbody> </table> </div> ) }
。정상적으로 특정PostgresUser의 instance와 연결된PostgresPostinstance가 조회됨.
React Application에서Application Server에PATCH HTTP Request를 전송하는 API호출을 통해 DB의 데이터를UPDATE하는 기능 구현
UPDATE를 수행하는 Component로 redirect하는 기능 구현
。ListTodosComponent에서UPDATE버튼을 누를 경우 해당 버튼의id를URL Parameter로서 포함하여useNavigate(URL) Hook를 통해 redirect 하는 기능 구현.// ListTodosComponent.jsx import { useNavigate } from 'react-router-dom'; const navigate = useNavigate() function updateState(id){ navigate(`/todoupdate/${id}`) } // jsx 코드 <td><button className="btn btn-secondary" onClick={ ()=>{updateState(todo.id)} }>UPDATE</button></td>。
JSX코드에서 화살표함수를 통해배열.Map(콜백함수)를 통해 렌더링되는 배열요소의 변수를 가져올 수 있다.
Container Component에서URL Parameter를 포함하여 redirecting 시 Update를 수행하는 Component로 Routing하기 위한<Route>구현
。해당<Route>는path="/URL/:변수명"를 선언하여useNavigate()에 의해URL Parameter를 포함하여 redirecting 시element의Component의useParams() Hook로 전달.// TodoApp.jsx <Route path="/todoupdate/:id" element={<AuthenticatedRoute> <TodoUpdateComponent/> </AuthenticatedRoute>}/>。
<AuthenticatedRoute>의 자식 Component로 설정하여 로그인 상태로서AuthContext.AuthState가true일때만 접근할 수 있도록 설정.
▶ 브라우저에서 URL을 입력해서 접근을 못하도록 설정.
DB에서 특정User의 특정 Post 데이터를GET하는AxiosAPI 및 Spring에서 해당 조회 기능의 API 구현하기
。username과post id를 통해 특정Post의 데이터를 조회.// TodoApiService.js export const retrievePostByPostIdApi = (username,id) => apiClient.get(`/pg/jpa/users/${username}/posts/${id}`)// PgController.java @GetMapping(path="/pg/jpa/users/{username}/posts/{postid}") public PostgresPost GetPostByUser(@PathVariable String username, @PathVariable int postid){ Optional<PostgresUser> user = pgservice.GetPgUserByUsername(username); if(user.isEmpty()){ throw new UserNotFoundException("username :" + username); }else{ List<PostgresPost> posts = user.get().getPosts(); posts.removeIf(post->post.getId() != postid); // List<PostgresPost>에서 0번째 배열요소를 PostgresPost로 반환 return posts.get(0); } }▶
List<PostgresPost>로HTTP Response가 반환하는 경우,react의axios API의Promise객체는promise객체.then((response)=>{ response.data[0] }로서 인덱스를 기입하여HTTP Response Object를 받아야하며 그렇지 않을 경우undefined로 지정됨.
Todo의UPDATE를 수행하는 Component를 생성
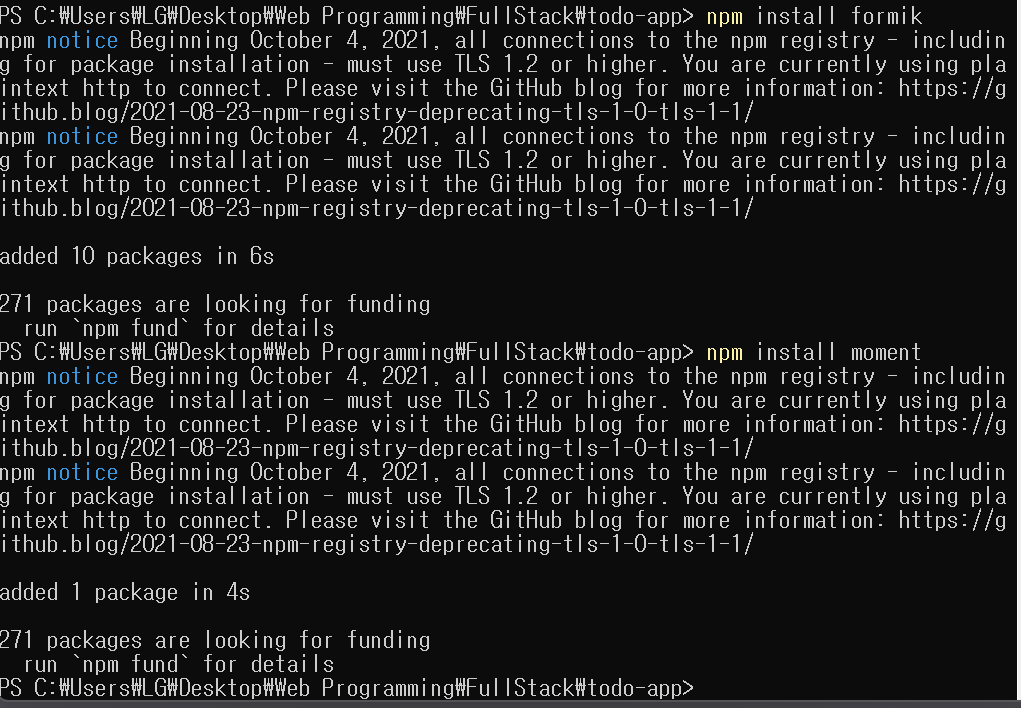
。formik,moment.js활용.
▶powershell에서React Project가 존재하는 directory에서npm install formik,npm install moment을 입력하여 dependency 정의
        // TodoUpdateComponent.jsx
import { useState , useEffect } from "react"
import { useParams } from "react-router-dom"
import { retrievePostByPostIdApi } from "./api/TodoApiService"
import { ExportContext } from "./security/AuthContext"
// Formik에서 <Formik> , <Field> , <Form> , <ErrorMessage> import.
import { Formik, Field ,Form, ErrorMessage } from "formik"
export default function TodoUpdateComponent(){
  const { id } = useParams()
  const context = ExportContext();
  const username = context.username;
  const [ description , setDescription ] = useState("");
  const [ targetdate , setTargetdate ] = useState("");
  useEffect( () => retrievePostById() , [id] );
  // Axios API를 통해 HTTP Response를 Promise로 받아서 Callback Method를 통해 State에 초기값용도의 Update할 데이터를를 지정
  function retrievePostById(){
    retrievePostByPostIdApi(username,id)
    .then(response =>{
      setDescription(response.data.description)
      setTargetdate(response.data.targetDate)
    })
    .catch((error)=>{console.log(error)})
    .finally(()=>{
      console.log("실행완료")})
  }
  // 입력필드 Error 발생 시 <ErrorMessage>에 표현될 Error Message 작성
  function validateForForm(value){
    let errors = {
      // 입력필드name : "Error Message" 를 담을 빈 배열
    }
    // Validation Logic 정의
    if (value.description.length < 5 ){
      // Error Message를 errors 배열에 정의
      errors.description = 'Enter at least 5 characters.'
    }
    if (value.targetdate == null){
      errors.targetdate = 'Enter a targetdate'
    }
    return errors
  }
  return (
    <div className="container">
    <h1 className="mb-3">Enter Todo Details</h1>
    <div>
      {/* <Formik> 정의 */}
      <Formik initialValues={ { description, targetdate } }  enableReinitialize={true}
      onSubmit = {(value)=>{console.log(value)}}
      validate = {validateForForm}
      validateOnChange = {false}>
        {
          (props)=>(
            <Form>
              {/* <Field name="description">에서 Error 발생 시 validate함수에서 정의된 ErrorMessage 전달. */}
              <ErrorMessage
              name = "description"
              component = "div"
              className = "alert alert-warning"/>
              {/* <Field name="targetdate">에서 Error 발생 시 validate함수에서 정의된 ErrorMessage 전달. */}
              <ErrorMessage
              name = "targetdate"
              component = "div"
              className = "alert alert-warning"/>
              {/* className="form-group"의 경우 <label>과 <Field>의 한쌍을 묶는게 일반적.*/}
              <fieldset className="form-group m-2">
                <label>Description</label>
                <Field type= "text" className="form-control" name="description"/>
              </fieldset>
              <fieldset className="form-group">
                <label>TargetDate</label>
                <Field type="date" className="form-control" name="targetdate"/>
              </fieldset>
              <div>
                <button className="btn btn-success" type="submit">Save</button>
              </div>
            </Form>
          )
        }
      </Formik>
    </div>
    </div>
  )
};
Formik활용
import { Formik, Form , Field , ErrorMessage } from "formik"
。Formik을 사용할 경우useState() Hook를 통한 입력 Field의onChange이벤트를 통한 mapping을 일일이 수행 할 필요없이 해당Formik을 사용하여Form을 동기화하여 쉽게 관리할 수 있는 장점이 존재.
。<Formik></Formik>태그를 정의 및 내부에 중괄호{ }를 구현하여 jsx코드로서의<Form>태그요소를 반환하는 함수를 작성.
▶ 함수로<Form>태그 요소 반환 시 소괄호( JSX 태그요소 )로 반환.
。<Formik initialValues={ { 변수 } }>을 설정하여Form element의 초기값으로 사용.
▶<Field>의name속성의 변수명과<Formik>의initialValues속성의 변수명이 동일한 경우 binding되어 초기값이 표현됨.
▶<Field>에서name속성을 기반으로<input>의values,onChange,onBlur등의 속성을 자동으로 설정된다.
。<Formik enableReinitialize = { true } >을 설정하여<Formik>의 re-initialization을 허용.
。<Formik onSubmit={ 함수명 }>을 지정하여Form내부의<button type="submit">으로Form제출 시 작동할 함수 설정.
▶ 이때 함수의 매개변수 (values)에 입력된 데이터들이key-value의Objecttype으로 전달됨.
。Bootstrap:form-control , form-group
▶className="form-group"의 경우<label>과<Field>의 한쌍을 묶는게 일반적.// Formik에서 <Formik> , <Field> , <Form> import. import { Formik, Field ,Form } from "formik" <div> {/* <Formik> 정의 */} <Formik initialValues={ { description, targetdate } } {/* Form의 초기값 설정 */} enableReinitialize={true} {/* Formik의 재초기화 설정 */} onSubmit={ (values)=>{console.log(values)} } > {/* Form 제출 시 실행할 함수 설정 */} { (props)=>( <Form> {/* className="form-group"의 경우 <label>과 <Field>의 한쌍을 묶는게 일반적.*/} <fieldset className="form-group m-2"> <label>Description</label> <Field type= "text" className="form-control" name="description"/> </fieldset> <fieldset className="form-group"> <label>TargetDate</label> <Field type="date" className="form-control" name="targetdate"/> </fieldset> <div> <button className="btn btn-success" type="submit">Save</button> </div> </Form> ) } </Formik> </div>
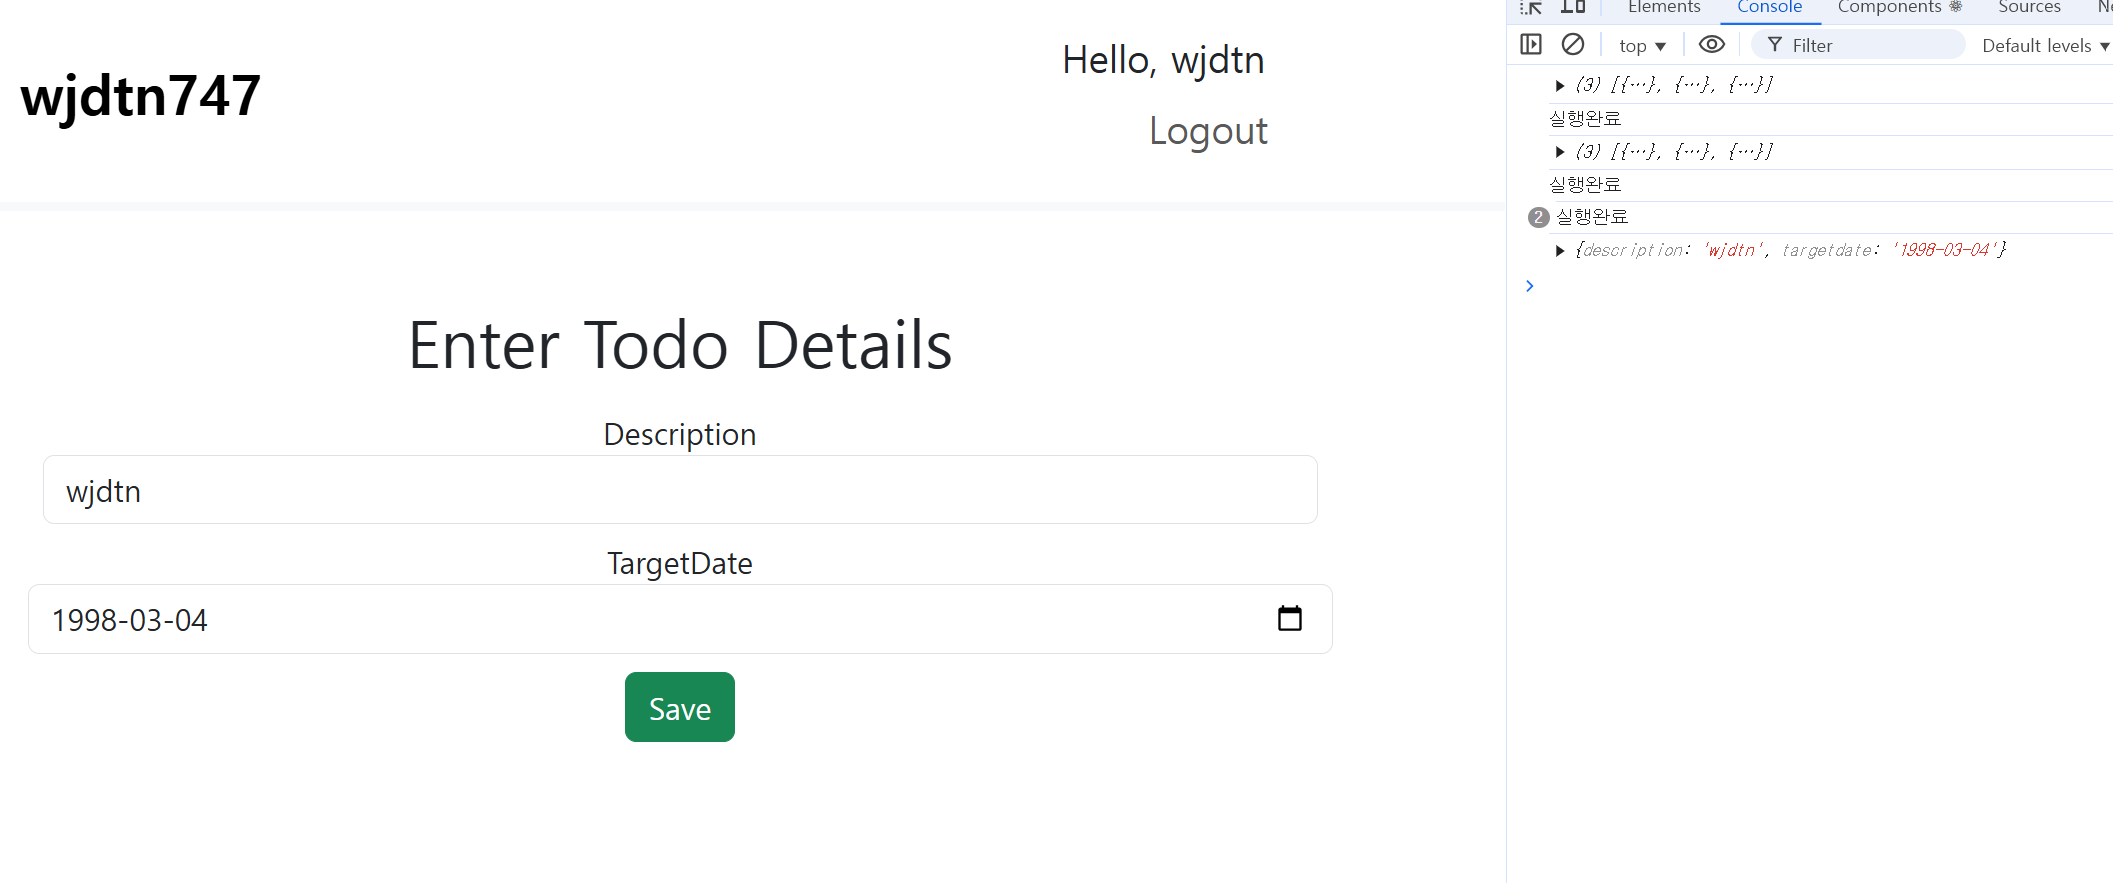
。Description,TargetDate<Field>의name속성을 통해<Formik>의initialValues={ { description, targetdate } }속성에 의하여 초기값이 자동으로 정의됨.
。Save 버튼을 통해Form제출 시<Formik>의onSubmit={ 함수 }속성의 함수가 실행되어object객체로서 값이 전달됨.
Formik의Validation활용
。<Formik>에validate = { Validation 수행 함수 }구현 시 에러가 발생하는경우,onSubmit속성의 함수가 작동되지않고, validate 속성의 함수가 작동됨.
▶ 이때,validate함수에{ 입력필드name : Error Message , ... }를 포함하여 return 시,<ErrorMessage name="입력필드name" />를 통해 표현됨.
。validate속성의 함수는onSubmit속성의 함수와 동일하게 매개변수에는 입력된 데이터들이{ key : value }의Object객체로서 전달되므로, 입력Field에서 전달된 값을 이용하여Validation수행.
。<Formik>에서validateOnChange = { false }설정.// Formik에서 <Formik> , <Field> , <Form> , <ErrorMessage> import. import { Formik, Field ,Form, ErrorMessage } from "formik" // 입력필드 Error 발생 시 <ErrorMessage>에 표현될 Error Message 작성 function validateForForm(value){ let errors = { // 입력필드name : "Error Message" 를 담을 빈 배열 } // Validation Logic 정의 if (value.description.length < 5 ){ // Error Message를 errors 배열에 정의 errors.description = 'Enter at least 5 characters.' } if (value.targetdate == null){ errors.targetdate = 'Enter a targetdate' } return errors } <div> {/* <Formik> 정의 */} <Formik initialValues={ { description, targetdate } } enableReinitialize={true} onSubmit = {(value)=>{console.log(value)}} validate = {validateForForm} {/* Validation검증함수 설정 */} validateOnChange = {false}> {/* 입력Field의 onChange 이벤트 off */} { (props)=>( <Form> {/* <Field name="description">에서 Error 발생 시 validate함수에서 정의된 ErrorMessage 전달. */} <ErrorMessage name = "description" component = "div" className = "alert alert-warning"/> {/* <Field name="targetdate">에서 Error 발생 시 validate함수에서 정의된 ErrorMessage 전달. */} <ErrorMessage name = "targetdate" component = "div" className = "alert alert-warning"/> </Form> ) } </div>
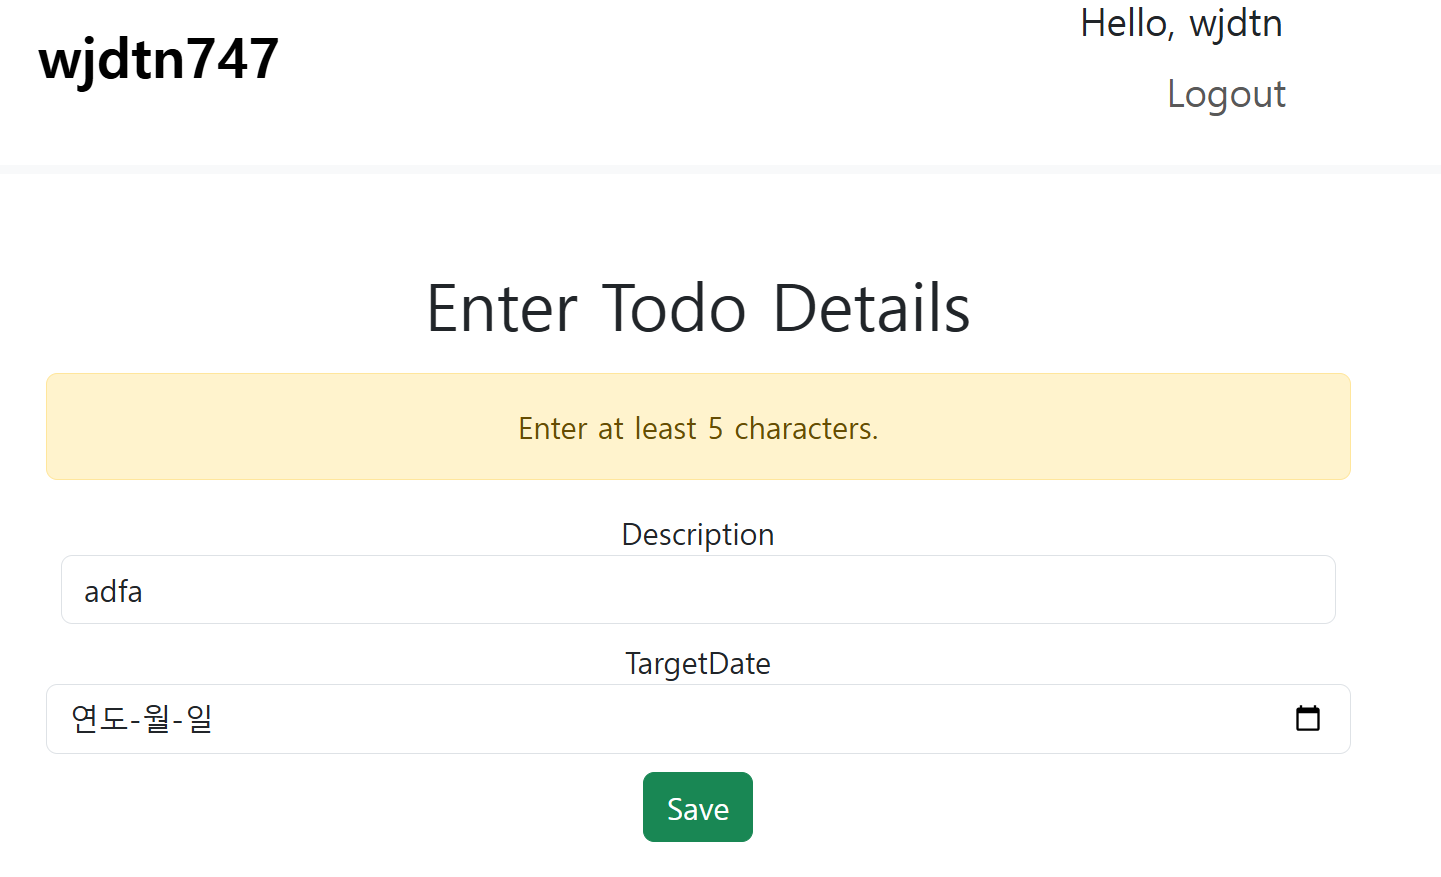
。<Form>제출 시validate속성의 함수를 우선 실행 후validation에 이상이 없을 경우,onSubmit속성의 함수를 실행
▶validate속성의 함수에Validation logic으로 정의된 입력Field에 Error가 발생할 경우, 임의로 정의한 ErrorMessage를 return하면서<ErrorMessage name="에러발생입력Fieldname">에 ErrorMessage를 표시하고,onSubmit속성의 함수를 실행하지 않는다.
Formik:
。React에서Form을 쉽게 관리할 수 있도록 도와주는 library.
▶form의 입력값관리, Validation 검사 등을 간편하게 수행가능.
。powershell에서React Project가 존재하는 directory에npm install formik을 입력하여 dependency 정의.
。useState() Hook를 통한 입력 Field의onChange이벤트를 통한 mapping을 일일이 수행 할 필요없이 해당Formik을 사용하여Form을 동기화하여 쉽게 관리할 수 있는 장점이 존재.
▶ 그러나, typing할때마다 validation을 수행하면 좋지 않으므로,validateOnChange={false}로 이벤트 종료.
Formik특징
State관리
React의useState() Hook없이도Form의 입력값은 쉽게 관리 가능.
Validation검증 :
Form의 유효성을 검증하는 역할을 수행.
Form Submit
onSubmit을 통해 쉽게 처리가능.
Formik의 Component 종류
<Formik>:
。<Form>의 상태를 관리하는 Container 역할을 수행.
▶<Form>의 초기값, Validation 검증,onSubmit함수등을 설정 가능.
<Formik>주요 속성
initialValues:<Form>의 초기값 설정
。<Field type="range">를 사용하기 위해서는 해당<Field>에name="변수명"을 지정 후initialValues={{변수명:초기값}}으로 초기값을 지정해야한다.
onSubmit={ 함수 }:
。<Form>제출 시 실행할 함수.
。함수의 매개변수에는 입력된 데이터들이{ key : value }의Object객체로서 전달됨.
validate={ Validate함수 }:
。사용자 임의의Validation검증을 정의.
▶validate={ validate함수 }로 함수 구현 시 에러가 발생하는경우onSubmit속성의 함수가 작동되지않고,validate속성의 함수가 작동됨.
。onSubmit속성과 동일하게validate속성에서 정의되는 함수의 매개변수에는 입력된 데이터들이{ key : value }의Object객체로서 전달됨.
。해당validate함수가 특정 입력필드의 ErrorMessage를 return하는 경우,<ErrorMessage name="입력필드name">를 통해 표현이 가능.
enableReinitialize = { boolean }:<Formik>의 re-initialization을 설정.
validateOnChange = { boolean }:Formik의<Field>에 typing을 수행할때마다onChange이벤트를true,false설정.
▶ typing 할때마다에 일일이 검증을 수행하면 안좋으므로, 보통false로 설정한다.
<Form>:
。HTML의<form>과 동일하지만<Formik>과 자동으로 연결.
▶<Formik>에서onSubmit을 정의한 경우,<Form>에서onSubmit을 정의하지 않더라도<Formik>이 자동으로<Form>을 관리.
。<Field type="range">를 사용하기 위해서는 해당<Field>에name="변수명"을 지정 후initialValues={{변수명:초기값}}으로 초기값을 지정해야한다.
。formik의<Form>을 사용할 경우handleSubmit을 구현할 필요 없이 자동으로 동작.
<Field>:
。HTML의<input>과 동일한 입력Field 역할을 수행하지만,<Formik>과 자동으로 연결.
。formik의<Field>를 사용할 경우name속성을 기반으로<input>의values,onChange,onBlur등의 속성이 자동으로Formik에 의해 관리 및 설정된다.
<ErrorMessage>:
。Formik에서 Validation 검증 Error Message를 표시하는 Component.
▶ 특정 입력필드에서 Validation 검증에 실패 시 해당 Error Message를 자동으로 표시.
。<Formik>의validate함수의 Validation 검증을 정의해야 Error Message를 표현 가능.
。formik의<ErrorMessage>은<Field>의name속성을 기반으로 Error Message를 자동으로 가져온다.
▶<Formik validate={(value) => { { 입력필드name : "ErrorMessage" } } }>정의 및<ErrorMessage name="입력필드name">을 정의할 경우, 입력필드에서 오류 발생 시 해당 Error Message를 표현.
name="입력필드name":
。해당 입력필드에서 오류 발생 시validate함수에서 정의된Error Message를 표현.
component="div":
。<ErrorMessage>를 표현할 HTML 태그요소 정의
Moment.js
。Javascript에서 날짜와 시간을 쉽게 다룰 수 있도록하는 라이브러리.
▶ 그러나, 공식적으로는 비효율적이고 무거우므로 현재는Day.jslibrary로 대체됨.
。powershell에서React Project가 존재하는 directory에npm install moment을 입력하여 dependency 정의
- DB에 UPDATE를 수행하는
Business Logic구현하기
。@Service가 선언되어JpaRepository<EntityType,pk type>interface의 instance를 생성하여DB와 상호작용을 수행하는Business Logic이 구현하는 Class에 정의.// Update Post @Transactional public void updatePGPost(PostgresPost post){ // 기존 DB Entity를 넣을 경우, UPDATE를 수행한다. pgPostRepository.save(post); }。
JpaRepository객체.save(DBEntity)는INSERT와UPDATE를 수행.
▶ 기존DB Entity는UPDATE, 새로운DB Entity는INSERT
▶DELETE후INSERT를 수행하는 경우 동시성 문제가 발생하므로 주의.
- Spring Controller Method에서
@PutMapping을 활용하여 UPDATE를 수행하는 Controller Method 생성
。PostgresPost의 Update를 수행하기위헤Controller Method로 Mapping된 URL로 수정된PostgresPost의Content가HTTP Request Body로 전송 시Controller Method매개변수의@RequestBody로 Mapping. @RequestBody// Post의 Update를 수행하고 Update한 PostgresPost instance를 return. @PutMapping(path="/pg/jpa/users/{username}/posts/{postid}") public PostgresPost UpdatePostByUserId(@PathVariable String username, @PathVariable int postid, @RequestBody PostgresPost post){ // HTTP Request Body가 @RequestBody를 통해 변수에 Mapping되어 Update를 수행. pgservice.updatePGPost(post); return post; }
- DB에
CREATE를 수행하는Business Logic구현하기// Create Post @Transactional public void createPGPost(PostgresPost post){ // 새로운 DB Entity를 넣을 경우, INSERT를 수행한다. pgPostRepository.save(post); }
- Spring Controller Method에서
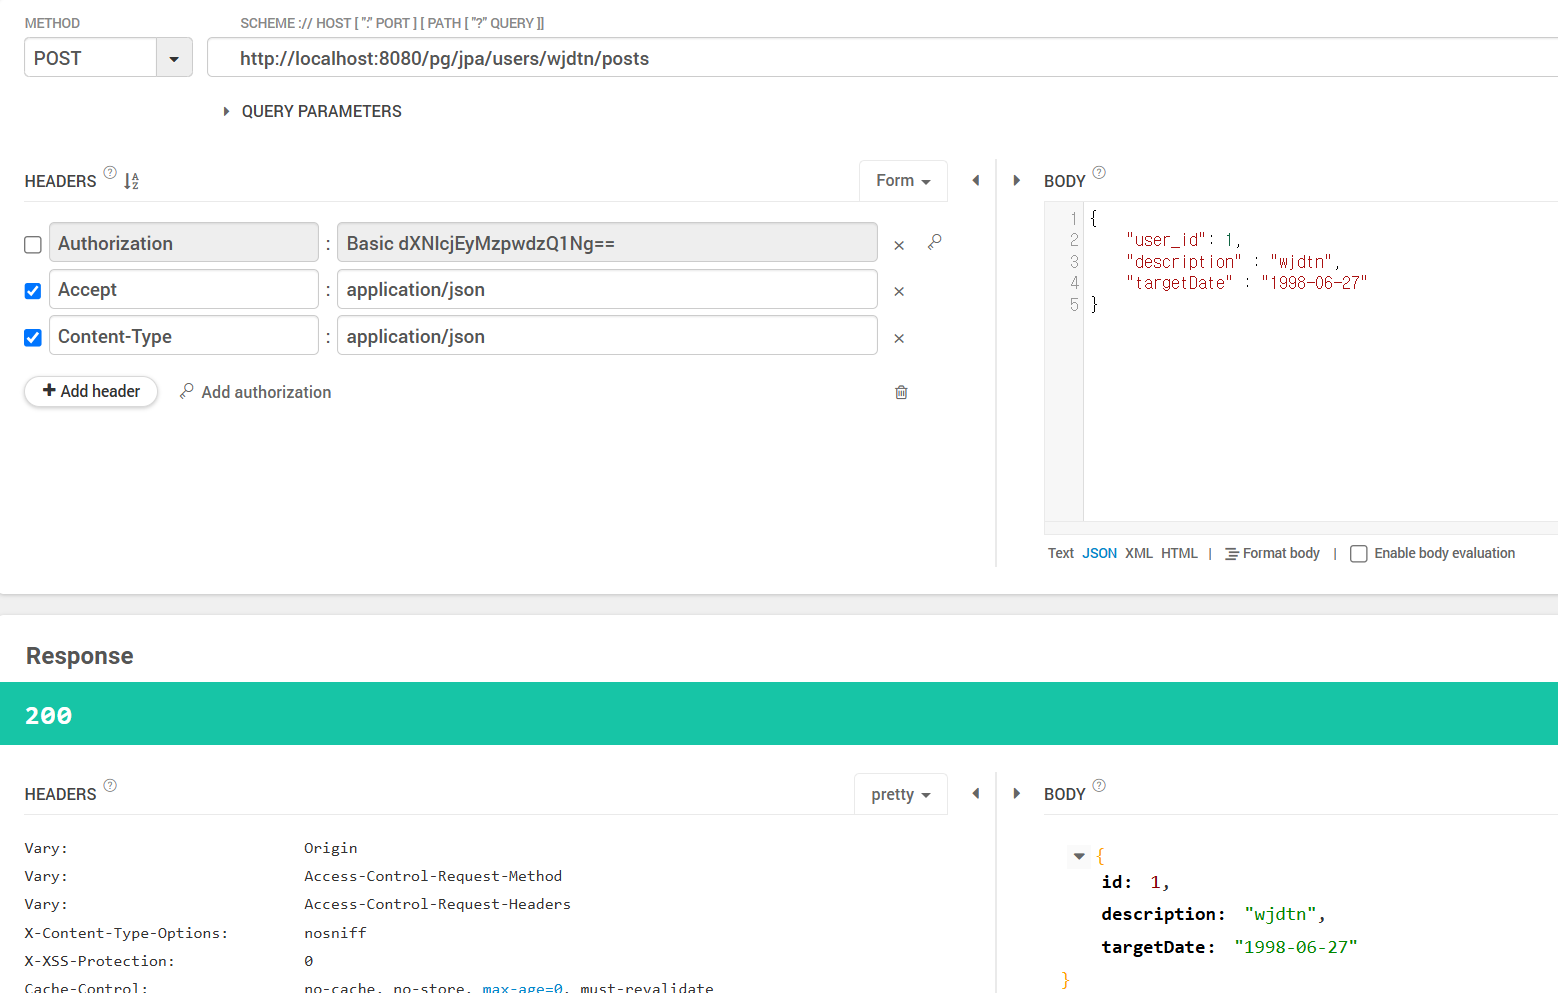
@PostMapping을 활용하여 CREATE를 수행하는 Controller Method 생성
。URL Parameter로 전송한username를 이용하여 해당하는PostgresUser객체를JpaRespository<> interface의 Custom Method로 가져온 후PostgresPost의 외래키 field 역할의user의setter로 지정.
▶PostgresPostinstance의 외래키가 해당PostgresUser로 지정됨.// Post의 Save한 PostgresPost instance를 return. @PostMapping(path="/pg/jpa/users/{username}/posts") public PostgresPost UpdatePostByUserId(@PathVariable String username, @RequestBody PostgresPost post){ Optional<PostgresUser> user = pgservice.GetPgUserByUsername(username); post.setUser(user.get()); pgservice.createPGPost(post); return post; }
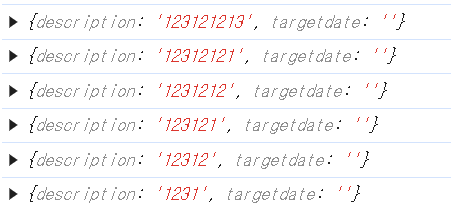
。API로 Test할 경우 다음처럼 추가됨을 확인 가능.
▶IdField의 경우 공란으로 작성하더라도@GeneratedValue를 통해 자동 할당.
- React의
Axios API구현.// todo가 HTTP Request Body로서 API 호출 수행. export const updatePostApi = (username, id, todo)=>apiClient.put(`/pg/jpa/users/${username}/posts/${id}` , todo) export const createPostApi = (username, todo)=>apiClient.post(`/pg/jpa/users/${username}/posts` , todo);。
axios객체.put("url", Object객체): API 호출 시Object객체를HTTP Request Body로서 전송.
- Post Update를 수행하는 Component에서
Formik의onSubmit속성 함수 작성하기// onSubmit 함수 function submitForm(value){ const post = { id : id, description : value.description, targetDate : value.targetdate } updatePostApi(username,id,post) .then(response =>{ console.log(response) navigate("/todos") }) .catch((error)=>{console.log(error)}) .finally(()=>{ console.log("실행완료")}) }。
<Formik>의onSubmit을 통해 전달된 입력Field의 값을 이용해 PostgresPostObject생성.
▶ 성공적으로 생성 된 경우useNavigate() Hook를 통해 List로 안내.
- Post Create를 수행하는 Component 구축 및
Formik의onSubmit속성 함수 작성하기// ListTodosComponent.jsx <button className="btn btn-success" onClick={ ()=>{ navigate(`/todocreate/`) } }>CREATE</button> // TodoApp.jsx <Route path="/todocreate" element={<AuthenticatedRoute> <TodoCreateComponent/> </AuthenticatedRoute>}/>// TodoCreateComponent.jsx import { Formik, Field ,Form, ErrorMessage } from "formik" import { createPostApi } from "./api/TodoApiService" import { ExportContext } from "./security/AuthContext" import { useNavigate } from "react-router-dom"; export default function TodoCreateComponent(){ const description = "description" const targetdate = "1998-04-04" const context = ExportContext(); const username = context.username; const navigate = useNavigate() function validateForForm(value){ let errors = {} if (value.description.length < 5 ){ errors.description = 'Enter at least 5 characters.' } if (value.targetdate == null){ errors.targetdate = 'Enter a targetdate' } return errors } // onSubmit 함수 function submitForm(value){ const post = { description : value.description, targetDate : value.targetdate } createPostApi(username,post) .then(response =>{ console.log(response) navigate("/todos") }) .catch((error)=>{console.log(error)}) .finally(()=>{ console.log("실행완료")}) } return ( <div className="container"> <h1 className="mb-3">Enter Todo Details</h1> <div> {/* <Formik> 정의 */} <Formik initialValues={{ description , targetdate }} enableReinitialize={true} onSubmit = {submitForm} validate = {validateForForm} validateOnChange = {false}> { (props)=>( <Form> {/* <Field name="description">에서 Error 발생 시 validate함수에서 정의된 ErrorMessage 전달. */} <ErrorMessage name = "description" component = "div" className = "alert alert-warning"/> {/* <Field name="targetdate">에서 Error 발생 시 validate함수에서 정의된 ErrorMessage 전달. */} <ErrorMessage name = "targetdate" component = "div" className = "alert alert-warning"/> {/* className="form-group"의 경우 <label>과 <Field>의 한쌍을 묶는게 일반적.*/} <fieldset className="form-group m-2"> <label>Description</label> <Field type= "text" className="form-control" name="description"/> </fieldset> <fieldset className="form-group"> <label>TargetDate</label> <Field type="date" className="form-control" name="targetdate"/> </fieldset> <div> <button className="btn btn-success" type="submit">Save</button> </div> </Form> ) } </Formik> </div> </div> ) }const post = { description : value.description, targetDate : value.targetdate }▶ 다음처럼
PostgresPostinstance에 생성할Object객체생성 시 field의 이름을 올바르게 작성하지않으면 null로 값이 전달됨.