
1)개요
- 쿠버네티스를 이용해서 애플리케이션을 배포하다보면 pod(Pod, ReplicaSet, Deployment, DaemonSet, StatefulSet 등)을 만들기 위한 작업을 수행하고 외부로 노출시키기 위해서 Service(ClusterIP, NodePort, LoadBalancer, Ingress Controller, External IP 등) 와 데이터를 저장하기 위한 Volume 작업 등을 수행해야 합니다.
- 쿠버네티스 만을 이용하게 되면 여러 개의 작업을 별개로 수행해야 하기 때문에 업데이트를 할 때 오류가 발생하거나 일부분이 업데이트 되지 않는 일이 발생할 수 있습니다.
- 이러한 작업들을 하나의 패키지로 묶어서 한 번에 수행하기 위한 도구가 Helm
2)Helm 설치
-
설치 확인
helm version
- 레포지토리 추가
helm repo add 이름 URLhelm repo add kiamol https://kiamol.nethelm repo add bitnami https://charts.bitnami.com/bitnami- 삭제
helm repo remove 이름 - 리스트
helm repo list
- 삭제
- 레포지토리의 캐시를 업데이트
helm repo update
- 애플리케이션 검색
helm search repo 애플리케이션이름helm search repo vweb
helm search repo nginx
- 애플리케이션 다운로드
helm pull 애플리케이션이름helm pull bitnami/nginx ls
- 구조를 알아보기 위해서 압축 해제
tar xvfz nginx-18.2.4.tgz
ls
ls -al nginx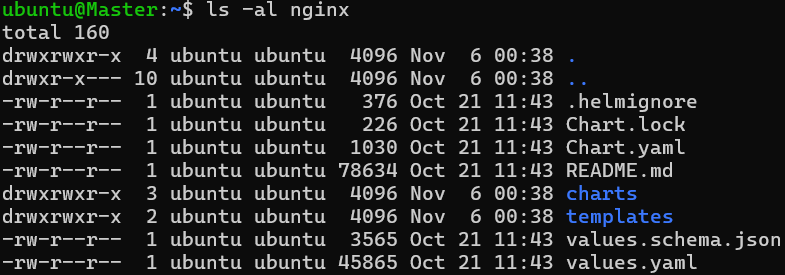
- 환경 변수 확인
helm show values 이름 - 애플리케이션 설치
helm install --set 환경변수=값… 레이블 애플리케이션이름- 로컬의 nginx를 설치
cd nginxhelm install nginx -f values.yaml .helm ls
kubectl get pods
- 원격 서버의 kiamol/vweb을 설치
helm install --set servicePort=8010 --set replicaCount=2 vweb kiamol/vweb --version 1.0.0
helm ls
kubectl get pods
- 로컬의 nginx를 설치
- helm 제거
helm uninstall 애플리케이션이름helm uninstall nginxhelm uninstall vweb
4)패키징
- 패키징 명령
helm create 차트이름cd kiamol/ch10 helm create samplechart ls
- 명령을 수행하면 Chart.yaml, Values.yaml, charts 와 template 디렉토리가 생성되고 기본 코드를 작성해 줍니다.
ls samplechart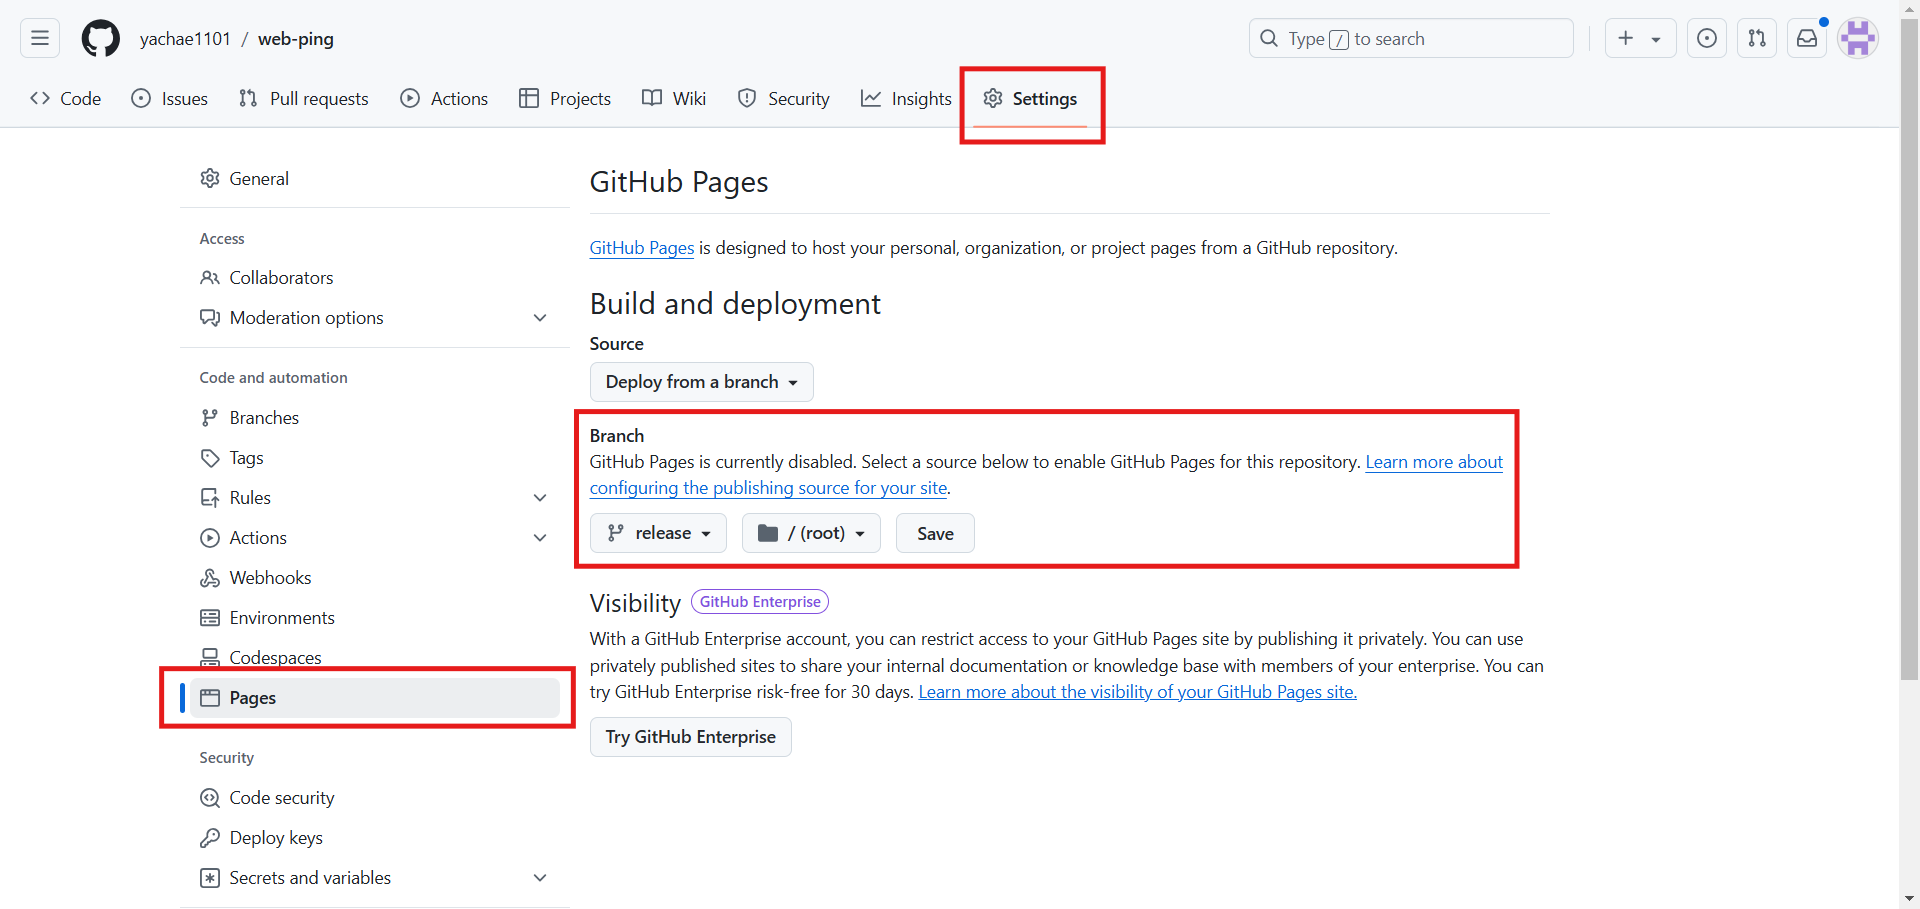
5)레지스트리를 만들어서 업로드
- 레지스트리를 만드는 방법
- Cloud 의 File Storage 이용(AWS의 S3 등)
- Harbor를 이용해서 구축
- git hub 같은 버전 관리 사이트를 이용
- 직접 웹 서버를 구축(S3는 Front End Server의 기능을 하는 것이 가능)
6)Github Page로 Helm 패키지 저장 및 다운로드
- git hub 레포지토리 와 배포할 데이터를 가진 디렉토리를 동기화
- github 레포지토리를 생성(README.md 파일을 소유한 상태)
- 로컬에서 clone
git clone https://github.com/yachae1101/web-ping.git cd web-ping - 브랜치 변경
git checkout -b release - README.md를 수정
nano README.md - git hub에 push
git add .
git commit -m "release branch 생성"
git push -u origin release
- git hub 레포지토리를 웹 사이트로 변경
- git hub 레포지토리에서 [Settings] - [Pages]를 선택한 후 branch 부분에서 원하는 브랜치를 선택하고 save를 클릭

- 확인
https://{username}.github.io/{repositoryname}/https://yachae1101.github.io/web-ping/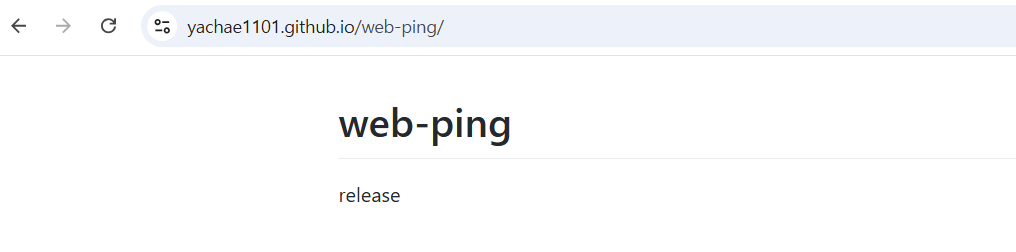
web-ping 레포지토리의 release 브랜치의 README.md 파일이 보인다.
- git hub 레포지토리에서 [Settings] - [Pages]를 선택한 후 branch 부분에서 원하는 브랜치를 선택하고 save를 클릭
- 배포할 디렉토리 복사
cp -r /home/ubuntu/kiamol/ch10/web-ping/ .
ls
- 압축 파일을 생성
helm package 디렉토리/helm package web-ping ls
- index.yaml 파일 생성
helm repo index .vi index.yaml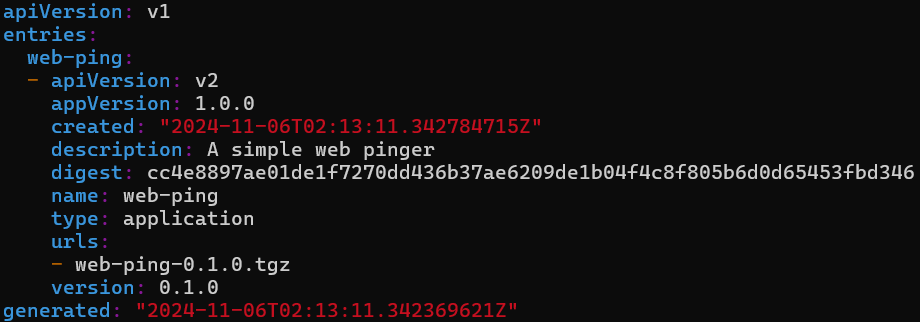
- 구조 확인
tree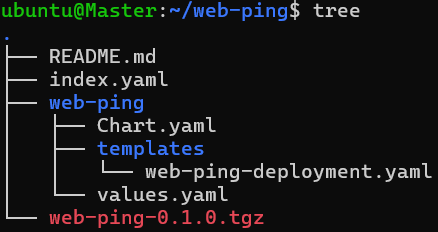
- push 수행
git add .
git commit -m "chart init"
git push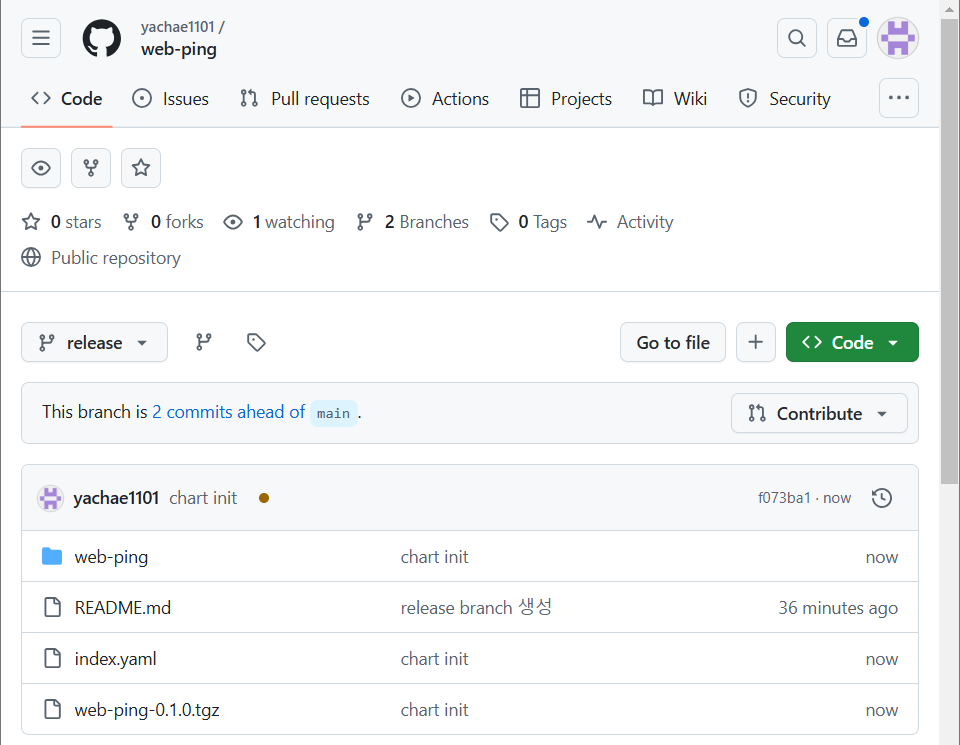
- 레포지토리 등록
helm repo add {REPO_NAME} https://{USER_NAME}.github.io/{REPO_NAME}/helm repo add web-ping https://yachae1101.github.io/web-ping/
helm repo list
helm search repo web-ping
- 설치
helm install web-ping-app web-ping/web-ping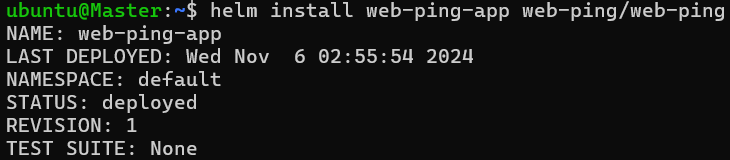
helm ls
