문제
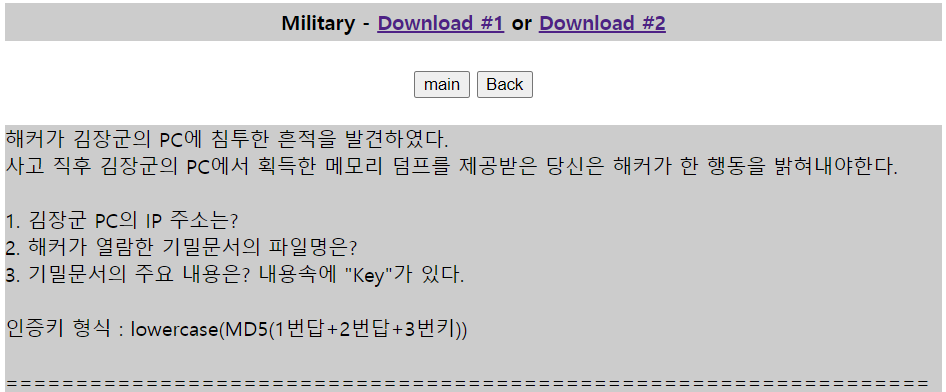
문제는 위와 같다.
메모리 덤프이기 때문에 volatility를 사용하여 분석해야 한다.
설치 및 간단한 사용법을 알아보자
volatility 설치
최근 volatility를 2.6버전과 3.0 버전을 모두 깃을 통해 확인할 수 있도록 했다.
volatility 2.6 Windows
이 문제를 풀 때는 2.6 버전이 필요했기 때문에 아래의 링크를 통해 다운받았다.
https://github.com/volatilityfoundation/volatility/releases/tag/2.6.1
volatility_2.6_win64_standalone.zip 얘로 받았고, 압축을 해제하면 된다.
그리고 분석할 메모리 덤프 파일을 [PATH]/volatility_2.6_win64_standalone 이 경로 안에 옮겨준다.
사용법은 cmd를 열어 위의 volatility가 설치된 경로로 이동해준 후, .\volatility_2.6_win64_standalone.exe -f [분석할 파일명] 이런 식으로 사용하면 된다.
volatility 3.0 Linux
┌──(kali㉿kali)-[~]
└─$ git clone https://github.com/volatilityfoundation/volatility3.git

┌──(kali㉿kali)-[~]
└─$ cd volatility3
이렇게 받은 volatility3 경로로 이동하셔서 사용하시면 됩니다.
사용 예시는 python3 vol.py -f [분석할 파일명] [플러그인명] 이와 같습니다.
📌 Volatility 3 Linux & Windows 분석 명령어 비교
| 분석 목표 | Volatility 3 (Linux) | Volatility 3 (Windows) |
|---|---|---|
| 기본 시스템 정보 확인 | linux.info.Info | windows.info.Info |
| 실행 중인 프로세스 확인 | linux.pslist.PsList | windows.pslist.PsList |
| 숨겨진 프로세스 확인 | linux.psscan.PsScan | windows.psscan.PsScan |
| 프로세스 트리 구조 확인 | linux.pstree.PsTree | windows.pstree.PsTree |
| 실행 중인 프로세스의 명령줄 확인 | linux.psaux.PsAux | windows.cmdline.CmdLine |
| 프로세스 환경 변수 확인 | linux.envars.Envars | ❌ (Windows에서는 지원하지 않음) |
| CMD에서 실행된 명령어 확인 | ❌ (Linux에서는 지원하지 않음) | windows.cmdscan.CmdScan |
| 콘솔 히스토리 확인 | ❌ (Linux에서는 지원하지 않음) | windows.consoles.Consoles |
| 로드된 커널 모듈 확인 | linux.lsmod.Lsmod | ❌ (Windows에서는 DLL로 대체됨) |
| 숨겨진 커널 모듈 탐지 | linux.hidden_modules.Hidden_modules | ❌ (Windows에서는 DLL 분석 필요) |
| 로드된 DLL 확인 | ❌ (Linux에서는 지원하지 않음) | windows.dlllist.DllList |
| 열려 있는 네트워크 소켓 확인 | linux.sockstat.Sockstat | ❌ (Windows에서는 netscan으로 대체됨) |
| 네트워크 연결 확인 | ❌ (Linux에서는 지원하지 않음) | windows.netscan.NetScan |
| 사용 중인 파일 확인 | linux.lsof.Lsof | ❌ (Windows에서는 handles로 대체됨) |
| 파일 시스템 캐시 확인 (열어본 파일 분석) | linux.pagecache.Files | ❌ (Windows에서는 filescan으로 대체됨) |
| 페이지 캐시 속 특정 inode 검사 | linux.pagecache.InodePages | ❌ (Windows에서는 지원하지 않음) |
| 메모리에서 ELF 실행 파일 추출 | linux.elfs.Elfs | ❌ (Windows에서는 PE 파일로 대체됨) |
| 메모리에서 실행 파일 덤프 | ❌ (Linux에서는 ELF로 분석) | windows.pedump.PEDump |
| Bash 히스토리 확인 | linux.bash.Bash | ❌ (Windows에서는 cmdscan으로 대체됨) |
| 네트워크 필터 및 방화벽 규칙 확인 | linux.netfilter.Netfilter | ❌ (Windows에서는 지원하지 않음) |
| 파일 핸들 확인 | ❌ (Linux에서는 lsof 사용) | windows.handles.Handles |
| 열려 있는 파일 목록 확인 | ❌ (Linux에서는 lsof 사용) | windows.filescan.FileScan |
| 최근 열어본 파일 확인 (Windows 레지스트리 분석) | ❌ (Linux에서는 지원하지 않음) | windows.registry.printkey.PrintKey -K "RecentDocs" |
📌 Volatility 2 Linux & Windows 분석 명령어 비교
| 분석 목표 | Volatility 2 (Linux) | Volatility 2 (Windows) |
|---|---|---|
| 기본 시스템 정보 확인 | linux_banner | imageinfo |
| 실행 중인 프로세스 확인 | linux_pslist | pslist |
| 숨겨진 프로세스 확인 | linux_psscan | psscan |
| 프로세스 트리 구조 확인 | linux_pstree | pstree |
| 실행 중인 프로세스의 명령줄 확인 | linux_psaux | cmdline |
| 프로세스 환경 변수 확인 | linux_envars | ❌ (Windows에서는 지원하지 않음) |
| CMD에서 실행된 명령어 확인 | ❌ (Linux에서는 지원하지 않음) | cmdscan |
| 콘솔 히스토리 확인 | ❌ (Linux에서는 지원하지 않음) | consoles |
| 로드된 커널 모듈 확인 | linux_lsmod | ❌ (Windows에서는 DLL로 대체됨) |
| 숨겨진 커널 모듈 탐지 | linux_hidden_modules | ❌ (Windows에서는 DLL 분석 필요) |
| 로드된 DLL 확인 | ❌ (Linux에서는 지원하지 않음) | dlllist |
| 열려 있는 네트워크 소켓 확인 | linux_sockstat | ❌ (Windows에서는 netscan으로 대체됨) |
| 네트워크 연결 확인 | ❌ (Linux에서는 지원하지 않음) | netscan |
| 사용 중인 파일 확인 | linux_lsof | ❌ (Windows에서는 handles로 대체됨) |
| 파일 시스템 캐시 확인 (열어본 파일 분석) | linux_pagecache | ❌ (Windows에서는 filescan으로 대체됨) |
| 페이지 캐시 속 특정 inode 검사 | linux_inodes | ❌ (Windows에서는 지원하지 않음) |
| 메모리에서 ELF 실행 파일 추출 | linux_elfs | ❌ (Windows에서는 PE 파일로 대체됨) |
| 메모리에서 실행 파일 덤프 | ❌ (Linux에서는 ELF로 분석) | procdump |
| Bash 히스토리 확인 | linux_bash | ❌ (Windows에서는 cmdscan으로 대체됨) |
| 네트워크 필터 및 방화벽 규칙 확인 | linux_netfilter | ❌ (Windows에서는 지원하지 않음) |
| 파일 핸들 확인 | ❌ (Linux에서는 lsof 사용) | handles |
| 열려 있는 파일 목록 확인 | ❌ (Linux에서는 lsof 사용) | filescan |
| 최근 열어본 파일 확인 (Windows 레지스트리 분석) | ❌ (Linux에서는 지원하지 않음) | printkey -K "RecentDocs" |
풀이
설치와 사용법을 익혔으니 이제 풀이를 해보겠습니다.
문제 파일명을 MemoryDump로 바꿔주었고요, volatility 경로로 옮겨줍니다.

그리고 메모리 덤프의 정보를 알기 위해 imageinfo 플러그인을 사용하여 정보를 확인했습니다.
리눅스에서 volatility3을 이용하려고 했는데, 해당 메모리 덤프의 windows 버전과 맞지 않아서 volatility2.6을 설치했습니다.
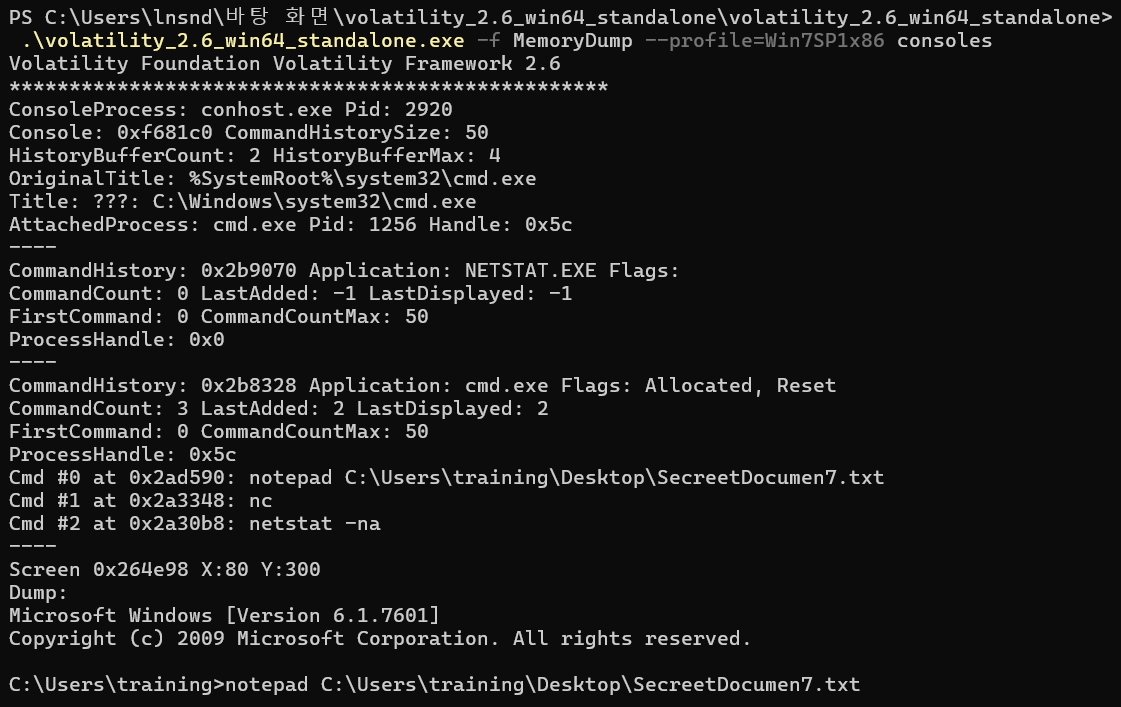
MemoryDump의 console 히스토리 기능을 이용하기 위해
.\volatility_2.6_win64_standalone.exe -f MemoryDump --profile=Win7SP1x86 consoles이렇게 입력해주었더니, notepad로 SecreetDocumen7.txt 를 연 것을 볼 수 있습니다. 이 파일명이 문제 2번의 답입니다.
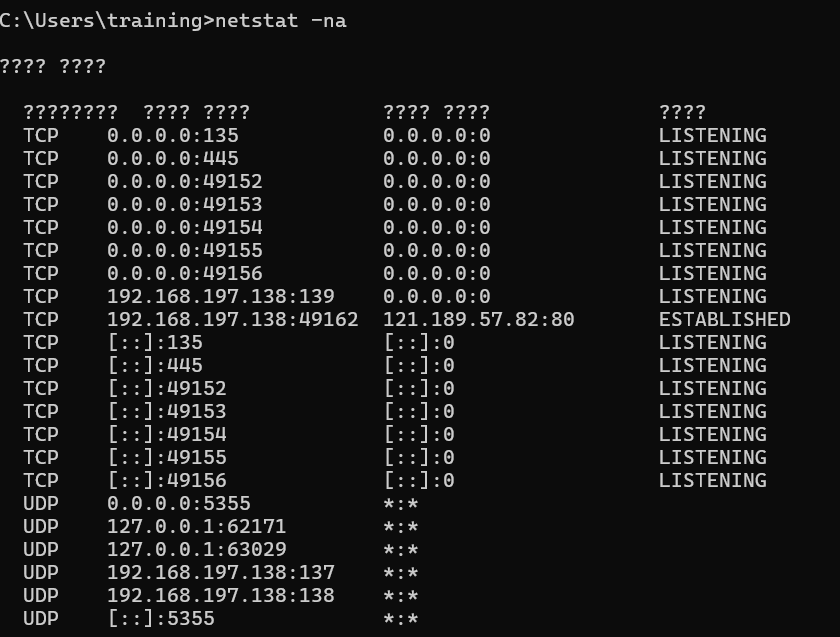
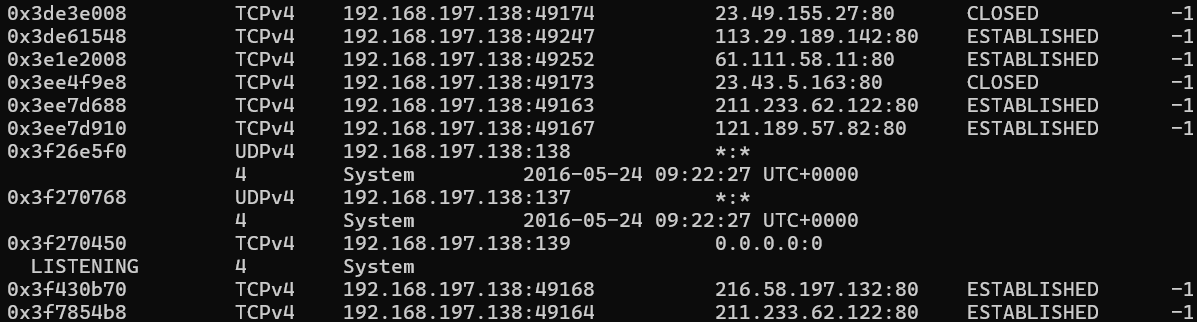
좀더 밑으로 내려보면 netstat -na 실행 결과로 192.168.197.138이 가장 1번 문제의 답 같지만, 정확하게 확인해보기 위해서 netscan을 이용하여 확인했습니다.
 (생략)
(생략)
이렇게 192.168.197.138 이 1번의 답인 것을 확인했습니다.

이제 key를 확인하면 되는데, SecreetDocumen7.txt를 확인하기 위해 filescan 결과 중 해당 파일명과 관련된 정보를 찾기 위해 filescan | findstr "SecreetDocumen7.txt" 를 입력했습니다.
해당 offset을 이용하여 dumpfiles를 실행하면 파일을 복구할 수 있습니다.
.\volatility_2.6_win64_standalone.exe -f MemoryDump --profile=Win7SP1x86 dumpfiles -Q 0x000000003df2ddd8 -D .의 결과로 덤프된 파일이 현재 작업하고 있는 경로에 file.#### 형식으로 생성됩니다.
-Q 옵션: 특정 파일 오프셋을 지정해서 파일 덤프
-D . 옵션: 현재 디렉토리에 저장
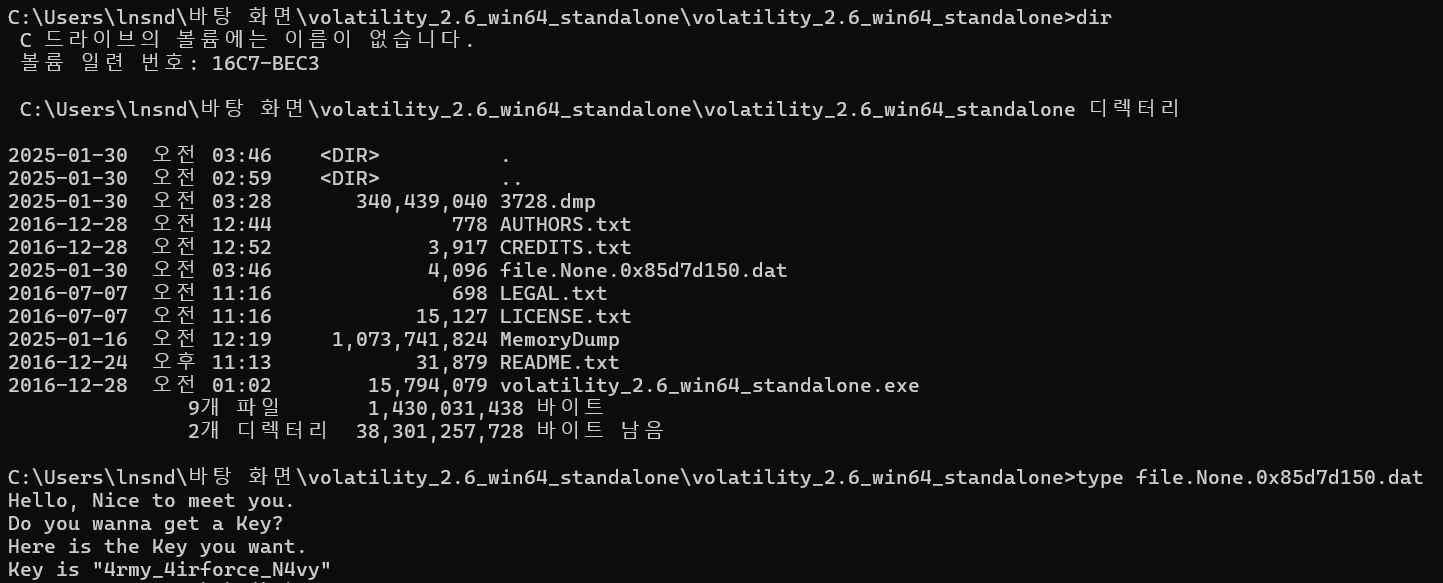
dir 명령어를 통해 해당 디렉토리에 새롭게 덤프된 파일이 'file.None.0x8~~' 가 생긴 것을 확인이 가능하고, type file.000000003df2ddd8.dat 를 통해 cmd에서 내용을 확인해볼 수 있습니다.
key의 값이 있는 것을 확인했고, 이제 1번+2번+3번 모두 구했으니 MD5로 변환해주면 됩니다!
192.168.197.138SecreetDocumen7.txt4rmy_4irforce_N4vy

참고
https://gamednd.tistory.com/73
https://kkamagistory.tistory.com/701
https://www.postype.com/@cpuu/post/9993241