=> ERD
logical diagram
physical diagram
project 기획
기획서 : 기획적인 분석 / 디자인 분석 / 프로그램 분석(uml, erd, 시스템 분석, 프로그램 언어 추천이유)
- 파일 -> 데이터베이스 사용 목적
-
다중사용(동시 접속, 제한을 준 접속)
관리자 : root, 또는 관리자가 일반 사용자에게 권한을 줘서 사용 가능(관리자 급으로는 권한 주지 않음), 암호는 꼭 암호화하기 -
네트워크 원격 접속
네트워크 카드
-유선
-무선
-
루프백 - 기본 (127.0.01 = localhost)
-
인터넷용 아이피 - 인터넷에 접속해야함(공유기, 라우터)
인트라넷(사내망용, 내부 아이피) - 192.168.xxx.xxx
인터넷 - 다름
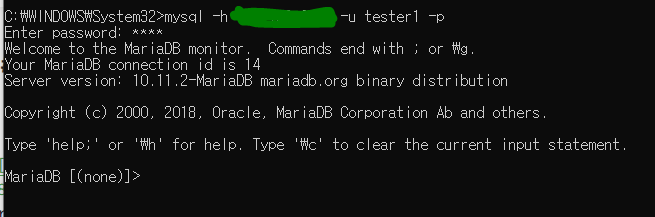
사용자 만드는 법
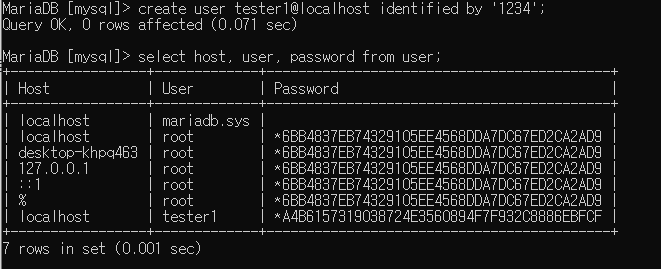
create user 사용할아이디 identified by '비밀번호';
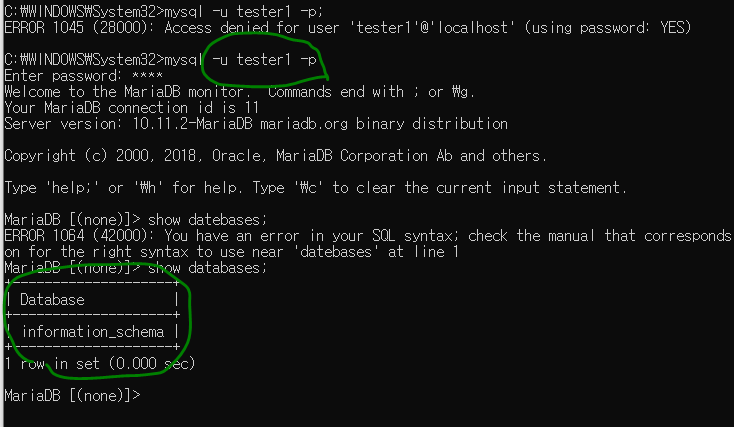
접속은 되지만 권한은 적은 모습

내 아이피 입력시 에러가 뜨지만 로컬호스트 아이피를 입력시 정상 실행된다.
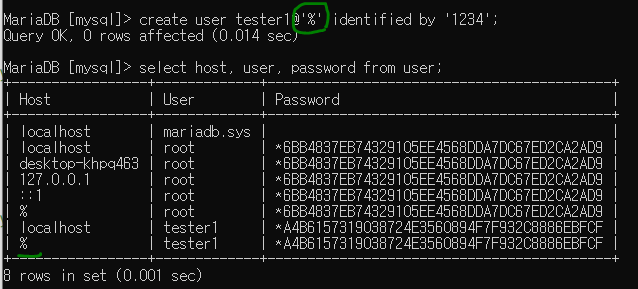
'%' = 어느 아이피에서도 접속할 수 있다는 뜻
내 아이피로도 접속이 되는 모습
사용자 삭제 : drop
drop user 사용자아이디@~~
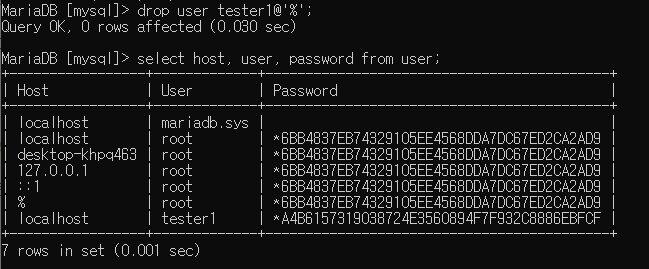
'%' 삭제되는 모습
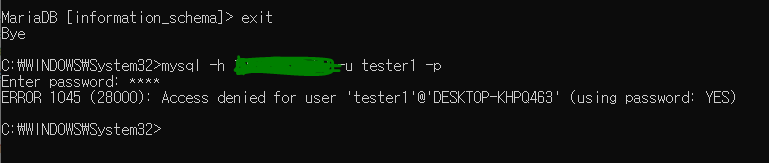
삭제가 되어도 접속중이라면 정상적으로 실행은 된다(하지만 exit로 종료를 하면 이후 다시 들어오지 못한다)
사용자 권한
DCL(Data Control Langauge)
grant - 권한 부여
revoke - 권한 회수
권한 확인 : show privileges
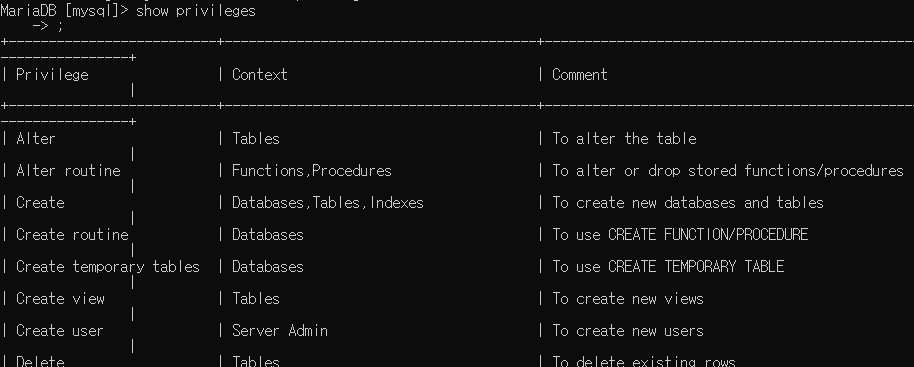
주어진 권한에 대한 확인
show grants for 사용자@아이피;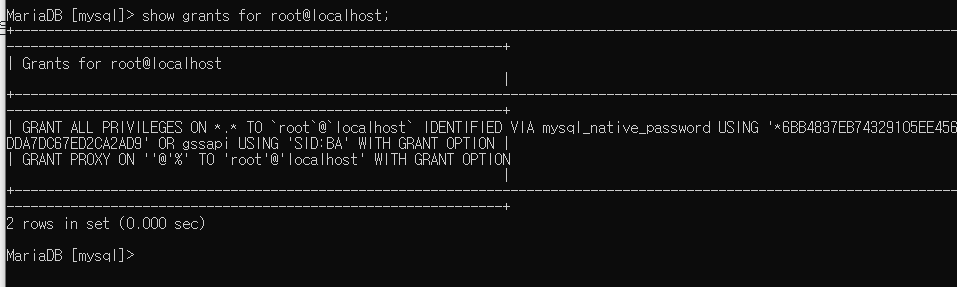
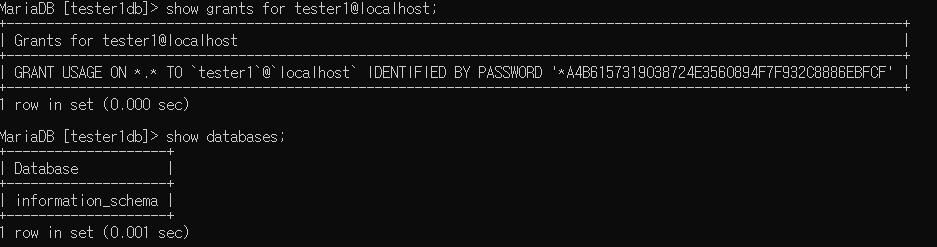
관리자에 대한 권한 확인

사용자는 아직 권한이 부여되지 않아서 아무것도 뜨지 않는다.
관리자에서 만든 데이터베이스 사용자에서 사용할 수 있게 하기
권한을 주고 난 후에 다시 데이터베이스에 들어가야한다(바로 적용안됨)

tester1 사용자에게 권한을 부여한다(tester1db의 *(모든것)) - 이때 사용자에서 바로 적용 안된다. / 특정 권한을 부여하면 바로 적용됨
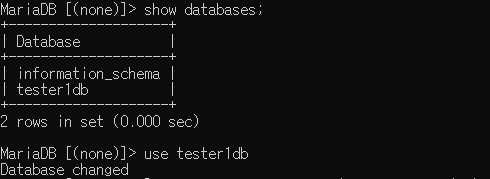
tester1 사용자 쪽에서 tester1db를 사용할 수 있다.

생성 권한만 있고 drop, select, desc 등등 사용할 수 없다.

create 권한만 있다고 확인됨
모든 권한 주기
권한을 주고 난 후에 다시 데이터베이스에 들어가야한다(바로 적용안됨)

관리자에서 사용자에게 모든 권한주기

tester1에서 모든 권한 부여됨
create 뿐 아니라 alter, drop 등 사용 가능
권한 지우기 : revoke
revoke create on 데이터베이스명.테이블명 from 사용자명@localhost;특정 권한을 지울 때는 바로 적용된다
모든 권한 지울 때
revoke all on tester1db.* from tester1@localhost;
exit 나갔다가 다시 들어와야 적용된다.
tester1에서 본 모습 : tester1db를 줬던 권한이 빠져있다.
세부적인 dml
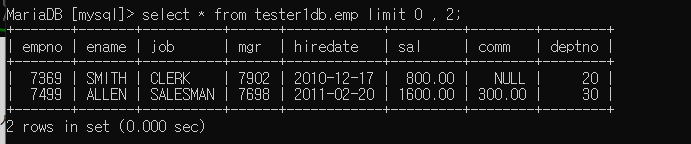
create table tester1db.emp as select * from sample.emp;sample.emp를 전부 가져와서 tester1db에 emp만들어 안에 집어넣기

권한 주기
grant select on tester1db.emp to tester1@localhost;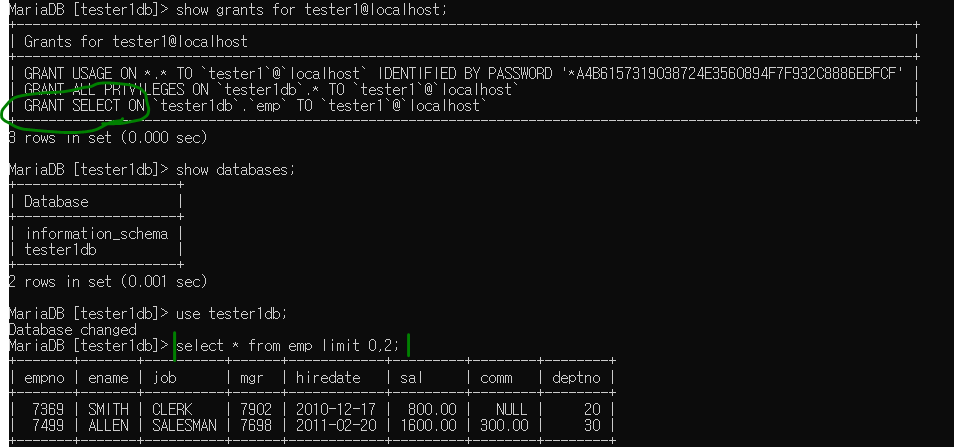
tester1에서 확인 ( 권한 부여된 모습),select문 사용 가능
insert 쓰고 싶으면 insert 권한 부여 후 사용
관리자에서

grant insert on tester1db.emp to tester1@localhost;
tester1db에서 확인
update, delete 등등 권한 부여 후 사용 가능하다.
권한 부여 , 사용자 생성 동시에 하기
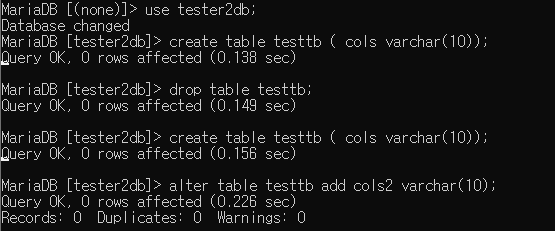
grant all privileges on tester2db.* to tester2@localhost identified by '1234';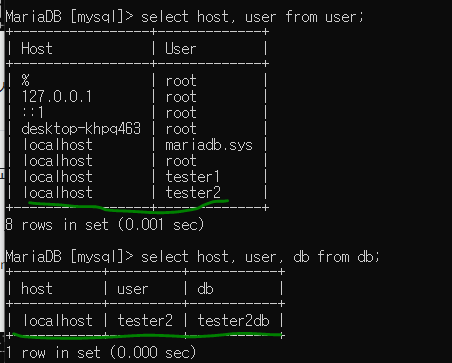
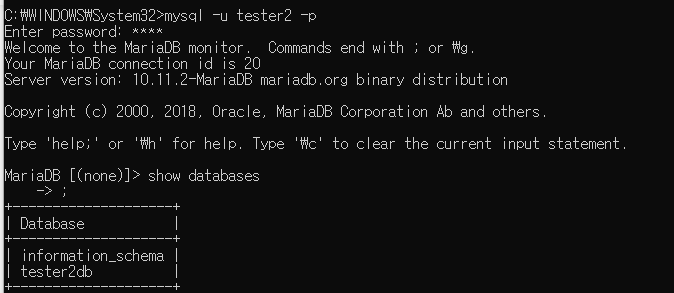
tester2 사용자 확인
데이터베이스에 대한 백업 / 복원
백업
백업받기 위해서 데이터베이스 멈추고 작업하기 ( 그냥 받으면 깨짐 )
백업 도구
dump(백업)는 원격도 가능
mysqldump - 아무곳에서나 실행시킬 수 있는 명령어, 복원용 스크립트 생성
csv

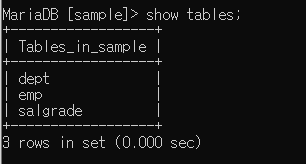
sample 데이터를 dump_all.sql 파일에 백업시키는 명령어

sample에 데이터를 백업시킨 모습
-u root -p sample emp > dump_emp.sql특정 테이블만 부분적으로 백업 가능함
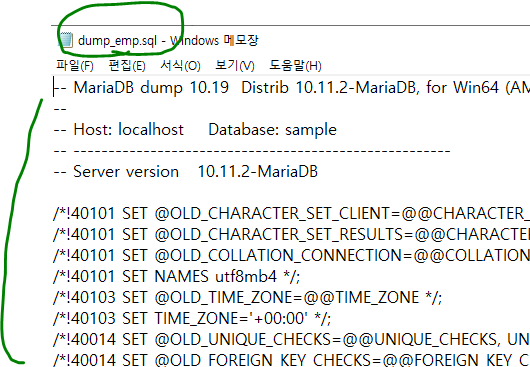
sample의 emp 테이블 백업 모습
복원
백업과 반대 방향으로 < 주면 된다.
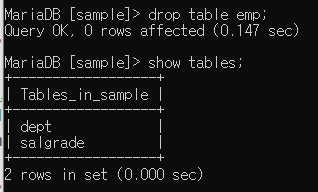
- sample에서 emp 삭제
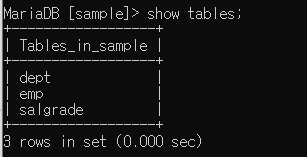
- 복원 ( < 이용 : dump_emp.sql을 sample안에 넣겠다는 명령어)
-u root -p sample < dump_emp.sql- sample 가서 확인
database 완전히 삭제해도 백업데이터가 있다면 복원 가능하다
- sample 삭제 (삭제 후 백업 데이터 받을 데이터 베이스 만들어야 함, sample 만들기)

- 나가서 복원 명령어 입력, sample 데이터베이스에 all 넣기
mysql -u root -p sample < dump_all.sql- 확인
자바와 mariadb 연동하기
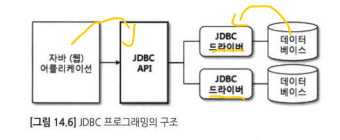
각 데이터베이스 제작업체에서 드라이버 제공
jdbc driver - 클래스로 작성
mariadb - org.mariadb.jdbc.Driver (connector 제공업체에서 알 수 있음)
url - jdbc:mysql://ip번호(거의localhost);포트번호/데이터베이스명 --> 버전 2.~~ maria사용시
url - jdbc:mariadb://ip번호(거의localhost);포트번호/데이터베이스명 --> 버전 3.~~ maria사용시
ex1

jdbc:mysql://localhost:3306/sample
id - root
password
import java.sql.Connection;
import java.sql.DriverManager;
import java.sql.SQLException;
public class JDBCEX2 {
public static void main(String[] args) {
try {
//Connecter 제공업체에서 알 수 있다.
Class.forName("org.mariadb.jdbc.Driver");
System.out.println("드라이버 로딩 완료");
} catch (ClassNotFoundException e) {
System.out.println("[에러] : " + e.getMessage());
}
String url = "jdbc:mysql://localhost:3306/sample";
String user = "root";
String password = "123456"; --> 이 암호는 mysql에서 우리가 지정한 암호!
Connection conn = null;
try {
//접속
conn = DriverManager.getConnection(url, user, password);
System.out.println("연결 성공");
} catch (SQLException e) {
System.out.println("[에러] : " + e.getMessage());
} finally {
if (conn != null) try { conn.close(); } catch(SQLException e) {};
}
}
}-
Class.forname으로 드라이버 로딩하기 ( try ~ catch 받아줘야함),
DriverManager는 Class.forName( ) 메소드를 통해서 생성 -
url(내가 접속할), id, password (그곳의 아이디와 비번) 를 각각 변수로 선언
-
Connection로 객체 선언 후, DriverManager.getConnection(url, id, password)로 연결 ( try ~ catch 받아줘야함)
위의 코드를 정리한 것

import java.sql.Connection;
import java.sql.DriverManager;
import java.sql.SQLException;

public class JDBCEX2 {

	public static void main(String[] args) {
		String url = "jdbc:mysql://localhost:3306/sample";
		String user = "root";
		String password = "123456";

		Connection conn = null;

		try {
			//Connecter 제공업체에서 알 수 있다.
			//처리 로직
			Class.forName("org.mariadb.jdbc.Driver");
			System.out.println("드라이버 로딩 완료");

			conn = DriverManager.getConnection(url, user, password);
			System.out.println("연결 성공");
		} catch (ClassNotFoundException e) {
			System.out.println("[에러] : " + e.getMessage());
		} catch (SQLException e) {
			System.out.println("[에러] : " + e.getMessage());
		} finally {
			if (conn != null)  try { conn.close(); } catch(SQLException e) {};
		}
	}
}
Statement / preparedStatement : 쿼리를 던지는 방법
Statement - connection으로 연결된 객체에 쿼리 작업을 실행하기 위한 객체 ( sql 쿼리문 사용 가능)
preparedStatement - statement보다 기능이 향상된 클래스
-
int executeUpdate
select 이외의 모든 sql 사용 가능
리턴값이 intResultset executeQuery
select 만 사용 가능
데이터
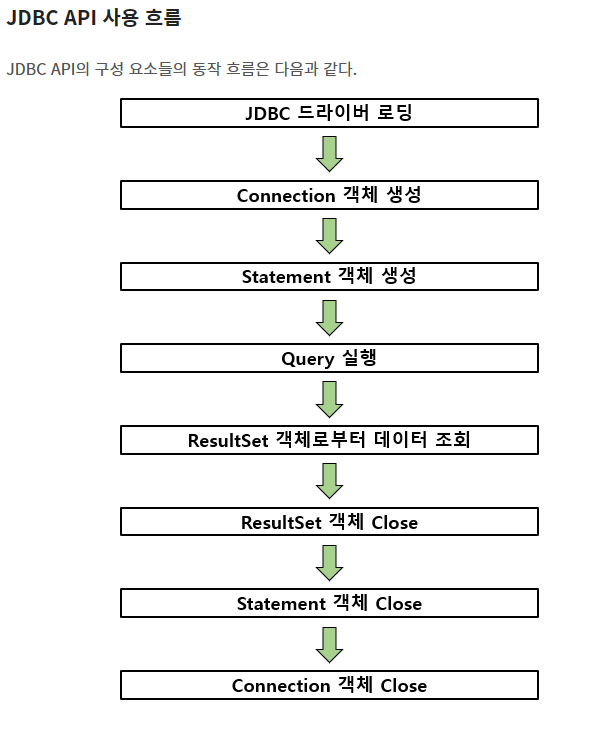
사용흐름 보고 코딩 순서 익히기
Select제외한 DML : insert 문 사용하기
import java.sql.Connection;
import java.sql.DriverManager;
import java.sql.SQLException;
import java.sql.Statement;
public class JDBCEX4 {
public static void main(String[] args) {
String url = "jdbc:mysql://localhost:3306/sample";
String user = "root";
String password = "123456";
Connection conn = null;
Statement stmt = null;
try {
//Connecter 제공업체에서 알 수 있다.
//처리 로직
Class.forName("org.mariadb.jdbc.Driver");
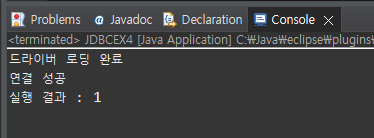
System.out.println("드라이버 로딩 완료");
conn = DriverManager.getConnection(url, user, password);
System.out.println("연결 성공");
stmt = conn.createStatement();
//DML
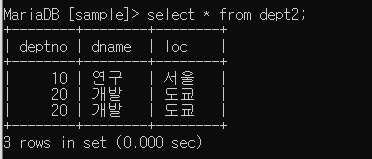
String sql = "insert into dept2 values (10, '연구', '서울')";
int result = stmt.executeUpdate(sql); --> insert문 실행
//또는 변수 할당하여 sql에 변수로 집어넣기
String deptno = "20";
String dname = "개발";
String loc = "도쿄";
String sql = "insert into dept2 values (" + deptno +", '" + dname + "', '" + loc + "')";
-> int형인 숫자도 문자열로, 문자열은 ""포함한 상태에서 '' 써줘야 함
String sql = String.format("insert into dept2 values (%s, '%s', '%s')", deptno, dname, loc);
--> 위 코드 편하게 쓴 것
int result = stmt.executeUpdate(sql);
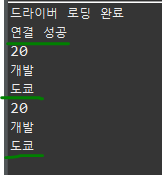
System.out.println("실행 결과 : " + result); --> 실행하고 db가서 보면 데이터 있음
} catch (ClassNotFoundException e) {
System.out.println("[에러] : " + e.getMessage());
} catch (SQLException e) {
System.out.println("[에러] : " + e.getMessage());
} finally {
if (stmt != null) try { stmt.close(); } catch(SQLException e) {};
if (conn != null) try { conn.close(); } catch(SQLException e) {};
}
}
}- 먼저 자바랑 데이터베이스 연동부터 하기(Connection)
- cmd에서 테이블 만들기
- 자바 툴에서 sql 명령문을 써서 작업하고 실행하기(여기서는 insert문 사용)
- cmd로 돌아가서 작업한 내용 확인 (insert문 삽입된 거 확인)
update문 사용하기
	String sql = String.format("update dept2 set dname = '%s' where deptno = %s", dname, deptno);
    --> 위 코드 insert 구문 요걸로 바꾸기만 하기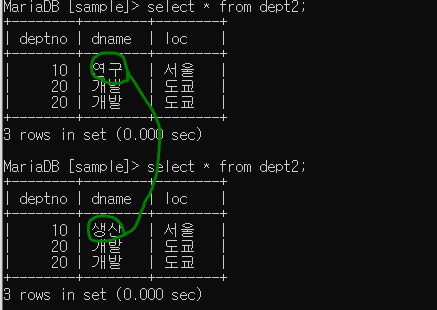
delete문 사용하기
String sql = String.format("delete from dept2 where deptno = %s", deptno);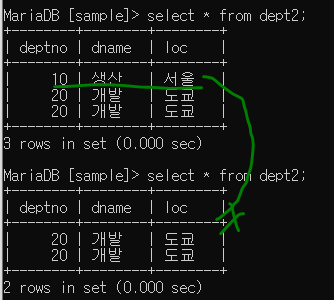
DDL : create문 사용하기
String sql = "create table testtbl (col1 varchar(10))";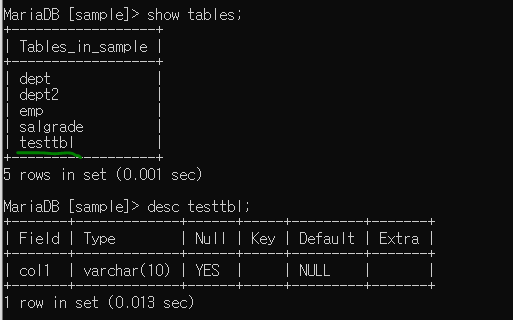
응용 - dept3 만들기 (컬럼 deptno int(2), dname varchar(14), loc carchar(13))
String sql = "create table dept3 (deptno int(2), dname varchar(14) ,loc varchar(13))";StringBuilder를 통하여 만들어보기 ( 다른 구문은 모두 동일)
StringBuilder sbSQL = new StringBuilder();
sbSQL.append("create table dept4 (");
sbSQL.append("deptno int(2),");
sbSQL.append("dname varchar(14),");
sbSQL.append("loc varchar(13))");

int result = stmt.executeUpdate(sbSQL.toString());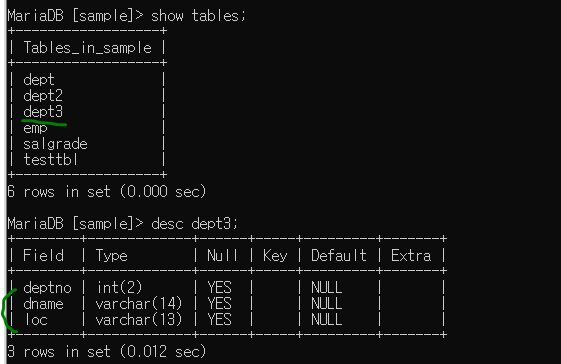
Resultset executeQuery
Statemnt 의 executeQuery() 메서드는 SELECT 쿼리를 실행할 때 사용되며,
SELECT 쿼리의 실행 결과를 java.sql.ResultSet 객체에 담아서 리턴
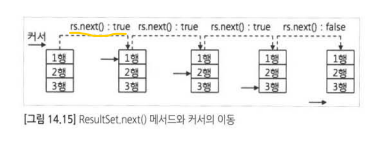
Resultset은 next() 메서드를 이용하여 select 결과의 존재 여부 확인 가능
1행 위에 있다가 커서의 다음 행이 존재하는 경구 true 리턴, 다음 행이 없는 경우 false 리턴한다.
import java.sql.Connection;
import java.sql.DriverManager;
import java.sql.ResultSet;
import java.sql.SQLException;
import java.sql.Statement;

public class JDBCEX7 {

	public static void main(String[] args) {
		String url = "jdbc:mysql://localhost:3306/sample";
		String user = "root";
		String password = "123456";

		Connection conn = null;
		Statement stmt = null;
		ResultSet rs = null;

		try {
			//Connecter 제공업체에서 알 수 있다.
			//처리 로직
			Class.forName("org.mariadb.jdbc.Driver");
			System.out.println("드라이버 로딩 완료");

			conn = DriverManager.getConnection(url, user, password);
			System.out.println("연결 성공");

			stmt = conn.createStatement();

			String sql = "select * from dept2";

			rs = stmt.executeQuery(sql);

			while(rs.next()) { --> //1행 이전에 있으므로 rs.next통해서 옮겨줌,
            next가 false가 나올 때 까지 반복(끝까지 반복)

				System.out.println(rs.getString("deptno"));
				System.out.println(rs.getString("dname"));
				System.out.println(rs.getString("loc"));
			}

		} catch (ClassNotFoundException e) {
			System.out.println("[에러] : " + e.getMessage());
		} catch (SQLException e) {
			System.out.println("[에러] : " + e.getMessage());
		} finally {
			if (rs != null)  try { rs.close(); } catch(SQLException e) {};
			if (stmt != null)  try { stmt.close(); } catch(SQLException e) {};
			if (conn != null)  try { conn.close(); } catch(SQLException e) {};
		}
	}
}
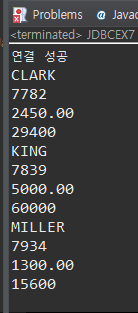
응용 - 10번 부서의 사원번호, 사원이름, 급여, 연봉 출력하는 프로그램
String sql = "select empno, ename, sal, truncate(sal * 12 + ifnull(comm, 0),0) annsal
from emp where deptno = 10";

rs = stmt.executeQuery(sql);

while(rs.next()) {
	System.out.println(rs.getString("ename"));
    //--> 이름 대신 인덱스번호 넣어도됨 = System.out.println(rs.getString(1));
	System.out.println(rs.getString("empno"));
	System.out.println(rs.getString("sal"));
	System.out.println(rs.getString("annsal"));  --> 컬럼명이 길어 as해서 적음
	}