1) 학습한 내용
리액트로 기상 화면 만들기
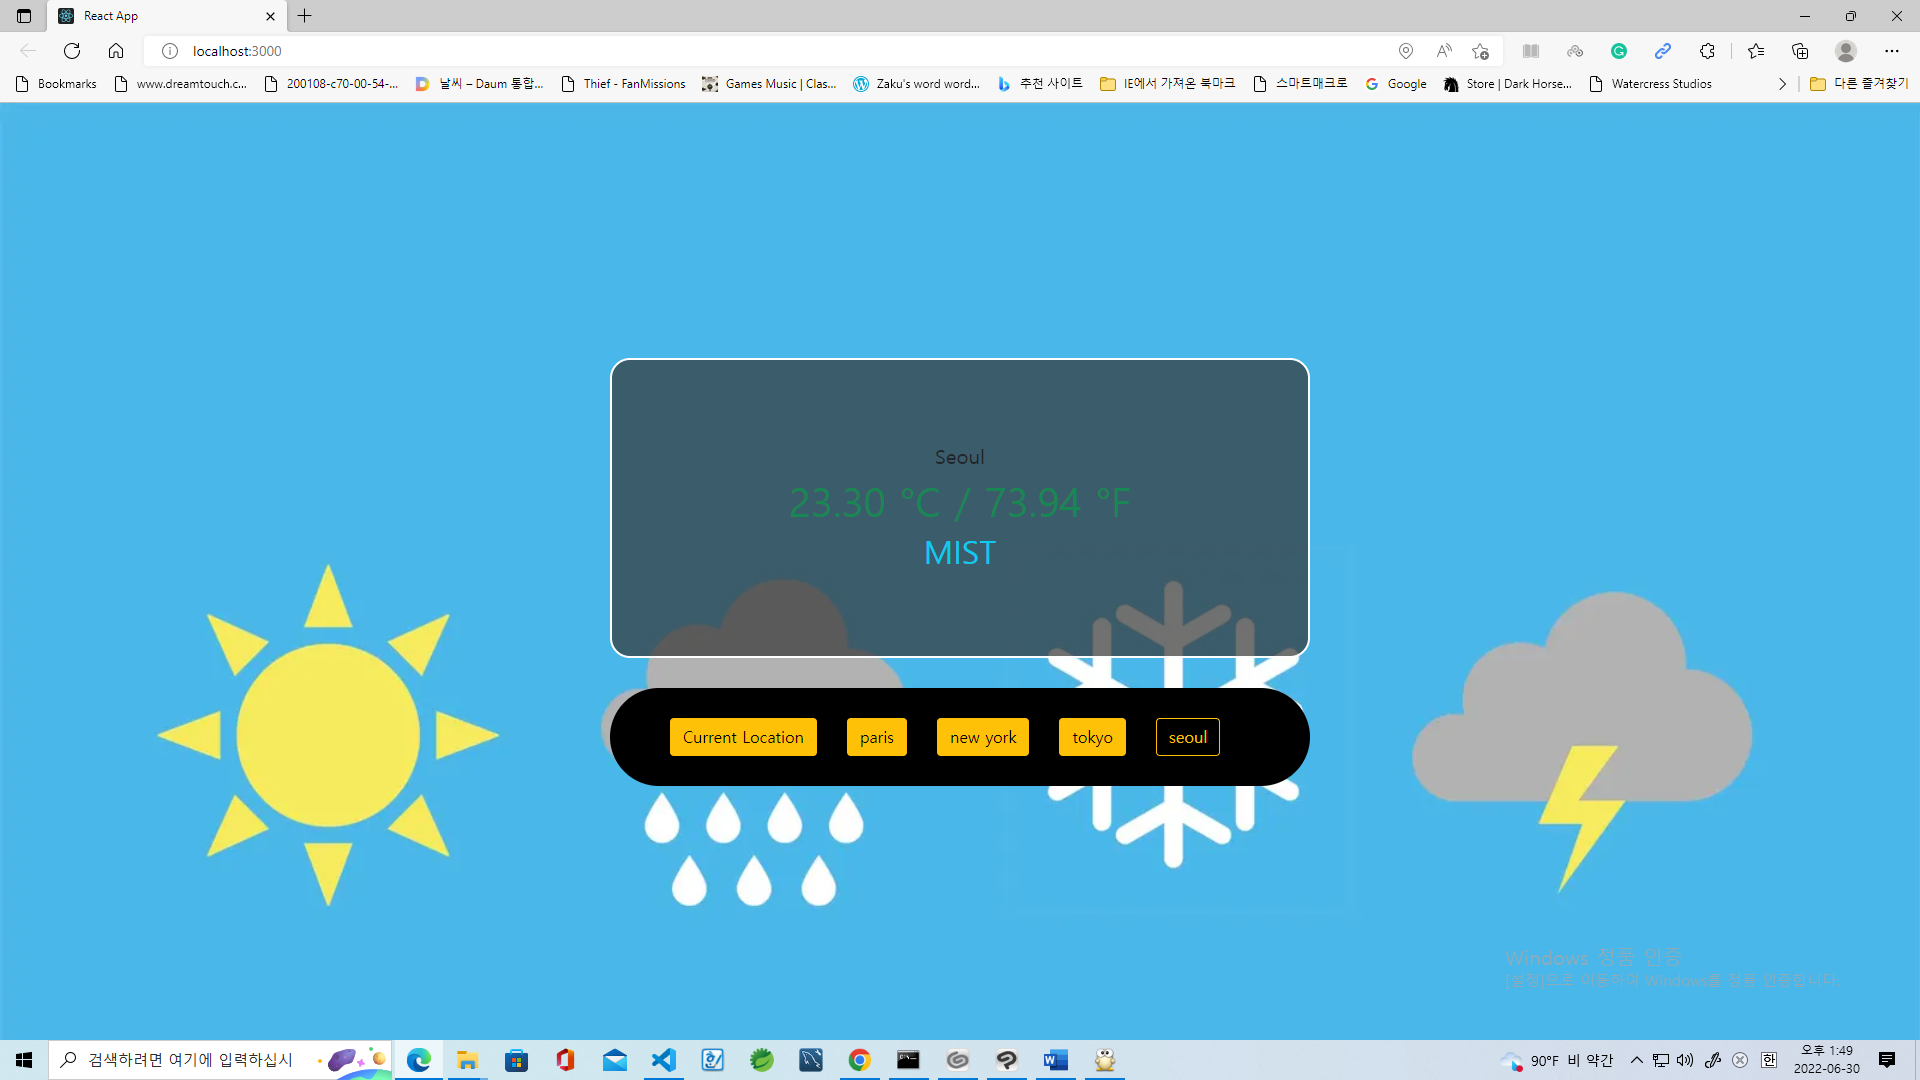
이번에는 날씨 상황을 보여주는 화면을 만들기 위해서는 아래와 같은 코드로 작성했었다.
우선 기상 상황판을 만들기 전에 https://home.openweathermap.org/ 사이트에 접속해서 회원가입을 한 다음에 API키를 준비해야 한다. 그 다음에는 리액트 프로젝트를 만든다.
components
PublicNavbar.js
해당 코드는 날씨 상황판의 네비게이션 바를 만들어내는 코드다.
import React from 'react';
import { Navbar, Nav } from 'react-bootstrap';

const PublicNavbar = () => {
  return (
    <Navbar bg="light" expand="lg" className="position-fixed navbar-fixed">
      <Navbar.Brand></Navbar.Brand>
      <Nav className="mr-auto"></Nav>
      <Nav>
        <a
          href="https://github.com/dhminh1024/cs_weather_app"
          target="_blank"
          rel="noreferrer"
        ></a>
      </Nav>
    </Navbar>
  );
};

export default PublicNavbar;
WeatherBox.js
해당 코드는 섭씨, 화씨를 나타내는 코드에 날씨 상황을 알려주는 판이다.
import React from 'react';
import { Card } from 'react-bootstrap';

const WeatherBox = ({ weather }) => {
  const temperatureC =
    weather && weather.main ? (weather.main.temp - 273.15).toFixed(2) : '';
  const temperatureF =
    weather && weather.main
      ? (((weather.main.temp - 273.15) * 9) / 5 + 32).toFixed(2)
      : '';
  return (
    <Card className="weather-card">
      <Card.ImgOverlay className="d-flex flex-column justify-content-center text-center">
        <Card.Title>{weather?.name}</Card.Title>
        <Card.Text className="text-success h1">
          {`${temperatureC} °C / ${temperatureF} °F`}
        </Card.Text>
        <Card.Text className="text-info text-uppercase h2">
          {weather && weather.weather[0]?.description}
        </Card.Text>
      </Card.ImgOverlay>
    </Card>
    );
};

export default WeatherBox;
WeatherButton.js
날씨 상황판에 있는 도시나 지역을 눌러서 그곳의 날씨 상황을 보여준다.
import React from 'react';
import { Button } from 'react-bootstrap';

const WeatherButton = ({ cities, selectedCity, handleCityChange }) => {
  return (
    <div class="menu-container">
      <Button
        variant={`${selectedCity === null ? 'outline-warning' : 'warning'}`}
        onClick={() => handleCityChange('current')}
      >
        Current Location
      </Button>

      {cities.map((city) => (
        <Button
          variant={`${selectedCity === city ? 'outline-warning' : 'warning'}`}
          onClick={() => handleCityChange(city)}
        >
          {city}
        </Button>
      ))}
    </div>
  );
};

export default WeatherButton;
App.js
해당 코드는 메인 화면을 구성하는 곳이다.
import 'bootstrap/dist/css/bootstrap.min.css';
import './App.css';
import WeatherBox from './components/WeatherBox';
import WeatherButton from './components/WeatherButton';
import { Container } from 'react-bootstrap';
import React, {useState, useEffect} from 'react';
import {ClipLoader} from 'react-spinners';

const API_KEY = '0639bdfec75e35b7817d78b6b2ca0ef3';
const cities = ['paris', 'new york', 'tokyo', 'seoul'];

const App = () => {
  const [loading, setLoading] = useState(false);
  const [city, setCity] = useState(null);
  const [weather, setWeather] = useState(null);
  const [apiError, setAPIError] = useState('');

  const getWeatherByCurrentLocation = async (lat, lon) => {
    console.log('현재 위치', lat, lon);
    try {
      let url = //units=metric 캘빈을 섭씨로
        // let url = `https://api.openweathermap.org/data/2.5/weather?lat=${lat}&lon=${lon}&appid=${API_KEY}`;
        // `https://api.openweathermap.org/data/2.5/weather?q=${city}&appid=${API_KEY}`;
      `http://api.openweathermap.org/data/2.5/weather?lat=35.87222&lon=128.60250&appid=API키`;
      //&units=metric
        const res = await fetch(url);
        const data = await res.json();
        setWeather(data);
        setLoading(false);
        } catch (err) {
          setAPIError(err.message);
          setLoading(false);
        }
      };

      const getCurrentLocation = () => {
        navigator.geolocation.getCurrentPosition((position) => {
          const { latitude, longitude } = position.coords;
          getWeatherByCurrentLocation(latitude, longitude);
          //console.log('현재위치?', latitude, longitude);
        });
      };

      const getWeatherByCity = async () => {
        try {
          let url = `https://api.openweathermap.org/data/2.5/weather?q=${city}&appid=${API_KEY}`;
          //&units=metric
          const res = await fetch(url);
          const data = await res.json();
          setWeather(data);
          setLoading(false);
         } catch (err) {
          console.log(err);
          setAPIError(err.message);
          setLoading(false);
        }
      };

      useEffect(() => {
        if (city == null) {
          setLoading(true);
          getCurrentLocation();
        } else {
          setLoading(true);
          getWeatherByCity();
        }
      }, [city]);

      const handleCityChange = (city) => {
        if (city === 'current') {
          setCity(null);
        } else {
          setCity(city);
        }
      };

  return (
    <Container className="vh-100">
      {loading ? (
        <div className="w-100 vh-100 d-flex justify-content-center align-items-center">
         <ClipLoader color="#f86c6b" size={150} loading={loading} />
        </div>
        ) : !apiError ? (
          <div class="main-container">
          <WeatherBox weather={weather} />
          <WeatherButton
           cities={cities}
           handleCityChange={handleCityChange}
           selectedCity={city}
          />
        </div>
        ) : (
          apiError
        )}
      </Container>
  );
};

export default App;
그리고, 이전에 가입했던 사이트에서 받아온 API키를 복사해서 붙여넣는다. API키는 랜덤으로 생성된다.
App.css
body {
  background: url(https://camo.githubusercontent.com/bcae277e88b0b3e72e4340030547d4a5e43f32ac8717bd8378cc50d6ab1672e3/68747470733a2f2f6d656469612e77697265642e636f2e756b2f70686f746f732f3630366462613163396131356637336135393761326161312f6d61737465722f775f31363030253243635f6c696d69742f776561746865722e6a7067);
  height : 100vh;
  background-repeat: no-repeat;
  background-size: cover;
}

.weather-card{
  background-color: rgba(52,52,52,.7);
  padding: 50px;
  border: 2px solid #fff;
  border-radius: 20px;
  max-width: 700px;
  width:100%;
  height: 300px;
}
.main-container{
  display: flex;
  flex-direction: column;
  align-items: center;
  justify-content: center;
  height: 100%;

}
.menu-container{
  display: flex;
  justify-content: center;
  background-color: #000;
  border-radius: 60px;
  max-width: 700px;
  width:100%;
  padding: 30px;
  margin-top: 30px;

}
.menu-container Button{
  margin-right:30px;
}

.menu-container Button:hover{
  background-color: #ffc107;
}
화면의 로딩 화면 만들기
With Yarn:
yarn add react-spinnersWith npm:
npm install --save react-spinners결과
2) 학습내용 중 어려웠던 점
오늘 학습은 전체적으로 강사의 지시를 제대로 따라갔었지만 가장 어려웠던 것은 리액트에 익숙해져야 하는 시간이 필요하다는 것이다. 리액트라는 라이브러리를 익히는 것은 그 라이브러리를 가지고 많이 따라하고 따라해봐야 하기 때문이다.
3) 해결방법
리액트를 많이 사용하고 아무 프로젝트나 만들고 인터넷에 리액트로 사이트를 만드는 코드가 있는데, 그것도 참고해야 할 필요가 있다.
4) 학습소감
리액트 수업을 통해서 나는 풀스택을 배워야 할 동기를 주게 되었다. 프론트 엔드의 대표격인 Vue js React Angular가 있는데 이 중에서 리액트를 배웠고 내 서랍에도 리액트 서적이 있다. 그리고, 백엔드로는 Django(Python)와 스프링부트(Java)가 있는데 이것 두 가지도 모두 배워야하고 SQL 역시 익혀야 한다.