- 본 시리즈는 정영주 교수님의 2022-2 '영상정보처리' 수업을 정리한 내용입니다.
컬러 처리
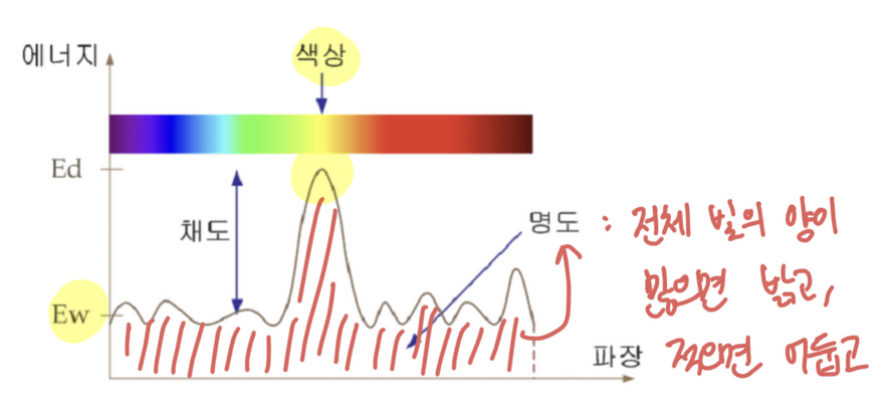
- 색
- 색상 : 우세주파수의 색상
- 명도 : 파형 아래 면적
- 전체 빛의 양이 많으면 밝고, 적으면 어둡고
- 채도 : Ed(가장 높) - Ew(가장 낮)
- Ew 작아지면 1)명도 저하 2)색상 인식 어려움
- 눈 구조
- 렌즈부분
- 홍채 : 빛의 양 조절 (=조리개)
- 수정체 : 초점거리 조절
- ←이거 잘 안되면 원시, 근시
- 필름 부분
- 망막
- 막대 세포 : 명암 인식, 어둠 반응
- 원추 세포 : 색상 인식, 밝음 반응
- 망막
- 렌즈부분
- 컬러 매칭 : 적은 수의 파장으로 모든 색을 만듬
- R,G,B로 만들면 R이 음의 값을 가지는 구간이 생김. 그래서 현실적으로 불가능!
컬러 모델
- CIE : 가상의 삼원색. 모두 양의 함수로 수학적으로 유도(현실적으로 만들기 불가능)

-
x + y + z = 1
- (x, y 결정되면 z 자동으로 결정되서, 2차원에서 표현 가능)
- X Z : 색
- Y : 명도
-
백색 기준으로 같은거리면 보색.
-
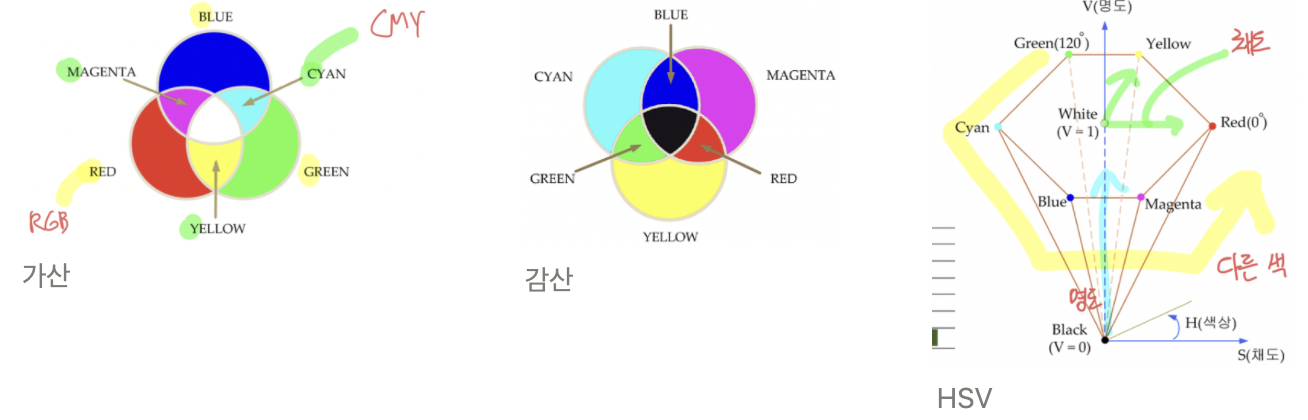
RGB 컬러모델
- RGB 삼중 자극 이론 (
원추세포는 RGB에 가장 민감하게 반응) - 가산 모델 (RGB)
- 빛의 합성 (ex.모니터)
- RGB 삼중 자극 이론 (
-
감산 모델 (CMY)
- 물감의 합성 (ex.프린터. 색은 더할수록 어두워져서 감산ㅇㅇ)
-
CMYK
- : CMY + K(회색농도)
-
HSV : 색상 + 채도 + 명도 (
직관적!)- 원뿔형 HSV : 색상 둥글게
- HLS : 명도 범위 2배
-
YUV : 컬러TV ↔ 흑백TV 호환성!
-
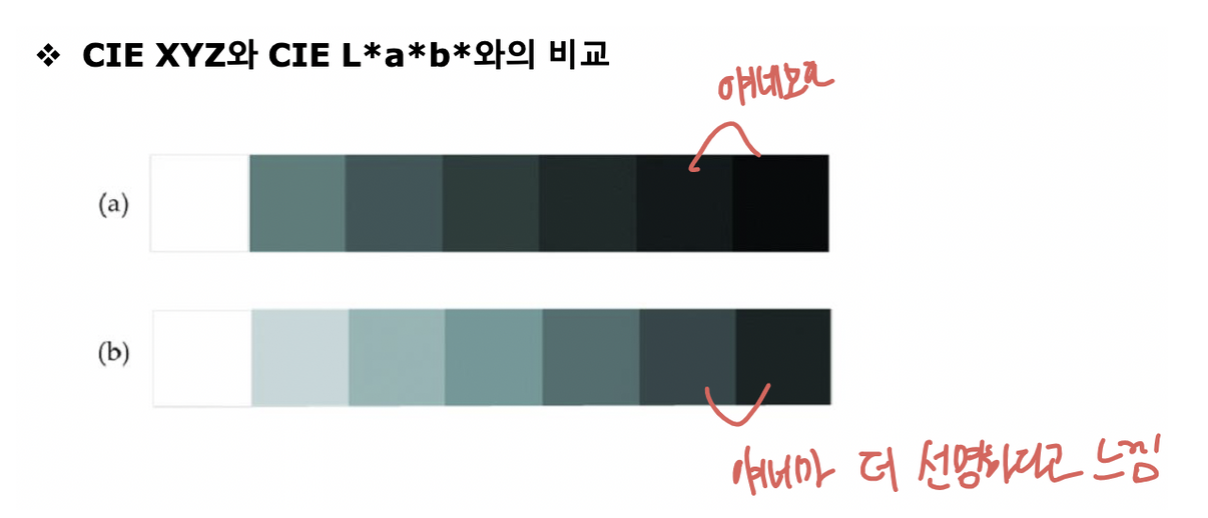
CIE Lab* : 인지된 색차가 맵 상의 거리에 비례하도록
- CIE 변형. CIE는 인지된 색차가 그림의 거리에 비례하지 않음
-
CMS :
- 컬러 호환성 - 1)컬러 모델 2)장비 특성에 따른 오차를 최소화
픽셀 단위 연산 처리
픽셀 화소 처리
- : 단위 픽셀 한개씩 독립적으로 작용하는 처리. (가장 기본적인 처리!)
- 영상이니까 이중 for문 돌면서 자기 픽셀 값만 변경
for(int i=0; i<height; i++) for(int j=0; j<width; j++) for (int c=0; c<3; c++) Out[i][j][c] = In[i][j][c]/2; # Out[i][j][c] = In[i][j][c] + In2[i][j][c] 처럼 다른 영상 값으로도 변경 가능. - 픽셀 화소 처리 vs. 영역 처리
- = 자신 만의 데이터 사용 vs. 주변의 여러 점들을 사용
- 상수 값 연산 결과
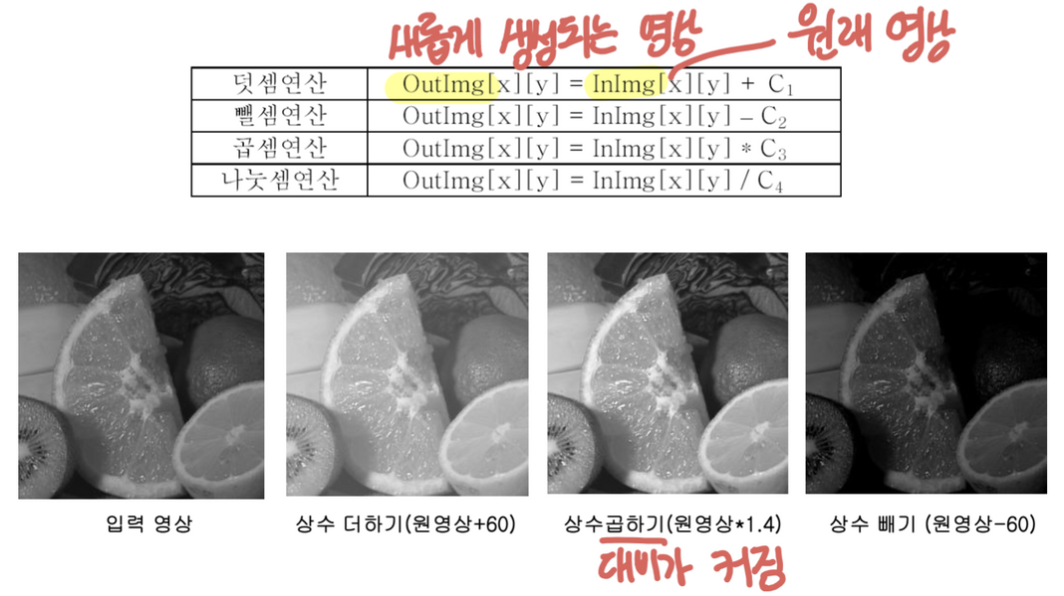
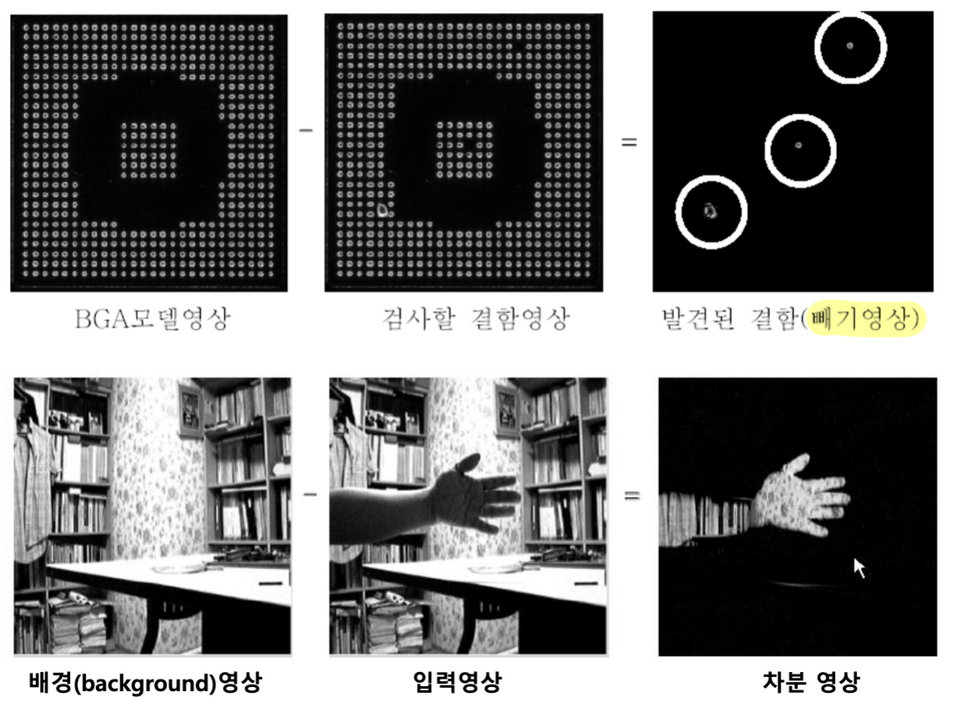
- 두 영상을 빼서 차이점을 볼 수도 있음.
rgb로 추출 구현
import cv2 as cv
import numpy as np

img = cv.imread("Mandrill.bmp", cv.IMREAD_COLOR)
cv.imshow("image", img)
H, W, C = img.shape[:] #C는 채널로 3이 들어감. 0=blue, 1=green, 2=red
img2 = np.zeros((H, W, C), img.dtype) #백지 상태
img3 = np.zeros((H, W, C), img.dtype)
img4 = np.zeros((H, W, C), img.dtype)

h, w, c = img.shape


for y in range(h):
    for x in range(w):
        for c in range(3):
            if(c==0) : #c가 0일때 blue 이므로, blue 값만 추출
                img2[y, x, c] = img[y, x, c]
            if(c==1) :#c가 1일때 green 이므로, green 값만 추출
                img3[y, x, c] = img[y, x, c]
            if(c==2) :#c가 2일때 red 이므로, red 값만 추출
                img4[y, x, c] = img[y, x, c]

cv.imshow("1911695_B", img2)
cv.imshow("1911695_G", img3)
cv.imshow("1911695_R", img4)
cv.waitKey(0)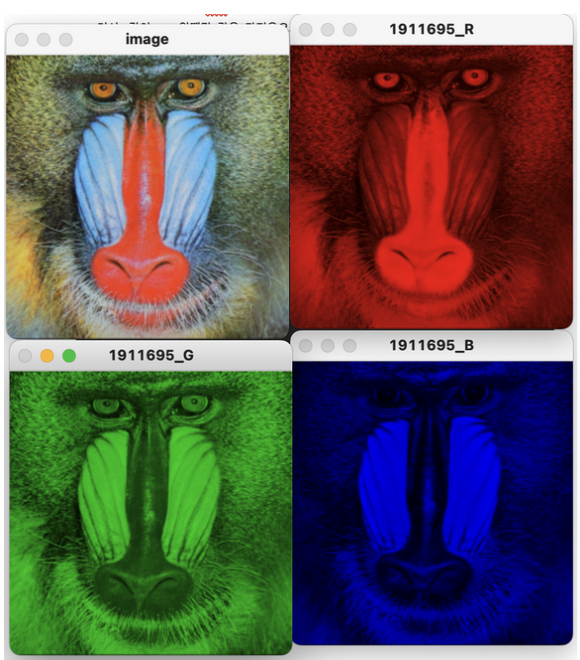
이미지 반전 구현
import cv2 as cv
import numpy as np

img = cv.imread("rice.bmp", cv.IMREAD_GRAYSCALE)
H, W= img.shape[:]
img_inverse = np.zeros((H, W), img.dtype)
for y in range(H):
    for x in range(W):
        img_inverse[y,x] = 255 - img[y,x]

cv.imshow("image",img)
cv.imshow("image_inverse", img_inverse)
cv.waitKey(0)
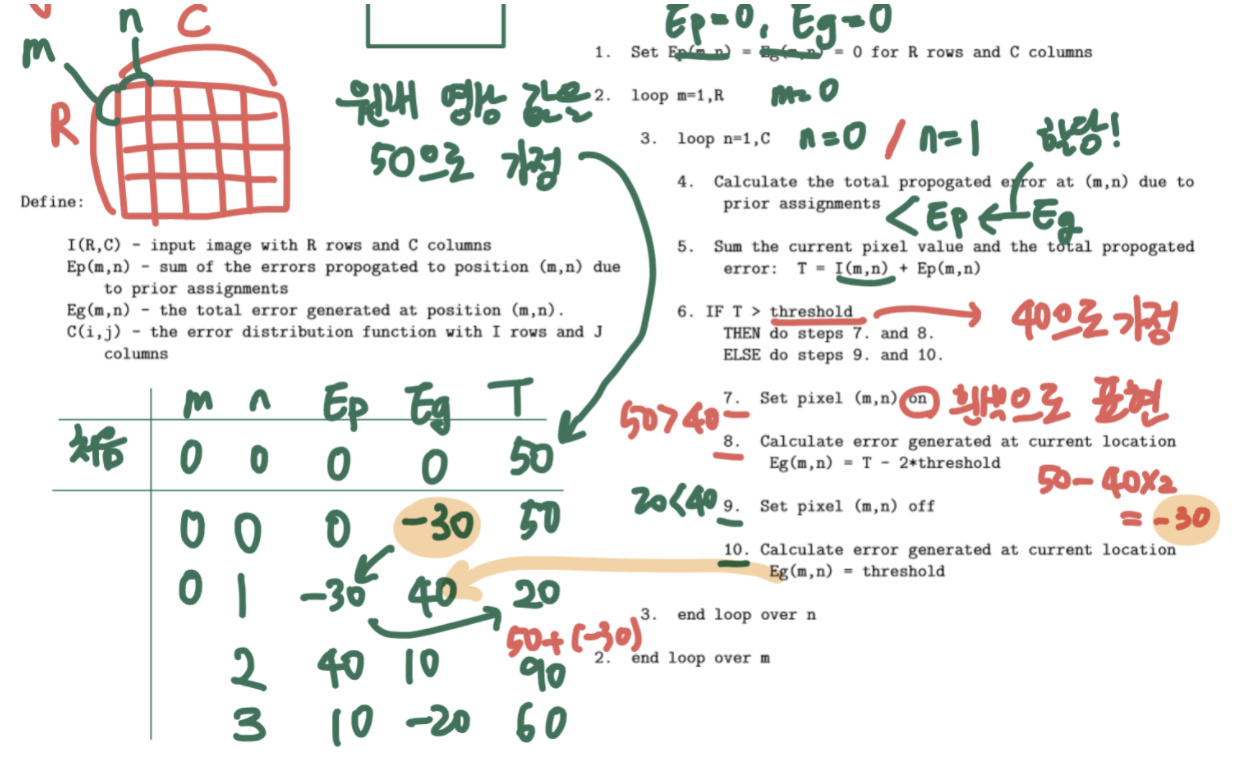
Image Halftoning : threshold 값으로 불을 킬지 말지 결정.
- 알고리즘 상, threshold 값보다 크면 흰색, 작으면 검은색.
- ⇒ threshold 값이 클수록 검은 점이 많이 찍힘.
간단한것들 정리