구글 로그인 + API 사용
유튜브는 구글꺼니까 아예 처음부터
구글 계정으로 로그인하면
유튜브 정보도 API로 받아올 수 있겠죠?
controllers/users.ts
import { Request, Response, NextFunction } from 'express';
import { getConnection } from 'typeorm';

import { google } from 'googleapis';
import { GetTokenOptions } from 'google-auth-library';

import token from './token';

import { User } from '../entities/User';

import 'dotenv/config';

const SERVER_PORT = process.env.SERVER_PORT || 4000;

const oauth2Client = new google.auth.OAuth2(
  process.env.GOOGLE_CLIENT_ID,
  process.env.GOOGLE_CLIENT_SECRET,
  `${process.env.SERVER_DOMAIN}:${SERVER_PORT}/users/login/callback`
);

const authURL = oauth2Client.generateAuthUrl({
  access_type: 'offline',
  scope: [
    'https://www.googleapis.com/auth/userinfo.profile',
    'https://www.googleapis.com/auth/userinfo.email',
    'https://www.googleapis.com/auth/youtube.readonly',
  ],
});

const usersController = {
  login: async (req: Request, res: Response, next: NextFunction) => { },
  callback: async (req: Request, res: Response, next: NextFunction) => { },
};

export default usersController;
import { Request, Response, NextFunction } from 'express';- 서버에서 받는 요청, 응답 처리용으로
express에서 가져옵니다
import { getConnection } from 'typeorm';- 서버에서 최근에 생성한 DB 연결을 가져오는 용으로
typeorm에서 가져옵니다
import { google } from 'googleapis';
import { GetTokenOptions } from 'google-auth-library';- 구글에서 제공하는 API 접속용 라이브러리입니다
GitHub - googleapis/google-api-nodejs-client
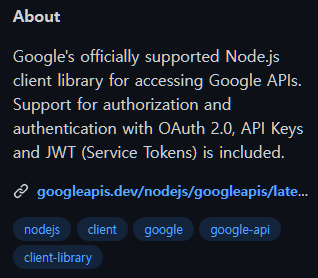
yarn add googleapis로 설치합니다
import token from './token';./token.ts에 토큰 생성 및 해독 관련 함수를 생성해서 불러옵니다
import { User } from '../entities/User';- DB의
user테이블을 연결합니다
import 'dotenv/config';.env에 GCP에서 준비한 웹 앱용OAuth클라이언트 설정을 입력해두고 시작합니다- GCP - 프로젝트 - API - 사용자 인증 정보 - OAuth 2.0 클라이언트 ID 에서 모두 설정할 수 있습니다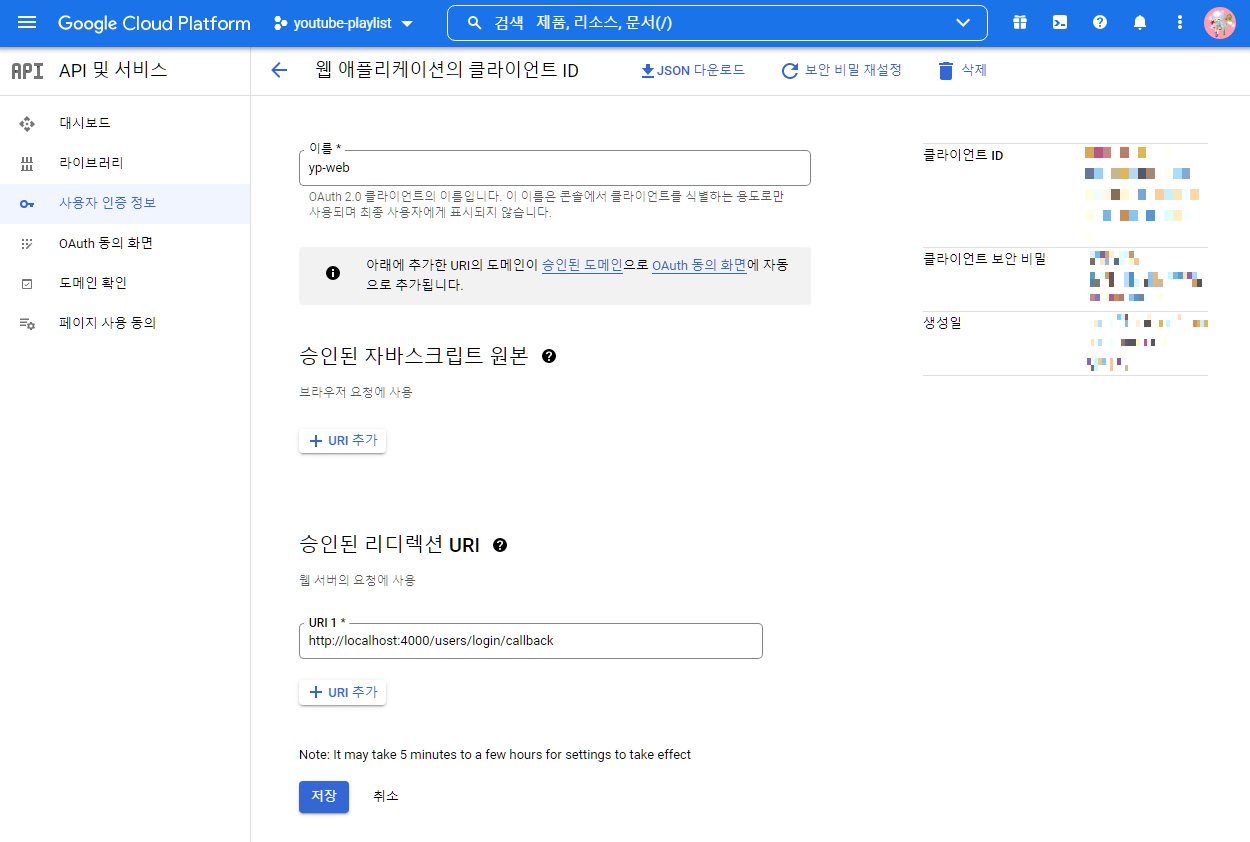
const SERVER_PORT = process.env.SERVER_PORT || 4000;- 서버의 포트는
.env에서 설정하거나 없으면 4000
const oauth2Client = new google.auth.OAuth2(
  process.env.GOOGLE_CLIENT_ID,
  process.env.GOOGLE_CLIENT_SECRET,
  `${process.env.SERVER_DOMAIN}:${SERVER_PORT}/users/login/callback`
);-
googleapis에서 제공하는oauth2Client입니다 -
google.auth.OAuth2에 들어가는parameter는
CLIENT_ID,CLIENT_SECRET,callback 주소순입니다- GCP에서 설정했던 내용을 넣어주시면 됩니다 (위 그림 참조)
- GCP에서 설정했던 내용을 넣어주시면 됩니다 (위 그림 참조)
const authURL = oauth2Client.generateAuthUrl({
  access_type: 'offline',
  scope: [
    'https://www.googleapis.com/auth/userinfo.profile',
    'https://www.googleapis.com/auth/userinfo.email',
    'https://www.googleapis.com/auth/youtube.readonly',
  ],
});- 사용자가 실제 구글 로그인을 하는 주소를 만들어줍니다
access_type은offlinescope는 구글 서비스 중 어느 부분까지만 볼 수 있게 할지를 정하는 부분입니다
여기서는 구글 사용자의profile,email, 그리고youtube의 읽기 전용 부분만 볼 수 있게 설정하였습니다
여기까지 설정하고 이제 endpoint별 실행할 함수를 설정해줍니다
const usersController = {
  login: async (req: Request, res: Response, next: NextFunction) => { },
  callback: async (req: Request, res: Response, next: NextFunction) => { },
};login:get, 단순히 구글 로그인용 주소로 이동하는 역할만 합니다
login: async (req: Request, res: Response, next: NextFunction) => {
    try {
      return res.redirect(authURL);
    } catch (err) {
      res.status(500).send({
        message: 'Internal server error',
      });
      next(err);
    }
  },
클라이언트에서 login으로 요청을 보내면 응답으로 구글 로그인용 주소를 만들어 이동하게끔 합니다
callback:get, 사용자가 구글 계정으로 로그인하고 돌아오는 주소입니다. GCP에서 설정한callback주소와 일치해야합니다.
callback: async (req: Request, res: Response, next: NextFunction) => {
    try {
      const authorizationCode: GetTokenOptions['code'] = req.query
        .code as string;
      const { tokens } = await oauth2Client.getToken(authorizationCode);
      oauth2Client.setCredentials(tokens);
      const oauth2 = google.oauth2({ auth: oauth2Client, version: 'v2' });
      const userinfo = await oauth2.userinfo.get();
      const queryBuilder = await getConnection().createQueryBuilder(User, 'user');
      const check = await queryBuilder
        .where('user.email = :email', { email: userinfo.data.email })
        .getOne();

      const tokenData = {
        id: -1,
        name: userinfo.data.name,
        email: userinfo.data.email,
        token: {
          youtube: {
            access_token: tokens.access_token,
            refresh_token: tokens.refresh_token,
          },
        },
      };
      if (!check) {
        const insert = await queryBuilder
          .insert()
          .into(User)
          .values([{ name: userinfo.data.name, email: userinfo.data.email }])
          .execute();
        console.log('새로운 계정 추가');
        tokenData['id'] = insert.raw.insertId;
      } else {
        console.log('기존 회원 로그인');
        tokenData['id'] = check.id;
      }

      const accessToken = token.generateAccessToken(tokenData)
      delete tokenData['token']
      token.sendAccessToken(res, tokenData, accessToken)
    } catch (err) {
      res.status(500).send({
        message: 'Internal server error',
      });
      next(err);
    }
  },
좀 길어서 한줄씩 볼게요
const authorizationCode: GetTokenOptions['code'] = req.query.code as string;- 구글 로그인을 하고 돌아올 때 인증코드를
query에 달아서 보내줍니다
이것의 타입은GetTokenOptions['code']로string이지만
typescript에서string으로 바로 인식을 못 해서
as string으로Type assertion을 해줍니다
타입 단언 - Type assertion
TypeScript: Documentation - Handbook
때로는TypeScript보다 당신이 어떤 값의 타입에 대한 정보를 더 잘 아는 경우도 존재합니다.
...
이런 경우, 타입 단언을 사용하면 타입을 좀 더 구체적으로 명시할 수 있습니다.
const { tokens } = await oauth2Client.getToken(authorizationCode);- 토큰은
oauth2Client에 인증코드를 넣어 얻어냅니다
oauth2Client.setCredentials(tokens);oauth2Client의 권한을 받은 토큰으로 설정하고
const oauth2 = google.oauth2({ auth: oauth2Client, version: 'v2' });- 실제 구글의 사용자 인증 정보를 옵션을 위와 같이 넣고 접근합니다
const userinfo = await oauth2.userinfo.get();- 사용자 인증 정보를
oauth2.userinfo.get()으로 얻어냈습니다
const queryBuilder = await getConnection().createQueryBuilder(User, 'user'); TypeORM에서 DB를 다루기 위한queryBuilder입니다
-getConnection()으로 접속했던 DB에 연결하고User를'user'로 별칭을 붙여줍니다TypeORM - Query Builder
QueryBuilder is one of the most powerful features of TypeORM - it allows you to build SQL queries using elegant and convenient syntax, execute them and get automatically transformed entities.
- 자세한 사용법은 공식문서를 참고하면서 적용하겠습니다
    const check = await queryBuilder
      .where('user.email = :email', { email: userinfo.data.email })
.getOne();queryBuilder로 DB에서 이메일 주소가 있는지 체크하여 기존 사용자와 신규 사용자를 구분
    const tokenData = {
      id: -1,
      name: userinfo.data.name,
      email: userinfo.data.email,
      token: {
        youtube: {
          access_token: tokens.access_token,
          refresh_token: tokens.refresh_token,
        },
      },
};- 토큰을 만들 정보입니다.
여기에는 사용자의 DB ID, 사용자 이름, 이메일, 그리고 유튜브 토큰을 담아주려고 합니다
    if (!check) {
      const insert = await queryBuilder
      .insert()
      .into(User)
      .values([{ name: userinfo.data.name, email: userinfo.data.email }])
      .execute();
      console.log('새로운 계정 추가');
      tokenData['id'] = insert.raw.insertId;
    } else {
      console.log('기존 회원 로그인');
      tokenData['id'] = check.id;
}-
DB에 없다면 (신규 사용자),
구글 사용자 정보를queryBuilder를 이용해 넣어주고
넣은 결과 중 ID를 토큰용 정보로 넣어줍니다 -
이미 DB에 등록되어 있다면 (기존 사용자),
위에서 조회한 DB 결과에서 ID를 토큰용 정보로 넣어줍니다
    const accessToken = token.generateAccessToken(tokenData)
    delete tokenData['token']
token.sendAccessToken(res, tokenData, accessToken)-
accessToken을 토큰용 정보에서 만들어내고
유튜브 토큰을 빼고 나머지를 클라이언트 응답으로 보내줍니다 -
토큰은
token.ts에서 만들고, 응답도 처리해줍니다
controllers/token.ts
import { Request, Response } from 'express';
import { sign, verify } from 'jsonwebtoken';

interface tokenData {
  id: number;
  name: string;
  email: string;
  token?: object;
}

export default {
  generateAccessToken: (data: tokenData) =>
    sign({ data }, process.env.ACCESS_SECRET, {
      expiresIn: 60 * 60 * 1000, // 1 hr
    }),
  sendAccessToken: (res: Response, data: tokenData, accessToken: string) => {
    res.header('Authorization', `Bearer ${accessToken}`);
    res.status(200).json({ data, message: 'OK' });
  },
  isAuthorized: (req: Request) => {
    const authorization = req.headers.authorization;
    if (!authorization) {
      return null;
    }
    const accessToken = authorization.split('Bearer ')[1];
    try {
      return verify(accessToken, process.env.ACCESS_SECRET);
    } catch (err) {
      return null;
    }
  },
};-
JWT를 이용합니다 -
tokenData로는id,name,email이 들어가야 하고,
token은 토큰 만들 때는 필요하지만, 응답으로 보내줄 땐 없어야 하기 때문에
선택 사항으로 만들었습니다 -
generateAccessToken: 토큰용 정보를 받아 유효시간 1시간 짜리 토큰을 만들어냅니다 -
sendAccessToken: 사용자 정보 (유튜브 토큰 없는), 액세스 토큰을 받아 응답의Header로'Authorization', `Bearer ${accessToken}를 붙여 보내줍니다src폴더의index.ts-app.use(cors())
CORS 설정 나중에 맞춰서 잘 해야겠습니다
-
isAuthorized: 요청의 토큰이 유효한지 확인하고 토큰의 내용을 해석해서 보내주는 함수입니다
이어서 많이 쓸 예정입니다
이어서
유튜브 API로 목록 조회
클라이언트에서 목록 띄우기