
0. Intro
Pytorch는 Google의 Tensorflow-Keras와 더불어, 세계에서 가장 많이 쓰이는 딥러닝 프레임워크 중 하나이다.
본인은 학부생 시절, Tensorflow 1.3을 처음 접하게 되고, 2.X 버전까지 Tensorflow를 사용하다가 실무에 와서 Pytorch를 접하게 되었다.
현재 느끼기에는, Tensorflow-Keras보다 연구자용으로 Pytorch가 더 많이 쓰이는 것 같고, 실제 github repository를 탐색하다 보면
딥러닝 쪽의 프레임워크로 Pytorch를 더 많이 찾아볼 수 있다. (주관적인 생각임)
(그리고 이제는 Pytorch가 훨~씬 편해졌다.. ㅎㅎ..)
이번 포스팅에서는 Pytorch에서 데이터셋을 로드하는 Dataloader와, 그것의 발판이 되는 Dataset 클래스 구현에 대해 살펴보려고 한다.
1. Before development
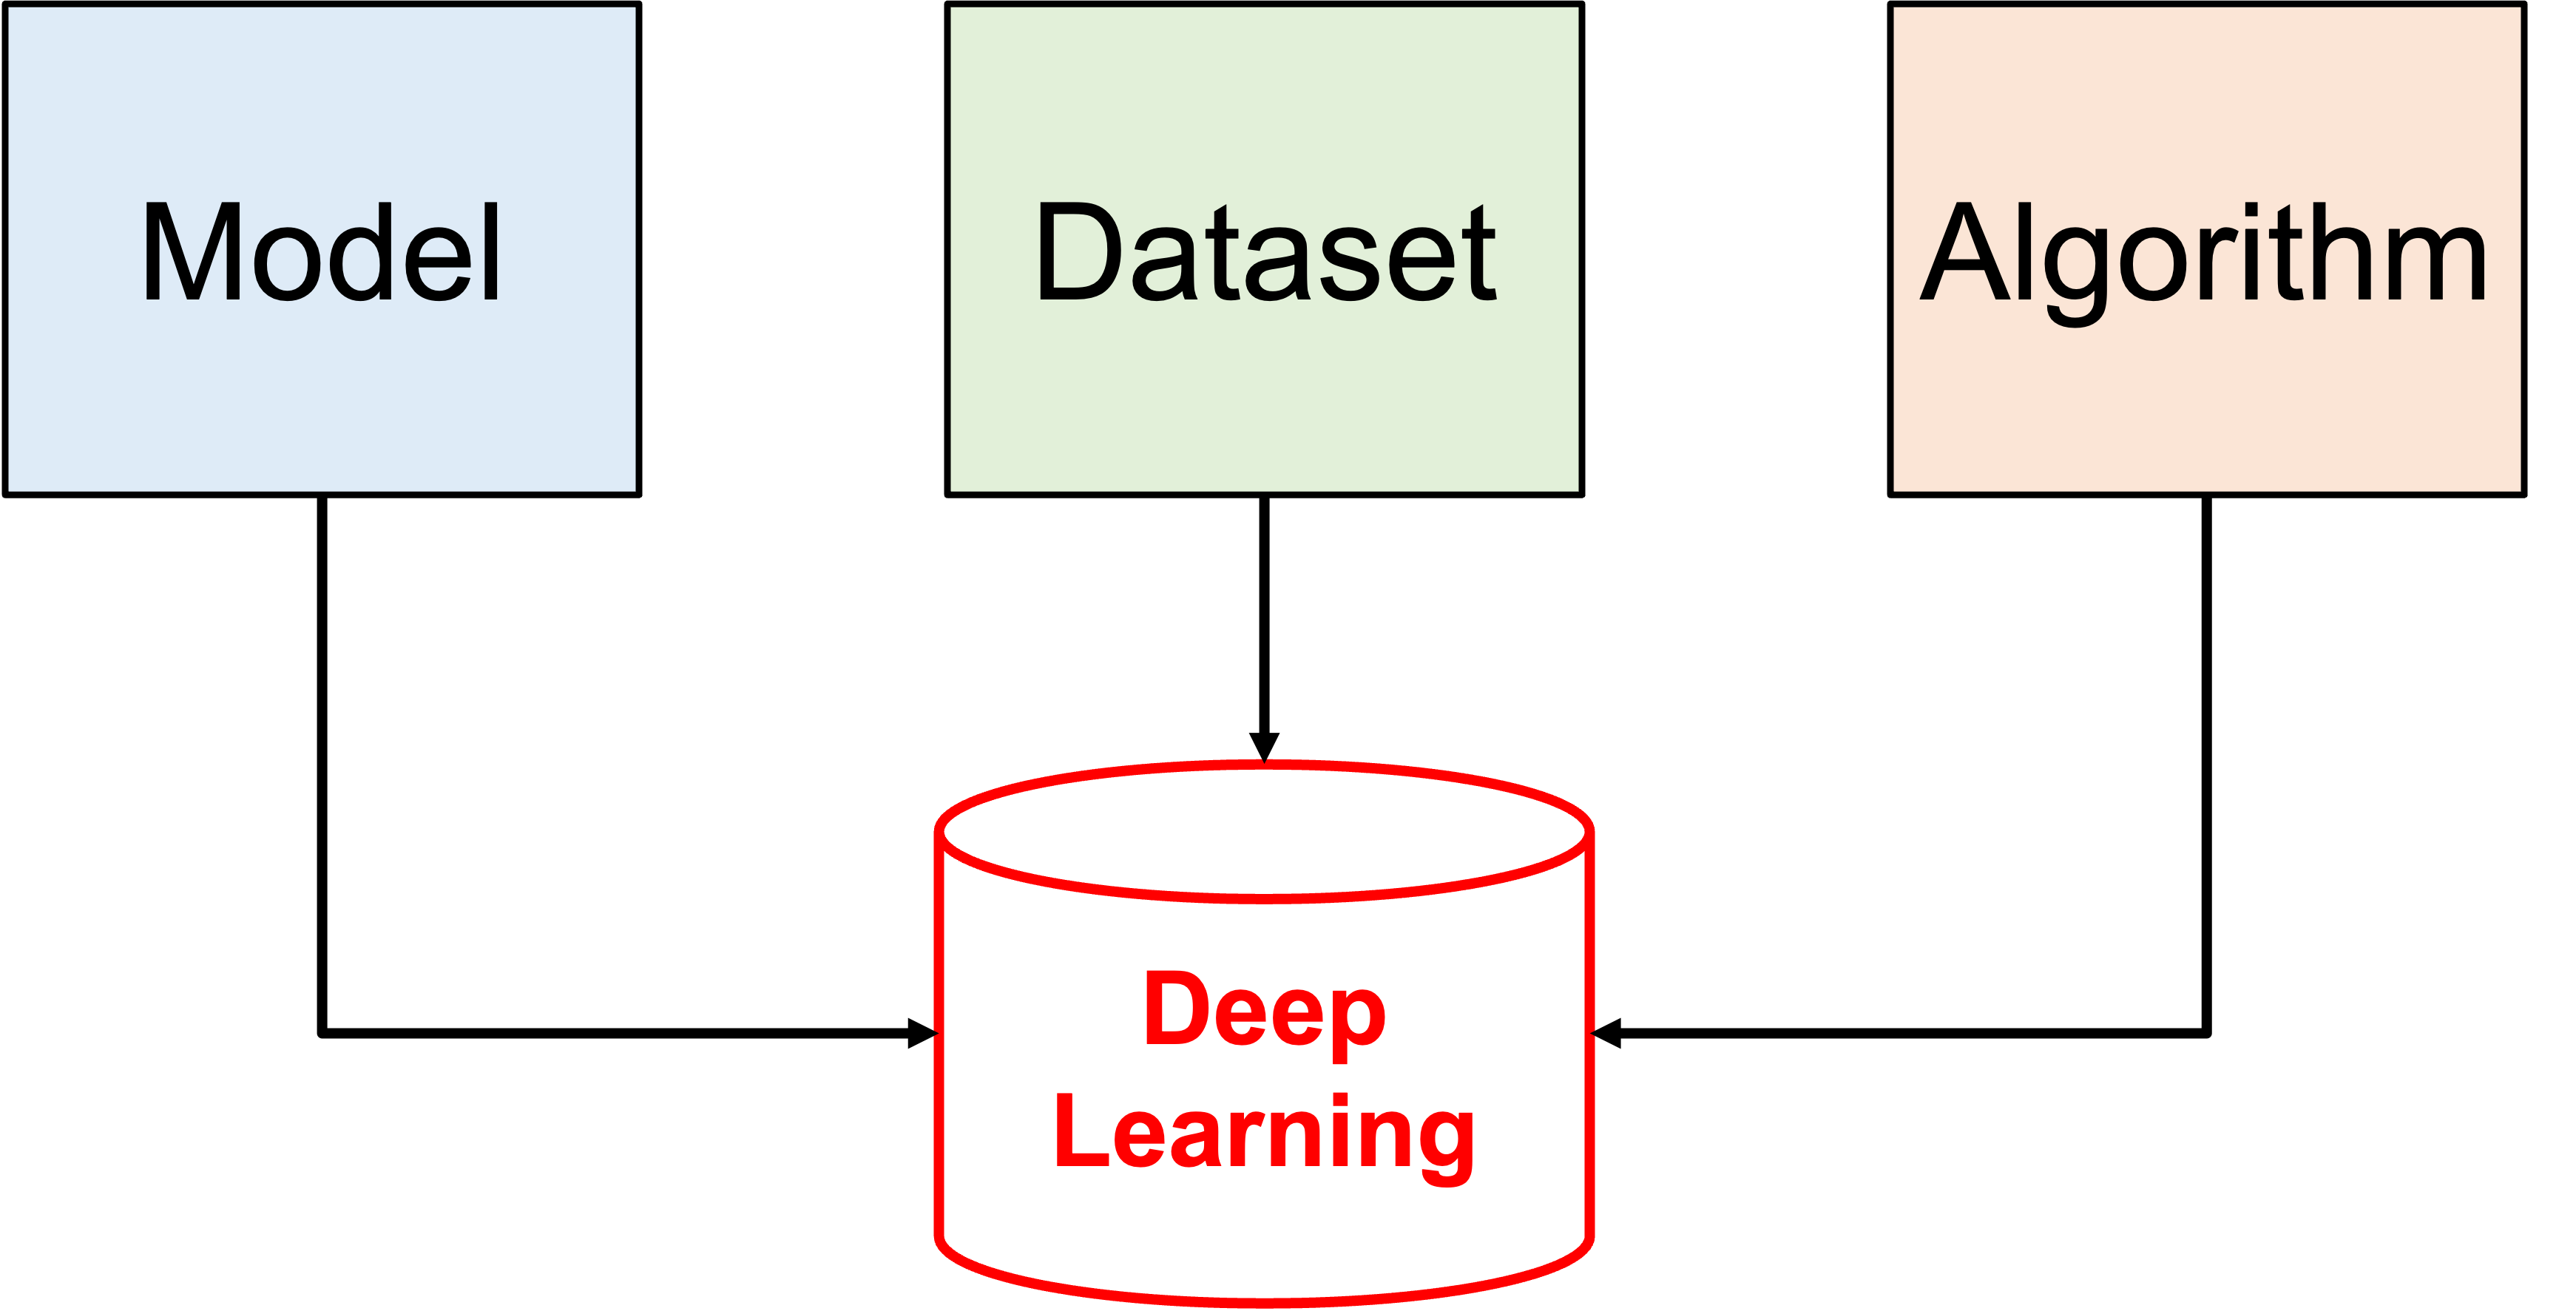
본인이 생각하는 이미지(Vision) 딥러닝의 핵심 3요소이다.
크게 모델, 데이터셋, 알고리즘으로 구분했다.
1) Model은 SOTA(State-Of-The-Art) 이든 아니든, Feature Extraction 기능을 하는 Convolutional Neural Network가 될 것이다.
2) Dataset
2-1) 어떠한 기업이나 연구소, 개인이 독자적으로 보유한 이미지 데이터셋이 될 수도, 웹 상에 존재하는 공개 데이터셋이 될 수도 있다.
2-2) 데이터셋에는 지도 학습(Supervised Learning) 기준으로 Classification, Object Detection, Segmentation task에 합당한 학습을 위해 정답 값이 존재한다.3) Algorithm은 Model과 Dataset을 제외한, Pre/Post Processing(전/후처리) 또는 경량화(Pruning), 양자화(Quantization) 등이 될 것이다.
라고 생각한다.
우리가 이번 포스팅을 위해서 집중해야 되는 부분은 Dataset 부분이다.
딥러닝 모델을 구현을 하든, 외부 github repository에서 가져와서 응용을 하든 필수적으로 생각해야 하는 부분이 Dataset이다.
(외부 github repository에서 모델을 가져와서 쓴다고 해도, 항상 training에서 막히는 일이 대부분이고, 그럴바엔 나는 Dataset class를 구현해서 내 입맛대로 쓰는 것을 더 선호하는 편이다.)
필자가 직접 구현한 Dataset class가 들어있는, 리모델링한 모델들이다.
- Easy-to-use VGGNet : https://github.com/bolero2/vggnet-torch
- Easy-to-use DeepLab V3+ : https://github.com/bolero2/deeplab-v3-torch
웹 상에는
- Classification을 위한 CIFAR-10, CIFAR-100과 같은 분류 데이터셋이 공개되어있고,
- Object Detection(탐지) 및 Semantic/Instance Segmentation(분할)을 위한 PASCAL VOC와 같은 공개 데이터셋 등이 존재한다.
- 그 외에, 개인 혹은 기업이 가지고 있는 private한 데이터셋이 존재한다.
Pytorch에는, 이러한 데이터셋을 Generation 형식과 유사하게 batch 단위로 로드하여, Network의 입력으로 사용할 수 있다.
2. in Development
실제 구현은 Dataloader 이전에 Dataset을 구현하는 것부터 시작한다.
(총 routine을 보자면, Dataset 구현 > Dataloader 생성 으로 볼 수 있다.)
Pytorch는 Open source이기 때문에, github에서 전체 코드를 살펴볼 수 있다.
Dataset class는 torch/utils/data/dataset.py에 구현되어 있다.
(원본 github code : https://github.com/pytorch/pytorch/blob/master/torch/utils/data/dataset.py)
torch/utils/data/dataset.py
class Dataset(Generic[T_co]):
    r"""An abstract class representing a :class:`Dataset`.
    All datasets that represent a map from keys to data samples should subclass
    it. All subclasses should overwrite :meth:`__getitem__`, supporting fetching a
    data sample for a given key. Subclasses could also optionally overwrite
    :meth:`__len__`, which is expected to return the size of the dataset by many
    :class:`~torch.utils.data.Sampler` implementations and the default options
    of :class:`~torch.utils.data.DataLoader`.
    .. note::
      :class:`~torch.utils.data.DataLoader` by default constructs a index
      sampler that yields integral indices.  To make it work with a map-style
      dataset with non-integral indices/keys, a custom sampler must be provided.
    """

    def __getitem__(self, index) -> T_co:
        raise NotImplementedError

    def __add__(self, other: 'Dataset[T_co]') -> 'ConcatDataset[T_co]':
        return ConcatDataset([self, other])

    # No `def __len__(self)` default?
    # See NOTE [ Lack of Default `__len__` in Python Abstract Base Classes ]
    # in pytorch/torch/utils/data/sampler.py
우리는 앞으로, 이 Dataset class를 불러와서, 상속받아서 사용해야 한다.
총 2가지 구현 의무가 있다.
1) __getitem__ 구현 : Dataloader가 __getitem__ 메소드로 이미지를 불러온다.
2) __len__ 구현 : Dataloader가 iteration 길이를 재기 위해서 __len__ 메소드를 참조한다.
- (1 iteration = (int) len / batch_size)
(실험 모델은 VGGNet을 사용하고, 해당 모델은 직접 작성하였다.)
(자세한 코드는 github repo : https://github.com/bolero2/vggnet-torch 를 참조.)
class VGGNet(nn.Module):
    def __init__(self, name, ch, num_classes, setting=None):
        super(VGGNet, self).__init__()
        # =========================== Setting ============================
        self.yaml = setting
        self.img_size = self.yaml['img_size']

        self.num_classes = num_classes
        self.category_names = [str(x) for x in range(0, self.num_classes)]
        self.root_dir = self.yaml['DATASET']['root_path']
        self.ext = self.yaml['DATASET']['ext']

        self.conv_layers = list()
        self.flatten = list()
        self.fc_layers = list()

        # ======================== get layer info ========================
        self.name = name
        layerset = self.yaml[self.name]
        fcset = self.yaml['fc_layer']
        self.ch = ch

        # ======================= Model Definition =======================
        for block in layerset:
            for layer_output in block:
                self.conv_layers += [nn.Conv2d(self.ch, layer_output, kernel_size=3, padding=1),
                                      nn.BatchNorm2d(layer_output),
                                      nn.ReLU(inplace=True)]
                self.ch = layer_output
            self.conv_layers += [nn.MaxPool2d(kernel_size=2, stride=2)]
        self.conv_layers += [nn.AdaptiveAvgPool2d((7, 7))]

        self.flatten += [nn.Flatten()]

        last_block = 0
        for block in range(0, len(fcset)):
            if block == 0:
                self.fc_layers += [nn.Linear(512 * 7 * 7, fcset[block])]
            else:
                self.fc_layers += [nn.Linear(fcset[block - 1], fcset[block])]
            last_block = fcset[block]

        self.fc_layers += [nn.Linear(last_block, self.num_classes)]

        self.total_layers = self.conv_layers + self.flatten + self.fc_layers

        self.model = nn.Sequential(*self.total_layers)
        self.softmax = softmax
        # ================================================================

        self._device = torch.device('cuda') if torch.cuda.is_available() else torch.device('cpu')
        self.criterion = nn.CrossEntropyLoss()

    def forward(self, x, phase='train'):
        for layer in self.model:
            x = layer(x)

        if phase == 'train':
            return x

        elif phase == 'test':
            return self.softmax(x)

        else:
            raise ValueError(f"phase: [{phase}] is invalid mode.")
모델에 이미지 데이터를 학습하기 위해서는, 데이터를 batch_size 마다 가져오고 싶을 것이다.
그리고 그 데이터라 함은,
- Image matrix
- Image matrix에 맞는 정답 값:
- Classification task에서는 one-hot encoding된 1차원 리스트 일 것이고,
- Detection task에서는 bounding box 좌표와 label index integer 일 것이고,
- Segmentation task에서는 Colormap 형태의 png Image matrix 일 것이다.
- 참조 : Semantic Segmentation Label Image
이렇게 2개를 필요로 한다. (지도학습 이기 때문에)
__getitem__ 메소드에서 이미지를 불러오기 때문에,
Dataset 클래스에서 cv2.imread(imgpath, cv2.IMREAD_COLOR) 또는 Image.open(imgpath) 등을 위의 __getitem__ 부분에 작성해줘야 한다.
3. Dataset class
torch의 Dataset class를 상속받아서 CustomDataset class를 제작하였다.
코드를 살펴보자.
import logging
import cv2
import numpy as np
import os
import torch
from torch.utils.data import Dataset


class CustomDataset(Dataset):
    def __init__(self, datapack, datadir='', category_names=[], imgsz=(224, 224, 3)):
        self.th, self.tw, self.tc = imgsz  # target-height, target-width, target-channel

        self.imgs = datapack[0]
        self.annots = datapack[1]
        self.datadir = datadir
        self.category_names = category_names

    def __getitem__(self, index):
        img = self.imgs[index]
        annot = self.annots[index]
        one_hot_encoded = np.zeros(shape=(len(self.category_names),))
        label_index = self.category_names.index(annot)
        one_hot_encoded[label_index, ] = 1

        img = cv2.imread(os.path.join(self.datadir, img), cv2.IMREAD_COLOR)
        img = cv2.resize(img, (self.th, self.tw))
        img = cv2.cvtColor(img, cv2.COLOR_BGR2RGB)
        img = img.astype(np.float32)
        img = img / 255.

        _img = torch.from_numpy(img).permute(2, 0, 1)
        _label = torch.Tensor(one_hot_encoded)
        return _img, _label

    def __len__(self):
        return len(self.imgs)
1) __init__ 부분에 여러 기본적인 정보들을 넣어주었다.
- 전체 image data의 경로 정보 :
self.imgs - 각 image data에 대한 라벨 정보 :
self.annots - image data의 root_path 정보 :
self.datadir - 모든 Category(분류 라벨)에 대한 정보 :
self.category_names
예를 들어, 고양이 사진인 img1.jpg 가 /dataset/cat/img1.jpg 이고 강아지 사진인 img1.jpg 가 /dataset/dog/img1.jpg 라면,
self.imgs에는 [cat/img1.jpg, dog/img1.jpg] 가 들어갈 것이다.self.annots에는 ['cat', 'dog'] 이 들어갈 것이다.self.datadir에는"/dataset"이 들어갈 것이다.self.category_names에는 ['cat', 'dog', ...] 가 들어갈 것이다.
이렇게 정보들을 먼저 넣어준다.
2) __getitem__ 부분에서 image path를 읽고, label 정보와 함께 return 해준다.
여기서 특징은, DataLoader 객체가 enumerate로 iteration을 생성할 때, 항상 인자가 integer 값으로 하나 들어간다.
위의 소스코드에서는 그 integer 값을 index 라는 파라미터 이름으로 지정하였다.
예를 들어, DataLoader 가 batch_size = 4 로 설정되어 있다면, __getitem__ function을 4번 호출하게 된다.
간단하게 DataLoader 클래스에서 어떻게 Dataset.__getitem__ 을 쓰는지 코드를 작성해보았다.
import random
import copy
from torch.utils.dataset import Dataset


# 총 이미지 데이터의 개수가 100개.
population = [x for x in range(0, 100)]
copied_population = copy.deepcopy(population)

batch_size = 4		# batch_size는 4로 설정함.

for iteration in range(0, int(len(population) / batch_size)):
    # batch_size 만큼 랜덤 샘플링 수행
    get_index = random.sample(population, batch_size)

    print(f"Iteration {iteration} : {get_index}")

    for _ind in get_index:
        Dataset.__getitem__(index=_ind)    # <- Dataset class 동작 위치.
        index = population.index(_ind)
        del population[index]              # 중복으로 데이터를 뽑는 것을 방지함.
result:
Iteration 0 : [86, 97, 18, 95]
# 0번째 iter에서는 이미지들 중 86, 97, 18, 95번째를 사용하는 것.

Iteration 1 : [8, 25, 74, 32]	# 이하 반복. 중복은 없음.
Iteration 2 : [62, 0, 10, 19]
Iteration 3 : [77, 9, 87, 23]
Iteration 4 : [17, 96, 15, 68]
Iteration 5 : [50, 14, 47, 78]
Iteration 6 : [39, 46, 93, 52]
Iteration 7 : [1, 44, 65, 16]
Iteration 8 : [59, 40, 53, 5]
Iteration 9 : [33, 72, 61, 67]
Iteration 10 : [37, 66, 11, 79]
Iteration 11 : [45, 43, 73, 34]
Iteration 12 : [85, 80, 20, 6]
Iteration 13 : [82, 64, 58, 69]
Iteration 14 : [21, 99, 2, 70]
Iteration 15 : [22, 92, 88, 71]
Iteration 16 : [91, 27, 36, 38]
Iteration 17 : [3, 4, 24, 57]
Iteration 18 : [89, 28, 48, 30]
Iteration 19 : [35, 83, 12, 41]
Iteration 20 : [54, 13, 29, 98]
Iteration 21 : [84, 81, 60, 94]
Iteration 22 : [7, 55, 75, 42]
Iteration 23 : [49, 76, 90, 31]
Iteration 24 : [26, 63, 51, 56]

# 총 데이터의 개수가 100개이고, batch-size 가 4이기 때문에 25번 iteration을 돌면
# 1 Epoch가 종료된다.
위의 소스코드에서 볼 수 있다시피, Dataset.__getitem__(index) 로 몇 번째 이미지를 가져올지 index 값을 넘겨주게 된다.
넘겨주는 integer 값은 단일 정수 값이기 때문에, Dataset class의 __getitem__ 에서는 1개의 이미지 인덱스에 대해서만 생각하면 된다.
이후의 절차는 다음과 같다:
img = self.imgs[index]로 index에 대한 이미지의 경로를 가져온다.annot = self.annots[index]로 index에 대한 라벨 정보를 가져온다.- 라벨 정보는 one-hot encoding 처리한다.
- (라벨 5개, [0, 1, 2, 3, 4] 에 대해서 라벨 정보가 3이라면? = [0, 0, 0, 1, 0]
one_hot_encoded = np.zeros(shape=(len(self.category_names),))
label_index = self.category_names.index(annot)
one_hot_encoded[label_index, ] = 1
- 1번에서 받아온 이미지의 경로를 바탕으로 image data의 matrix를 가져오고, normalization을 수행한다.
img = cv2.imread(os.path.join(self.datadir, img), cv2.IMREAD_COLOR)
img = cv2.resize(img, (self.th, self.tw))
img = cv2.cvtColor(img, cv2.COLOR_BGR2RGB)
img = img.astype(np.float32)
img = img / 255.
torch.Tensor형으로 바꿔주고, 이미지 정보와 라벨 정보를 반환한다._img = torch.from_numpy(img).permute(2, 0, 1) _label = torch.Tensor(one_hot_encoded) return _img, _label
Dataset class는 이렇게하면 모든 역할을 다 한 것이다.
핵심은, index를 받아서 해당 index 번째의 "이미지 데이터의 Tensor"와 그에 맞는 "라벨 정보의 Tensor"를 리턴해준다! 라고 할 수 있겠다.
3) __len__ 부분에서 전체 데이터의 개수를 return 해준다.
아까 위에서 DataLoader 의 동작 방식 코드에서 본 것 처럼, iteration 마다 batch_size 만큼의 index를 반환해주게 되는데, 그 때 필요한 것이 전체 이미지의 개수이다.
그냥 단순하게
def __len__(self):
    return len(self.imgs)
이렇게 구현해주면 된다.
이번 포스팅에서는
Datasetclass에서__getitem__메소드와__len__메소드의 역할DataLoaderclass의 동작 방식과 그에 따른__getitem__의 파라미터의 역할Datasetclass에서__getitem__메소드의 구현 방식과__len__메소드의 구현 방식
에 대해서 알아보았다.
포스팅이 길어진 관계로, 2편에서 Dataloader class와 그 클래스에서 사용하는 파라미터들에 대해서 알아보도록 하겠다.
