[사이드 프로젝트] react & flutter 채팅 앱 만들기 2 - React
들어가며
지난 시간에는 Spring boot의 websocket 튜토리얼을 해봤다.
이번 시간에는 React를 통해서 기본적인 채팅앱 UI를 구현하고 튜토리얼로 만든 서버랑 websocket 연결 테스트를 해볼 것이다.
ch.0 React Project 만들기
우선 기본적으로 나는 요즘 Nest js를 공부하고 있기 때문에 Node와 npm이 깔려있다.
다만 react는 yarn으로 설치하는 것이 더 좋기 때문에(개인 취향) yarn으로 project를 만들어보도록 하자
yarn create react-app practice_websocket_react
이제 여기서 필요없는 부분을 삭제하자.
- logo.svg
- index.js의 App-header,
- App.css의 내부 코드
- App.test.js
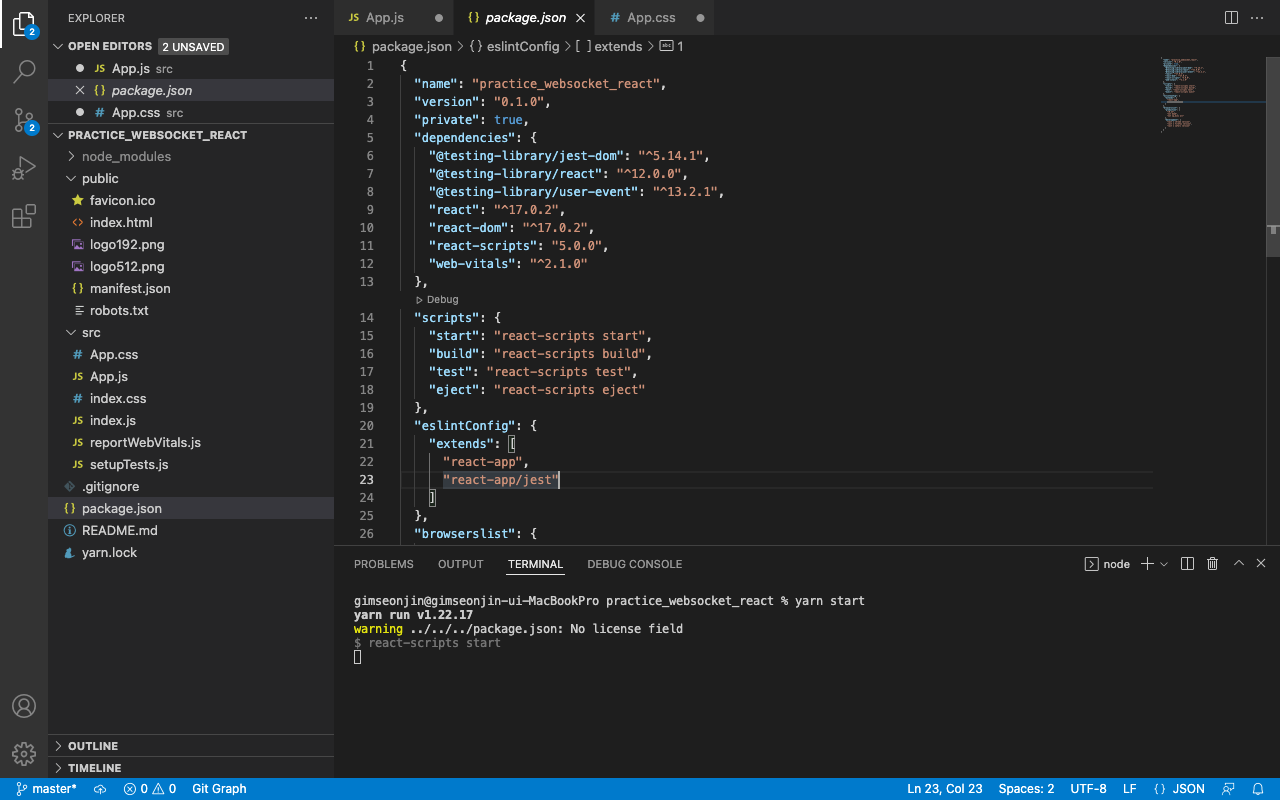
그 후 yarn start를 통해서 돌아가는 지 확인해보자
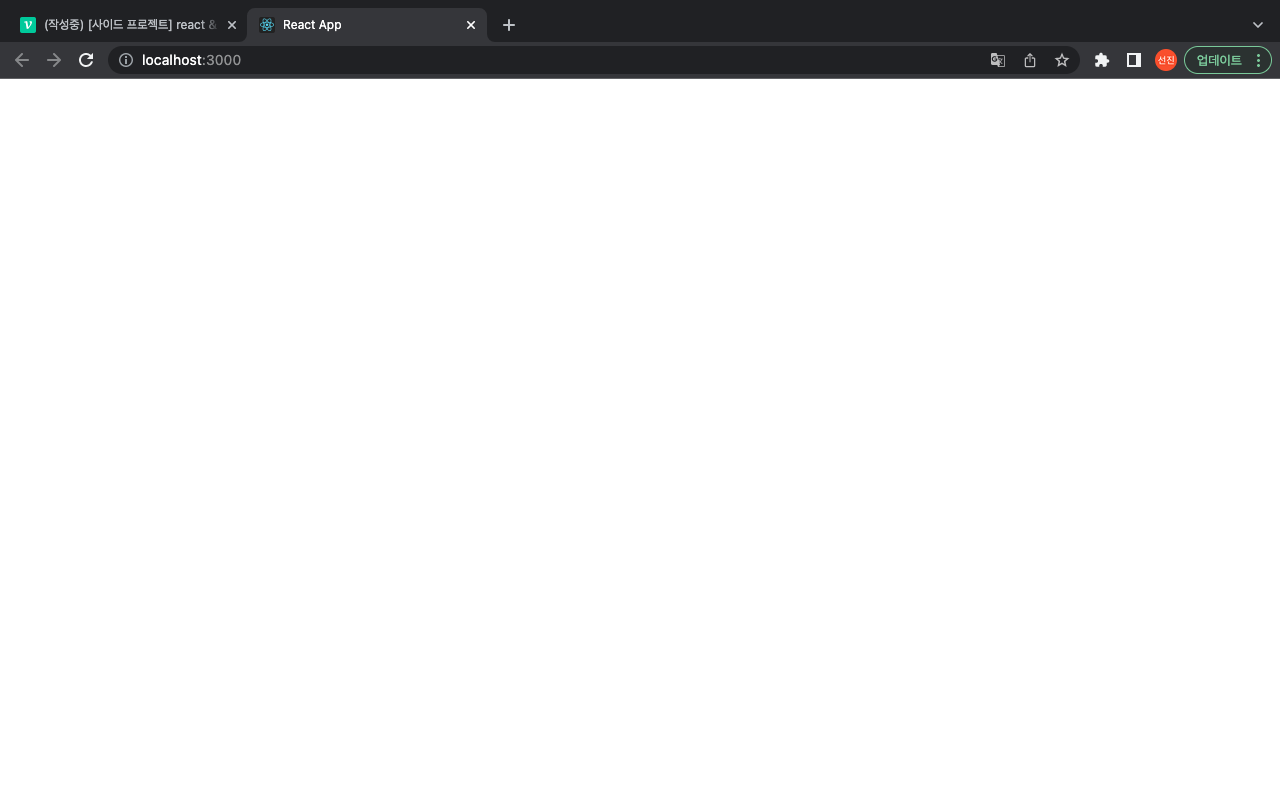
빈화면! 잘뜬다!
ch.1 react bootstrap 설치
이제 React에서 bootstrap을 통해 UI를 구축할 것이다.
React에서 bootstrap을 사용하기 위한 라이브러리가 크게 2가지 있다.
하나는 reactstrap이고 하나는 react-bootstrap이다.
둘 다 써봤지만 뭐가 좋다고 판단하기 애매해서 npm에서 각각 검색해봤다.
reactstrap
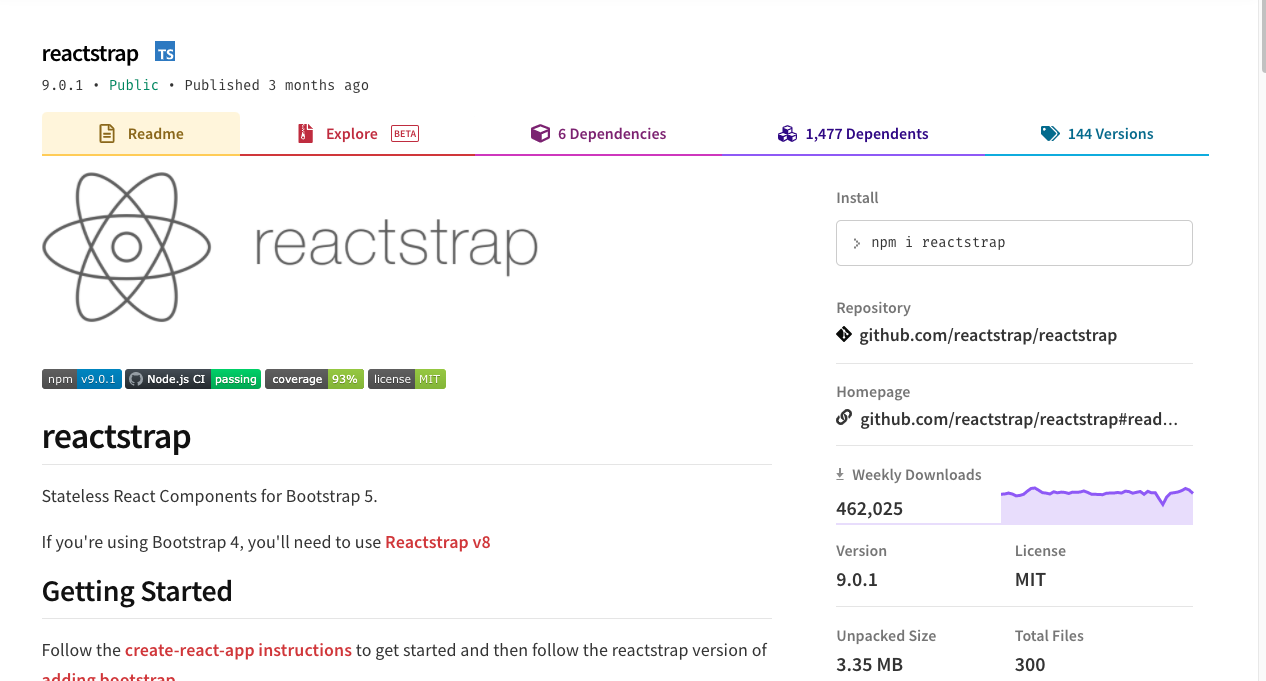
reactstrap은 3달 전에 업데이트 됐고 1주일간 다운로드 횟수가 462,025회이다.
(나도 저런 라이브러리 만들어보고 싶다.)
react-bootstrap
오 이 친구는 한 달전에 업데이트 됐고 1주일간 다운로드 횟수가 986,162회다.
오케이 react-bootstrap 사용 확정!
공식 문서에 나온대로 세팅해보자
npm install react-bootstrap bootstrap@5.1.3설치 완료 후, index.js에서 bootstrap CSS를 가져오도록 하자.
import React from 'react';
import ReactDOM from 'react-dom';
import './index.css';
import App from './App';
import reportWebVitals from './reportWebVitals';

// bootstrap css 가져오기
import 'bootstrap/dist/css/bootstrap.min.css';

ReactDOM.render(
  <React.StrictMode>
    <App />
  </React.StrictMode>,
  document.getElementById('root')
);

// If you want to start measuring performance in your app, pass a function
// to log results (for example: reportWebVitals(console.log))
// or send to an analytics endpoint. Learn more: https://bit.ly/CRA-vitals
reportWebVitals();
그 후 App.js에서 간단하게 button을 가져와서 테스트 해보자
import './App.css';
import {Button} from 'react-bootstrap'

function App() {
  return (
    <div className="App">
      <Button variant="primary">Primary</Button>{' '}
    </div>
  );
}

export default App;
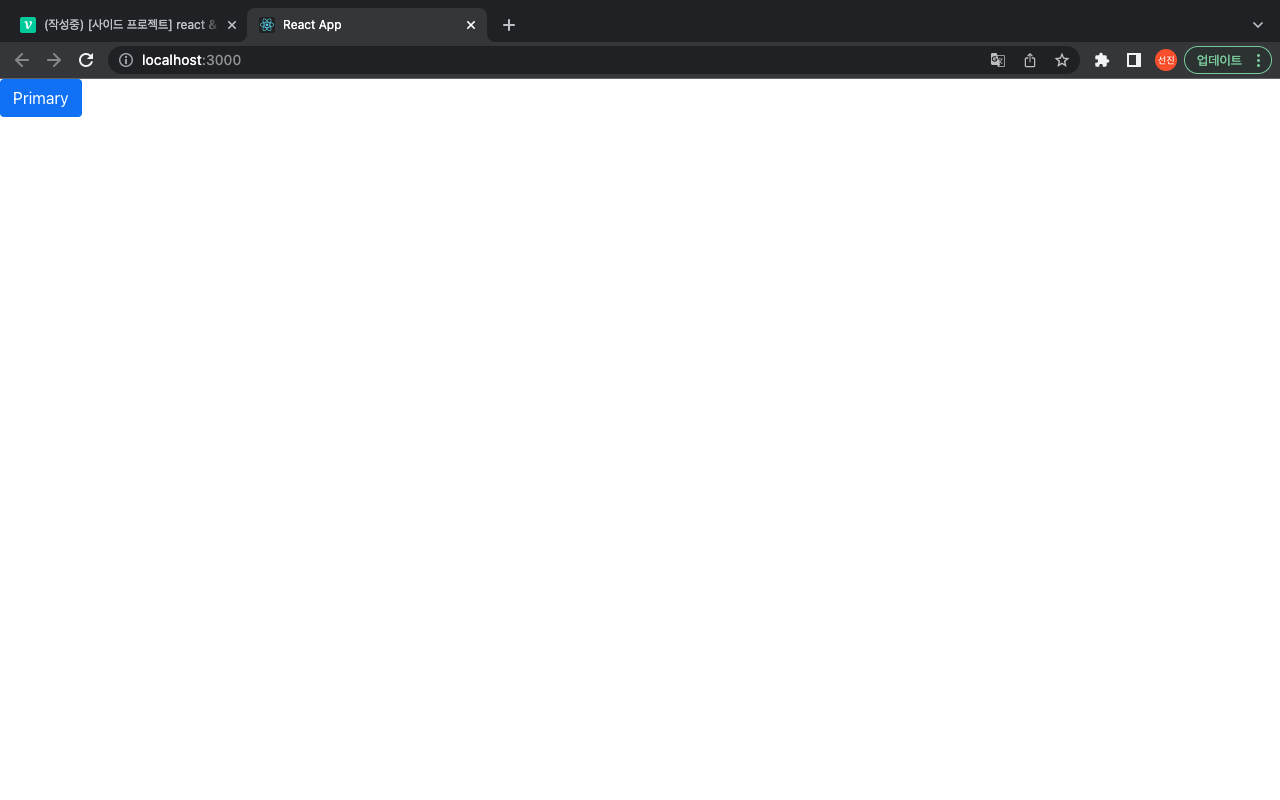
버튼이 잘 뜬다!
ch.2 UI 디자인하기 with kakao oven
이제 카카오 오븐(내가 쓰는 UI 디자인 툴이다.)을 서서 간단하게 UI를 작성했다.
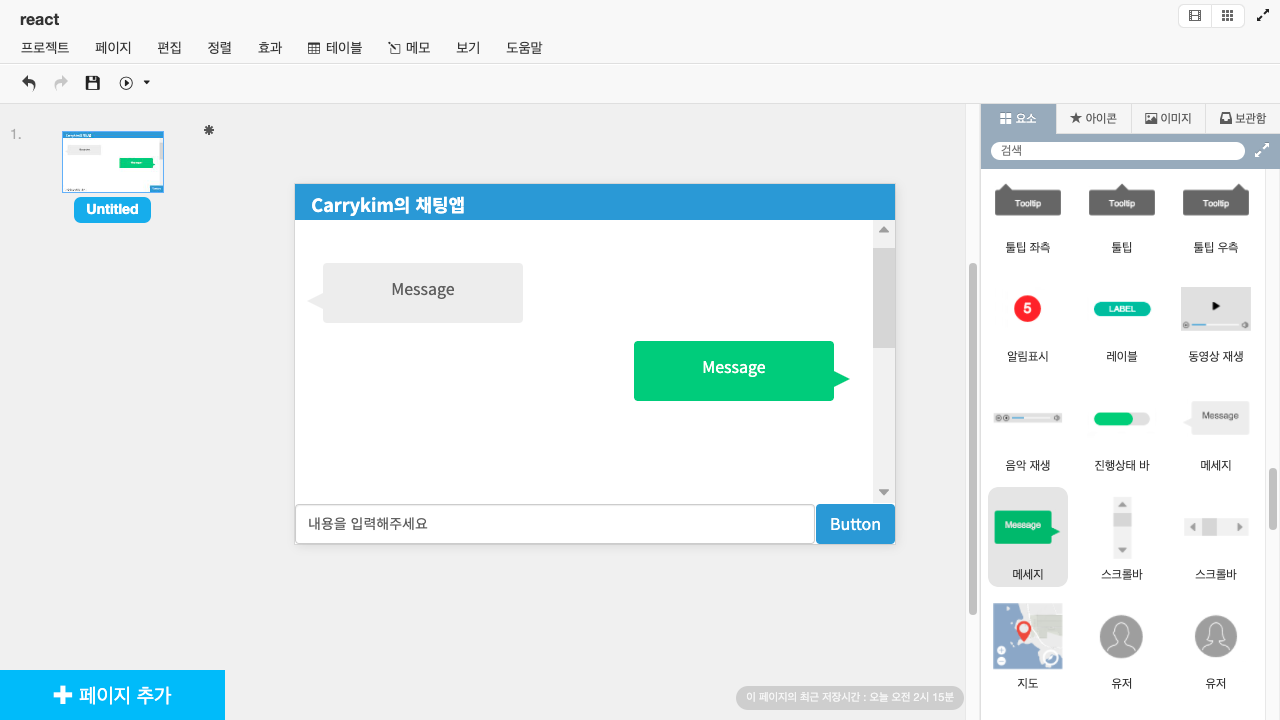
- 상단에 파란색 헤더가 존재
- 입력창 및 버튼은 하단에 존재(footer 활용)
- 채팅 메시지는 내가 보낸 것은 오른쪽 상대방이 보낸 것은 왼쪽!
ch.3 header 만들기
나는 백엔드 개발자를 목표로 하기에 프론트엔드에서의 코드 스타일이나 네이밍이 틀릴 수 있다! 양해부탁드립니다!
우선 첫번째로 header component를 만들고 난 후 Navbar 컴포넌트를 가져와서 구현, App.js에 추가해준다.
Header.js
import '../css/Header.css';
import {Navbar} from 'react-bootstrap'

function Header() {
  return (
    <Navbar bg="primary" variant="dark" className = "header-container">
        <Navbar.Brand className = "header-title-container">
            <h3>Carrykim의 채팅앱</h3>
        </Navbar.Brand>
    </Navbar>
  );
}

export default Header;
Header.css
.header-title-container{
    margin-left: 3%;
}
App.js
import './App.css';
import Header from './component/Header'

function App() {
  return (
    <div className="App">
      <Header/>
    </div>
  );
}

export default App;
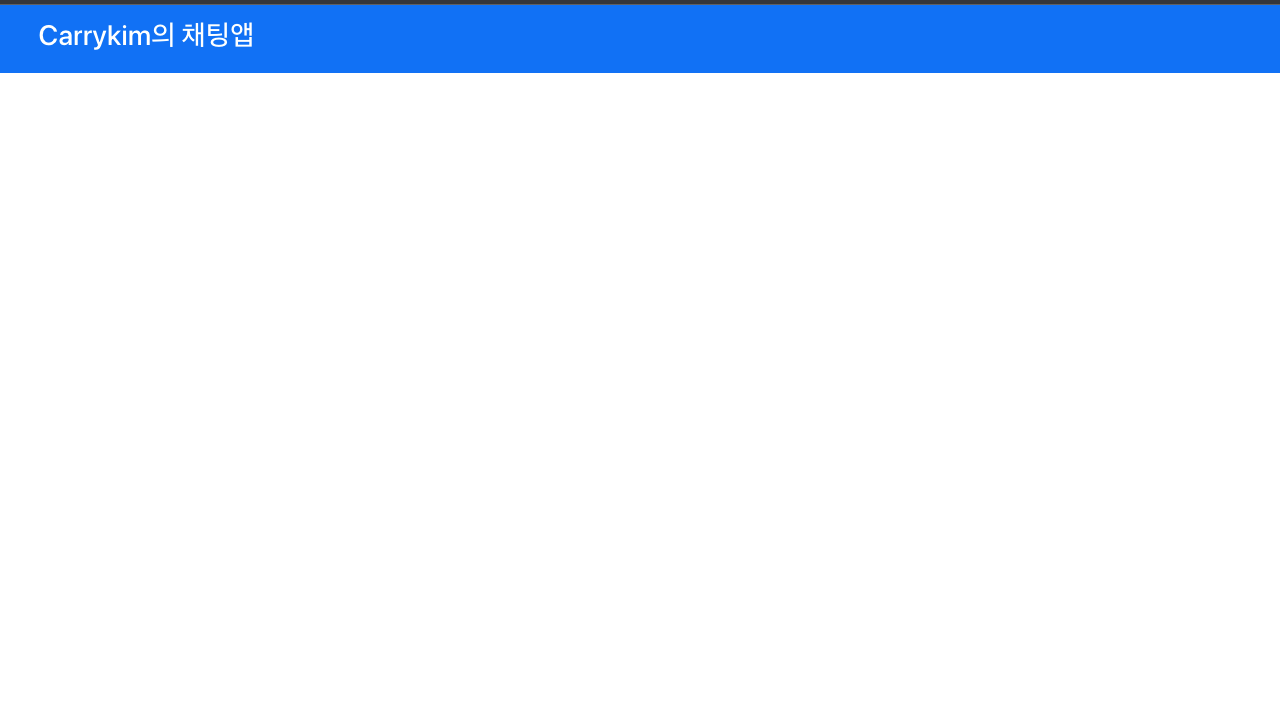
흠! 아주 맘에 든다!!
ch.4 footer 만들기
이제 헤더와 마찬가지로 footer를 만들어보겠다.
footer에서는 입력칸과 보내기 버튼이 있으며 보내기 버튼에는 icon을 넣어서 구현하도록 하겠다.
Footer.js
import '../css/Footer.css';
import {Form,Button} from 'react-bootstrap'
import sendImage from '../icon/send-icon.png'

function Footer() {
  return (
      <footer>
        <Form.Control placeholder="" className="input-form"/>
        <Button variant="primary" type="submit" className="input-button">
            <img className = "send-icon" src={sendImage} />
        </Button>
      </footer>
  );
}

export default Footer;
Footer.css
footer {
    width: 100%;
    height: 8%; /* footer의 높이 */
    position: absolute;
    bottom: 0;
    left: 0;
    background-color: #E2E2E2;
    display: flex;
    align-items: center;
}

.input-form{
    width: 80%;
    height: 90%;
}

.input-button{
    width: 20%;
    height: 90%;
}

.send-icon{
    height: 90%;
}
App.js
import './App.css';
import Header from './component/Header'
import Footer from './component/Footer';

function App() {
  return (
    <div className="App">
      <Header/>
      <Footer/>
    </div>
  );
}

export default App;
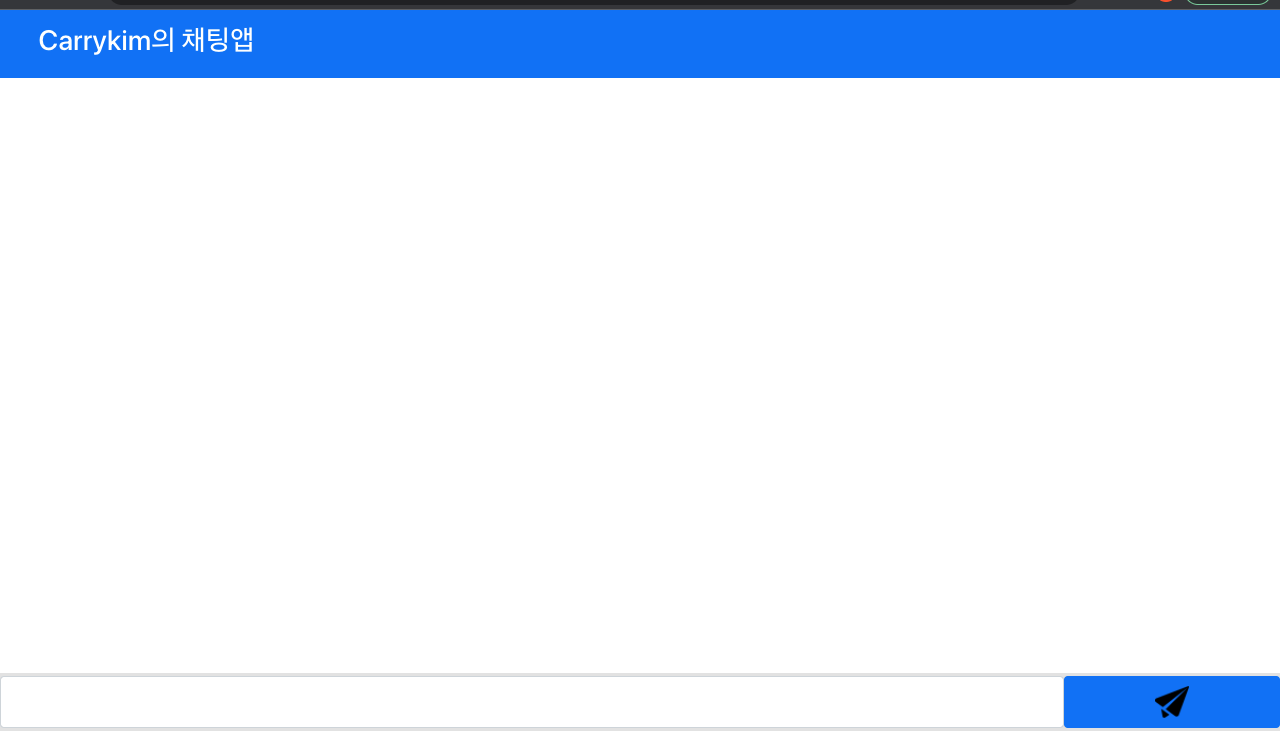
아이콘이 검은색인 것은 아쉽지만 흰색은 유료여서... 이걸로 만족한다!
ch.5 main.js 만들기
이제 마지막으로 main.js를 만들어서 메시지를 띄워볼 것이다.
다만 위에서 내가 잘못 구현한 것이 footer에서 메세지를 보내면 main으로 보내기가 어렵다!
원래대로라면 main 컴포넌트 내부에 메시지를 주고 받는 컴포넌트와 출력하는 컴포넌트를 구현했어야 했는데 메시지 보내는 것을 footer, 즉 main 이랑 동등한 level의 컴포넌트에 구현해서 주고 받기가 어렵다.
따라서 App.js에 message를 저장하는 useState를 구현해서 footer -> App -> main으로 전달해줘야 한다.
이때 message는 딕셔너리 형태로 {msg : "메시지", from : boolean}으로 from이 true면 내가 보낸 거, false면 다른 사람이 보낸 것으로 하여 main 내부에서 구분하여 각기 다른 메시지 css를 매핑한다.
App.js
import './App.css';
import Header from './component/Header'
import Footer from './component/Footer';
import Main from './component/Main';
import { useState } from 'react';

function App() {

  const [message, setMessage] = useState([{msg:"hi", from:false}])

  const getMessage = (msg, from) =>{
    setMessage((current) => [...current,({msg:msg, from:from})])
  }

  return (
    <div className="App">
      <Header/>
        <Main message = {message}/>
      <Footer setMessage = {getMessage}/>
    </div>
  );
}

export default App;
Footer.js
import './App.css';
import Header from './component/Header'
import Footer from './component/Footer';
import Main from './component/Main';
import { useState } from 'react';

function App() {

  const [message, setMessage] = useState([{msg:"hi", from:false}])

  const getMessage = (msg, from) =>{
    setMessage((current) => [...current,({msg:msg, from:from})])
  }

  return (
    <div className="App">
      <Header/>
        <Main message = {message}/>
      <Footer setMessage = {getMessage}/>
    </div>
  );
}

export default App;
Main.js
import '../css/Main.css';
import {Toast,ToastContainer} from 'react-bootstrap'

function Main(props) {
  return (
      <main className = "main-container">
          <ToastContainer bsPrefix = "toast-main-container">
            {
                props.message.map((item) => (
                    item.from ? (
                        <Toast bg = 'info' className = "my-message">
                            <Toast.Body>{item.msg}</Toast.Body>
                        </Toast>
                    )
                    : (
                        <Toast bg = 'light' className = "other-message">
                            <Toast.Body>{item.msg}</Toast.Body>
                        </Toast>
                    )
                ))

            }
          </ToastContainer>
      </main>
  );
}

export default Main;
Main.css
.my-message{
    margin-top: 3%;
    margin-right: 5%;
    margin-left: auto;
}

.other-message{
    margin-top: 3%;
    margin-left: 5%;
    margin-right: auto;
}

.toast-main-container{
    width: 100%;
    display: flex;
    flex-direction: column;
}

.main-container{
    width: 100%;
}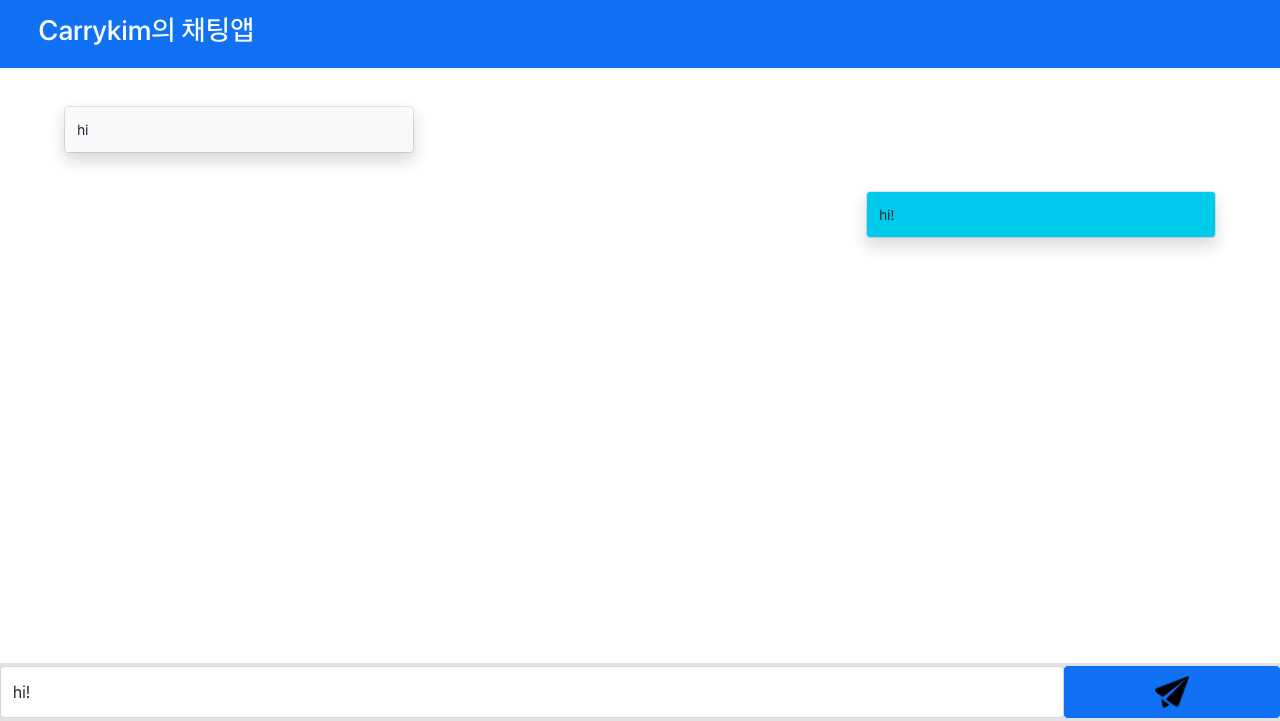
내가 보낸 메시지의 색이 맘에 들진 않지만 이정도면 만족!
다음 시간에는 Spring boot 코드를 고쳐서 연결해보도록 하겠다.