[사이드 프로젝트] react & flutter 채팅 앱 만들기 4 - Flutter
들어가며
일단! Flutter 작업은 끝났다!(뚜둥?!?) 작업하면서 작성하던 블로그 글이 날라가서 지금 글은 후기에 가깝다. 따라서 중간에 몇몇 단계가 누락될 수 있다!
ch.0 Flutter UI 만들기
이제 플러터로 UI를 만들어볼 것이다.
최상단에 title을 포함한 AppBar와 메세지 출력을 위한 List & ListView.builder, 메시지 입력을 위한 TextField와 ElevatedButton을 추가하였다.
Widget build(BuildContext context) {
return Scaffold(
appBar: AppBar(
title: Text(widget.title),
),
body: Center(
child: Column(
mainAxisAlignment: MainAxisAlignment.center,
children: [
Container(
height: MediaQuery.of(context).size.height * 0.8,
child: ListView.builder(
shrinkWrap: true,
itemBuilder: (context, postion){
return GestureDetector(
child: Card(
child:
Text(list[postion].content,
textAlign:
list[postion].uuid == myUuid?
TextAlign.right:
TextAlign.left
)
),
);
},
itemCount: list.length,
),
),
Container(
decoration: BoxDecoration(
border: Border.all(
width: 1,
color: Colors.grey,
),
),
child: Row(
children: <Widget>[
Padding(
padding: EdgeInsets.fromLTRB(20, 5, 20, 5) ,
child:
SizedBox(
width: MediaQuery.of(context).size.width * 0.7,
child: TextField(
controller: _textController,
style: TextStyle(color: Colors.black),
keyboardType: TextInputType.text,
decoration: InputDecoration(hintText: "Send Message"),
)
),
),
Padding(
padding: EdgeInsets.all(0) ,
child:
SizedBox(
width: MediaQuery.of(context).size.width * 0.15,
height: MediaQuery.of(context).size.width * 0.1,
child: ElevatedButton(
onPressed: sendMessage, // 여기 사용된 sendMessage 함수는 차후 websocket 연결에서 다룹니다.
child: Icon(Icons.send),
)
),
)
],
)
)
],
),
),
);
}ch.1 stomp_dart_client으로 서버와 연결
이제 서버와 연결을 해야한다. 어떤 라이브러리를 사용할 지 결정해야해서 우선 pub.dev으로 가서 stomp를 검색해봤다.
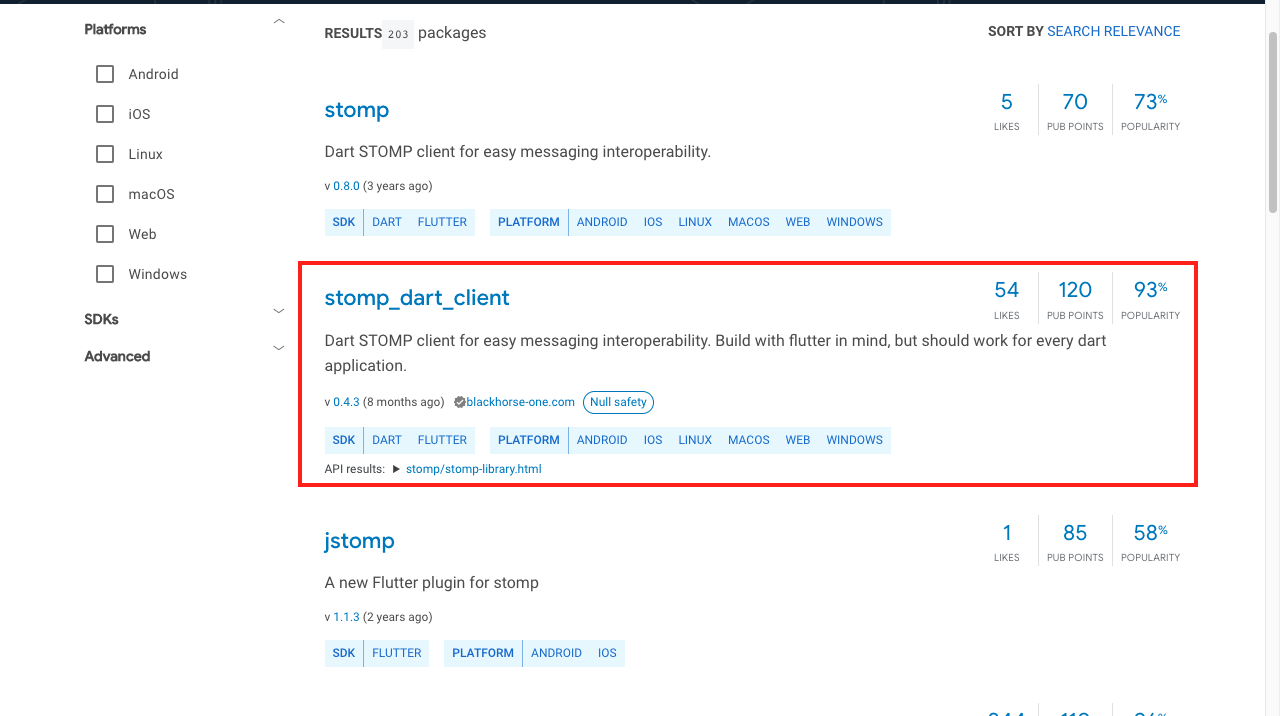
여러 패키지 중에서 가장 많은 좋아요와 포인트를 받은 stomp_dart_client를 선택하기로 했다!
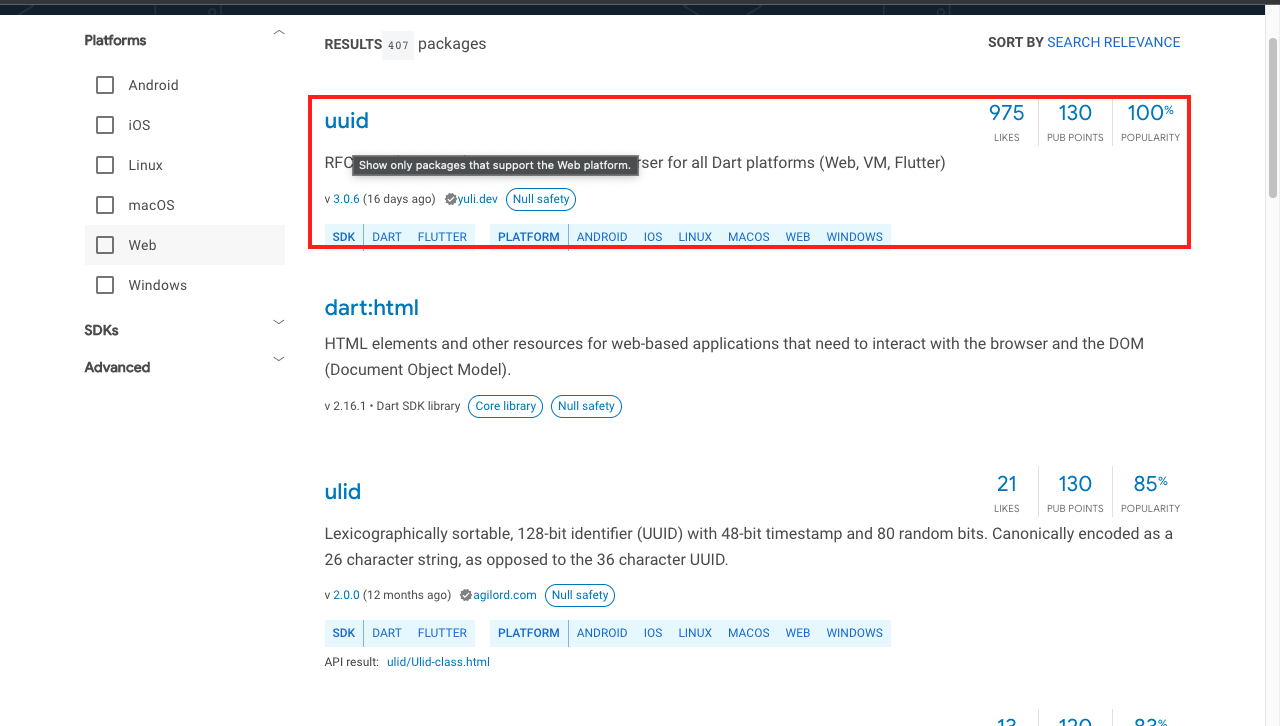
그리고 uuid를 만들기 위한 라이브러리도 검색했다.
# 설치 진행
$ flutter pub add stomp_dart_client
$ flutter pub add uuid
그리고 Message를 주고받기 위한 DTO를 만들어줘야한다.
(나중에 Message라는 이름의 class를 사용하는 라이브러리를 가져와야하기 때문에 클래스 이름을 Msg로 하였습니다.)
class Msg {
  String content;
  String uuid;

  Msg({
    required this.content,
    required this.uuid
  });

}
이제 stomp_dart_client Readme에 따라 초기화를 진행한다.
세부적인 부분은 React의 client와 비슷하다.
class _MyHomePageState extends State<MyHomePage> {
StompClient? stompClient;
final socketUrl = 'baseurl/chatting';
void onConnect(StompFrame frame) {
stompClient!.subscribe(
destination: '/topic/message',
callback: (StompFrame frame) {
if (frame.body != null) {
Map<String, dynamic> obj = json.decode(frame.body!);
Msg message = Msg(content : obj['content'], uuid : obj['uuid']);
setState(() => {
list.add(message)
});
}
});
}
sendMessage(){
setState(() {
stompClient!.send(destination: '/app/message', body: json.encode({"content" : _textController.value.text, "uuid": myUuid}));
});
}
void initState() {
super.initState();
if (stompClient == null) {
stompClient = StompClient(
config: StompConfig.SockJS(
url: socketUrl,
onConnect: onConnect,
onWebSocketError: (dynamic error) => print(error.toString()),
));
stompClient!.activate();
}
}
}
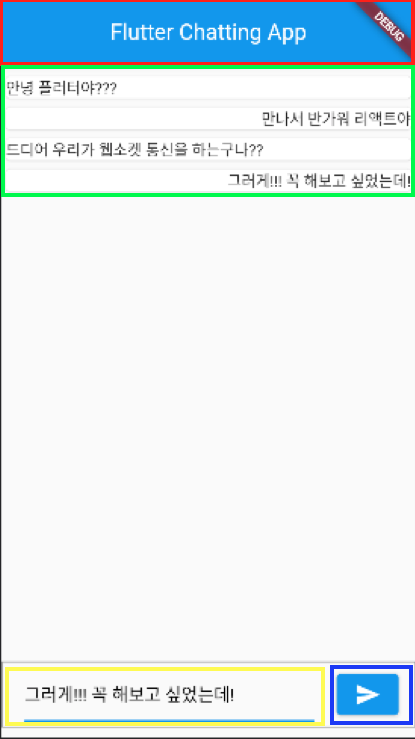
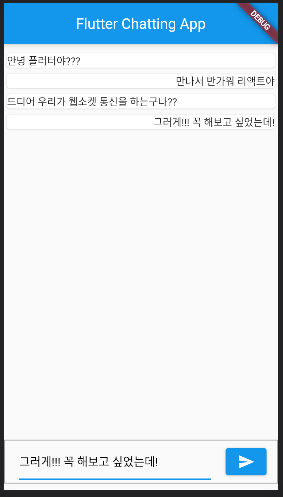
React UI

Flutter UI
ch.2 flutter_local_notifications으로 메세지 알림
길고 길었다! 이번 프로젝트를 시작한 이유! 이제 메시지가 오면 flutter에서 알림창을 띄우는 기능을 만들어 볼 것이다!
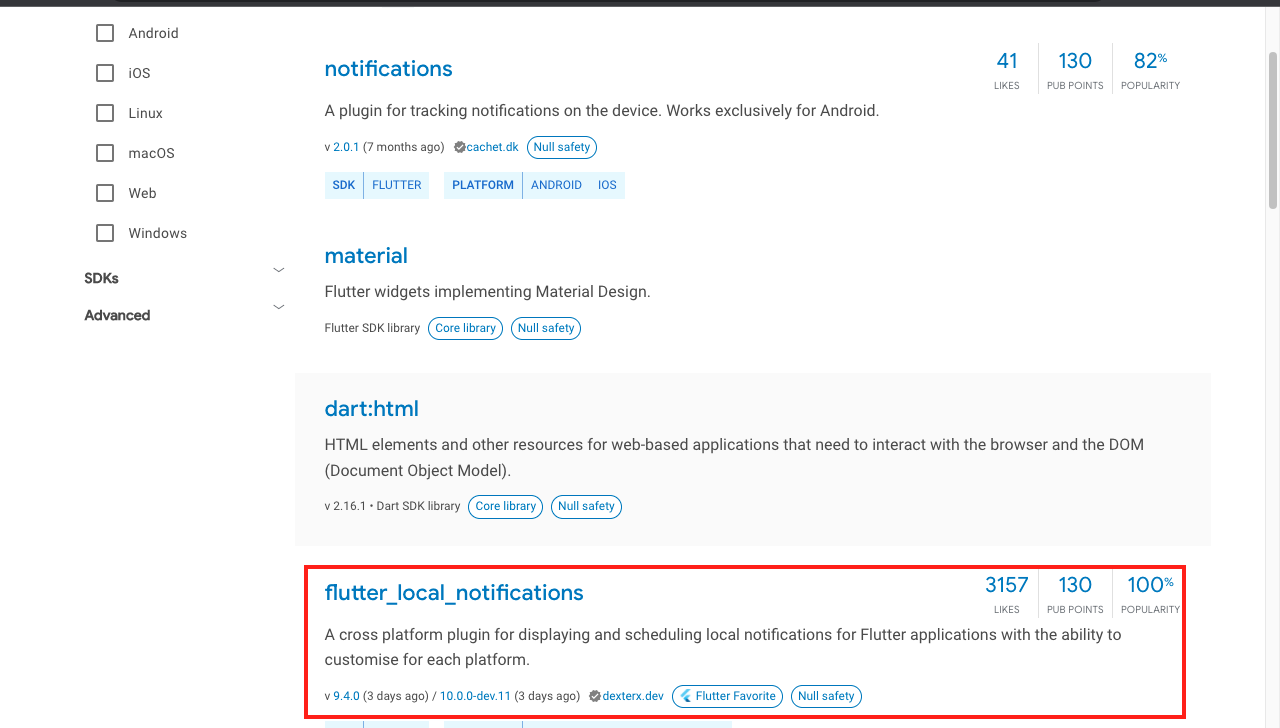
마찬가지로 사용할 라이브러리를 pub.dev에서 notification을 검색해서 찾아보니 flutter_local_notification이 좋을 듯 하다!
$ flutter pub add flutter_local_notificationsflutter_local_notification은 crossplatform으로 설정 하나로 안드로이드와 ios에서 사용할 수 있다. 다만 이번에는 안드로이드에서만 테스트할 예정이기 때문에 ios 설정은 생략하겠다.
안드로이드 설정은 AndroidManifest.xml를 수정하면 된다.
<manifest xmlns:android="http://schemas.android.com/apk/res/android"
    package="com.example.practice_websocket_flutter">
   <application
        android:label="practice_websocket_flutter"
        android:name="${applicationName}"
        android:icon="@mipmap/ic_launcher">
        <activity
            android:name=".MainActivity"
            android:exported="true"
            android:launchMode="singleTop"
            android:theme="@style/LaunchTheme"
            android:configChanges="orientation|keyboardHidden|keyboard|screenSize|smallestScreenSize|locale|layoutDirection|fontScale|screenLayout|density|uiMode"
            android:hardwareAccelerated="true"
            android:windowSoftInputMode="adjustResize">
            <!-- Specifies an Android theme to apply to this Activity as soon as
                 the Android process has started. This theme is visible to the user
                 while the Flutter UI initializes. After that, this theme continues
                 to determine the Window background behind the Flutter UI. -->
            <meta-data
              android:name="io.flutter.embedding.android.NormalTheme"
              android:resource="@style/NormalTheme"
              />
            <intent-filter>
                <action android:name="android.intent.action.MAIN"/>
                <category android:name="android.intent.category.LAUNCHER"/>
            </intent-filter>
        </activity>
        <!-- Don't delete the meta-data below.
             This is used by the Flutter tool to generate GeneratedPluginRegistrant.java -->
        <meta-data
            android:name="flutterEmbedding"
            android:value="2" />

  	<!-- 아래의 서비스를 추가해줘야합니다.-->
        <service
            android:name="com.dexterous.flutterlocalnotifications.ForegroundService"
            android:exported="false"
            android:stopWithTask="false"/>
    </application>
  	<!-- 아래의 권한을 허용해줘야합니다.-->
    <uses-permission android:name="android.permission.FOREGROUND_SERVICE" />
</manifest>
그리고 초기화를 해줍니다.
class _MyHomePageState extends State<MyHomePage> {
...
FlutterLocalNotificationsPlugin? _flutterLocalNotificationsPlugin;
Future<void> _showNotification(String content) async {
const AndroidNotificationDetails androidPlatformChannelSpecifics =
AndroidNotificationDetails('your channel id', 'your channel name',
channelDescription: 'your channel description',
importance: Importance.max,
priority: Priority.high,
ticker: 'ticker');
const NotificationDetails platformChannelSpecifics =
NotificationDetails(android: androidPlatformChannelSpecifics);
await _flutterLocalNotificationsPlugin!.show(
0,
'메시지가 도착했습니다.',
content,
platformChannelSpecifics,
payload: content,
);
}
void onSelectNotification(String? payload) async {
debugPrint("$payload");
showDialog(
context: context,
builder: (_) => AlertDialog(
title: Text('Notification Payload'),
content: Text('Payload: $payload'),
));
}
void initState() {
...
var initializationSettingsAndroid = AndroidInitializationSettings('@mipmap/ic_launcher');
var initializationSettingsIOS = IOSInitializationSettings();
var initializationSettings = InitializationSettings(android: initializationSettingsAndroid, iOS: initializationSettingsIOS);
_flutterLocalNotificationsPlugin = FlutterLocalNotificationsPlugin();
_flutterLocalNotificationsPlugin!.initialize(initializationSettings,
onSelectNotification: onSelectNotification);
}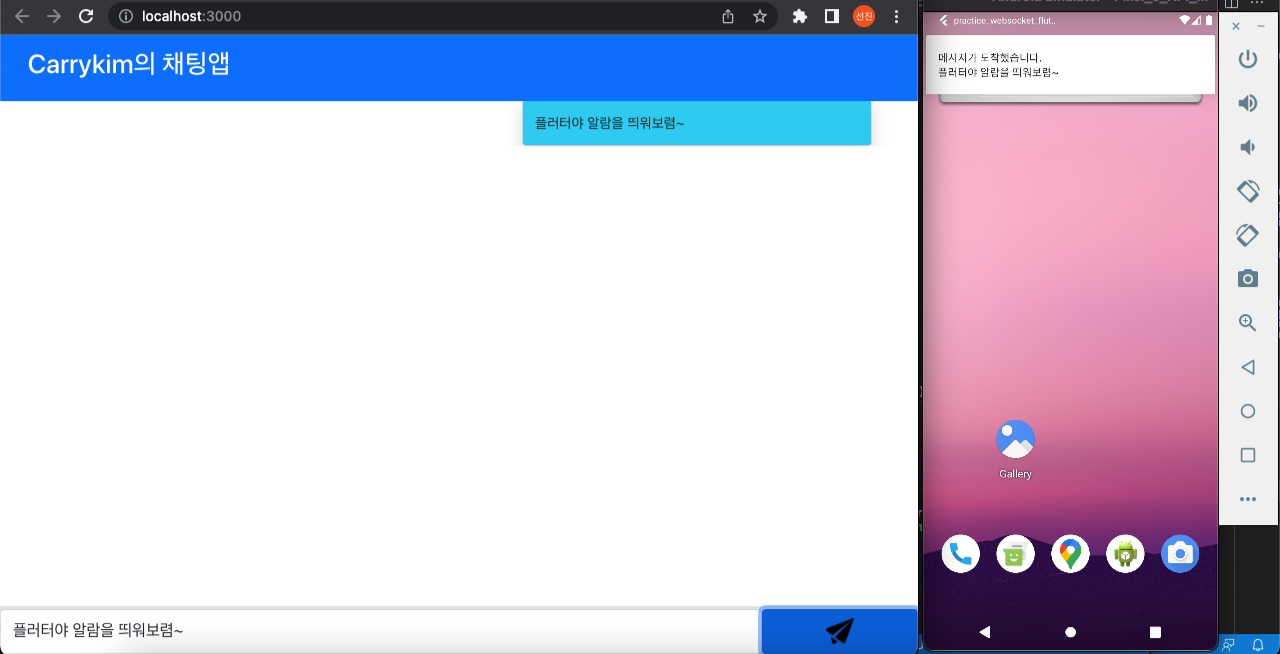
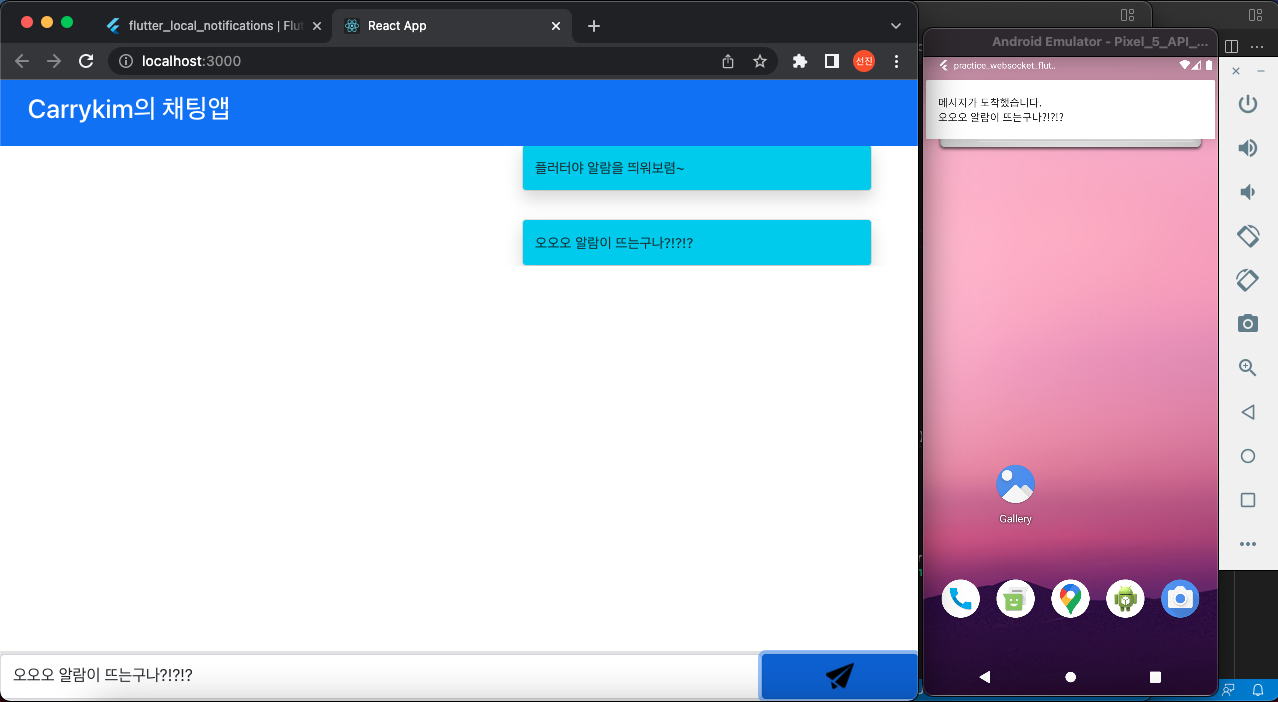
이제 flutter를 실행한 후, 백그라운드에 켜놓고 React에서 메시지를 보내면 다음과 같이 알람창이 뜨는 것을 볼 수 있습니다!!
ch.3 마무리
websocket으로 메시지를 주고 받는 것을 학습해봤다. 이때 중요한 것은 'websocket으로 연결된 프로그램이 백그라운드에 실행되어 있어야 한다!' 이다. 다만 항상 백그라운드에 돌리는 것은 어렵기 때문에 실제 서비스에서는 푸쉬 알람을 동의하면 휴대폰 내부의 푸쉬 알림 프로그램에 어플리케이션이 등록되고 FCM이나 GCM으로 이를 다룰 수 있게 된다.(이 방법을 많이 사용)
그 밖에도 SSE(Sever Send Event)를 활용하면 Websocket보다 더 가볍게 푸쉬알람을 구현할 수 있다. 하지만 "바퀴는 다시 개발할 필요가 없다" 라는 말처럼 푸쉬알람은 FCM이나 GCM을 사용하자!