3인칭 카메라
Cinemachine을 이용하여 3인칭 카메라를 만들어보자.
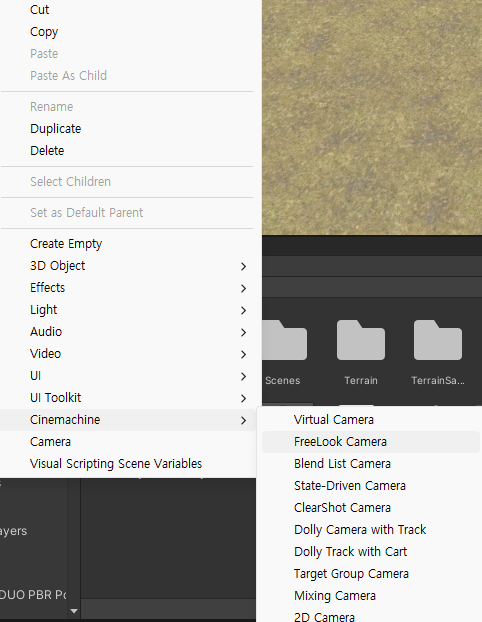
FreeLock 카메라
씬에 FreeLock 카메라를 추가한다.
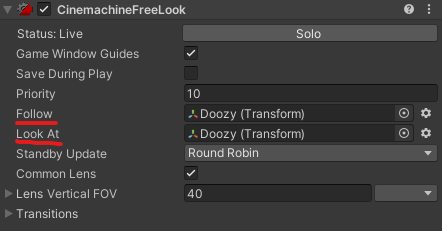
FreeLock 카메라에 Follow 타겟과 Look At 타겟을 지정한다.
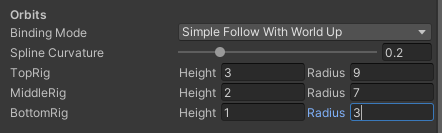
Orbits
FreeLock 카메라를 선택하고 씬 뷰를 보면 3개의 빨간색 원을 볼 수 있다.
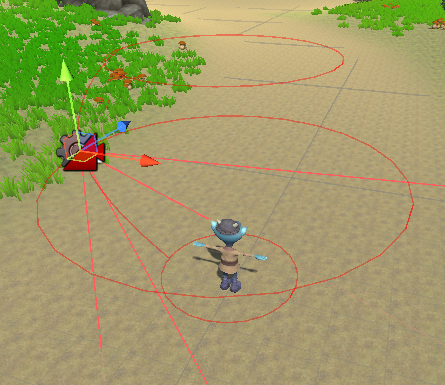
이는 카메라의 세가지 궤도 반경을 보여준다.
상단, 중단, 하단의 Rig의 높이와 반경을 변경하여 카메라 높이가 변경됨에 따라 캐릭터에 얼마나 가까이 위치하는지 설정할 수 있다.
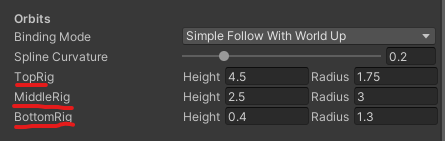
카메라가 높을수록 반경이 커지고, 카메라가 낮을수록 확대된다.
스크립트
카메라가 바라보는 방향으로 움직이도록 스크립트를 작성해보자.
using System.Collections;
using System.Collections.Generic;
using UnityEngine;

public class PlayerMovement : MonoBehaviour
{
    public float maximumSpeed = 3;
    public float rotationSpeed = 720;
    public Transform cameraTransform;

    private CharacterController characterController;
    private Animator animator;

    private void Start()
    {
        characterController = GetComponent<CharacterController>();
        animator = GetComponent<Animator>();
    }

    void Update()
    {
        float horizontalInput = Input.GetAxis("Horizontal");
        float verticalInput = Input.GetAxis("Vertical");

        Vector3 movementDirection = new Vector3(horizontalInput, 0, verticalInput);

        float inputMagnitude = Mathf.Clamp01(movementDirection.magnitude);
        float speed = inputMagnitude * maximumSpeed;

        if (Input.GetKey(KeyCode.LeftShift) || Input.GetKey(KeyCode.RightShift))
        {
            inputMagnitude *= 0.5f;
        }

        animator.SetFloat("Input Magnitude", inputMagnitude, 0.05f, Time.deltaTime);

        // 카메라의 y회전만으로 새회전을 생성
        // 카메라의 y회전을 이동 방향에 적용
        movementDirection = Quaternion.AngleAxis(cameraTransform.rotation.eulerAngles.y, Vector3.up) * movementDirection;
        movementDirection.Normalize();

        Vector3 velocity = movementDirection * speed;

        characterController.Move(velocity * Time.deltaTime);

        if (movementDirection != Vector3.zero)
        {
            Quaternion toRotation = Quaternion.LookRotation(movementDirection, Vector3.up);
            transform.rotation = Quaternion.RotateTowards(transform.rotation, toRotation, rotationSpeed * Time.deltaTime);
        }
    }

    private void OnApplicationFocus(bool focus)
    {
        // 어플리케이션이 포커스를 받으면 커서를 숨긴다.
        if (focus)
        {
            Cursor.lockState = CursorLockMode.Locked;
        }
        else
        {
            Cursor.lockState = CursorLockMode.None;
        }
    }
}
Quaternion.AngleAxis
public static Quaternion AngleAxis (float angle, Vector3 axis);
axis을 기준으로 angle만큼 회전시킨 회전량
angle: 회전량
axis: 기준축
카메라 정렬
캐릭터와 같은 방향을 향하도록 카메라를 자동으로 정렬시키는 기능을 추가해보자.
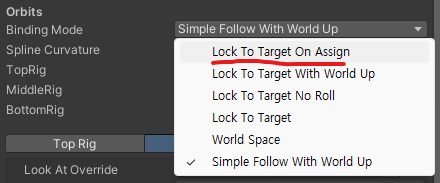
Binding Mode
FreeLock 카메라의 Binding Mode 값을 Lock To Target On Assign으로 변경한다.
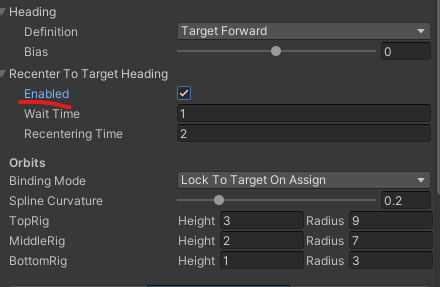
Recenter to Target Heading
다시 중심 맞추기의 Enabled 값을 활성화한다.
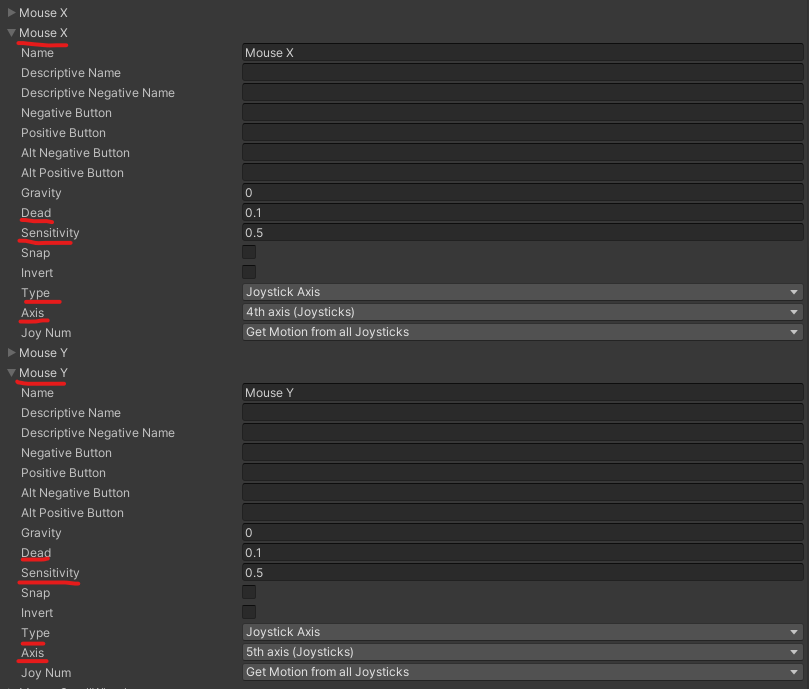
게임패드
게임패드의 오른쪽 썸스틱을 이용하여 마우스와 같은 기능을 수행하도록 해보자.
Edit->Project Settings->Input Manager로 들어가 Mouse X, Mouse Y를 복사하고 다음 설정을 적용한다.