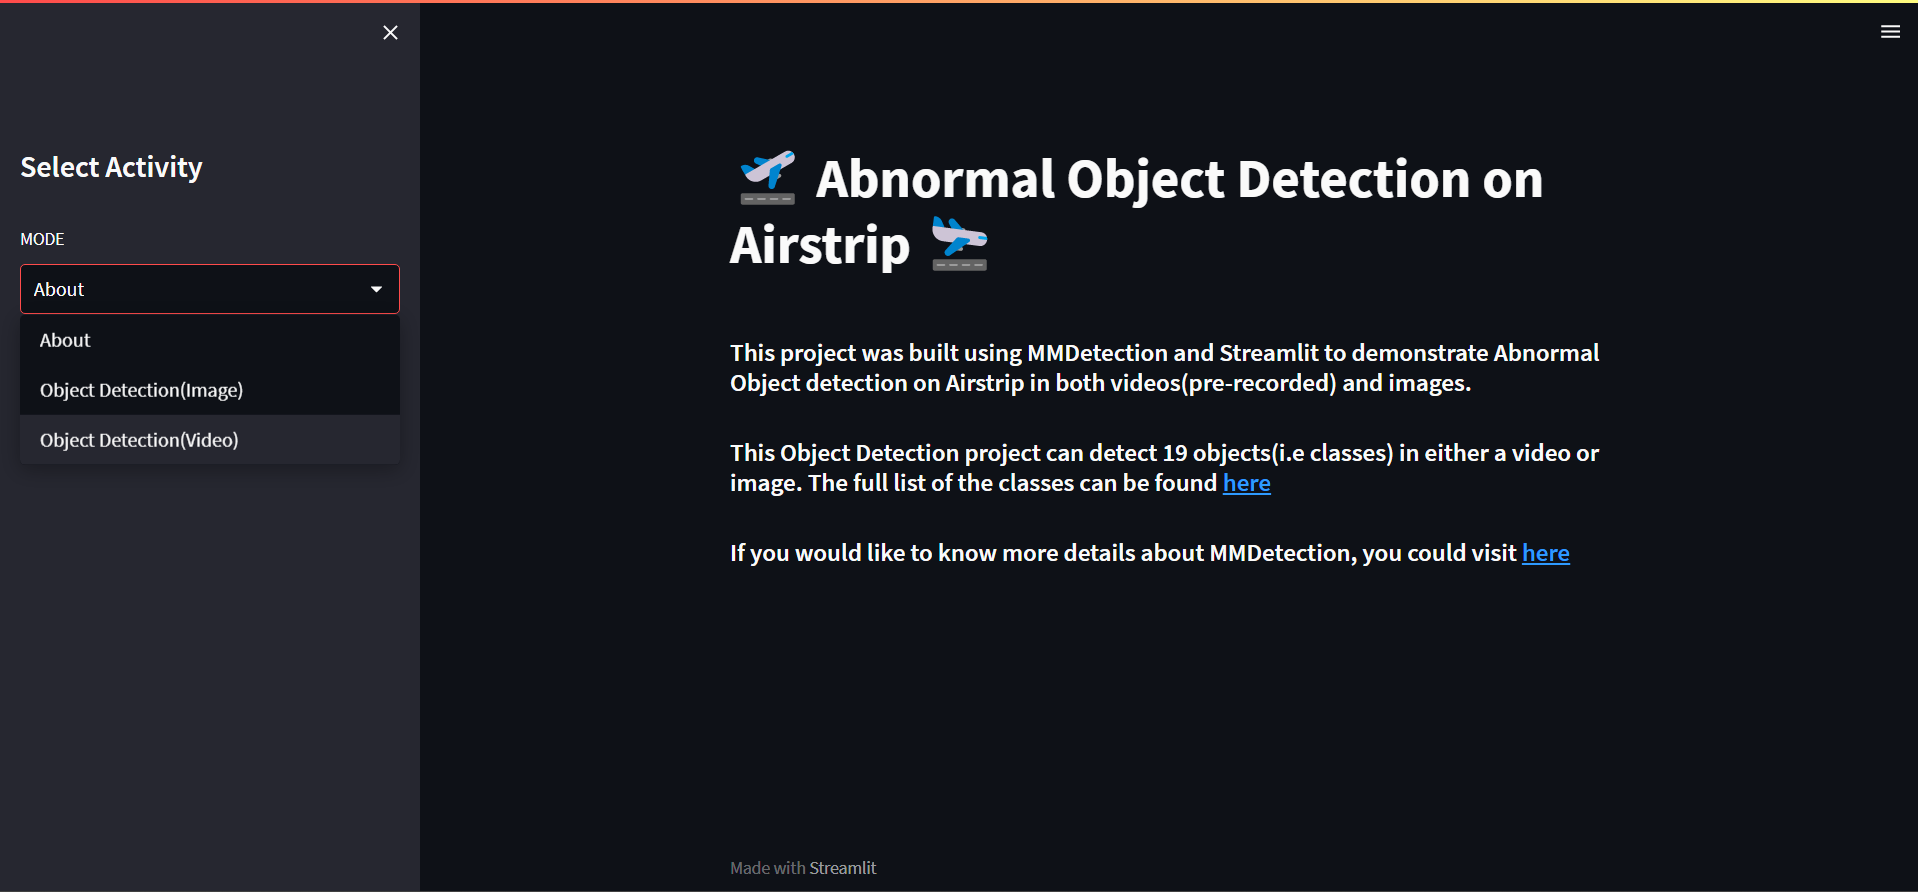
👉 0. 개요
이 문서에서는 최종적으로 산출한 Object Detection Model weight를 가지고 Web Application으로 서비스하는 과정을 다룬다.
Ngrok과 Open Source App Framework Streamlit을 이용해 Web Application을 구현했다.
구현 과정은 다음과 같다.
Ngrok
- Ngrok의 authentication token 발급
- Colab에서 외부 url이 접근할 수 있는 Ngrok Secure Tunnel 생성
Streamlit
- Ngrok Secure Tunnel에 접근하여 Streamlit 백그라운드 실행 + Ngrok 연결
- Image를 업로드하면 detect된 image 내 objects들의 리스트, confidence score 그래프 그리고 detect된 이미지 송출
- Video를 업로드하면 detect된 video를 송출
전체 구현 코드는 여기서 확인할 수 있다.
👉 1. 구현 과정
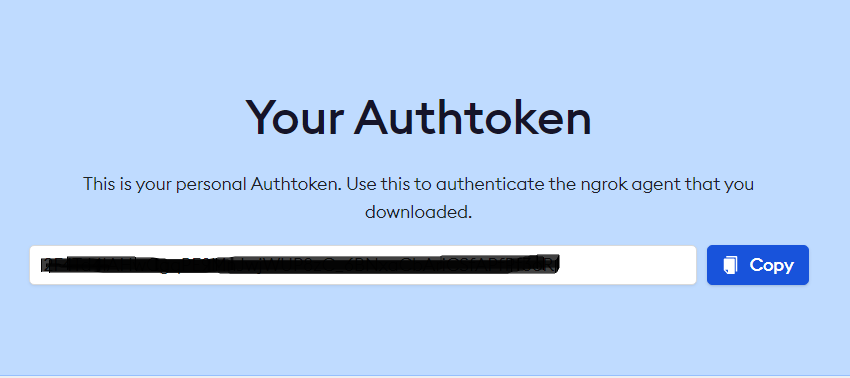
1. Ngrok의 Authentification Token 발급
Ngrok은 방화벽을 넘어서 외부에서 로컬에 접속할 수 있게 하는 터널 프로그램이다.
Ngrok을 사용하려면 Ngrok 홈페이지에서 고유의 Authentification Token을 발급받아야 한다.
2. Colab에서 외부 url이 접근할 수 있는 Ngrok Secure Tunnel 생성
먼저, Colab에서 streamlit과 pyngrok 패키지를 설치한다.
pyngrokwhich acts as a python wrapper around ngrok.
Installing pyngrok both offers the python package as well as the CLI
그다음, ngrok에 발급받은 Authentification Token을 등록하고,
작성한 streamlit.py를 백그라운드로 실행시켜서 외부에서 접근할 수 있는 Secure Tunnel을 생성한다.
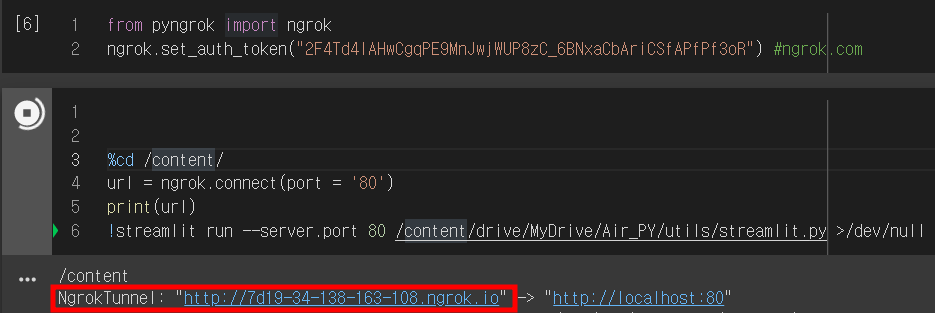
3. Ngrok Secure Tunnel에 접근하여 Streamlit 백그라운드 실행 + Ngrok 연결
위 빨간 박스 안에 있는 tunnel 주소로 접근하게 되면, Streamlit이 백그라운드로 실행이 되고, Ngrok과 연결이 된 상태가 된다.
백그라운드로 실행되고 있는 streamlit.py에서 Object Detection Model Weight를 불러와서 Inference를 실행한다.

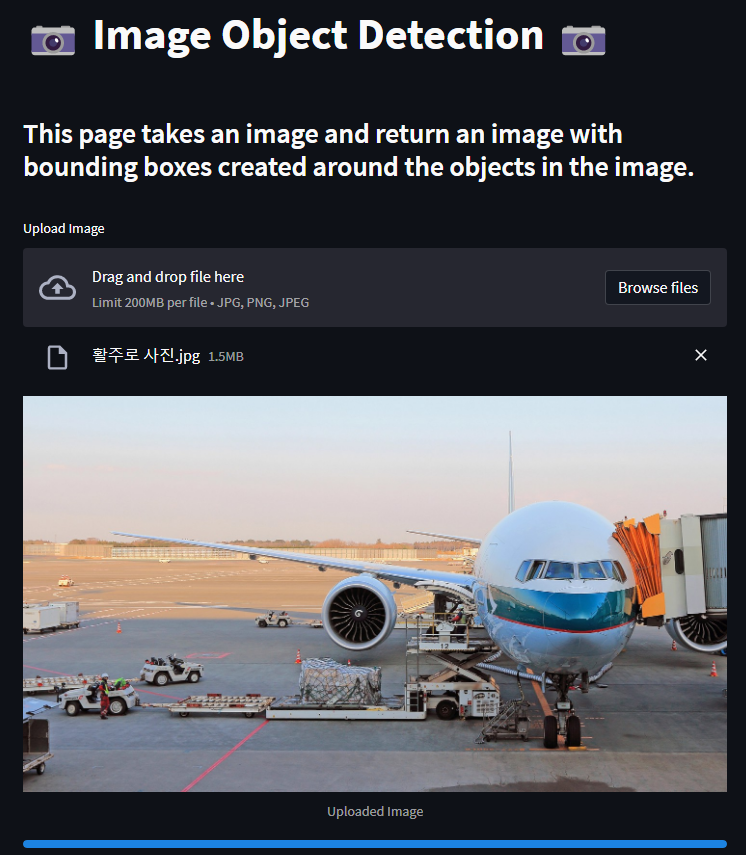
4. Image Inference
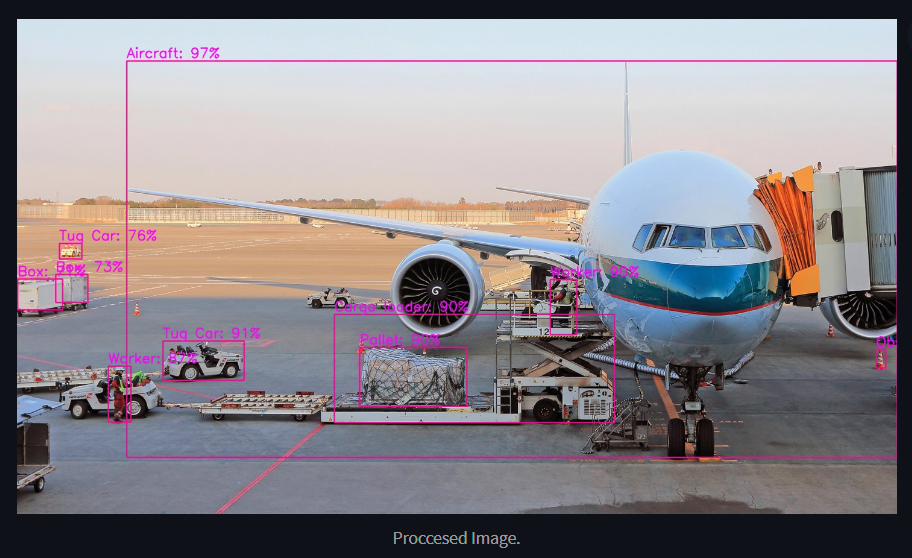
Image를 업로드하면 백그라운드에서 Model Weight를 전달받아 inference한 결과를 streamlit 화면에 송출한다.
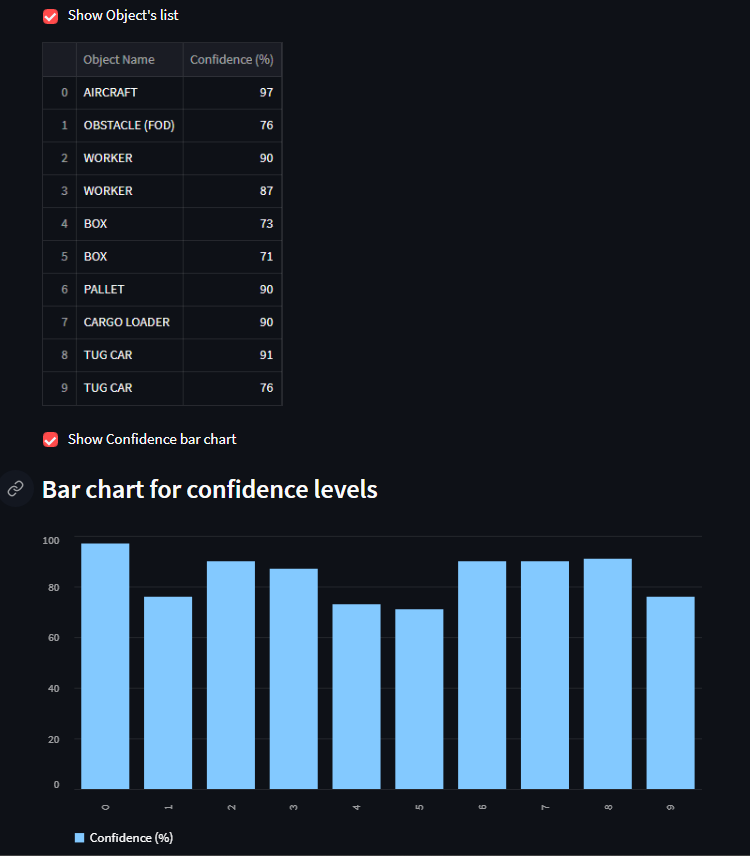
Inference가 완료되면 원본 이미지와 이미지 내 detect된 객체들의 리스트, confidence score 그리고 detect된 이미지를 표시하도록 구현했다.
이미지 업로드
Detect된 이미지
Detect된 객체 리스트 & Confidnece 그래프
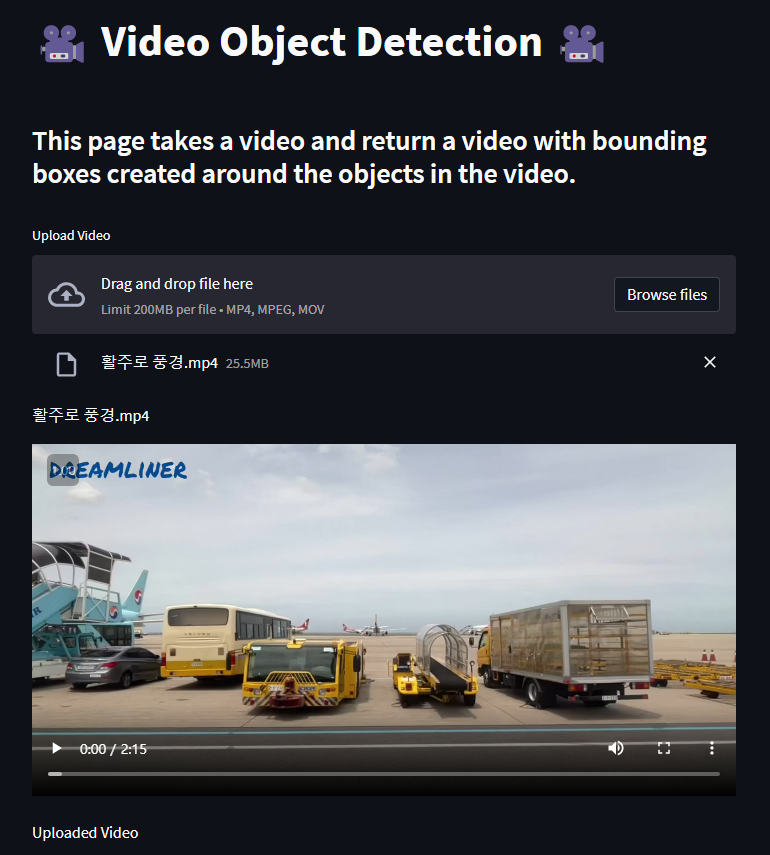
5. Video Inference
Video를 업로드하면 이미지와 동일하게 백그라운드에서 Model Weight를 전달받아 inference한 결과를 streamlit 화면에 송출한다.
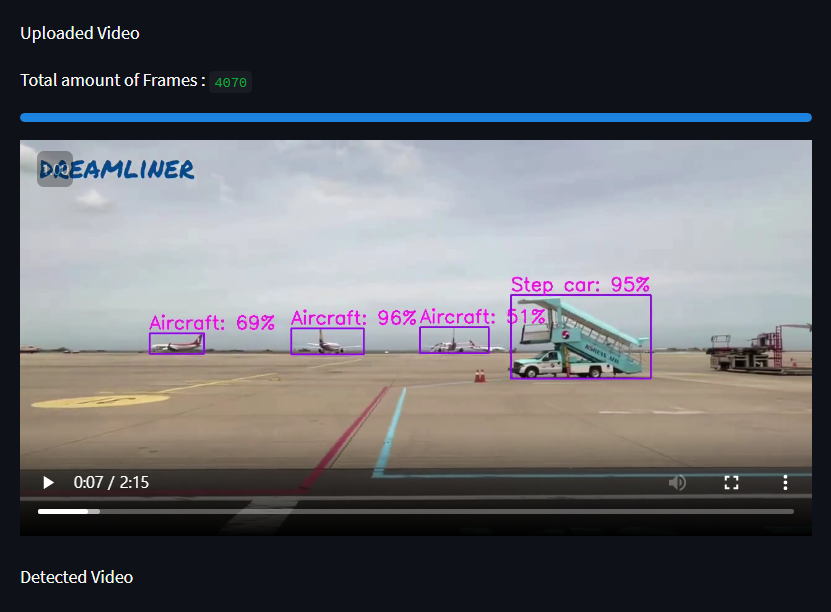
Detect된 video와 원본 video를 비교할 수 있게 화면을 구성했다.
비디오 업로드
Detect된 비디오
최종 완성 후, detect해 본 video는 여기에서 확인할 수 있다.