지난 글에 이어 새 피드 작성하기 페이지에서 이미지 파일을 유저가 업로드 할 수 있도록 하고, 이미지를 업로드하면 곧장 S3에 올라갈 수 있도록 하는 과정을 설명하려고 한다.
이를 구현하는 과정을 크게 [input 태그 커스텀] - [AWS SDK 연동] - [대체 이미지 설정] 단계로 나눌 수 있다.
1. <input> 태그 사용하기
먼저 클라이언트의 파일 업로드를 위해 <input type="file"> 태그를 활용한다.
브라우저에 띄우면 아래와 같이 파일선택 버튼 & 파일 업로드 시 파일명이 뜨는 텍스트가 뜬다.

시간이 많았다면 이 input 태그를 커스텀하여 스타일링 했었을텐데, 그러질 못했다 ㅠㅠ... 추후에 이 포스팅을 참고하여 못생긴 기본디자인을 새롭게 스타일링 해야겠다.
어쨌든 아래와 같이 onChange 이벤트 콜백함수를 호출하면 event.target.files[0]에 유저가 업로드한 파일이 담기게 된다.
const firstImgHandle = (event) => {
    const imageFile = event.target.files[0];

 //...

  return (
      //....
          <div className={styles.filebox}>
            <input
              type="file"
              id="ex_file"
              accept="image/*"
              onChange={firstImgHandle}
            ></input>
          </div>
        </div>
  };
2. AWS SDK 연동하기
AWS 객체를 사용하기 위해 프로젝트 폴더에 aws-sdk 모듈을 설치한다.
npm install aws-sdk
sdk 설치가 끝났다면 AWS 설정 객체를 업데이트한다.
이 때, IdentityPoolId는 이전 글의 두 번째 단계를 참고하면 된다.
const Writing = () => {

  //...

  AWS.config.update({
    region: "ap-northeast-2", // 버킷이 존재하는 리전을 문자열로 입력하기. (Ex. "ap-northeast-2")
    credentials: new AWS.CognitoIdentityCredentials({
      IdentityPoolId: "ap-northeast-2:a17da5be-96ef-4046-aaa8-62455cef2362", // cognito 인증 풀에서 받아온 키를 문자열로 입력하기. (Ex. "ap-northeast-2...")
    }),
  });

  //...

}
이전 글의 AWS 환경을 잘 따라왔다면, S3에 접근할 수 있는 상태가 되었다.
이제 파일을 선택하면 S3에 업로드할 수 있도록 <input type="file">의 콜백 함수를 작성하면 아래와 같다.
const Writing = () => {
const [firstImg, setFirstImg] = useState(null); //이미지파일url 상태값
//...
const firstImgHandle = (event) => {
const imageFile = event.target.files[0]; //업로드된 파일 객체
if (!imageFile) {
return setFirstImg(null);
}
// S3 SDK에 내장된 업로드 함수
const upload = new AWS.S3.ManagedUpload({
params: {
Bucket: "pickmeupimagestorage", // 업로드할 대상 버킷명 문자열로 작성.
Key: imageFile.name, //업로드할 파일명
Body: imageFile, // 업로드할 파일 객체
},
});
const promise = upload.promise();
promise.then(
function (data) {
setFirstImg(data.Location);
},
function (err) {
console.log(err);
}
);
};
//...
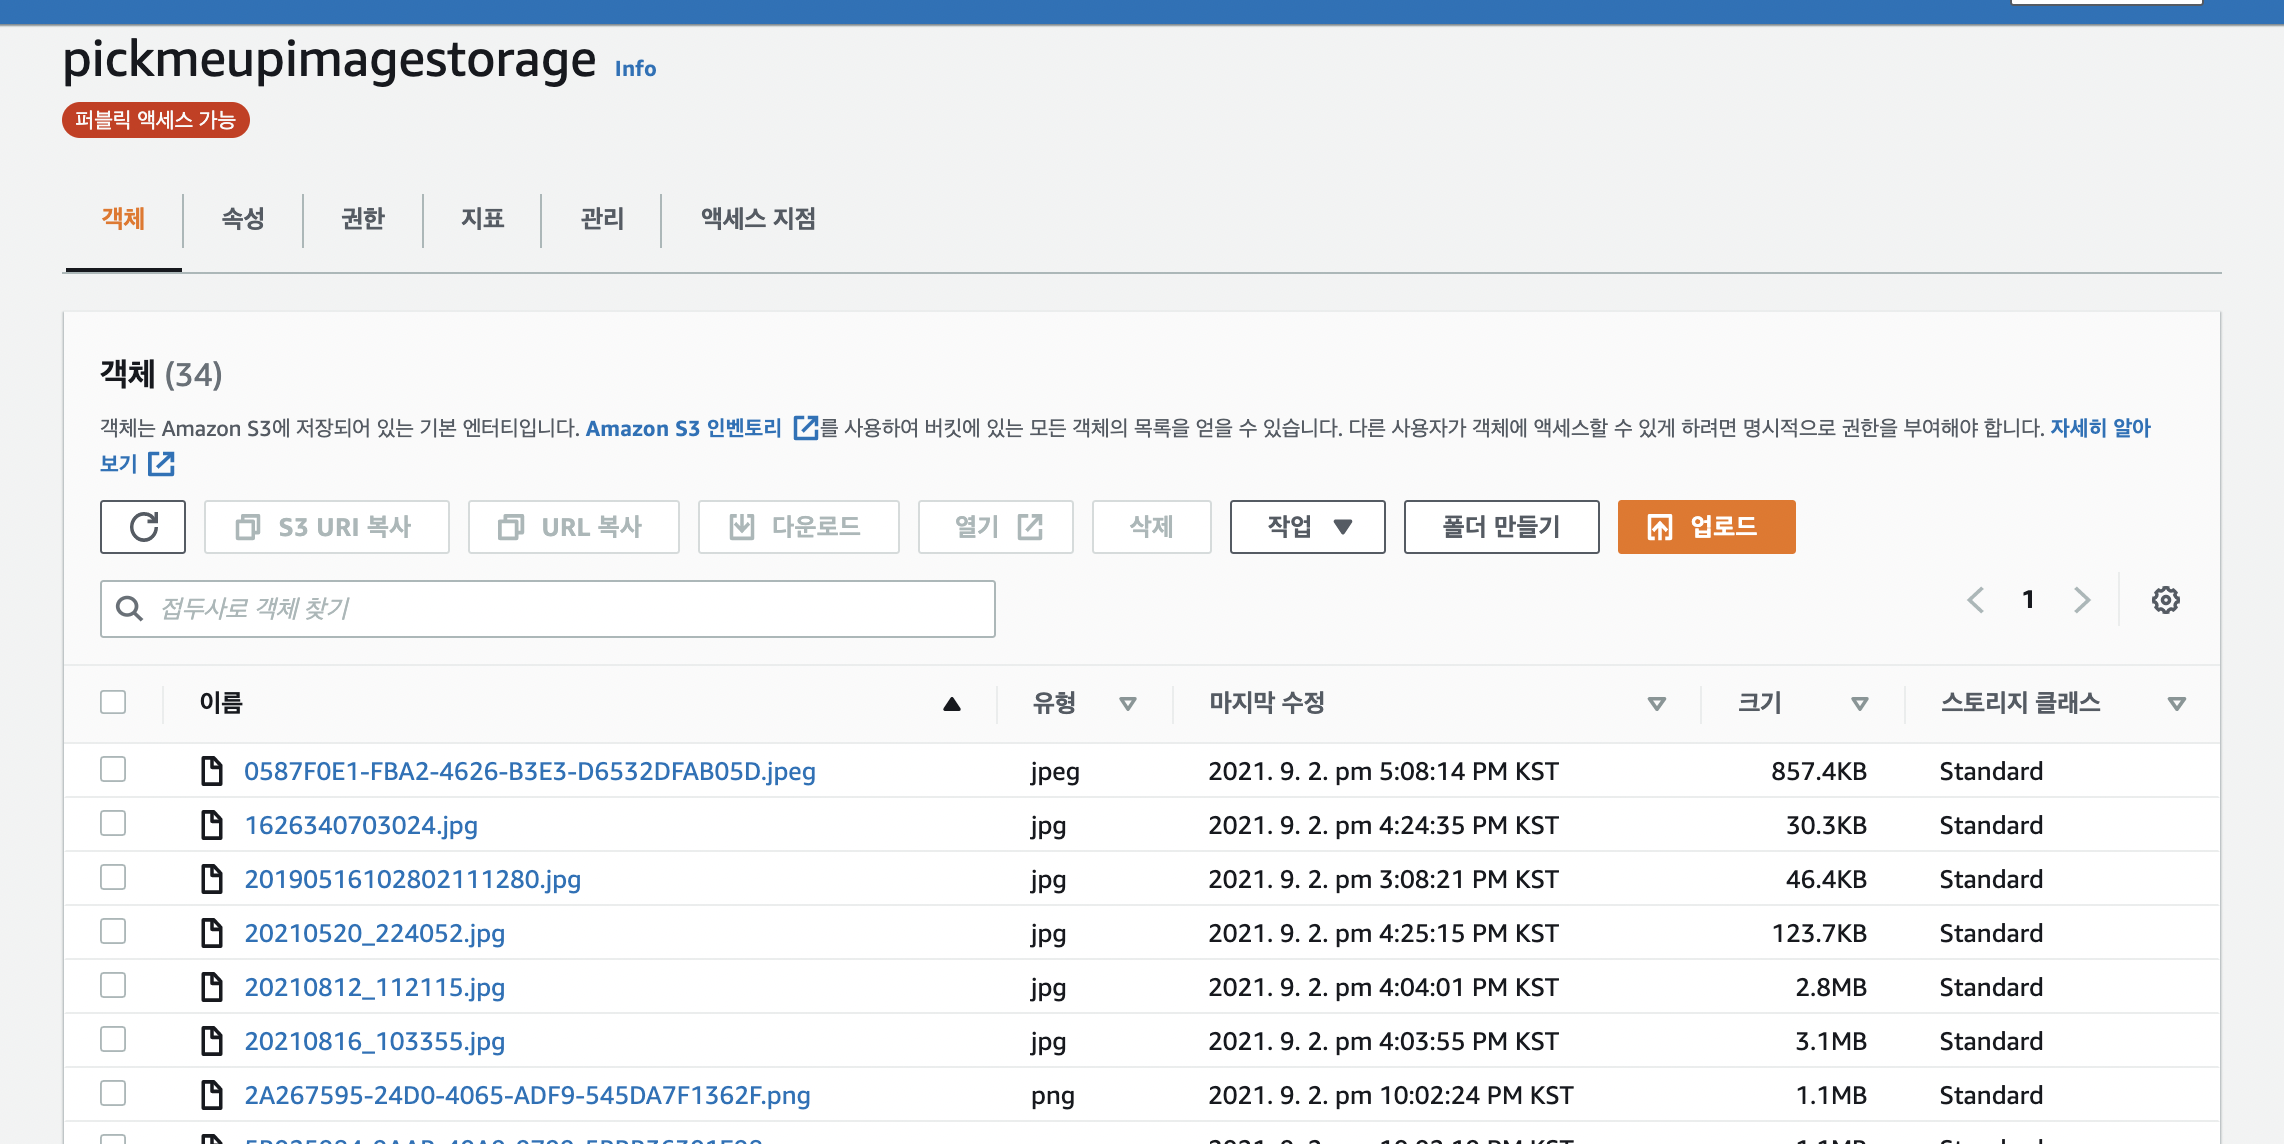
}이제 파일을 선택하면 버킷에 이미지가 추가된 것을 확인할 수 있다.
3. 이미지 preview 띄우기
이제 적절히 state를 활용하여 업로드한 이미지를 활용할 수 있다.
S3 버킷을 퍼블릭으로 설정해두었기 때문에 이미지를 외부에서 접근할 수 있다.
생성된 url(string 타입)을 하나의 state로 정하고 <img src=""> src에 넣어주기만 하면 된다.
const Writing = () => {

  const [firstImg, setFirstImg] = useState(null); //이미지파일url 상태값
  //...

  const firstImgHandle = (event) => {
    const imageFile = event.target.files[0]; //업로드된 파일 객체
    if (!imageFile) {
      return setFirstImg(null);
    }

    // S3 SDK에 내장된 업로드 함수
    const upload = new AWS.S3.ManagedUpload({
      params: {
        Bucket: "pickmeupimagestorage", // 업로드할 대상 버킷명 문자열로 작성.
        Key: imageFile.name, //업로드할 파일명
        Body: imageFile, // 업로드할 파일 객체
      },
    });

    const promise = upload.promise();

    promise.then(
      function (data) {
        setFirstImg(data.Location);
      },
      function (err) {
        console.log(err);
      }
    );
  };

  //...

  return (
  		<div className={styles.filebox}>
            <input
              type="file"
              id="ex_file"
              accept="image/*"
              onChange={firstImgHandle}
            ></input>
            {firstImg ? (
              <img className={styles.fileView} src={firstImg}></img>
            ) : null}
          </div>
        </div>
  )

}
결과 화면
위 3가지 과정을 잘 따라오면 아래와 같이
1. 이미지 파일을 업로드 하면 --> S3 버킷에 이미지가 저장되고,
2. 저장된 이미지를 접근할 수 있는 고유 URL로 preview 이미지를 띄울 수 있다!
추후에 자체 서버에서 이미지 파일을 다룰 수 있는 방법이 있는지도 알아봐야겠다 :)