[reference]
- https://aboutreact.com/react-native-login-and-signup/ (로그인, 회원가입 예제)
- https://jw910911.tistory.com/73 (AsycStorage 개념)
위의 블로그를 참고하다보니
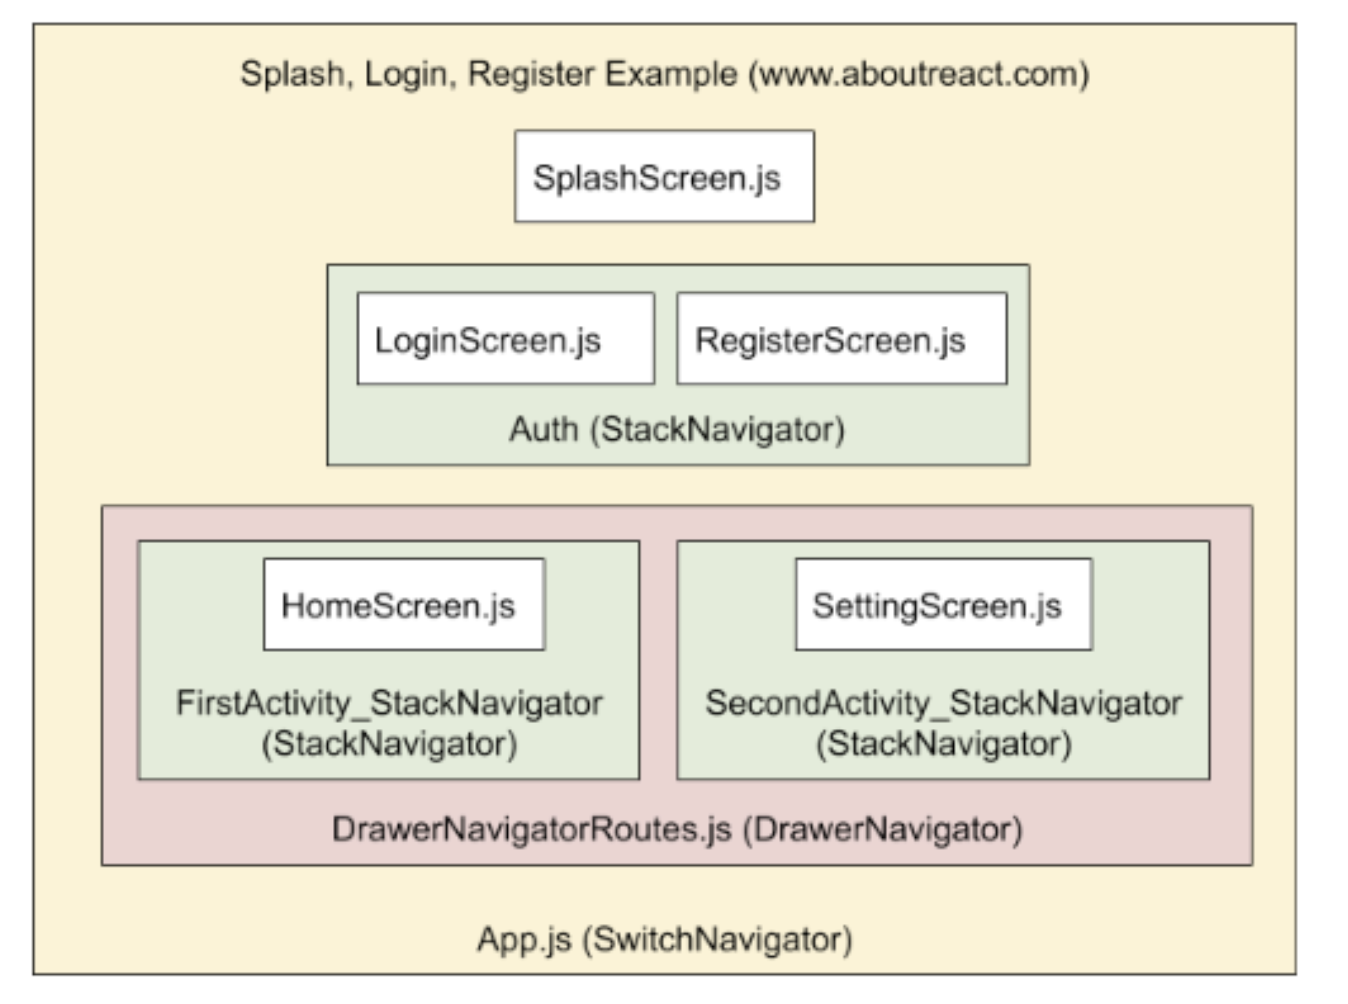
다음과 같이 로그인/회원가입으로 가기 전 로그인 여부를 확인하는 SplshScreen.js가 필요할 것 같다....!
현재 App.js의 네비게이터 구성은
const App: () => React$Node = () => {
  return (
    <NavigationContainer>
      <Stack.Navigator>
        <Stack.Screen
          name="Logout"
          component={LogoutScreen}
          options={{headerShown: false}}
        />
        <Stack.Screen
          name="Login"
          component={LoginScreen}
          options={{
            title: '',
            headerBackTitleVisible: false,
            headerBackImage: BackBtn,
          }}
        />
        <Stack.Screen
          name="Register"
          component={RegisterScreen}
          options={{
            title: '',
            headerBackTitleVisible: false,
            headerBackImage: BackBtn,
          }}
        />
      </Stack.Navigator>
    </NavigationContainer>
  );
};

const styles = StyleSheet.create({});

export default App;
이렇게 되어있다.
새로 구상한 네비게이터 구상은 이정도고 (DrawerNavigator안에서 각각의 Stack은 추후 Screen을 추가하면서 생각해야한다)
현재 로그인/회원가입 버튼을 눌러서 LoginScreen, RegisterScreen으로 네비게이트 되는 LogoutScreen은 그냥 냅두기로 해서 Auth Stack에는 총 3개의 Screen이 들어가게 되었다. → 아니다 그냥 없앴다! 대신 LoginScreen에서 회원가입으로 넘어갈 수 있는 텍스트를 만들어뒀다.

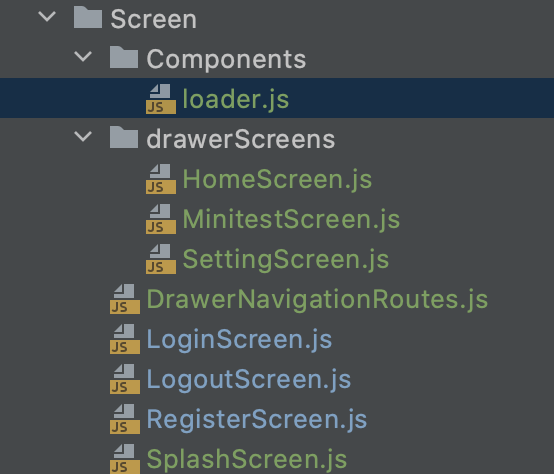
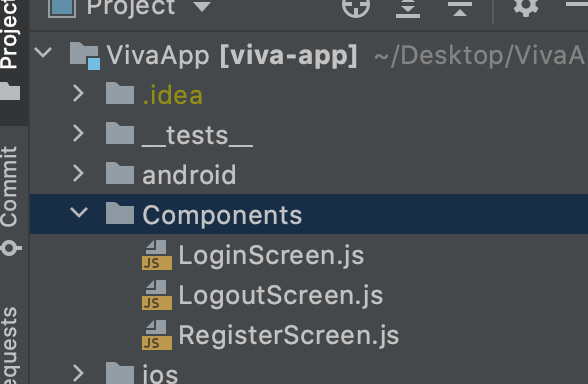
다음과 같이 구조를 변경하고, 파일을 추가해주었다!
따라서 App.js 스택 구조를 다음과 같이 변경하였다.
App.js
// Stack Navigator for Login and Register and Logout Screen
const Auth = () => {
  return (
    <Stack.Navigator>
      {/*<Stack.Screen*/}
      {/*  name="Logout"*/}
      {/*  component={LogoutScreen}*/}
      {/*  options={{headerShown: false}}*/}
      {/*/>*/}
      <Stack.Screen
        name="Login"
        component={LoginScreen}
        options={{
          title: '',
          headerBackTitleVisible: false,
          headerBackImage: BackBtn,
        }}
      />
      <Stack.Screen
        name="Register"
        component={RegisterScreen}
        options={{
          title: '',
          headerBackTitleVisible: false,
          headerBackImage: BackBtn,
        }}
      />
    </Stack.Navigator>
  );
};
const App: () => React$Node = () => {
return (
<NavigationContainer>
<Stack.Navigator initialRouteName="SplashScreen">
{/* SplashScreen which will come once for 5 Seconds */}
<Stack.Screen
name="SplashScreen"
component={SplashScreen}
// Hiding header for Splash Screen
options={{headerShown: false}}
/>
{/* Auth Navigator: Include Login and Signup */}
<Stack.Screen
name="Auth"
component={Auth}
options={{headerShown: false}}
/>
{/* Navigation Drawer as a landing page */}
<Stack.Screen
name="DrawerNavigationRoutes"
component={DrawerNavigationRoutes}
// Hiding header for Navigation Drawer
options={{headerShown: false}}
/>
</Stack.Navigator>
</NavigationContainer>
);
};
일단 당장 만들어야 할 화면이... (리퍼런스 첫 블로그에서 많은 도움을 받았다. hook도 많이 배울 수 있었다.)
SplashScreen.js와 loader.js이다
SplashScreen.js
AsyncStorage을 이용해서 local 데이터베이스에 유저정보를 저장할 것이다.
이 데이터를 이용해 user_id가 저장되어있는 경우 = 로그인되어있는 경우는
바로 homeScreen.js로 이동하게되고, 아닌 경우 Auth스택으로 이동하여 로그인이나 회원가입을 해야한다.
SplashScreen.js
// Import React and Component
import React, {useState, useEffect} from 'react';
import {ActivityIndicator, View, StyleSheet, Image} from 'react-native';
import {
  widthPercentageToDP as wp,
  heightPercentageToDP as hp,
} from 'react-native-responsive-screen';

import AsyncStorage from '@react-native-community/async-storage';

const SplashScreen = ({navigation}) => {
  //State for ActivityIndicator animation
  const [animating, setAnimating] = useState(true);

  useEffect(() => {
    setTimeout(() => {
      setAnimating(false);
      //Check if user_id is set or not
      //If not then send for Authentication
      //else send to Home Screen
      AsyncStorage.getItem('user_id').then((value) =>
        navigation.replace(value === null ? 'Auth' : 'DrawerNavigationRoutes'),
      );
    }, 3000);
  }, []);

  return (
    <View style={styles.container}>
      <Image
        source={require('../src/viva-logo-with-txt.png')}
        style={{width: wp(55), resizeMode: 'contain', margin: 30}}
      />
      <ActivityIndicator
        animating={animating}
        color="#6990F7"
        size="large"
        style={styles.activityIndicator}
      />
    </View>
  );
};

export default SplashScreen;

const styles = StyleSheet.create({
  container: {
    flex: 1,
    alignItems: 'center',
    justifyContent: 'center',
    backgroundColor: 'white',
  },
  activityIndicator: {
    alignItems: 'center',
    height: 80,
  },
});
LoginScreen.js
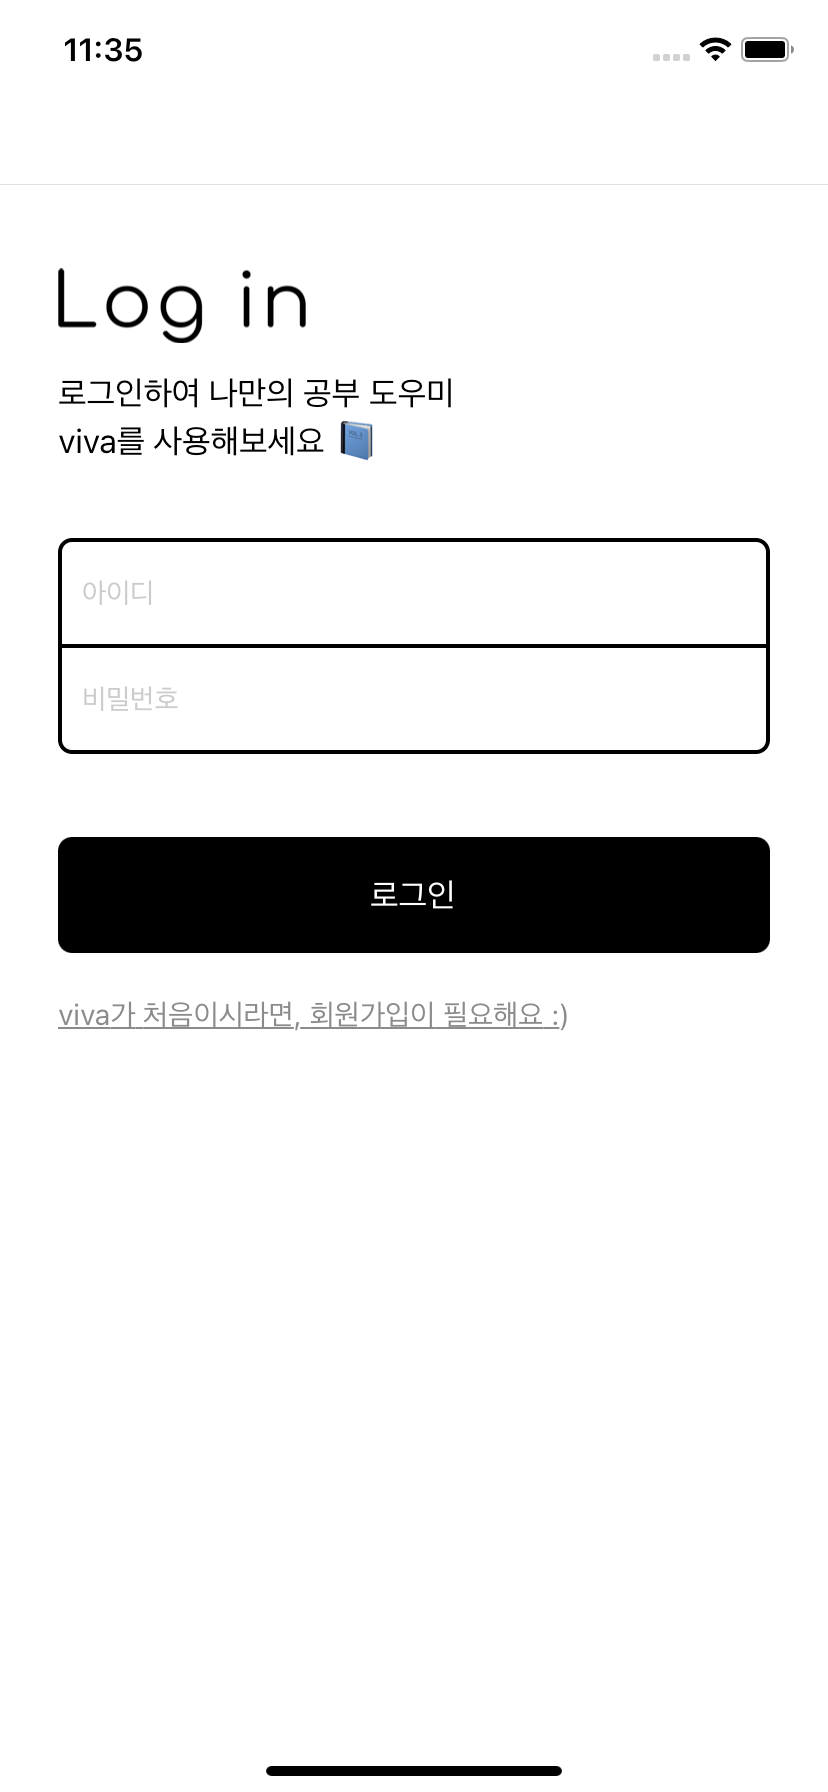
다음은 LoginScreen이다. Splash.js에서 user_id가 확인되지 않으면 Auth stack의 첫 screen인 LoginScreen.js로 이동하게 된다.
const [userId, setUserId] = useState('');
  const [userPassword, setUserPassword] = useState('');
  const [loading, setLoading] = useState(false);
const [errortext, setErrortext] = useState('');<TextInput
style={styles.textFormTop}
placeholder={'아이디'}
onChangeText={(userId) => setUserId(userId)}
autoCapitalize="none"
returnKeyType="next"
onSubmitEditing={() =>
passwordInputRef.current && passwordInputRef.current.focus()
}
underlineColorAndroid="#f000"
blurOnSubmit={false}
/>LoginScreen 에서는 hook을 이용하여 textInput값과 변수들을 관리하고, node.js 서버로 보낸다.
fetch('http://localhost:3001/api/user/login', {
      method: 'POST',
      body: formBody,
      headers: {
        //Header Defination
        'Content-Type': 'application/x-www-form-urlencoded;charset=UTF-8',
      },
    })
      .then((response) => response.json())
      .then((responseJson) => {
        //Hide Loader
        setLoading(false);
        console.log(responseJson);
        // If server response message same as Data Matched
        if (responseJson.status === 'success') {
          AsyncStorage.setItem('user_id', responseJson.data.stu_id);
          console.log(responseJson.data.stu_id);
          navigation.replace('DrawerNavigationRoutes');
        } else {
          setErrortext('아이디와 비밀번호를 다시 확인해주세요');
          console.log('Please check your id or password');
        }
      })
      .catch((error) => {
        //Hide Loader
        setLoading(false);
        console.error(error);
      });
  };
성공적으로 POST를 완료하면 로컬 DB인 AsyncStorage를 이용하여 user_id를 저장하는 코드이다.
이후 DrawerNavigationRoutes로 이동하게된다.
백엔드에서는 response에 로그인에 성공했을 시, Json형식으로 status키과 success value를 보내줌으로써 프론트에서 받아서 사용한다.
node.js API 일부
router.post('/', async function (req, res, next) {

... 생략

if (dbPassword === hashPassword) {
        res.send({
            message: "Login success",
            status:'success',
            data:{
                stu_id:body.stu_id
            }
        });
RegisterScreen.js
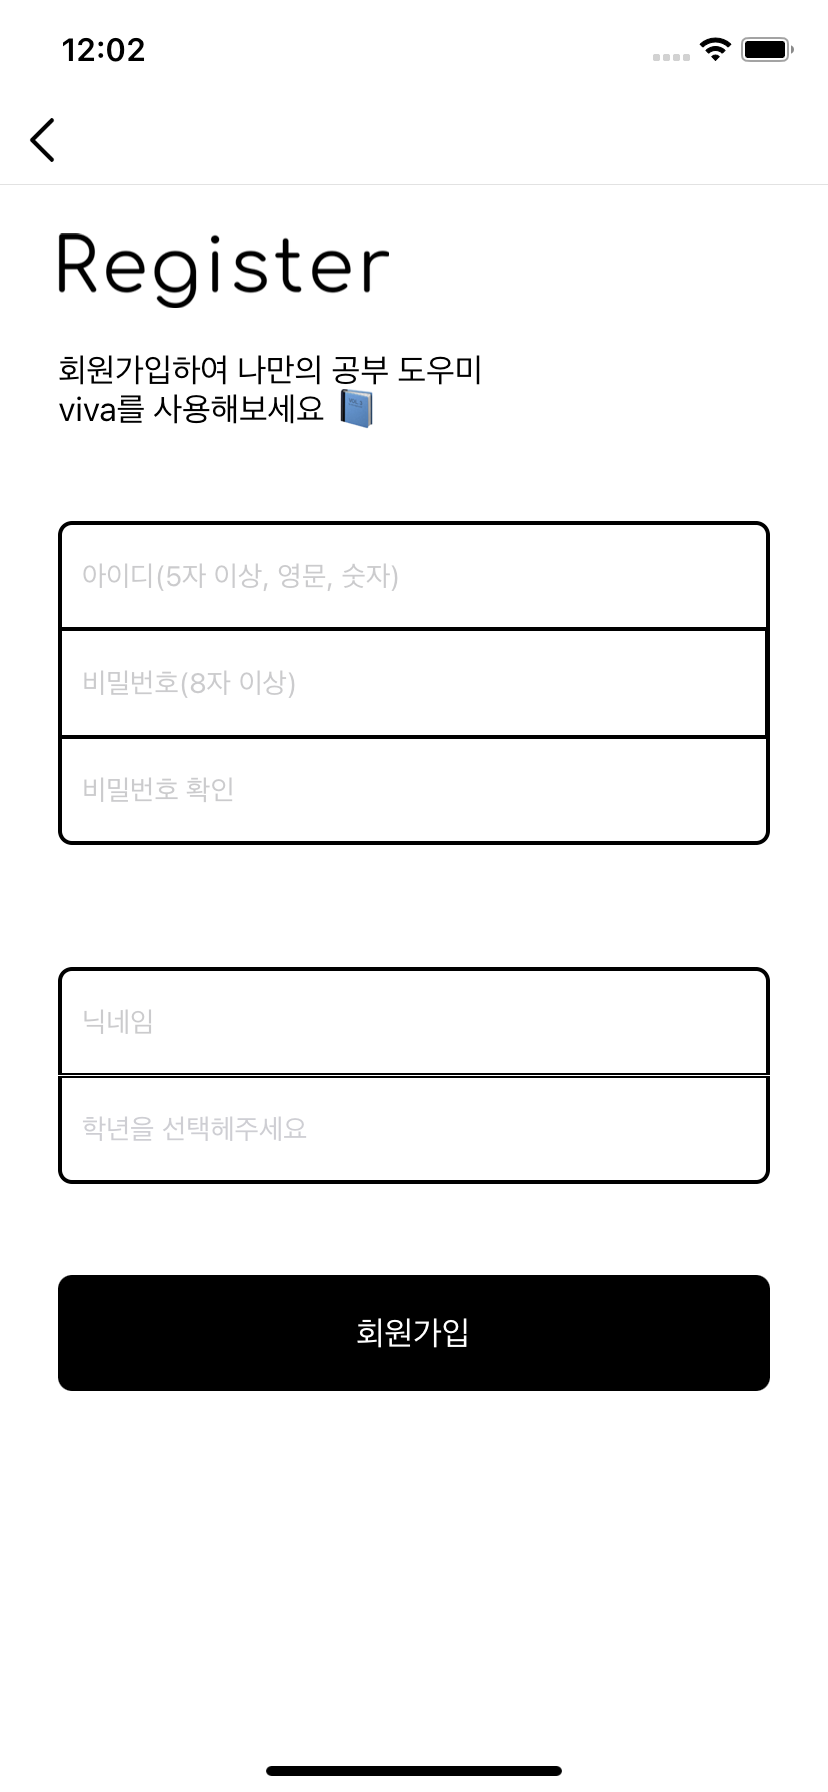
다음으로는 RegisterScreen이다. 앱 초기 구성에는, 로그인하기 버튼과 회원가입하기 버튼을 한 화면에 넣었지만 SplashScreen으로 앱 진입을 한 후, 바로 로그인스크린으로 가도록 수정하였다. 회원가입하기버튼은 로그인스크린 안에 존재한다!
아무튼 Register는 input으로 받을 변수가 많아서 코드가 꽤 길어졌다.
isRegistraionSuccess 이라는 hook을 사용해서 true일시, 회원가입이 완료되었다는 화면과 함꼐 로그인하기 버튼이 나오고 LoginScreen 으로 navigation을 이용해 이동한다.
import React, {useState, createRef} from 'react';
import {
widthPercentageToDP as wp,
heightPercentageToDP as hp,
} from 'react-native-responsive-screen';
import 'react-native-gesture-handler';
import RNPickerSelect from 'react-native-picker-select';
import Loader from './Components/Loader';
import {
StyleSheet,
View,
Text,
Image,
TouchableOpacity,
TextInput,
Keyboard,
Modal,
ScrollView,
} from 'react-native';
const RegisterScreen = (props) => {
const [userName, setUserName] = useState('');
const [userId, setUserId] = useState('');
const [userGrade, setUserGrade] = useState('');
const [userPassword, setUserPassword] = useState('');
const [userPasswordchk, setUserPasswordchk] = useState('');
const [loading, setLoading] = useState(false);
const [errortext, setErrortext] = useState('');
const [errortext2, setErrortext2] = useState('');
const [isRegistraionSuccess, setIsRegistraionSuccess] = useState(false);
const idInputRef = createRef();
const gradeInputRef = createRef();
const passwordInputRef = createRef();
const passwordchkInputRef = createRef();
const nameInputRef = createRef();
const placeholder = {
label: '학년을 선택헤주세요',
value: null,
color: '#9EA0A4',
};
const handleSubmitButton = () => {
setErrortext('');
if (!userName) {
alert('이름을 입력해주세요');
return;
}
if (!userId) {
alert('id를 입력해주세요');
return;
}
if (!userGrade) {
alert('학년을 선택해주세요');
return;
}
if (!userPassword) {
alert('비밀번호를 입력해주세요');
return;
}
if (userPasswordchk != userPassword) {
alert('비밀번호가 일치하지 않습니다');
return;
}
//Show Loader
setLoading(true);
var dataToSend = {
stu_nick: userName,
stu_id: userId,
stu_grade: userGrade,
password: userPassword,
};
var formBody = [];
for (var key in dataToSend) {
var encodedKey = encodeURIComponent(key);
var encodedValue = encodeURIComponent(dataToSend[key]);
formBody.push(encodedKey + '=' + encodedValue);
}
formBody = formBody.join('&');
fetch('http://localhost:3001/api/user/register', {
method: 'POST',
body: formBody,
headers: {
//Header Defination
'Content-Type': 'application/x-www-form-urlencoded;charset=UTF-8',
},
})
.then((response) => response.json())
.then((responseJson) => {
//Hide Loader
setLoading(false);
setErrortext2('');
console.log(responseJson);
// If server response message same as Data Matched
if (responseJson.status === 'success') {
setIsRegistraionSuccess(true);
console.log('Registration Successful. Please Login to proceed');
} else if (responseJson.status === 'duplicate') {
setErrortext2('이미 존재하는 아이디입니다.');
}
})
.catch((error) => {
//Hide Loader
setLoading(false);
console.error(error);
});
};
if (isRegistraionSuccess) {
return (
<View style={styles.container}>
<View style={{flex: 1}} />
<View style={{flex: 2}}>
<View
style={{
height: hp(13),
justifyContent: 'center',
alignItems: 'center',
}}>
<Image
source={require('../src/success.png')}
style={{
height: wp(20),
resizeMode: 'contain',
alignSelf: 'center',
}}
/>
</View>
<View
style={{
height: hp(7),
justifyContent: 'center',
alignItems: 'center',
}}>
<Text style={{color: 'black', fontSize: wp('4%')}}>
회원가입이 완료되었습니다.
</Text>
</View>
<View style={{height: hp(20), justifyContent: 'center'}}>
<View style={styles.btnArea}>
<TouchableOpacity
style={styles.btn}
activeOpacity={0.5}
onPress={() => props.navigation.navigate('Login')}>
<Text style={{color: 'white', fontSize: wp('4%')}}>
로그인하기
</Text>
</TouchableOpacity>
</View>
</View>
</View>
</View>
);
}
return (
<View style={styles.container}>
<Loader loading={loading} />
<View style={styles.topArea}>
<View style={styles.titleArea}>
<Image
source={require('../src/Register.png')}
style={{width: wp(40), resizeMode: 'contain'}}
/>
</View>
<View style={styles.TextArea}>
<Text style={styles.Text}>회원가입하여 나만의 공부 도우미</Text>
<Text style={styles.Text}>viva를 사용해보세요 📘</Text>
</View>
</View>
<View style={styles.formArea}>
<TextInput
style={styles.textFormTop}
placeholder={'아이디(5자 이상, 영문, 숫자)'}
onChangeText={(userId) => setUserId(userId)}
ref={idInputRef}
returnKeyType="next"
onSubmitEditing={() =>
passwordInputRef.current && passwordInputRef.current.focus()
}
blurOnSubmit={false}
/>
<TextInput
style={styles.textFormMiddle}
secureTextEntry={true}
placeholder={'비밀번호(8자 이상)'}
onChangeText={(UserPassword) => setUserPassword(UserPassword)}
ref={passwordInputRef}
returnKeyType="next"
onSubmitEditing={() =>
passwordchkInputRef.current && passwordchkInputRef.current.focus()
}
blurOnSubmit={false}
/>
<TextInput
style={styles.textFormBottom}
secureTextEntry={true}
placeholder={'비밀번호 확인'}
onChangeText={(UserPasswordchk) =>
setUserPasswordchk(UserPasswordchk)
}
ref={passwordchkInputRef}
returnKeyType="next"
onSubmitEditing={() =>
nameInputRef.current && nameInputRef.current.focus()
}
blurOnSubmit={false}
/>
</View>
<View style={{flex: 0.5, justifyContent: 'center'}}>
{userPassword !== userPasswordchk ? (
<Text style={styles.TextValidation}>
비밀번호가 일치하지 않습니다.
</Text>
) : null}
</View>
<View style={styles.formArea2}>
<TextInput
style={styles.textFormTop}
placeholder={'닉네임'}
onChangeText={(UserName) => setUserName(UserName)}
ref={nameInputRef}
returnKeyType="next"
onSubmitEditing={() =>
gradeInputRef.current && gradeInputRef.current.focus()
}
blurOnSubmit={false}
/>
<RNPickerSelect
style={{...pickerSelectStyles}}
onValueChange={(userGrade) => setUserGrade(userGrade)}
placeholder={placeholder}
items={[
{label: '1학년', value: 1},
{label: '2학년', value: 2},
{label: '3학년', value: 3},
]}
/>
</View>
<View style={{flex: 0.7, justifyContent: 'center'}}>
{errortext2 !== '' ? (
<Text style={styles.TextValidation}>{errortext2}</Text>
) : null}
</View>
<View style={{flex: 0.75}}>
<View style={styles.btnArea}>
<TouchableOpacity style={styles.btn} onPress={handleSubmitButton}>
<Text style={{color: 'white', fontSize: wp('4%')}}>회원가입</Text>
</TouchableOpacity>
</View>
</View>
<View style={{flex: 3}} />
</View>
);
};완성 화면
SplashScreen.js

LoginScreen.js
Register.js

이제 로그인, 회원가입 구현은 완료하였고
본격적으로 로그인 후 나오는 Home, Setting, Minitest 메뉴들을 tabnavigator안에 넣어야한다.
지금보니 계속 drawernavigator 언급했는데 바꿔야겠다 ..ㅎㅎ
오늘의 개발일지 끝!


server에 사용되는 node js 파일은 혹시 어디 저장하셨을까용 ??