코드스테이츠 5주차 #2
<회고> 이머시브코스 2일차 오늘은 기존의 pre코스에서 test로 봤던 pass me를 페어와 같이 github workflow를 토대로 코드 리뷰를 진행하고 Jest와 Eslint를 사용하여 테스트 해보고 코드를 보기 좋게 정렬하는 시간을 가졌다. eslint는 에어비엔비 프론트엔드 스타일로 적용을 시켜 보았는데 과정이 조금은 귀찮게 느껴졌지만 사용하고 난 후 귀찮던 마음이 싹 사라지게 되었다. eslint는 프로젝트나 모든 과정에서 사용하게 될거 같았다.
근데 왜 이제 2일차인데 힘들지?? 😂ㅠㅠ
< 오늘 배운 것들 >😆
- jest
- eslint
- ES6
- allow function
1. Jest
- what is jest??
Jest는 javaScript의 테스트를 생성 및 구성을 하기 위한 javaScript라이브러리입니다.
Jest는 NPM패키지로 배포되며,JavaScript 프로젝트에 설치할 수 있습니다.
- jest get start
jest 공식홈페이지 : jest 설치
npm install --save-dev jestAdd the following section to your package.json:
{
  "scripts": {
    "test": "jest"
  }
}
jest 실행
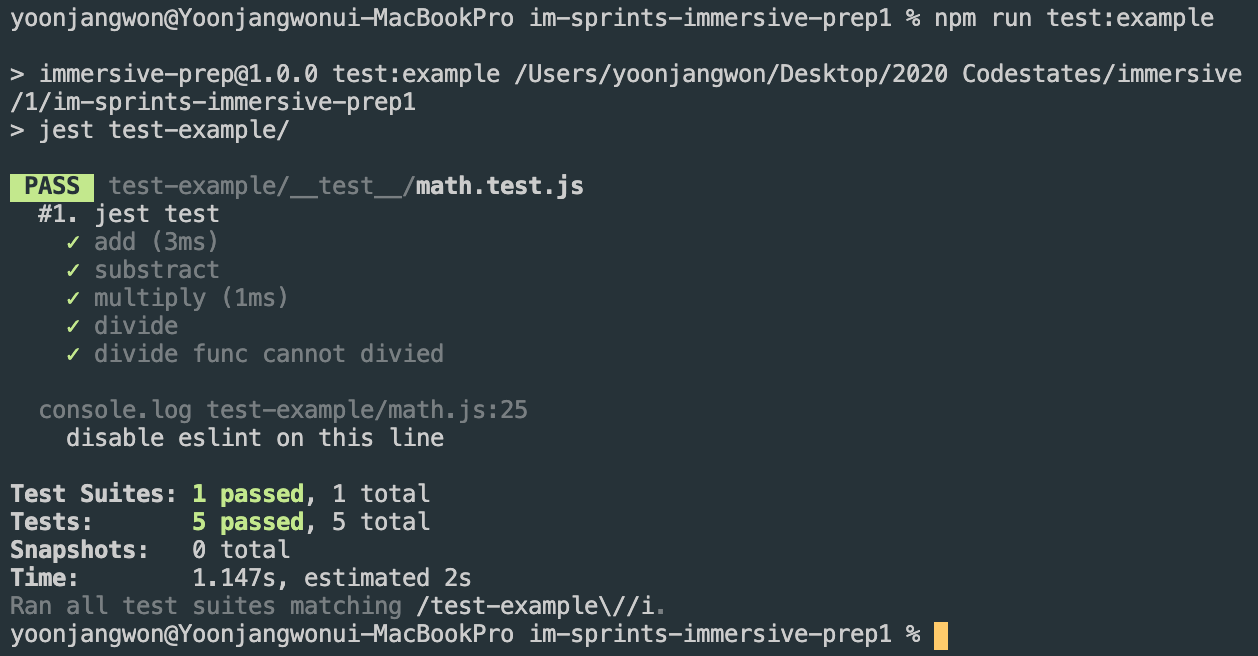
npm run testtest 확인을 describe it 구문을 사용하여 만들었다.
// math.test.js
const {
  add, substract, multiply, divide,
} = require('../math');

describe('#1. jest test', () => {
  // 1. Create test case to check add function works what it is supposed to be.
  it('add', () => {
    expect(add(1, 2)).toEqual(3);
  });
  // 2. Create test case to check substract function works what it is supposed to be.
  it('substract', () => {
    expect(substract(3, 1)).toEqual(2);
  });
  // 3. Create test case to check multiply function works what it is supposed to be.
  it('multiply', () => {
    expect(multiply(5, 5)).toEqual(25);
  });
  // 4. Create test case to check divide function works what it is supposed to be.
  it('divide', () => {
    expect(divide(10, 2)).toEqual(5);
  });
  // 5. Create test case to check divide function returns "cannot divide something with 0"
  // when it tries to divdie a number with zero.
  it('divide func cannot divied', () => {
    expect(divide(5, 0)).toEqual(Infinity);
  });
// 6. Group tests using `describe()`
});
적용화면

Jest를 사용할 때는 root folder에 적용한다.
2. Eslint
Eslint : get start
- Eslint airbnb를 적용하기
- eslint 설치하기
npm install --save-dev eslint- airbnb-eslint와 관련된 eslint 기타 플러그인들을 설치
npm install --save-dev eslint-plugin-import
npm install --save-dev eslint-plugin-react
npm install eslint-plugin-jsx-a11y@5.1.1 --save-dev- eslint-config-airbnb를 설치
npm install --save-dev eslint-config-airbnb4.ES6와 Node 환경을 적용하기 위해 추가 설정도 포함합니다.
-
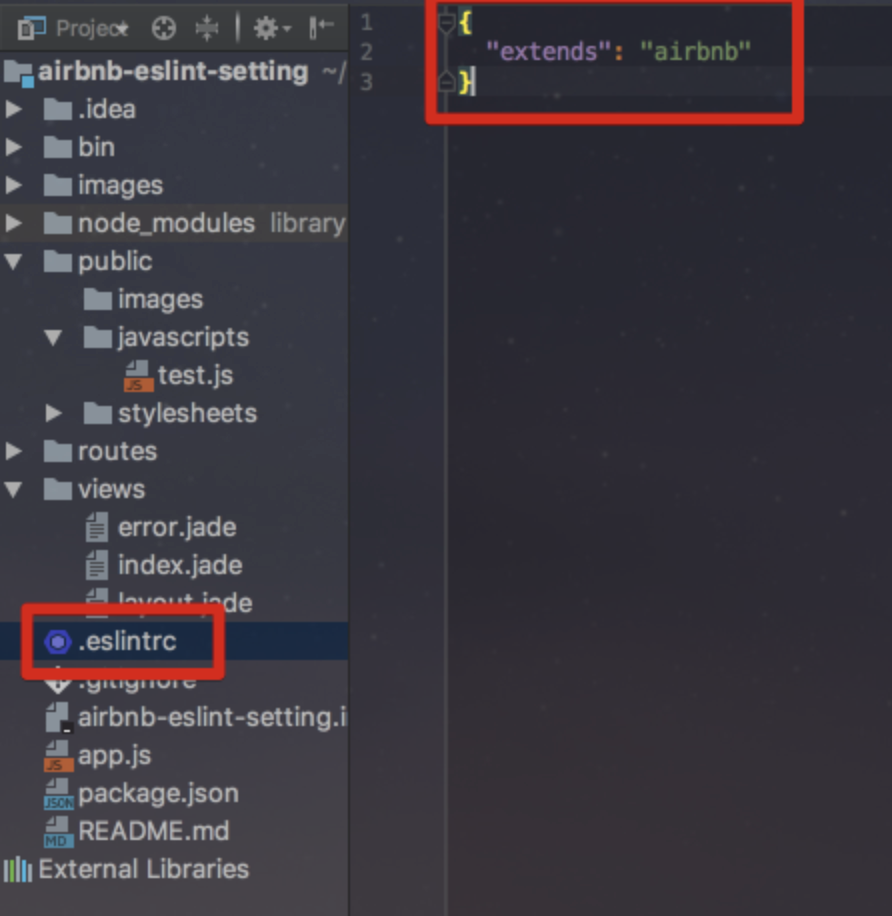
프로젝트 내부에 .eslintrc 파일을 하나 생성합니다.
-
아래와 같이 airbnb 옵션을 추가합니다.

.eslintrc.json에 적용 시켜 줍니다.
{
  "env": {
    "node": true,
    "es6": true
  },
  "extends": "airbnb"
}
3. Allow function
화살표 함수 표현(arrow function expression)은 function 표현에 비해 구문이 짧고 자신의 this, arguments, super 또는 new.target을 바인딩 하지 않습니다. 화살표 함수는 항상 익명입니다. 이 함수 표현은 메소드 함수가 아닌 곳에 가장 적합합니다. 그래서 생성자로서 사용할 수 없습니다.
위의 설명을 풀어서 정리하면 화살표 함수의 특징은
- function 표현을 짧게 사용
- this, arguements, new.target을 binding하지 않음
- 메소드 함수 표현이 아닌 곳에 적합
- constructor 불가
ES5 버전 map ES6버전 map 화살표 함수
var materials = [
  'Hydrogen',
  'Helium',
  'Lithium',
  'Beryllium'
];

materials.map(function(material) {
  return material.length;
}); // [8, 6, 7, 9]

// 위에 있는 함수를 화살표 함수를 이용해 아래와 같이 표현할 수 있다.

materials.map((material) => {
  return material.length;
}); // [8, 6, 7, 9]

materials.map(({length}) => length); // [8, 6, 7, 9]
4. ES5 & ES6
- What is ES?
ES는 ecmascript의 약자이며 자바스크립트를 위한 표준스크립팅 언어입니다.
ES5와 ES6는 ecmascript의 버전 차이이며 이 차이는 코드 표현에 차이가 있습니다. ES6는 개발자가 쉽게 코드를 짤 수 있도록 만들어 주었습니다. 그렇지만 modern brower들은 현재 ES5버전을 지지하고 있기 때문에 ES6가 모던브라우저에서 작동이 안되는 경우도 종종 있습니다.
ES5와 ES6의 여러 차이점에 대해 알아 보도록 하겠습니다.
Arrow Function (=>)
A. Return Number function
// ---------- ES5 ----------
function getNum() {
  return 10;
}
// ---------- ES6 ----------
const getNum = () => 10;
B. Return Array function
// ---------- ES5 ----------
function getArr() {
  return [1, 2, 3];
}
// ---------- ES6 ----------
const getArr = () => [1, 2, 3];
C. Return Object function
// ---------- ES5 ----------
function getObj() {
  return { a: 1, b: 2, c: 3 };
}
// ---------- ES6 ----------
// Note the () to differentiate with actual code block
const getObj = () => ({ a: 1, b: 2, c: 3 });
Object Manipulation
A. Extract object values
var obj1 = { a: 1, b: 2 };
// ---------- ES5 ----------
var a = obj1.a;
var b = obj1.b;
// ---------- ES6 ----------
var { a, b } = obj1;
B. Define object
var a = 1;
var b = 2;
// ---------- ES5 ----------
var obj1 = { a: a, b: b };
// ---------- ES6 ----------
var obj1 = { a, b };
여러가지 차이 점들이 있지만 내가 아는 선에서 정리 해보았다.
