.gif)
THREE.JS 사용해보기 2 에 이어 이번글에서는 Mesh의 형상을 정의하는 Geometry에 대한 글입니다!
GIS DEVELOPER님의 유튜브 영상을 보고 작성하였습니다. 정말 잘 설명해주십니다. 감사합니다!
BufferGeometry
A representation of mesh, line, or point geometry. Includes vertex positions, face indices, normals, colors, UVs, and custom attributes within buffers, reducing the cost of passing all this data to the GPU.
한마디로 형태라고 이해하면 될거 같다.
이미지 출처: https://www.freecodecamp.org/news/render-3d-objects-in-browser-drawing-a-box-with-threejs/
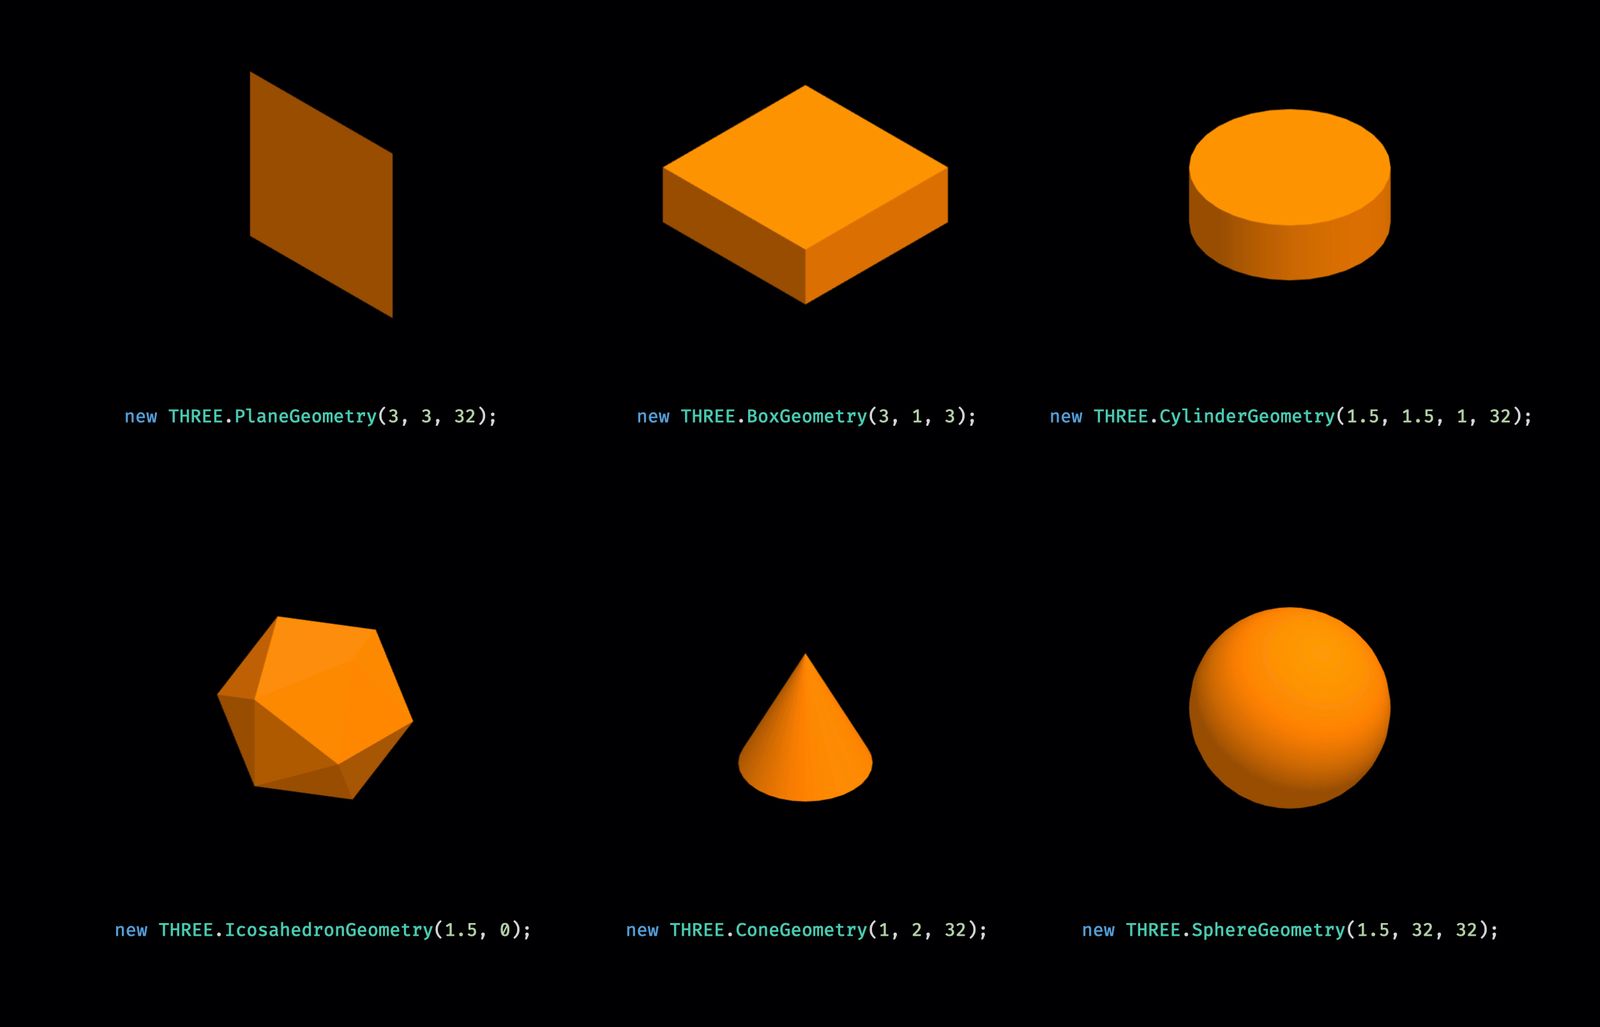
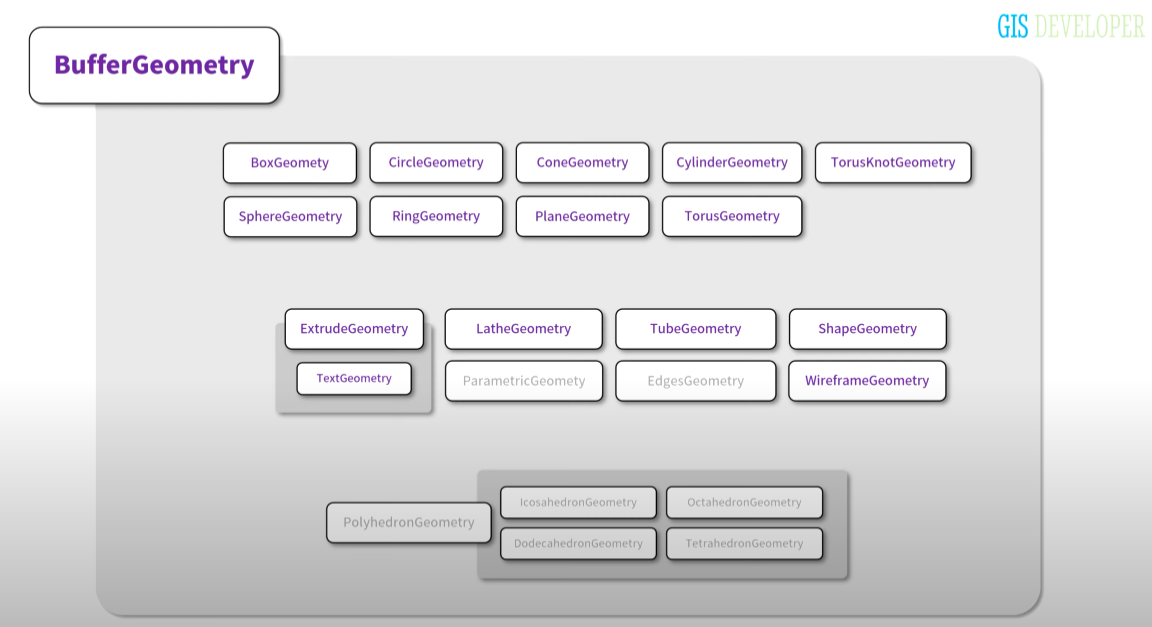
three.js에서 기본적으로 제공하는 geometry는 아래와 같다.
저번 글에서 구현한 geometry는 Box로 BufferGeometry 중 하나이다.
Geometry의 형상을 정의하기 위한 데이터 6가지
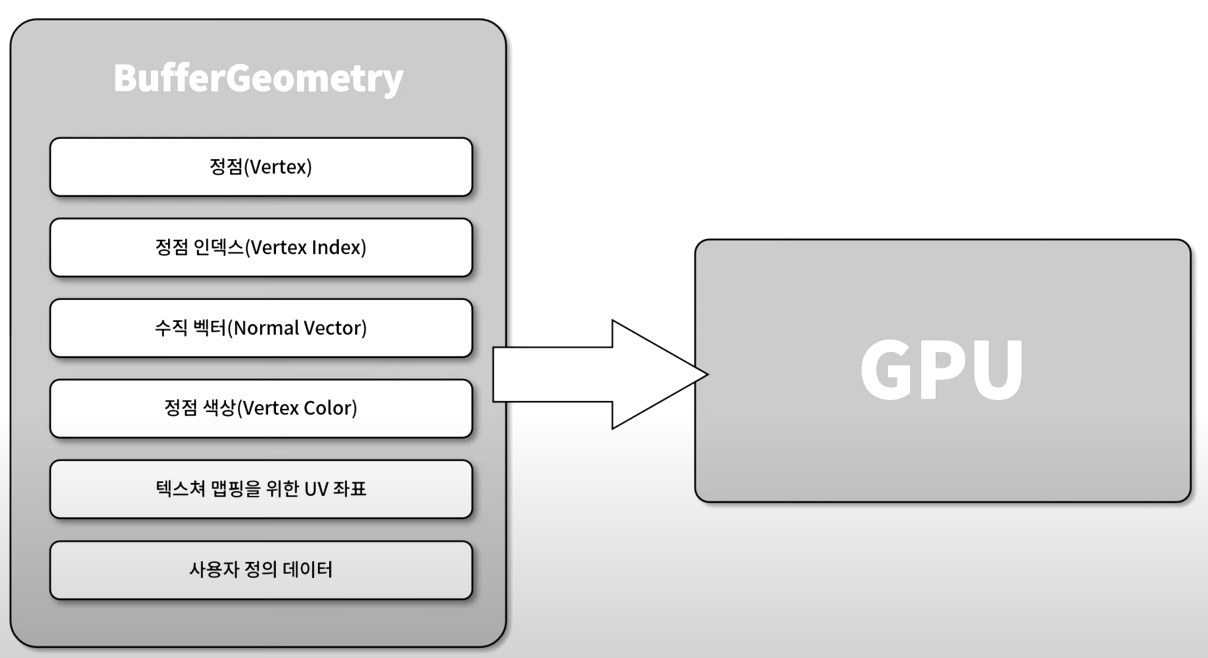
-정점 : 형상을 정의. x,y,z축에 대한 좌표
-정점 인덱스 : 3차원 오브젝트의 면을 구성하는 정점에 대한 인덱스
-수직 벡터 : 정점에 대한 수직벡터
-정점 색상 : 벡터 정점의 색상
-UV 좌표 : 텍스쳐 맵핑을 위한 좌표
-사용자 정의 데이터 : 사용자가 임의로 정의한 데이터
이런 데이터들은 GPU에 한번에 빠르게 전달된다.
Geometry 설정하기
js파일의 _setupModel method의 geometry 변수를 변경하면 된다.
아래 코드는 저번 글에서 사용했던 코드로 파랑색 정육면체를 구현한다.
const geometry = new THREE.BoxGeometry(1, 1, 1); //boxGeometry를 이용해 정육면체 mesh 생성

const material = new THREE.MeshPhongMaterial({ color: 0x44a88 }); //재질 선택. 예시에선 파랑색

const cube = new THREE.Mesh(geometry, material); //scene객체에 추가
다음 코드는 회색 정육면체에 노랑색 선이 있는 mesh이다.
_setupModel() {
		const geometry = new THREE.BoxGeometry(1, 1, 1);
		//BoxGeometry는 가로, 세로, 깊이 크기와 함께 가로,세로,깊이 각각에 대한 분할(Segments)수로 정의(분할수는 기본값 1)

		const fillMaterial = new THREE.MeshPhongMaterial({ color: 0x515151 }); // 회색 색상의 재질로 mesh 타입 오브젝트 생성
		const cube = new THREE.Mesh(geometry, fillMaterial);

		const lineMaterial = new THREE.LineBasicMaterial({ color: 0xffff00 }); // 노란색 선 재질 생성

		const line = new THREE.LineSegments(
			new THREE.WireframeGeometry(geometry),
			lineMaterial
		); // 앞에서 만든 geometry를 이용해 line타입 오브젝트 생성
		//WireframeGeometry 클래스: 와이어프레임 형태로 지오메트리 표현
		//만약 WireframeGeometry 적용하지 않고 생성하면 모델의 모든 외곽선이 표시되지 않음.

		const group = new THREE.Group();
		// mesh 오브젝트와 line 오브젝트를 하나의 오브젝트로 다루기 위해 그룹으로 묶음

		group.add(cube);
		group.add(line); //group에 추가하지 않으면 추가한 geometry만 표시.

		this._scene.add(group);
		this._cube = group; // 그룹 객체를 scene에 추가
  }
결과:
.gif)
마우스 휠로 회전시키기
기본 코드에서는 time값으로 회전축을 변경시켜 mesh를 자동으로 회전시킨다. 마우스 휠로 회전시키려면 따로 설정이 필요하다.
1. js 파일의 update 메서드의 this._cube.rotation x와 y 모두 주석처리하여 자동 회전 기능 삭제
2. OrbitControl 클래스 import하기
import { OrbitControls } from
"../examples/jsm/controls/OrbitControls.js";- constructor에 method 추가, 정의
constructor(){
  ...
  this._setupControls()
}
_setupControls() {
	new OrbitControls(this._camera, this._divContainer);
}
//카메라 개체와 마우스 이벤트를 받는 DOM 요소를 인자로 OrbitsControls 객체 생성
결과: