
AutoLayout의 StackView와 ScrollView에 대한 정리 노트!!
Stack View
Stack View에서 반드시 알아야 할 개념
- axis : 가로 ( Horizontal ) / 세로 ( Vertical )
- distribution :
stackView에 있는 여러가지의 object들의 분배 정도를 정하는 것UIStackView.Distributionfill: 전체 object의 사이즈를 꽉 채우는 것, 이 때 여러 가지의 object 들 중에서 누가 늘어나는 정도를 정하는 것이Content hugging Priorities이다.fillEqually: 모든 object가 같은 사이즈로 채워지는 것fillProprtionally: 각각의 object들의 가로 content 의 비율대로 정해지는 것equalSpacing: fill과 동일하지만 object 사이의 일정한 spacing을 가지는 것equalCentering: 각각의 object들의 중심까지의 거리가 동일한 것
- alignment :
stackView에 있는 여러가지의 object들의 위치 또는 정렬fill:stackView가 정렬하고 있는axis의 반대 방향으로 꽉 채우는 것leading:vertical로 정렬되어 있을 때, 왼쪽 세로로 정렬하는 것top:Horizontal로 정렬되어 있을 때, 위쪽 가로로 정렬하는 것firstBaseline:Baseline은 Text의 범위를 설정하는 것인데,fistBaseline은View안에 text가 있다면 첫번째 text의 위치를 맞춰주는 것center:stackView들을 중앙으로 정렬trailing:vertical로 정렬되어 있을 때, 오른쪽 세로로 정렬하는 것bottom:Horizontal로 정렬되어 있을 때, 아래쪽 가로로 정렬하는 것lastBaseline:lastBaseline은View안에 text가 있다면 마지막 text의 위치를 맞춰주는 것
- spacing : 간격
Dynamic Stack View
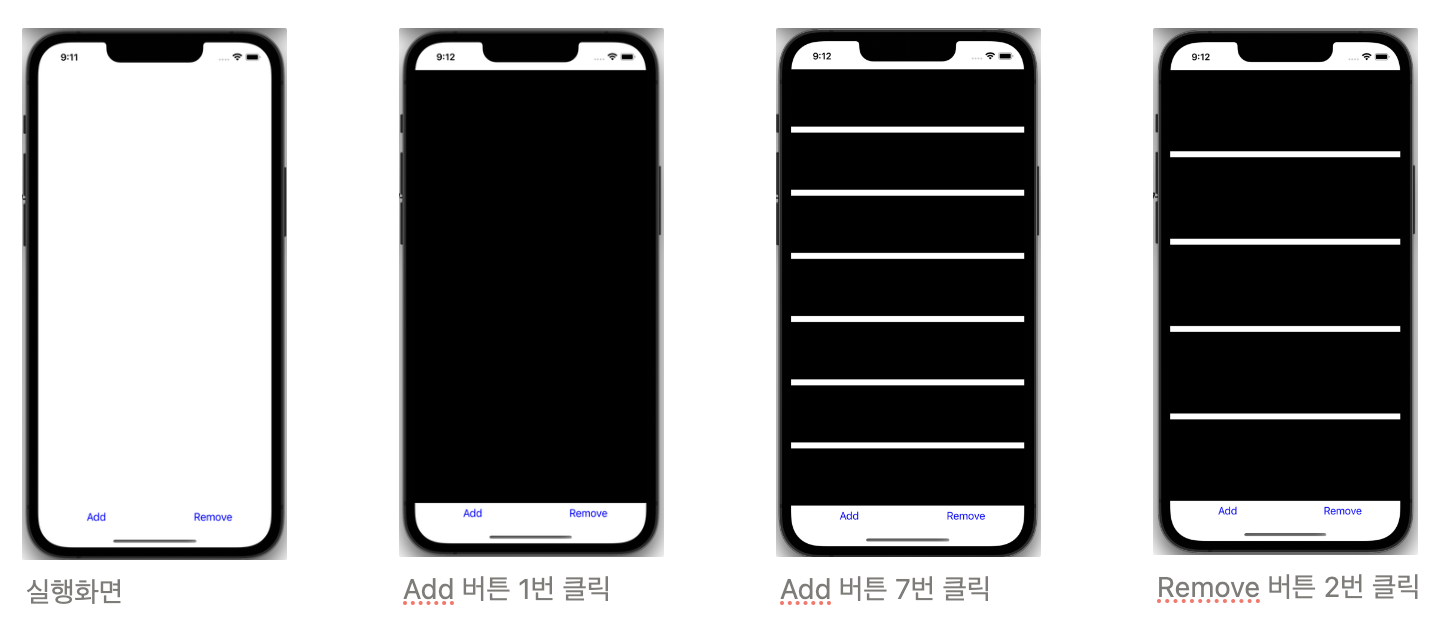
[ 버튼을 이용해 StackView에 View를 추가하거나 삭제하기 (with Code) ]
- 레이아웃 설정하기
override func viewDidLoad() {
    super.viewDidLoad()

    // View를 추가하고 삭제할 StackView
    var vertical: UIStackView = UIStackView()
    vertical.axis = .vertical
    vertical.translatesAutoresizingMaskIntoConstraints = false
    vertical.spacing = 10
    view.addSubview(vertical)

    // Button을 정렬할 StackView
    let horizontal = UIStackView()
    horizontal.axis = .horizontal
    horizontal.translatesAutoresizingMaskIntoConstraints = false
    view.addSubview(horizontal)

    // View를 StackView에 추가하는 버튼
    let addButton = UIButton()
    addButton.setTitle("Add", for: .normal)
    addButton.setTitleColor(.blue, for: .normal)
    //addButton.addTarget(self, action: #selector(addView), for: .touchUpInside)

    // View를 StackView에서 삭제하는 버튼
    let removeButton = UIButton()
    removeButton.setTitle("Remove", for: .normal)
    removeButton.setTitleColor(.blue, for: .normal)
    //removeButton.addTarget(self, action: #selector(removeView), for: .touchUpInside)

    // addButton과 removeButton StackView로 묶음
    horizontal.addArrangedSubview(addButton)
    horizontal.addArrangedSubview(removeButton)

    // StackView의 분배 설정 ( 동일하게 채우기 )
    horizontal.distribution = .fillEqually
    vertical.distribution = .fillEqually

    // StackView의 constraint 설정

    horizontal.bottomAnchor.constraint(equalTo: view.safeAreaLayoutGuide.bottomAnchor).isActive = true
    horizontal.leadingAnchor.constraint(equalTo: view.safeAreaLayoutGuide.leadingAnchor).isActive = true
    horizontal.trailingAnchor.constraint(equalTo: view.safeAreaLayoutGuide.trailingAnchor).isActive = true

    vertical.topAnchor.constraint(equalTo: view.safeAreaLayoutGuide.topAnchor).isActive = true
    vertical.bottomAnchor.constraint(equalTo: horizontal.topAnchor).isActive = true
    vertical.leadingAnchor.constraint(equalTo: horizontal.leadingAnchor).isActive = true
    vertical.trailingAnchor.constraint(equalTo: horizontal.trailingAnchor).isActive = true

}- StackView에 view를 추가하는 함수
@objc func addView() {
    let view = UIView()
    view.backgroundColor = .black
    vertical.addArrangedSubview(view)
}- StackView에 view를 제거하는 함수
@objc func removeView() {
    guard let last = vertical.arrangedSubviews.last else {return}
    self.vertical.removeArrangedSubview(last)
}
→ 이 함수는 VC안의 함수이므로 vertical을 사용하기 위해서는 vertical 저장변수가 전역변수로 이동해야한다.
- Button에 함수할당하기
addButton.addTarget(self, action: #selector(addView), for: .touchUpInside)
removeButton.addTarget(self, action: #selector(removeView), for: .touchUpInside)- 애니메이션 추가하기
@objc func addView() {
    let view = UIView()
    view.backgroundColor = .black
    view.isHidden = true

    vertical.addArrangedSubview(view)

    UIView.animate(withDuration: 0.3) {
        view.isHidden = false
    }
}
@objc func removeView() {
guard let last = vertical.arrangedSubviews.last else {return}
UIView.animate(withDuration: 0.3) {
last.isHidden = true
} completion: { _ in
self.vertical.removeArrangedSubview(last)
}
}Scroll View
Scroll View 설정 방법
-
Scroll View 추가하기
-
Scroll View의 Constraints 그리기
-
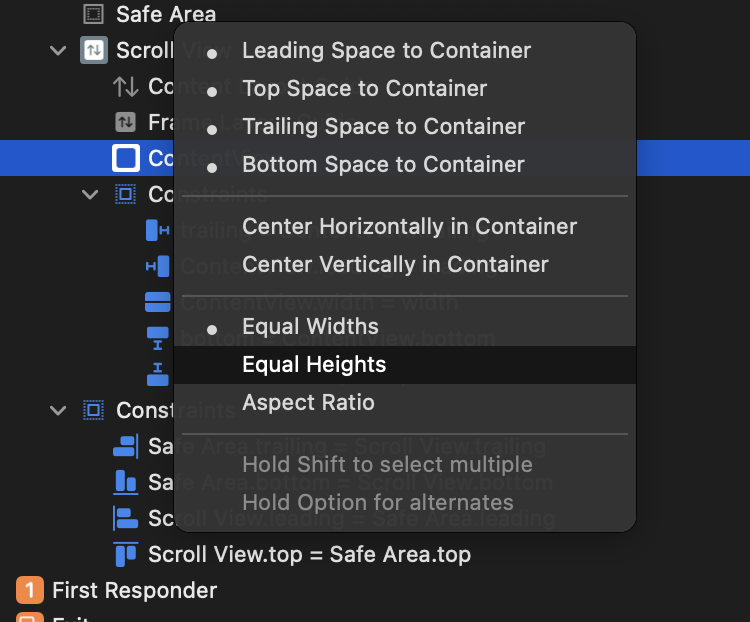
Scroll View 안에 View 추가하기 ( Label Name “Content View” 로 설정 )
-
Content View의 top, bottom, trailing, leading을 Scroll View로 고정시키기 → Content View는 Scroll View의 Content를 보여줄 View로 정의됨.
💡 remember
Content View는 고정되어 있는 View가 아닌 Scroll View 안에서 좌우/ 위아래로 스크롤하여 보여줄 수 있는 무한한 View -
만약 위아래로 scroll 하기를 원한다면, Content View의 너비를 Scroll View의 너비와 같도록 고정하고, 좌우로 scroll 하기를 원한다면, Content View의 높이를 Scroll View의 높이와 같도록 고정하기
-
ContentView안에 Layout하기를 원하는 Content들을 정렬하기
Q. Scroll View의 제약 설정만으로 오류가 뜨는 이유는?

A. Scroll View 안의 ContentView의 제약이 설정되지 않았기 때문에 오류가 뜨는 것
❗️Tip
ContentView 안에 Content를 넣지 않아도 오류가 뜨기 않도록 설정하는 방법
ContentView의 높이를 Scroll View의 높이와 같도록 설정하되,
priority를 낮추어서 ContentView에 다른 제약이 들어오면 그 제약을 따르도록 한다.
Dynamic Scroll View
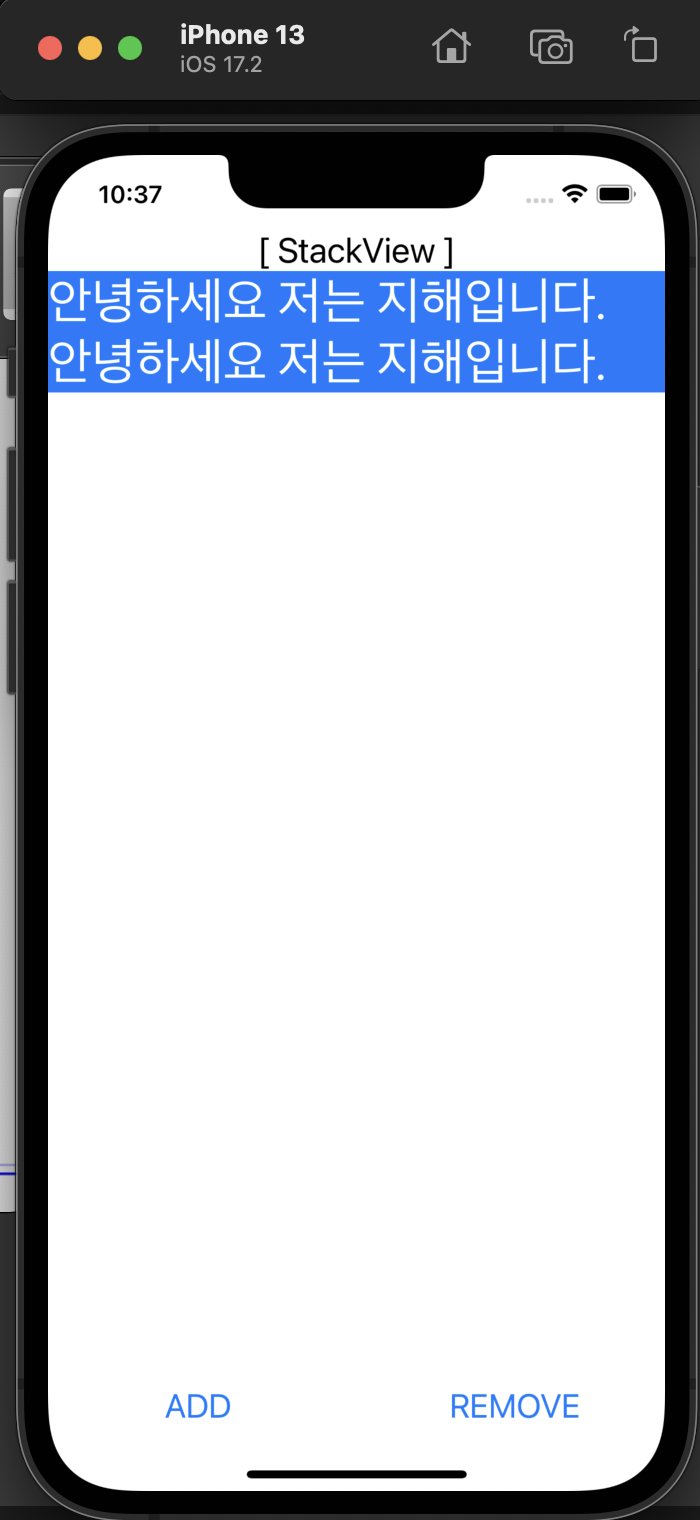
[ Scroll View 안에 Stack View를 담아 button을 통해 Label이 추가되고 삭제되는 화면 구현 ]
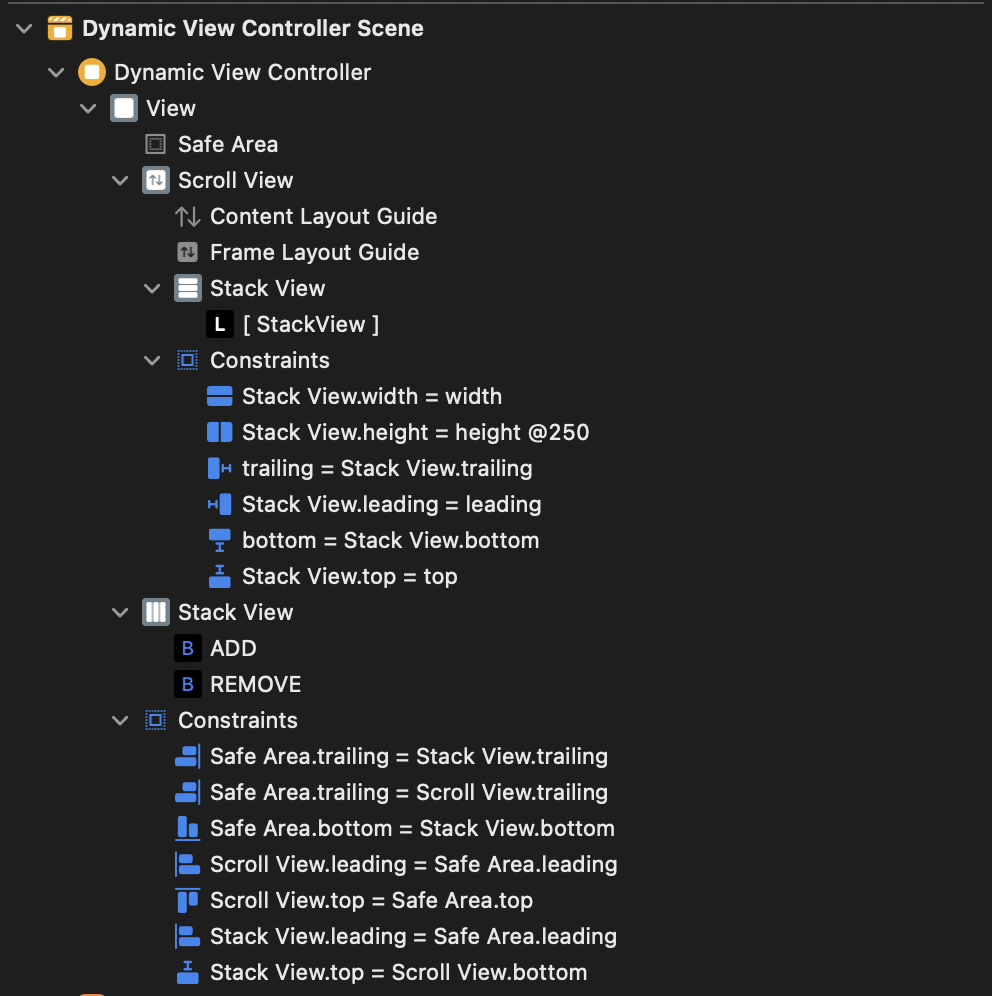
- AutoLayout 설정
- ViewController 코드
import UIKit

class DynamicViewController: UIViewController {

    @IBOutlet weak var stackView: UIStackView!

    override func viewDidLoad() {
        super.viewDidLoad()

    }

    @IBAction func addButton(_ sender: UIButton) {

        let label = UILabel()

        label.text = "안녕하세요 저는 지해입니다."
        label.font = UIFont.preferredFont(forTextStyle: .title1)
        label.numberOfLines = 0
        label.backgroundColor = .systemBlue
        label.isHidden = true
        label.textColor = .white
        label.adjustsFontForContentSizeCategory = true
        stackView.addArrangedSubview(label)

        UIView.animate(withDuration: 0.3) {
            label.isHidden = false
        }
    }

    @IBAction func removeButton(_ sender: UIButton) {
        guard let last = stackView.arrangedSubviews.last else {return}

        UIView.animate(withDuration: 0.3) {
            last.isHidden = true
        }completion: { _ in
            self.stackView.removeArrangedSubview(last)
        }
    }
}
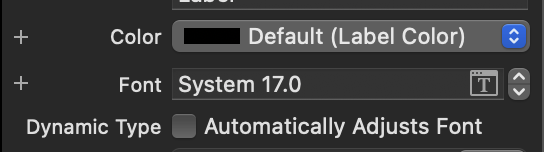
Dynamic Type
- 시스템 설정에 따른 TextSize 변경 설정 방법
-
Code
label.adjustsFontForContentSizeCategory = true -
Dynamic Type → Automatically Adjusts Font 체크
- button에 적용하기
→ button과 buttons IBOutlet 연결 시키기@IBOutlet var buttons: [UIButton]! override func viewDidLoad() { super.viewDidLoad() NotificationCenter.default.addObserver(self, selector: #selector(adjustButtonDynamicType), name: UIContentSizeCategory.didChangeNotification, object: nil) } @objc func adjustButtonDynamicType() { buttons.forEach{ $0.titleLabel?.adjustsFontForContentSizeCategory = true } }
- button에 적용하기
- 시뮬레이터 시스템 설정 바꾸는 방법
Xcode → Open Developer Tool → Assessibility Inspector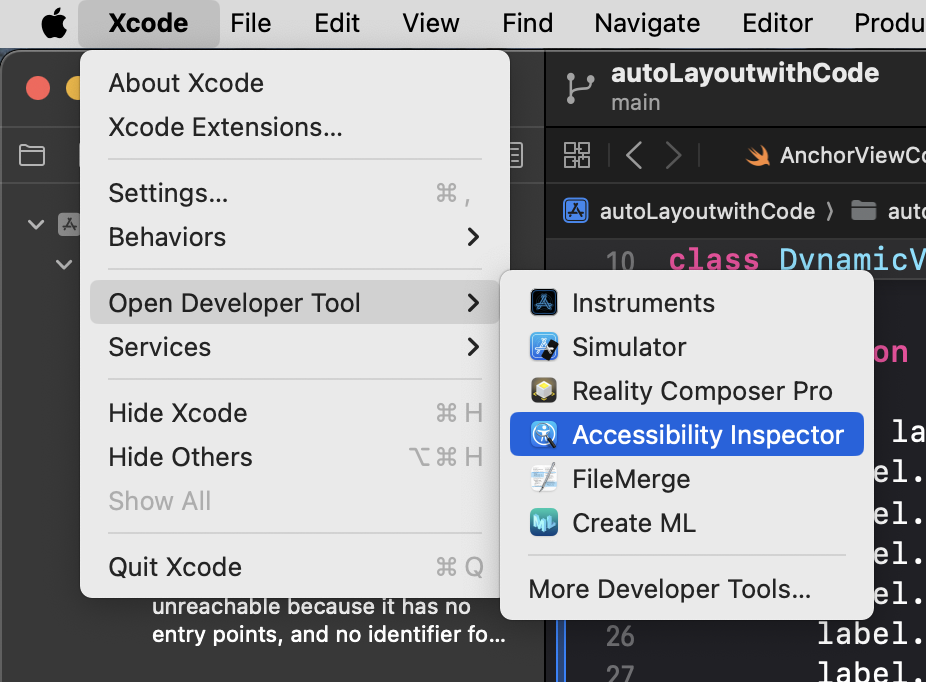
🍏 참고문서 : WWDC 2015 Session 218 참고