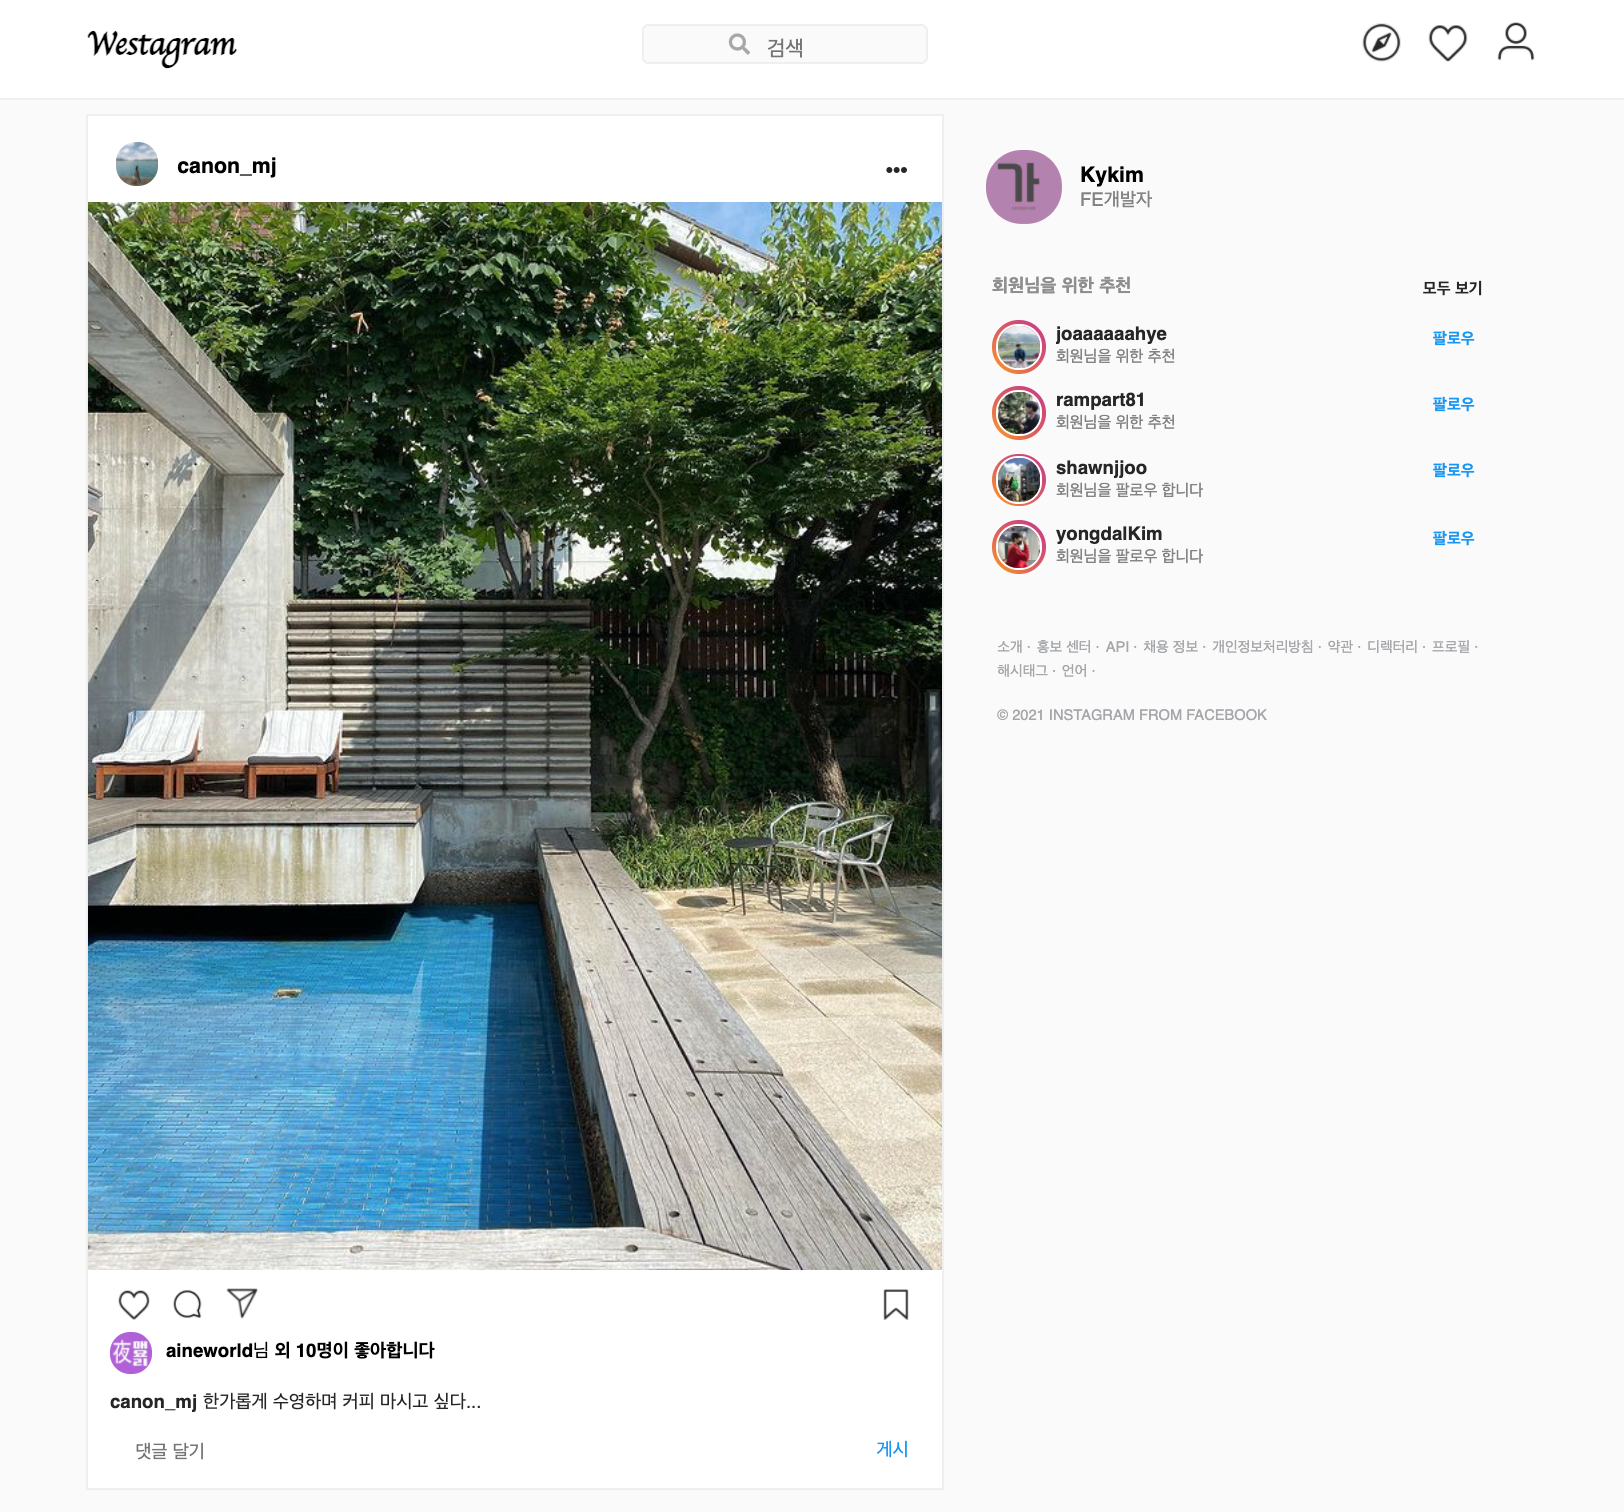
HTML, CSS, JavaScript를 학습한 후 HTML, CSS를 활용해 로그인 페이지, SNS 피드 페이지 레이아웃을 잡고, JavaScript/DOM으로 로그인, 댓글 입력/삭제 기능을 구현해 보았다.
JavaScript
로그인 페이지

구현 기능
1) 로그인 페이지 레이아웃 (HTML, CSS)
2) 아이디, 비밀번호 유효성 검사 기능
3) input값 입력시 버튼 스타일 변화
4) 로그인 시 main 페이지로 이동
코드 뜯어보기
"use strict";

const inputInfo = document.getElementsByClassName("inputGroup")[0];
const button = document.getElementById("inputButton");

function handleButton(buttonValid) {

    if(buttonValid) {
    button.disabled = false;
    } else {
    button.disabled = true;
    }

    if (window.event.keyCode === 13) {
        goToMain();
    }
}

function checkId(value) {
    if (value.length > 0) {
        return true;
    } else {
        return false;
    }
}

function checkPw(value) {
    if (value.length > 0) {
        return true;
    } else {
        return false;
    }
}

function handleInput() {
    const userId = document.getElementById("userInfo").value;
    const userPw = document.getElementById("userPw").value;

    const isValidId = checkId(userId); //T/F를 받게 됨
    const isValidPw = checkPw(userPw);

    if (isValidId && isValidPw) {
       handleButton(true);
    } else {
       handleButton(false);
    }
}

function goToMain() {
	alert("환영합니다!:)");
	location.replace('http://127.0.0.1:5500/main/main.html')
}

const init = () => {
    inputInfo.addEventListener("input", handleInput);
    button.addEventListener("click", goToMain);
};

init();
init() 초기화 함수 (필수 x)
- 자바스크립트의 entry point(시작점)를 쉽게 찾기 위해 설정한다.
- 브라우저에게 명료하게 전달할 수 있는 장점이 있다.
document.getElementsByClassName("inputGroup")[0] 인덱스로 접근하는 이유
getElementsByClassName은 class name이 같은 중복 값을 가져올 수 있다.
/cf/getElementById에서 Id는 한 개만 존재하며, DOM 요소를 가져온다.- 또한, (유사)배열 형태로 값을 가져온다. 요소가 1개 뿐이라고 할지라도 배열 안에 담긴다.
=> 따라서 인덱스로 접근해야 원하는 요소에 정확하게 접근할 수 있다.
querySelector vs getElementByClassName
getElementBy~는 필요한 요소를 앱 브라우저에서 전체에서 찾는다. (Id는 ID로, TagName은 tag name으로..)- 'query: 질의, 질문'이라는 뜻으로 여러 조건을 걸어서 물어볼 수 있다. (브라우저 전체에서 찾는 것이 아닌 내가 물어보는 조건에 맞는!)
document.querySelector("#main > .loginBtn > li") - 또한, querySelector를 쓰는 것이 메모리 효율에도 좋아 querySelector, querySelectorAll을 쓰는 것을 추천!
/cf/ 참조: https://guinatal.github.io/queryselector-vs-getelementbyid/
Event handler 위임
inputInfo.addEventListener("input", handleInput);
input 요소가 2개(아이디, 비밀번호)인데, 이벤트 핸들러는 하나 뿐이다.
- 이는 두 개의 태그를 감싸는 요소(form tag)에 '이벤트를 위임'한 것
- 이벤트 플로우는 전 포스팅 참조
https://velog.io/@kykim_dev/JavaScript-19-Basic-of-JavaScript-DOM-Event-Flow
https://joshua1988.github.io/web-development/javascript/event-propagation-delegation/
3항 연산자 사용
- 코드를 효율적으로 구성하기 위해서는 3항 연산자를 적극 활용하는 것이 좋다. 코드 길이를 확 줄여준다.
button.disabled = !buttonValid [? true : false;]([]생략 가능)
window.event.keyCode === 13
- 마우스 클릭 외 enter키를 눌렀을 때 실행되는 이벤트로 13은 enter키 코드를 뜻한다.
event handler 함수에 ()를 안쓰는 이유
inputInfo.addEventListener("input", handleInput함수명);
- eventListener 인자로 함수를 넘길 때
handleInput()이 아닌handleInput과 같이 함수명만 넘긴다. - 함수명에
()를 붙이면 함수를 호출하게 된다. 따라서 이벤트 핸들러 함수에 ()를 붙이면 이벤트가 실행되기도 전에 해당 함수가 바로 실행되어 버린다.
메인 페이지

구현 기능
1) 메인 페이지(navigation bar, feed, recommendation, footer) 레이아웃 (HTML, CSS)
2) 댓글 입력/게시 기능
3) 댓글 삭제 기능
코드 뜯어보기
"use strict";

const replyInput = document.getElementById("replyInput");
const replyButton = document.getElementById("replyButton");

function addReply(value) {
    const replyList = document.getElementById("#replyList");
    const newLists = document.createElement("li");
    const newContent = `<span class="name">kayoung</sapn>
    <span class="description">${value}</span>
    <span class="delete">x</span>`

    newLists.innerHTML = newContent;
    deleteEvent(newLists);
    replyList.appendChild(newLists);

    replyInput.value = "";
}

function deleteEvent(newLists) {
    const deletebutton = document.querySelector(".delete");
    deletebutton.addEventListener("click", () => newLists.remove())
}

function validateReply() {
    const replyValue = replyInput.value;
    if(replyValue.length > 0) {
        addReply(replyValue);
    } else {
        alert("댓글을 입력해주세요.")
    }
}

function init() {
    replyButton.addEventListener("click", validateReply);
}

init();
Template Literal
- 템플릿 리터럴을 사용하면 element를 효율적으로 만들 수 있다.
- Template Literal을 사용하지 않고 구성한 예 (가독성 측면에서는 사용하지 않는 것이 더 좋을 수 있다.)
function addReply(replyValue) {
    const newReply = document.createElement("li");
    const newName = document.createElement("span");
    const newContent = document.createElement("span");
    const deleteBtn = document.createElement("span");

    newName.classList.add("name");
    deleteBtn.classList.add("delete");
    newName.innerText = "kayoung";
    newContent.innerText = replyValue;
    deleteBtn.innerText = "x";

    deleteBtn.addEventListener("click", () => newReply.remove());

    newReply.appendChild(newName);
    newReply.appendChild(newContent);
    newReply.appendChild(deleteBtn);
    replyList.appendChild(newReply);

    replyInput.value="";
}
location.replace() 페이지 이동
- 페이지를 이동할 때
location.replace()또는location.href를 쓴다. - location.href는 객체 속성, loaction.replace()는 메서드(함수)로 작동된다.
- href는 페이지를 이동하는 것이기 때문에 뒤로가기 버튼을 누른경우 이전 페이지로 이동이 가능하지만,
- replace는 현재 페이지를 새로운 페이지로 덮어 씌우기 때문에 이전 페이지로 이동이 불가능하다.
출처: 생활코딩 https://opentutorials.org/module/2919/22904
